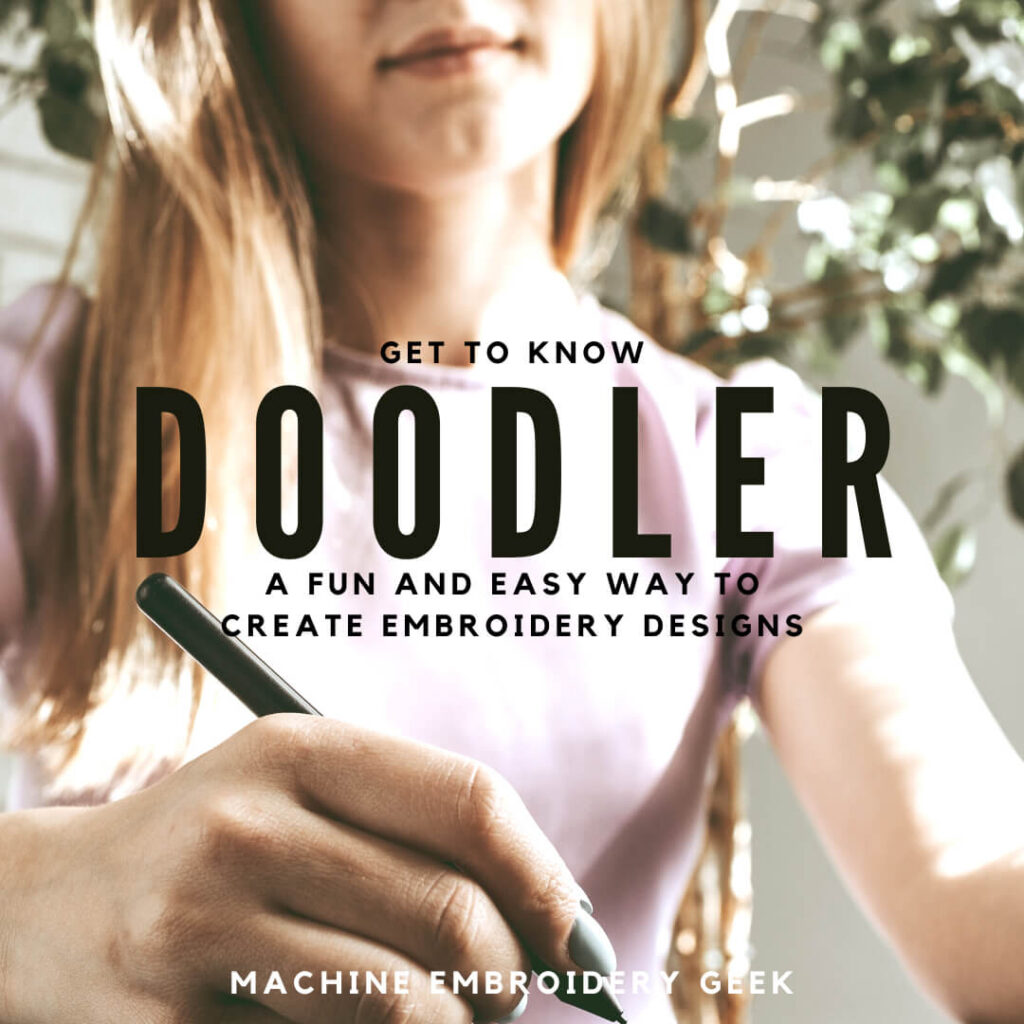
Doodler software: embroidery design creation made easy
By Julie on November 15th, 2022 This site contains affiliate links to products. We may receive a commission for purchases made through these links.
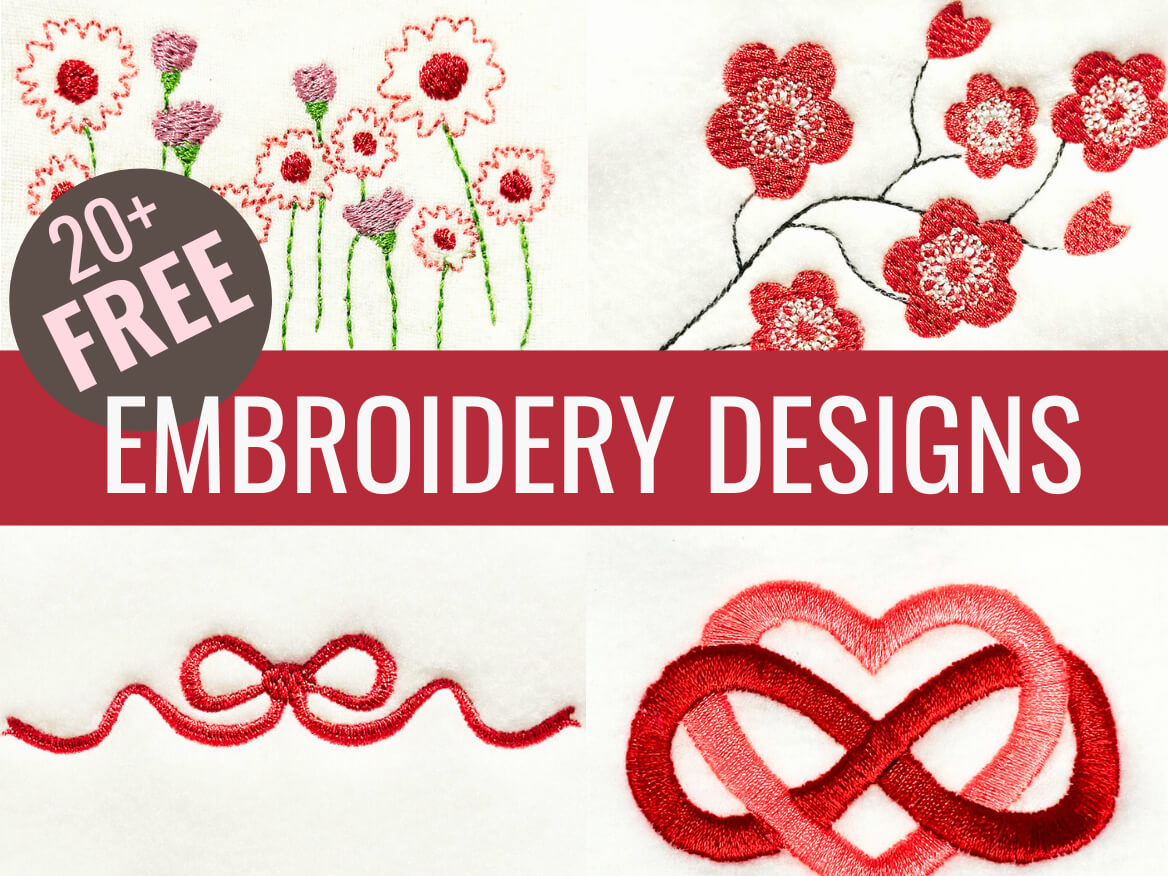
Looking for FREE embroidery designs and PDF patterns?
Subscribe to the Machine Embroidery Geek newsletter
For tips, how-tos, loads of inspiration and access to the resource library full of free machine embroidery designs and PDF patterns.
Thank you!
You have successfully joined our subscriber list.
Want to create your own embroidery designs but digitizing software seems too complex and intimidating? If so – you MUST check out Doodler embroidery software, a new program designed for both a PC and an iPad that removes all the barriers between you and custom embroidery design creation.
Sound pretty awesome? Lucky for me (and you) – I was given a private demo of this new software from its creator, embroidery digitizing legend, John Deer.
And, yes, I was a little star struck.
But, anyway, I got to learn a whole lot about Doodler from the person who knows it best. And, now I’m ready to share everything I learned.
Doodler is an easy-to-use embroidery design software that was created with the non-digitizer in mind. It includes a wide variety of features and tools that allow you to create beautiful embroidery designs without any prior digitizing experience.
And because it’s been designed specifically for those who don’t know how to digitize, it’s easy to use right from the start.
A program designed by a digitizer
Doodler was created by John Deer in conjunction with a software company called Pulse Microsystems. Pulse had a great deal of experience creating digitizing software as they had worked on previous projects with other big names in the industry. But, this time, instead of “software people” designing the digitizing software, the program was created with the guidance of a digitizer.
John told me that he was motivated to create Doodler from his experience digitizing and teaching digitizing for many years, approximately 80% of all machine embroidery enthusiasts WANT to learn to digitize, but only about 2-3% actually achieve that goal.
A fun, novelty program
When he designed Doodler, his goal was to make it a fun, novelty program, and not a full-blown digitizing program that would compete with robust digitizing programs like Hatch. It’s intended to help embroiderers learn some of the basics of digitizing and begin creating some of their own designs.
Good quality designs that stitch out well.
John explained that a lot of the settings in Doodler are based on his own personal preferences and what he has found works well as an experienced digitizer. So, the software is designed to make attractive embroidery designs, even for a user who doesn’t know how to digitize.
For example, Doodler will connect separate lines by snapping to end points of existing lines. Doodler understands that you are trying to create a continuous run.
Available on PC and iPad
Doodler was created for two different platforms – PC and iPad. Eventually, the plan is to have the program available for the Mac. While the iPad version incorporates most of the features of the PC version and looks quite similar, there are a few tasks that can only be done on a PC. But, for many, the iPad will likely be the preferred platform as it is much more portable and easier to use when you’re not at your desk.
How to create embroidery designs with Doodler
Getting started with Doodler is pretty easy. You simply purchase the software directly from the Embroidery Legacy website. After your order is complete, you will be able to activate the iPad version after downloading it from the Apple App Store.
Once you have the program installed, you simply start doodling! Save your work frequently! By default, your working file (on the PC) will be saved in JDX format. On an iPAD the working file is JDS.
JDX and JDS are not embroidery file formats. You will need to save out your design in a format that can be read by an embroidery machine. And you can only do this on a PC – not the iPAd. So if you create designs on an iPAD, then save them in JDS format, you will need to open them on your PC and save them out as embroidery files.
Understanding the Doodler interface
The Doodler interface is intended to be simple and intuitive. Buttons on the left-hand side are primarily related to file management (saving, undoing, importing, etc.). Buttons on the bottom are used for primarily selecting and editing the shapes. Along the right, you will find controls for changing colors and reordering the objects in the design. In the middle is your workspace where you doodle your designs.
One unique element within the interface is the Widget. It’s where you select all the different shape and stitch types you would want to use. The Widget is kind of like a painter’s palette where you return back to it to choose your next doodle style.
While I felt like the interface and icons were pretty simple and understandable, there are settings within the program to hide some of the tools to prevent overwhelm which might be helpful to people who are just getting started.
Designing your first embroidery project
Many digitizers use an image as a reference for creating a new embroidery design. Doodler lets you import images (PNG, JPG) so you can easily use them as a guide when you are doodling. This is not necessary though.
You can start with a blank canvas if you prefer.
When you’re ready to start digitizing, the first thing you may want to do is create some basic shapes. Doodler has a wide variety of built-in shapes that you can use. You can also freehand draw your own lines and shapes. You can do this by simply clicking on the option you want in the Widget and then clicking and dragging in your workspace. As you move your mouse, you will see a preview of the shape.
Once you have some basic lines and shapes, you can start playing around with the various embroidery effects that are available such as density, stitch width and stitch angle.
As you become more familiar with the program, you will likely want to further manipulate your objects. Doodler will let you manipulate the shape of your objects after you create them.
What’s it like to use Doodler to create an embroidery design?
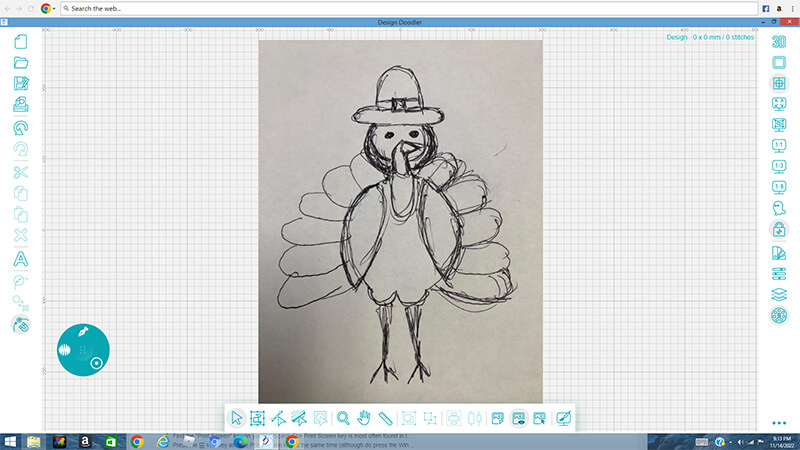
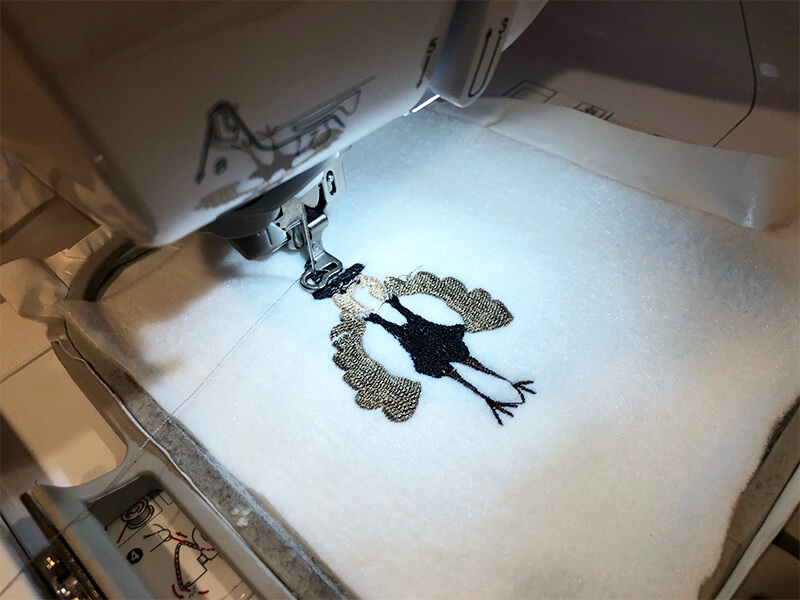
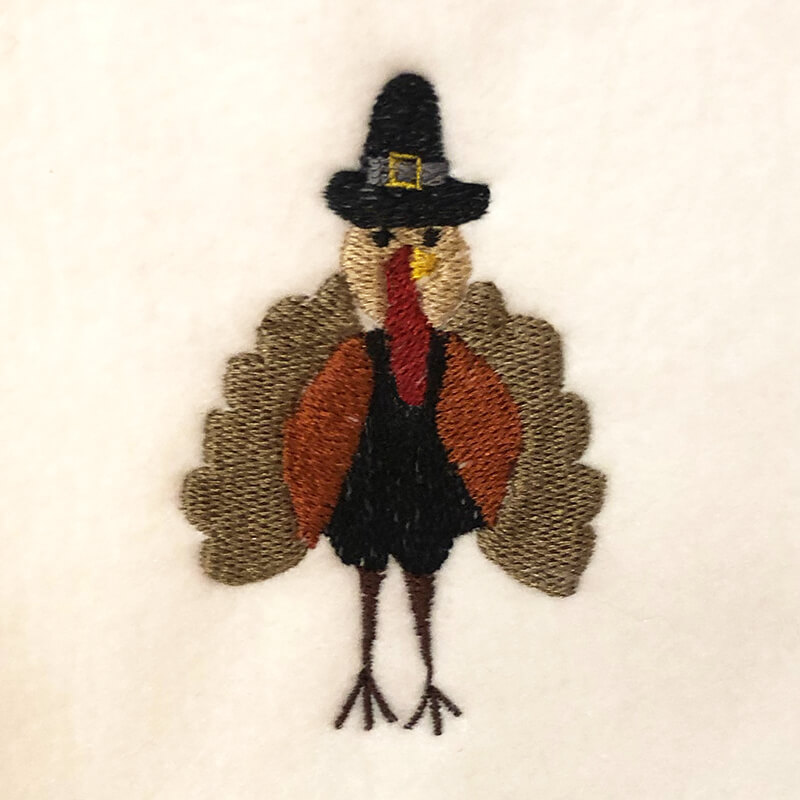
Of course, I had to try Doodler myself. So, I imported a (very rough) drawing of a turkey and based my embroidery design on this sketch.
Creating simple shapes
I started by creating some simple shapes to fill in the different parts of the turkey’s body and hat by simply clicking and dragging – just like freehand drawing. I was not super happy with the precision of my drawing, because I was just using a mouse. Had I been working with a stylus – I would have had much more control. Nevertheless, since I was digitizing at a zoomed in scale – the imperfections in my shapes would not be as noticeable when I scaled them down.
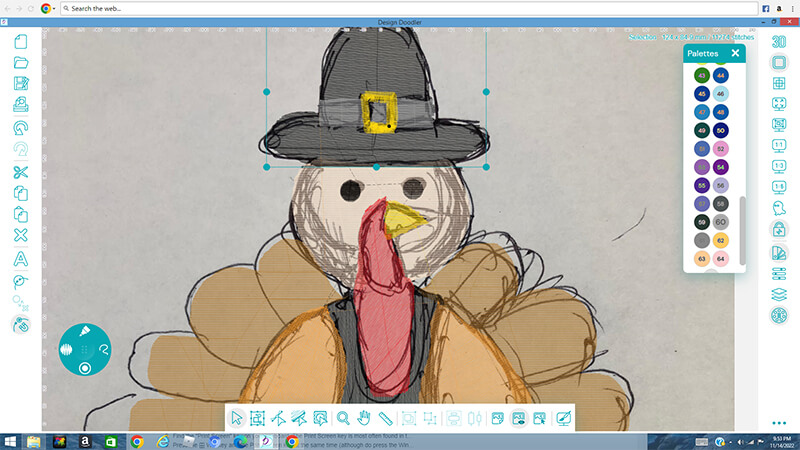
Changing object properties
After I created my shapes, I selected various objects and changed the thread color, fill type and stitch angle.
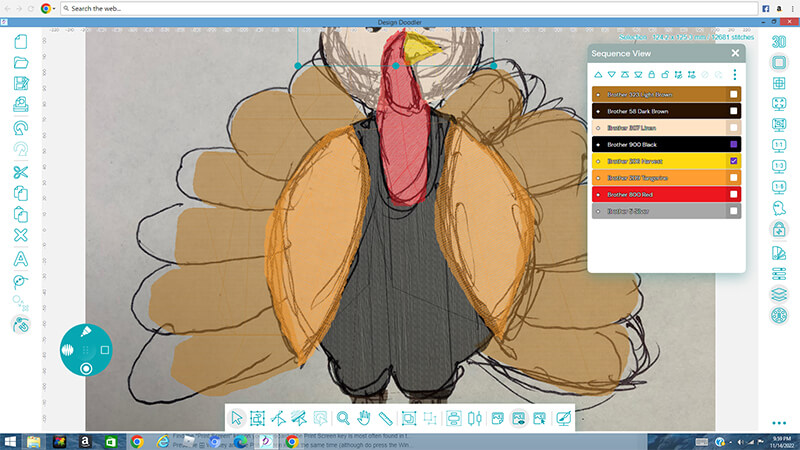
Changing stitch order of objects
Then, I manipulated the order of the objects so that it stitched out in a logical manner. I also grouped shape colors that were of the same color that could be stitched at the same time.
Previewing design
As I added more elements to my design I wanted to get a preview of what it would look like stitched out. This is wasy to do in Doodler. You simply toggle into 3D mode to get a sense for what your stitch out will look like.
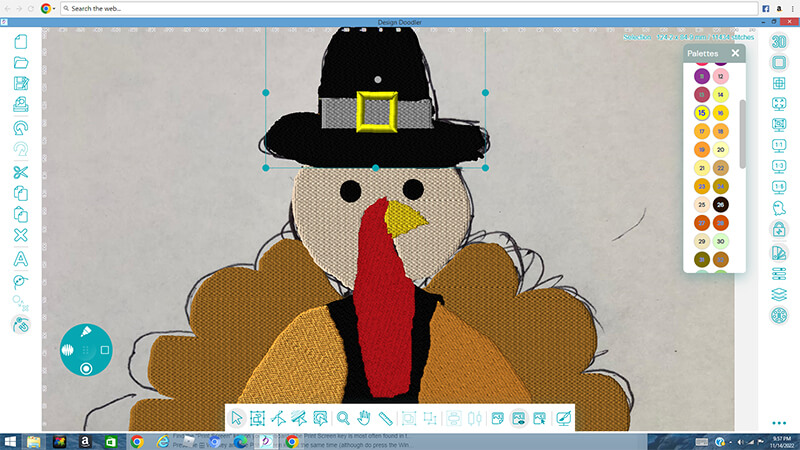
Test stitching design
After I finished creating my turkey design, I exported it as a PES file to stitch out on my Brother embroidery machine. I was not overly particular about the precision of my Doodling and, while I could see some of the flaws in my stitched out design, I think it stitched out surprisingly well.
If I really wanted to use this design on a finished project, I would return to Doodler and clean up my design a bit and stitch it out again.
Overall, I found the program very easy to use. It was very intuitive, and the icons were easy to understand. It was a bit different than my usual embroidery digitizing software but figured it out pretty quickly. I was able to create my turkey design within an hour of first opening the program.
Frequently asked questions about Doodler software for embroidery design creation
What types of files can I import?
You can import PNG and JPG files.
What type of embroidery file can I export?
Just about any embroidery file type you can imagine: PES, EXP, VP3, JEF, XXX, HUS… you name it.
Is there a free trial for Doodler software?
It’s coming! There will be a free trial for Doodler in the near future where you will be able to try out all the features but just not save out embroidery designs.
I’m not very good at drawing. Can I still use Doodler?
Yes! You can use images as a reference when you are doodling or you can use the built-in shapes to create your design.
How much control do I have over the stitches in my design?
You have a lot of control over the stitches in your design. You can adjust the density, stitch width, stitch length and angle.
Do you need to use a computer with a touch screen or a drawing pad and stylus to work with Doodler?
No, you can use a mouse. However, I think you would have more control over your shapes if you used a stylus with a touch screen computer or drawing pad.
Is Doodler similar to SewArt?
No. SewArt is primarily and auto digitizing tool. It does have some manual digitizing features, but it is designed to work with images in a very specific way.
How to learn more about Doodler software
If you’re interested in learning more about Doodler, there are a few resources you can check out. When you purchase the software, you will get access to several video lessons to help you learn the program.
Ready to check out Doodler software for embroidery design creation?
If you’re interested in trying your hand at embroidery digitizing, Doodler is a great place to start. It’s user-friendly interface makes it easy to get started, even if you’ve never used a digitizing program before. And with its unique features and capabilities, Doodler offers endless possibilities for creative expression. So what are you waiting for? Give Doodler a try today and see what all the fuss is about!
Want to remember this? Save “Doodler software for embroidery design creation” on your favorite Pinterest board
“I am so happy to have found Julie and Machine Embroidery Geek. I have taken a couple of classes like SewArt/SewWhatPro and Master the Machine. I am amazed at how down to earth the explanations in the class are. In the past people treated me as if I should already know everything and I was too proud to admit I didn’t. Julie takes you where you are and is very patient. I have even had some questions I could not work through on my own and she is a great resource. Thank you Julie for all your help.”


How do I import JPG & PNG files into design doodler? It does not seem to work.
I think I show that in the post. Maybe your image is not actually one of these formats?
No link for the doodler?
I’m sorry – I didn’t mean to leave that off: https://www.digitizingmadeeasy.com/embroidery-software-design-doodler/