By Julie on March 30th, 2021 This site contains affiliate links to products. We may receive a commission for purchases made through these links.
Looking for FREE embroidery designs and PDF patterns?
Subscribe to the Machine Embroidery Geek newsletter
For tips, how-tos, loads of inspiration and access to the resource library full of free machine embroidery designs and PDF patterns.
Thank you!
You have successfully joined our subscriber list.
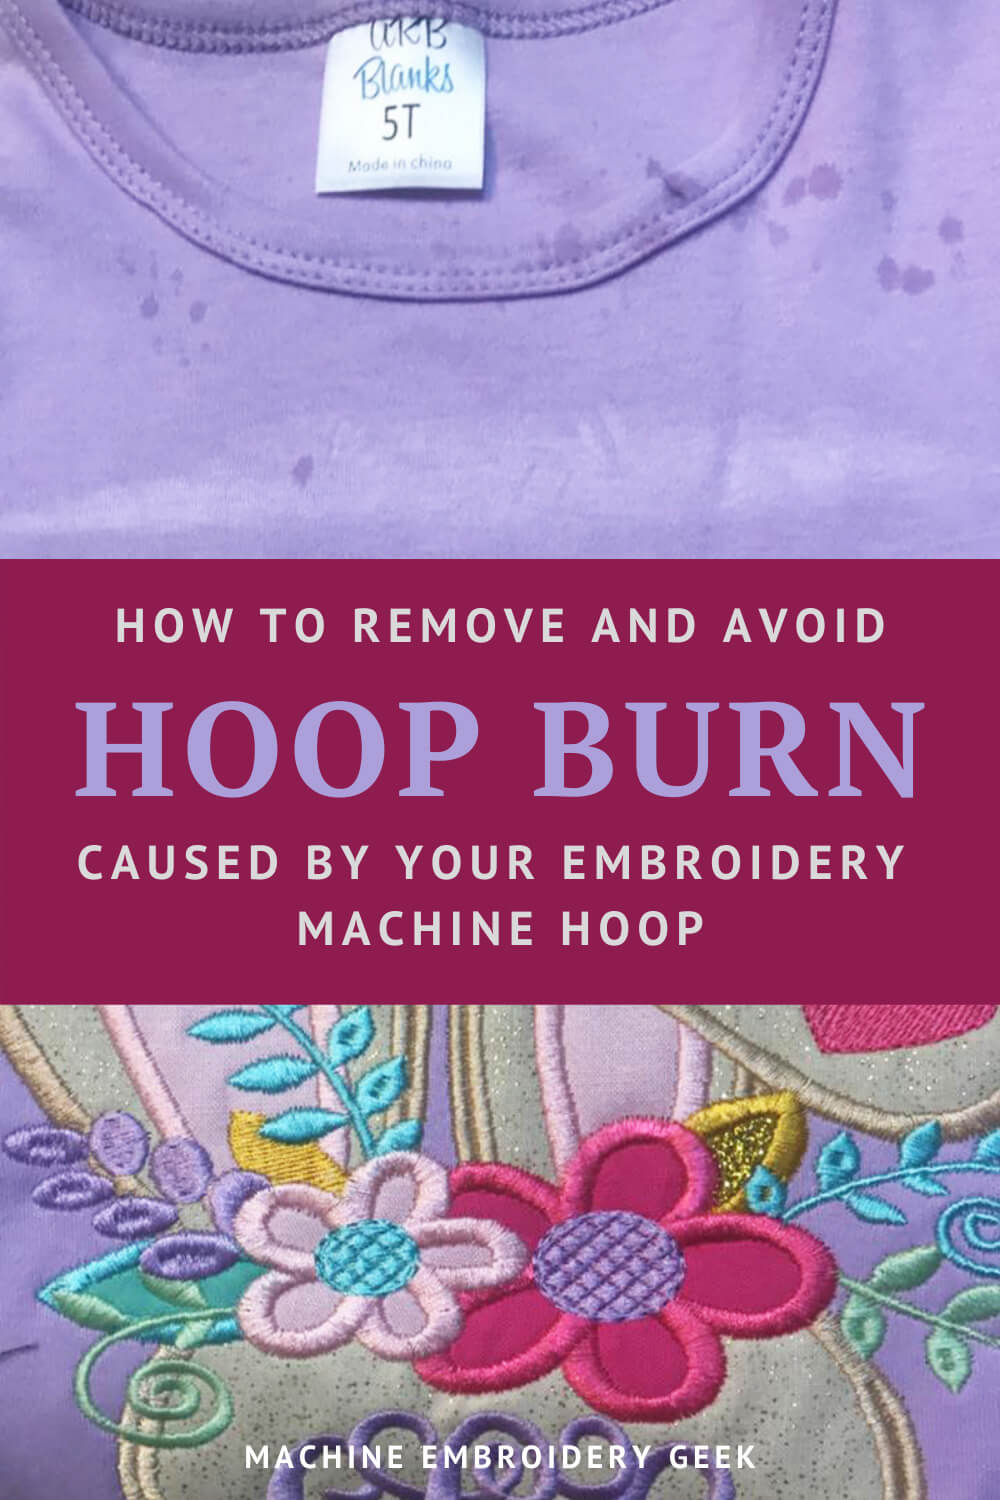
Setting up your project on an embroidery machine can be challenging. Some items are tricky to hoop – like baby onesies where the space is super tight. So, when you get it right, it can be quite satisfying. That is, until you remove your item from the hoop and you can see the shape of the embroidery hoop on your garment. DOH! This, my friends, is hoop burn, and it can be a bit of a buzzkill in the world of machine embroidery. Fortunately, there are some tricks to help you get rid of it and simple ways to avoid hoop burn altogether.
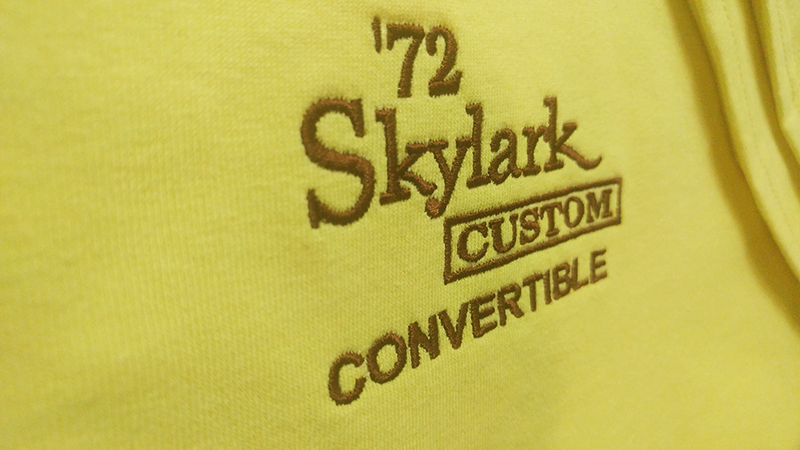
Hoop burn is when you take your project out of the embroidery hoop and markings remain on your project where your hoop was.
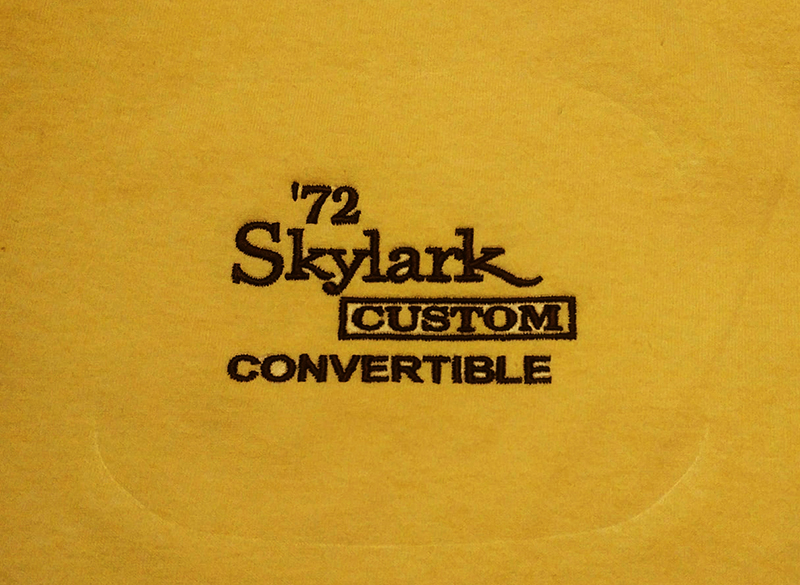
Notice how you can see the outline of the hoop on this shirt. Photo provided by Matt Dennison and used with his permission.
What causes hoop burn?
Hoop burn is caused from hooping the fabric so tightly that the hoop actually squeezes moisture out of the fabric where the hoop was. Once the fabric is released from the hoop, the area that was squished does not recover and a mark is left on the fabric.
But here’s the problem. In order to secure you project in the hoop, you want to make sure it’s taut. I know, I know, it’s a Catch-22. You want to hoop your project tightly, yet, the downside is you can end up with hoop burn.
What fabrics are most prone to hoop burn?
Before you hoop any projects, it’s important to be away of which types of fabrics are prone to hoop burn so that you can take appropriate precautions.
Knits
It may not seem intuitive, but t-shirts can be very prone to this problem. In my opinion, though, it’s never a good idea to hoop t-shirts anyway as they tend to stretch too much when they are hooped. Float your t-shirts!
Chenille and Velvet
Materials like chenille and velvet have pile. When the pile gets squished down in the hoop, you will get hoop burn. Again, it’s best to float your project when working with these materials. See how I embroidered a design on velvet by floating the material on the stabilizer.
Towels
When I was new to machine embroidery – I tried to hoop a towel. Big mistake. Fluffy towels are nearly impossible to hoop and so much easier to float. Plus – they are prone to hoop burn due to the nap of the terry cloth fabric. Learn how to embroider on towels.
Quilts
It might be tempting to hoop a quilt because it is comprised of a few disparate layers and hooping will hold it all together. But, be careful! The hoop can leave a permanent mark, so you may want to float it and pin generously around the edge. In general, hooping extra thick items like a quilt with battling or really thick towel can lead to really bad hoop burn.
Essential Stabilizer for Machine Embroidery
How do you remove hoop marks?
The method you use to get rid of the hoop burn is dependent on the material that you are working with. Sometimes it will go away easily but other times it is permanent and ruins the project. When there is hoop/fabric burn because of friction caused by fabric sandwiched between the two hoops many times you can’t remove it simply because of the nature of the fabric and fiber.
Notice how the hoop burn is now gone. Matt Dennison used a cheap steamer to remove the hoop burn. Photo provided by Matt Dennison and used with his permission.
Getting the material wet
The least invasive and easiest method for restoring hoop burned fabric is to spritz it with a little water using a spray bottle and leaving it alone to air dry. You can also lay a damp cloth on the project to get it wet. Just avoid rubbing aggressively on the markings.
White Vinegar
If you don’t mind the stench, white vinegar is another wonder product for removing hoop burn. Just sprits a bit, let it soak in and then iron or steam your project.
Steam
Some fabrics are not suitable for ironing. Ever melt any clothing with your iron? I have and it’s not a good look. You can gently steam a project with a cheap steamer and avoid touching the garment. Sometimes you don’t even need to wait long for the markings to go away. And bonus – your project looks freshly pressed.
Spray starch
Spray starch can remove hoop burn without even ironing and/or steaming. So, if you have some on hand, a quick spray might be a faster solution than getting out the iron or steamer.
Ice
Yep. The same trick you might have used to remove a furniture indentation in your carpet can also remove hoop burn! Just gently rub the ice over the affected area and let air dry.
Brushing with a scrap of the same fabric
If you are not interested in getting your project wet – you may be able to revive the marked area by gently rubbing it with a scrap of the same fabric.
How to avoid hoop burn
Float
The easiest way to avoid hoop burn is to avoid hooping altogether. If you tend to hoop everything, you may be surprised to learn that you can float almost anything as an alternative to hooping.
To float, you simply need to hoop your stabilizer and then stick your garment on top. For most projects, you can hoop a piece of sticky back tearaway stabilizer, score the top paper layer with a pin around the inside edge of the hoop, then peel the paper away. Mark the center point using a disappearing ink pen on the hooped stabilizer and then stick your project to stabilizer.
For extra security, you can also pin your project to the hooped stabilizer. Just be sure that the pins are placed near the hoop border and not anywhere near the stitch area. Also – if you decide to pin your project to the hooped stabilizer, make sure that the pins will not leave permanent holes in your fabric.
If my project requires permanent stabilizer (standard cutaway or fusible poly mesh), then I just cut a small piece to go under the embroidered area. I secure it to the back of the garment using temporary adhesive spray and then float both the garment and permanent stabilizer on the tearaway.
Fast Frames
Fast Frames are an add-on you can purchase for a multi-needle machine that allows you to avoid the downsides of hooping. You can use Fast Frames a couple of different ways. Typically people stick stabilizer underneath the hoop and then float the project on top, sticking the project to the exposed sticky surface within the frame. Some people use clips with their fast frames which might also permanently mark the fabric, so I would proceed with caution on those.
But what if you HAVE to hoop?
If you have to hoop an item – you can always do a test with a scrap piece of fabric. This way you can determine if the hoop will leave a mark and if you are able to remove it. If you are successful – then it’s safe to hoop!
Now that you understand how to remove hoop burn and avoid it in the first place – it should no longer be a problem!
Happy stitching!
xo
Julie
Essential Supplies for Machine Embroidery
Love free machine embroidery designs and PDF patterns?
“I am so happy to have found Julie and Machine Embroidery Geek. I have taken a couple of classes like SewArt/SewWhatPro and Master the Machine. I am amazed at how down to earth the explanations in the class are. In the past people treated me as if I should already know everything and I was too proud to admit I didn’t. Julie takes you where you are and is very patient. I have even had some questions I could not work through on my own and she is a great resource. Thank you Julie for all your help.”