By Julie on January 25th, 2020 This site contains affiliate links to products. We may receive a commission for purchases made through these links.
Looking for FREE embroidery designs and PDF patterns?
Subscribe to the Machine Embroidery Geek newsletter
For tips, how-tos, loads of inspiration and access to the resource library full of free machine embroidery designs and PDF patterns.
Thank you!
You have successfully joined our subscriber list.
As you have probably heard me mention before, I LOVE to visit fabric stores and have plenty of fabric laying around to show for it. For some reason though, it seems like all of the pieces in my sewing room tend to be about 1 yard. It’s barely enough for a skirt for me. However, one yard is plenty of fabric to make a dress for a little girl.
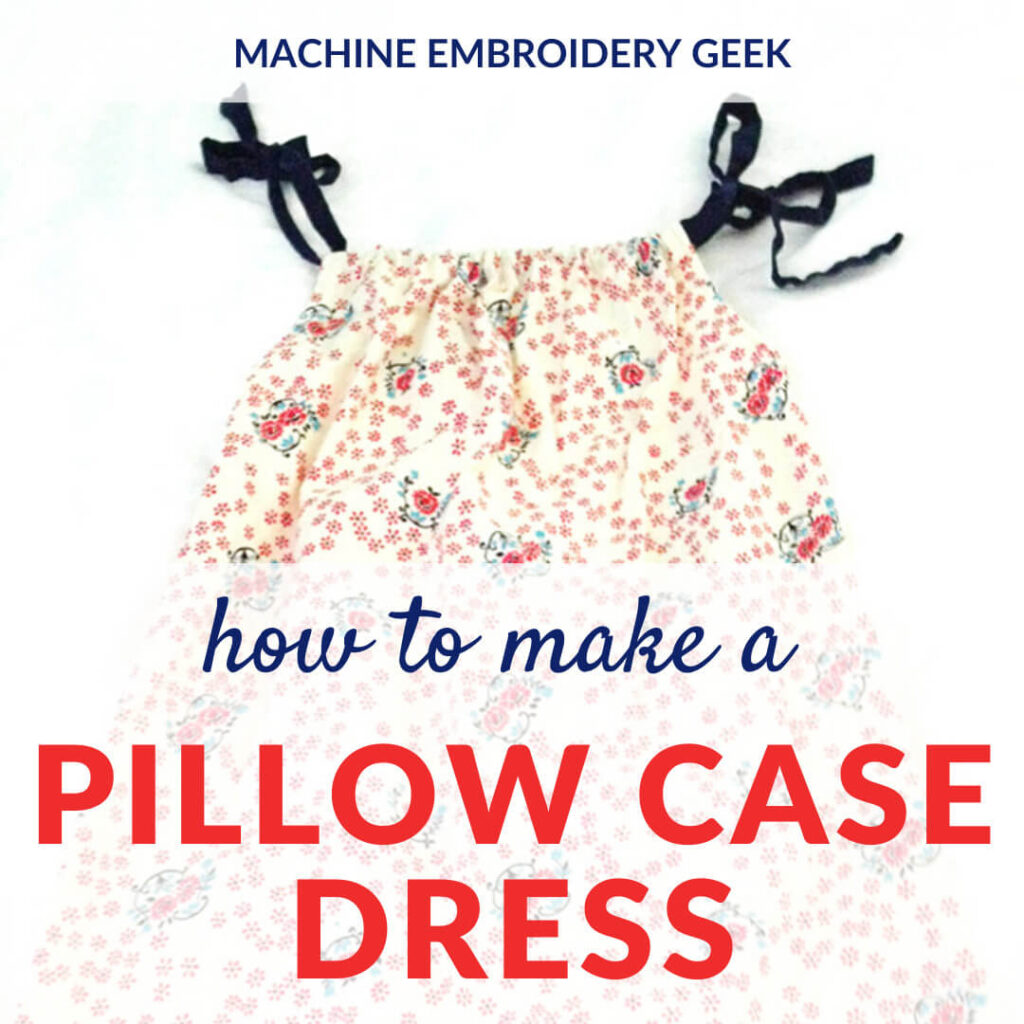
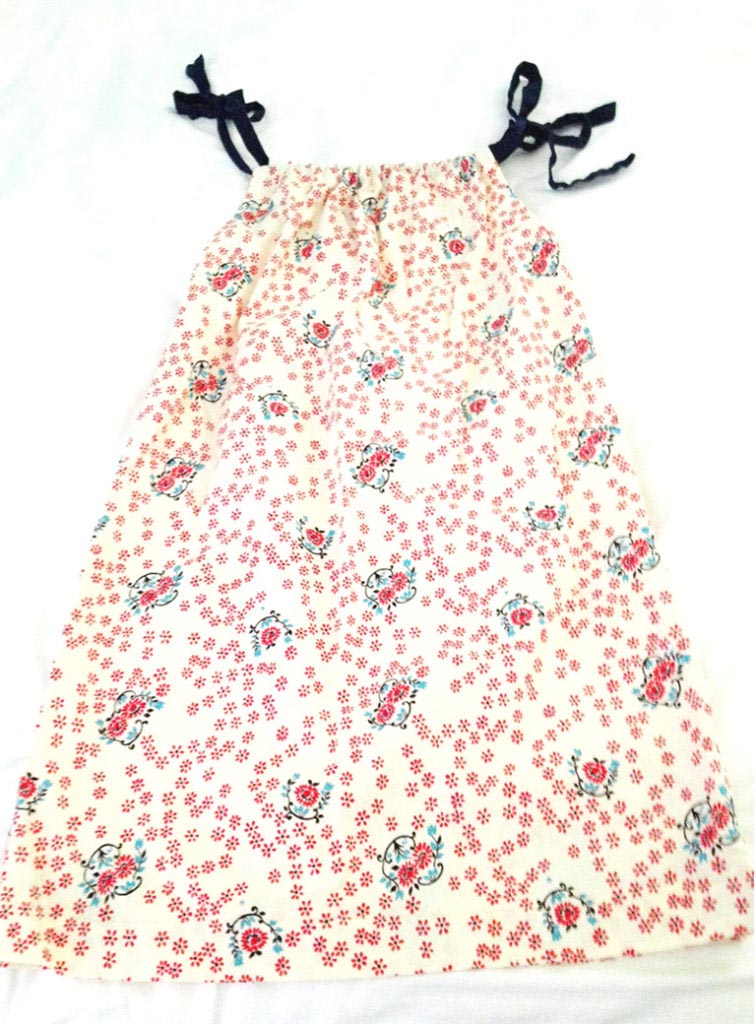
Once I had this realization, I got inspired and decided to use some of my fabric to make an easy, breezy dress for my little girl. I had seen several stores displaying pillow case dresses and I decided to give it a try. A pillow case dress is easy to make, easy to fit and provides a perfect canvas for machine embroidery and/or appliqué. Here’s how to make a pillow case dress.
But first, the inspiration…
Inspiration for a pillow case dress
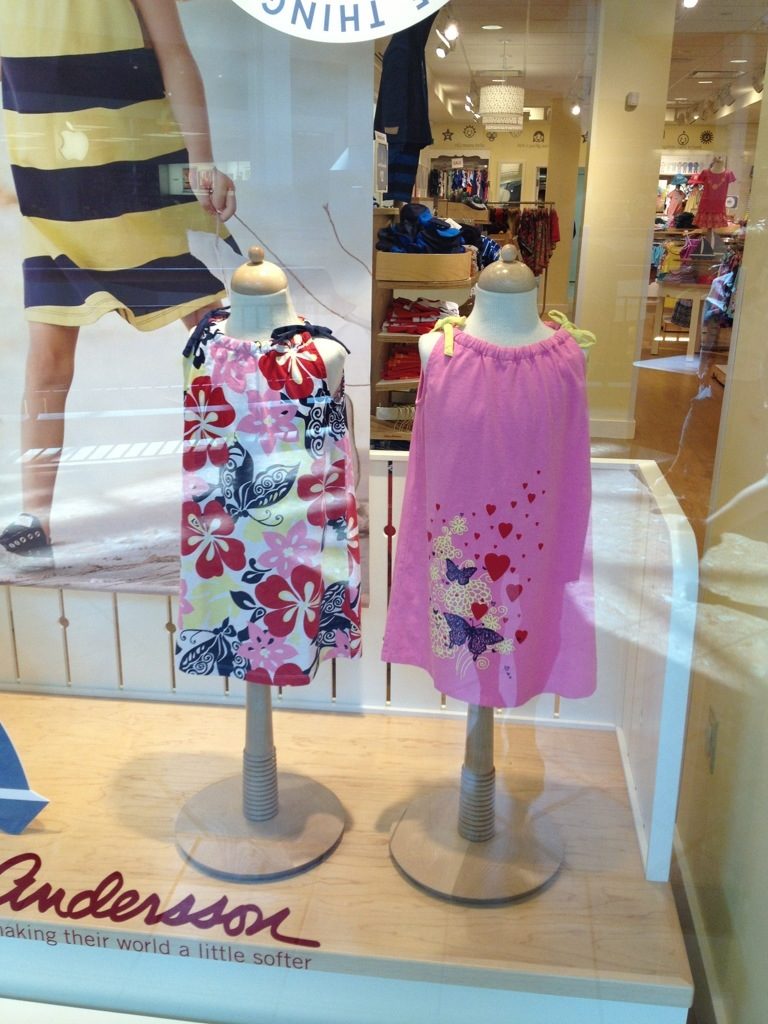
I first discovered the pillow case dress while walking through the mall, (something I rarely do), when I passed the window of the Hannah Anderson store. They were just perfect: simple, colorful sheaths that tied at the neck. These were particularly cute with their contrasting ties and the whimsical designs down the front. I could immediately picture a version filled with embroidery and appliqué of my own design.
When I looked a little closer, I noticed that Hannah Anderson was marketing them as “pillow case dresses.” After doing a bit of research I discovered that pillow case dresses actually get their name from how they were first constructed; they were literally made from pillow cases. Let’s say one of your pretty pillow cases got lost or destroyed, you could use it to make a dress for a small child.
I did not use one of our pillow cases for this project because all of our are either white or some hideous shade of brown and purple after the kids tie-dyed them at camp. But, what I do have is a heck-of-a-lot-of fabric from all of my recent fabric shopping trips, so that’s what I’m going with.
Another thing I learned is that the pillow case dress is designed to be a one-size-fits all kind of dress. So the owner can go with the dress. When she’s little, the dress fits like a dress, but as she gets bigger, it can be worn like a summer blouse.
Recommended Products
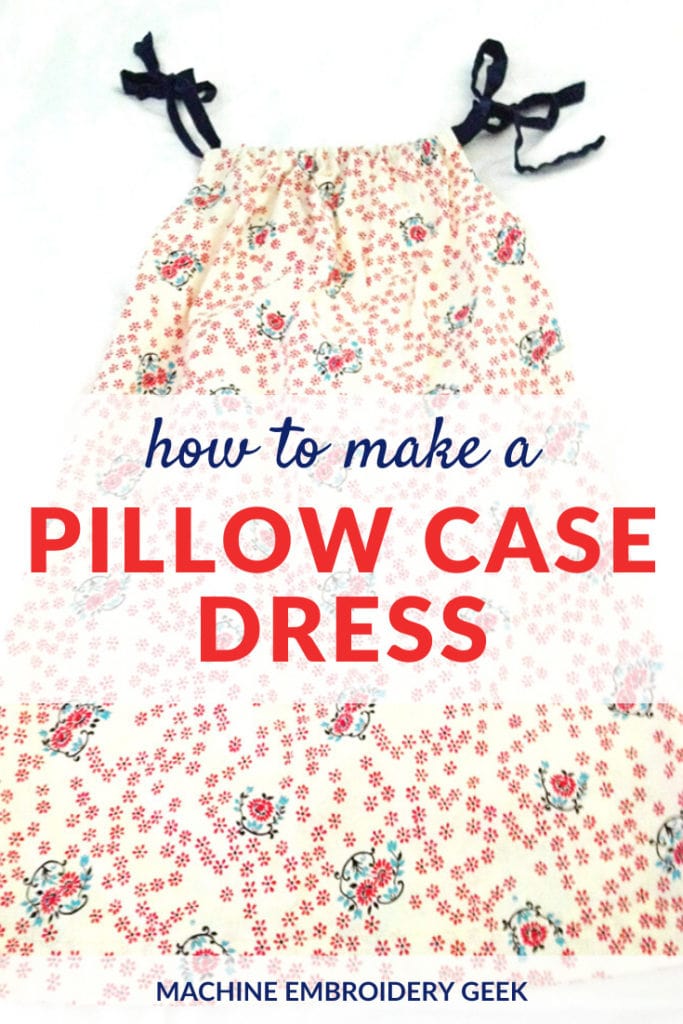
How to make a pillow case dress
Supplies needed for making a pillow case dress
About 1 yard of a lightweight 44″ wide fabric. I used a cotton broadcloth, but anything lightweight that drapes nicely will work. Remember, this is a pillow case dress, so the fabric should be akin to a pillow case!
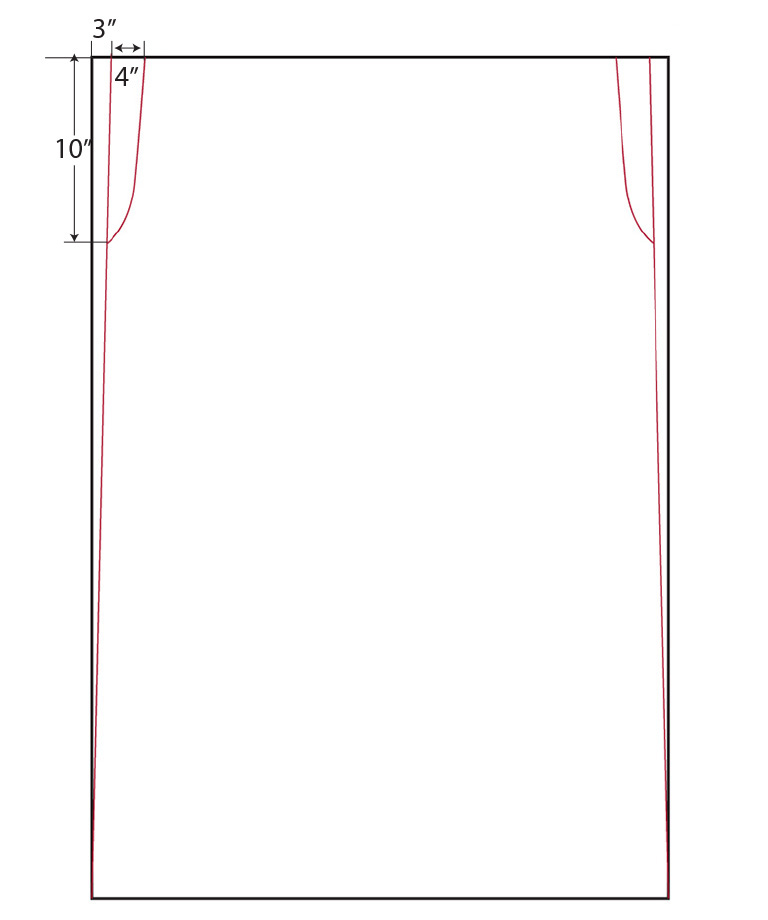
If you Google “how to make a pillow case dress,” you will find a number of tutorials on-line that all vary slightly. In some cases the tutorials instruct you to leave the shape of the dress as a rectangle and not remove any fabric around the armholes. I wasn’t crazy with the results of these tutorials. If you don’t remove any fabric around the arm holes, the resulting dress is very boxy. When I made my pillow case dress, I narrowed the fabric at the top and cut out some arm holes. Here’s exactly what I did.
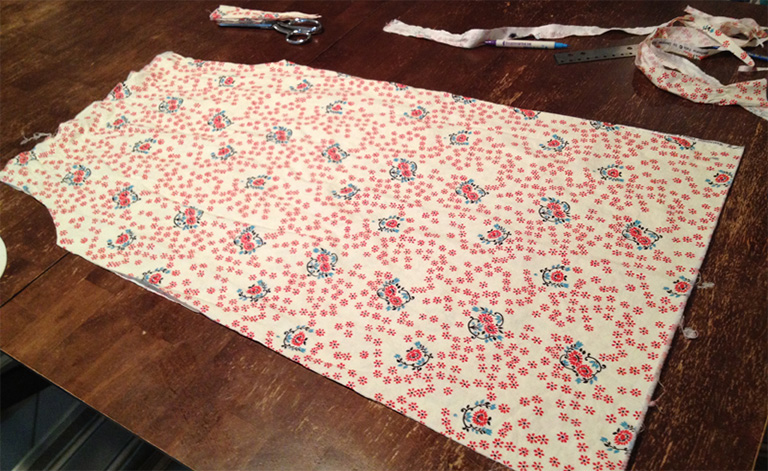
STEP 1: Fold your fabric in half along the grain of the fabric.
STEP 2: Cut the fabric into two pieces along the grain line.
STEP 3: Trim off some of the fabric on the seams so that they slightly angle in. Cut out a curve shape on both side for the arm holes. I used a french curve to draw the shape. Note: in the illustration, the red lines indicate the cutting lines.
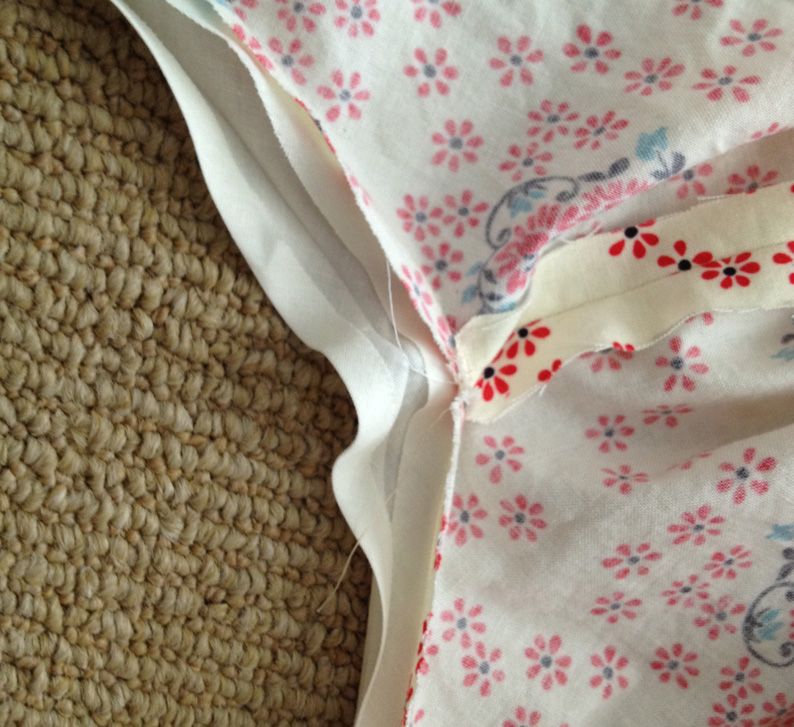
STEP 4: With right sides together, stitch the front and the back of the dress together along the side seams. Stop when you reach the bottom of the arm holes.
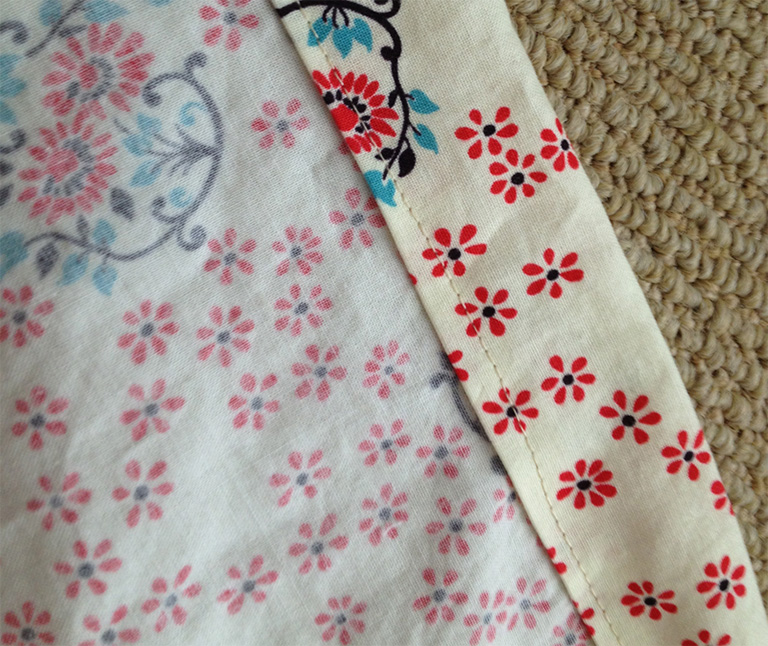
STEP 5: Pin then stitch the right side of bias tape to the right side of the arm hole from front to back. Then fold down bias tape and top stitch to finish the arm hole edges.
STEP 6: Fold the top edges on the top front and the top back over twice and stitch down to create a 1″ casing for the ribbon.
STEP 7: if you are not using grosgrain ribbon, create your ties by sewing a tube of fabric together about 30″ long, turn it and finish the edges closed.
STEP 8: Feed one tie through the front casing and another tie through the back casing. Tie the ties together on both sides.
STEP 9: Hem the dress
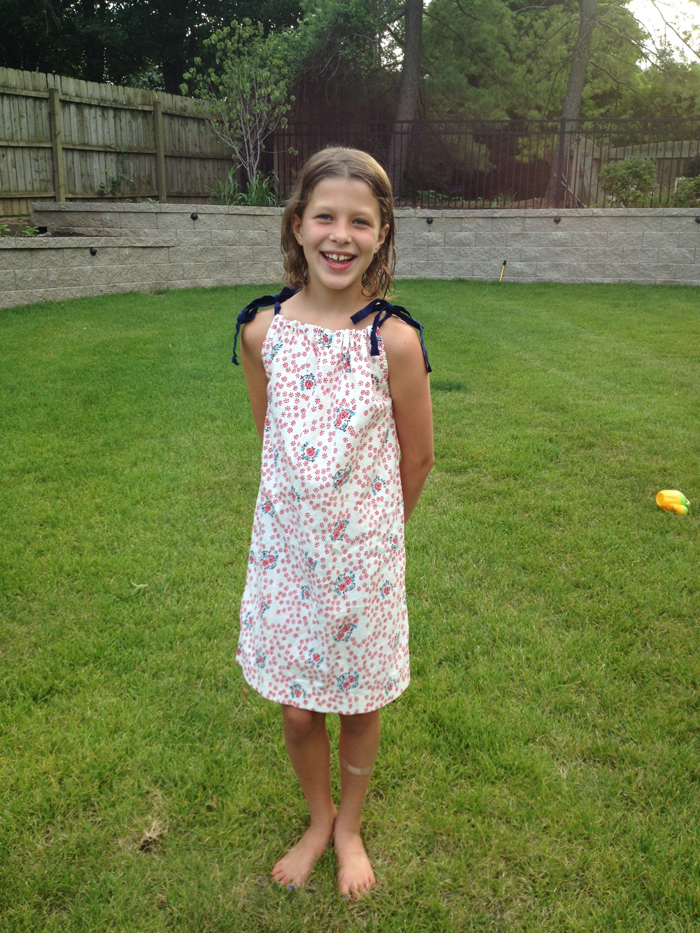
STEP 10: Find a cute model!
My fabulous model in her pillow case dress
Ways to embellish a pillow case dress
Because the shape of the pillow case dress is so simple, there are so many ways you can customize it with embroidery and appliqué. You could do a simple monogram on the chest, add an appliqué on the front, embroidery down the side(s) or finish off the bottom with some free-standing-lace.
Just wanted to say thank you for your amazing tutorials on embroidery! They are so easy to follow and understand. I’m a beginner and I’m now hooked on embroidery.


 fabric")


So cute. Would like for it to be fuller, so going to try it for my great granddaughter for her 2nd birthday.