By Julie on August 4th, 2020 This site contains affiliate links to products. We may receive a commission for purchases made through these links.
Looking for FREE embroidery designs and PDF patterns?
Subscribe to the Machine Embroidery Geek newsletter
For tips, how-tos, loads of inspiration and access to the resource library full of free machine embroidery designs and PDF patterns.
Thank you!
You have successfully joined our subscriber list.
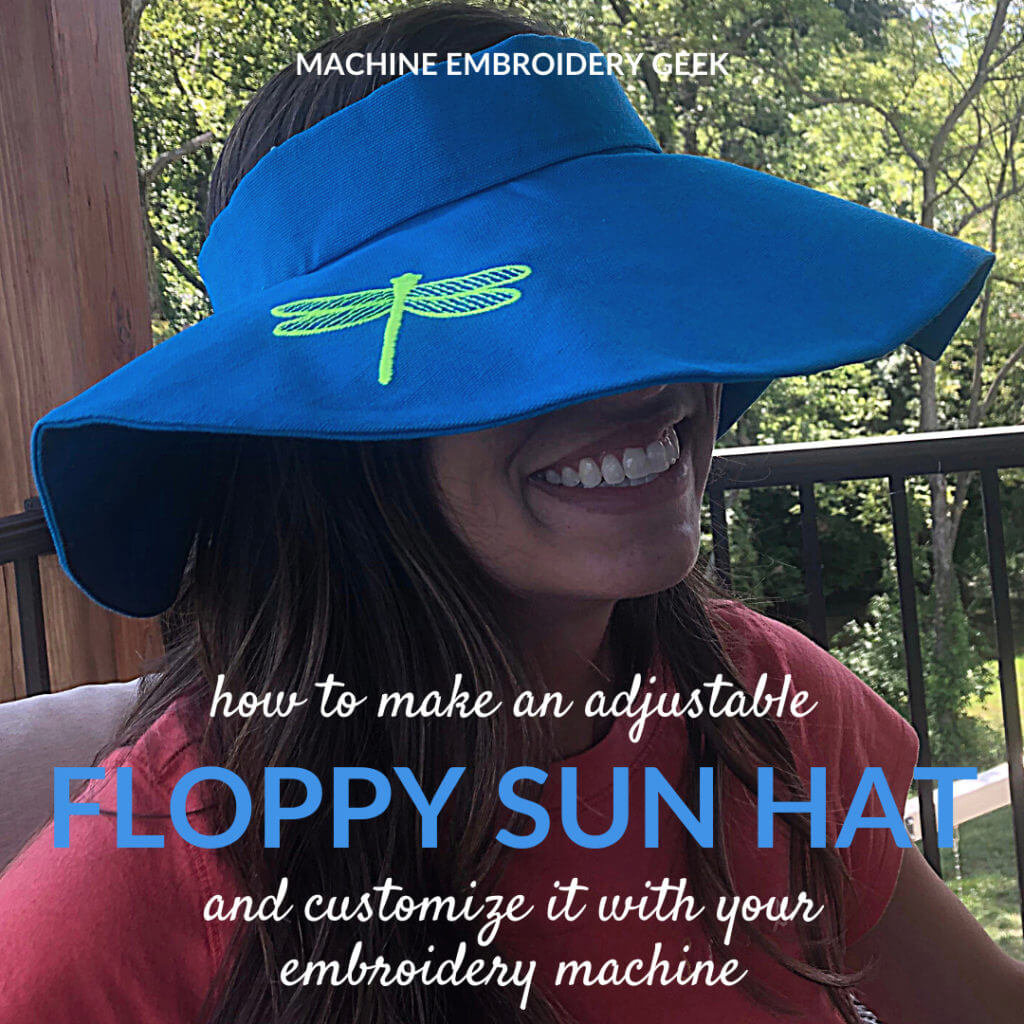
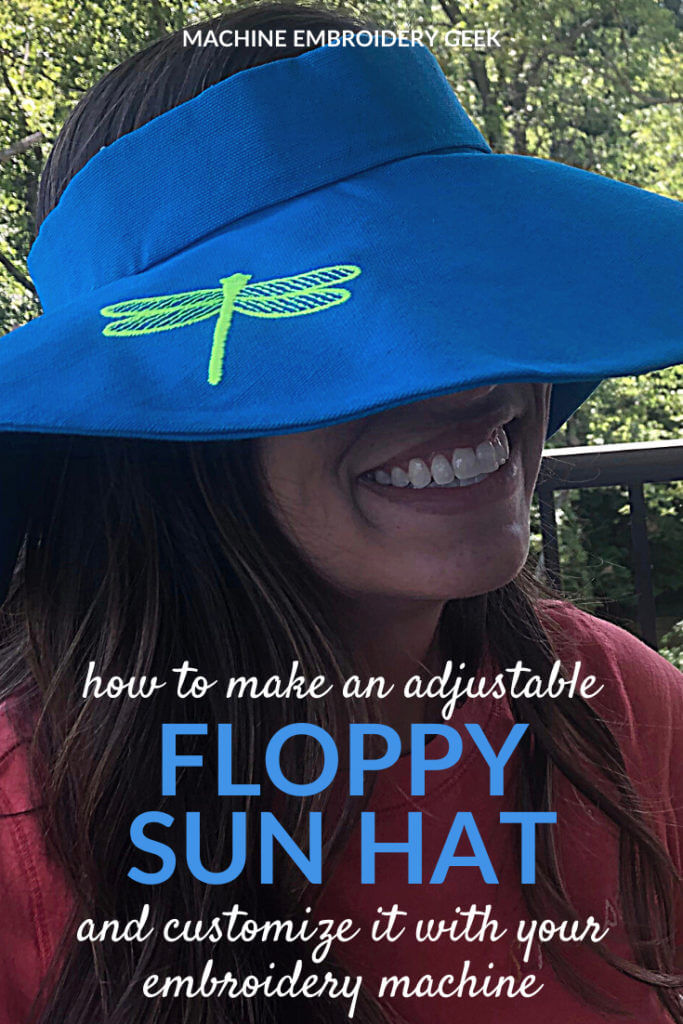
Yes, it’s getting to the point in the summer where I’ve gotten my fair share of vitamin D. Between working in the yard and daily runs, I get A LOT of sun. And now that I’m getting older, I see how important it is to avoid the sun for my skin’s optimal health and appearance. Sunscreen is great, but to really shade your face, there’s nothing like a big, floppy sun hat. So, today I’m going to show you how to make a sun hat with a fun, embroidered design.
If you have spent some time exploring this blog, you may have noticed that I have monogrammed quite a few straw hats. These are definitely fun and easy to make and a total fan favorite. But, what I DON’T like about embroidering on a sun hat is seeing the backside of the monogram under the brim of the hat. An easy way to solve this problem is to make your own sun hat!
Making a sun hat is an awesome idea because you can make it any color or style of fabric you want. You can also add the monogram or embroidery design before you stitch the hat together so you won’t be able to see the ugly back side of the embroidery when you are done.
Recommended Products
This particular sun hat that I designed is 100% adjustable, so it will work for any sized head. The flexibility in sizing and the high degree of customization make this particular sun hat a perfect gift.
So let’s get right to it.
How to make a sun hat
Supplies Needed
1/2 yard fabric – I used a duck cloth that was fairly stiff. Lighter weight fabrics can be bulked up with an additional layer of interfacing.
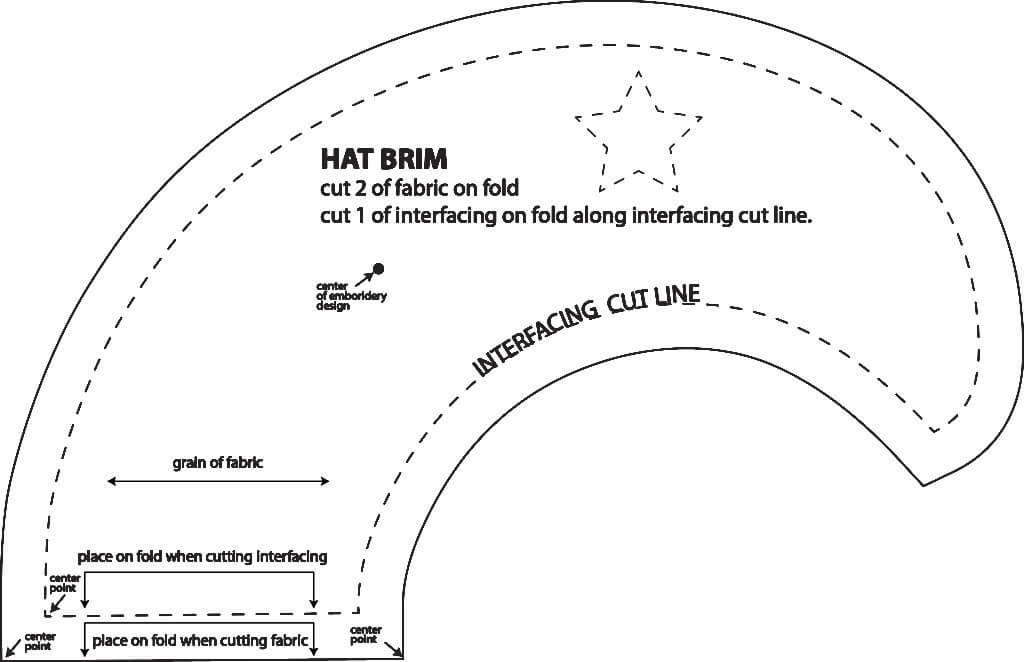
Print out the entire PDF file on 8.5″ x 11″ paper. I’ve set up the pattern so that you can print it on regular printer paper and then tape it together to make your pattern pieces. You will have two pattern pieces: brim and band. You will need to cut two brim pieces and two band pieces and 1 piece of interfacing for the brim and one for the band.
Note that the interfacing cut line on each piece is smaller than the pattern pieces. Therefore you should use the pattern to cut out the fabric first, then the interfacing.
Hat brim pattern piece. The dotted star is simply intended to help you line up separate piece of paper when you print on multiple sheets.
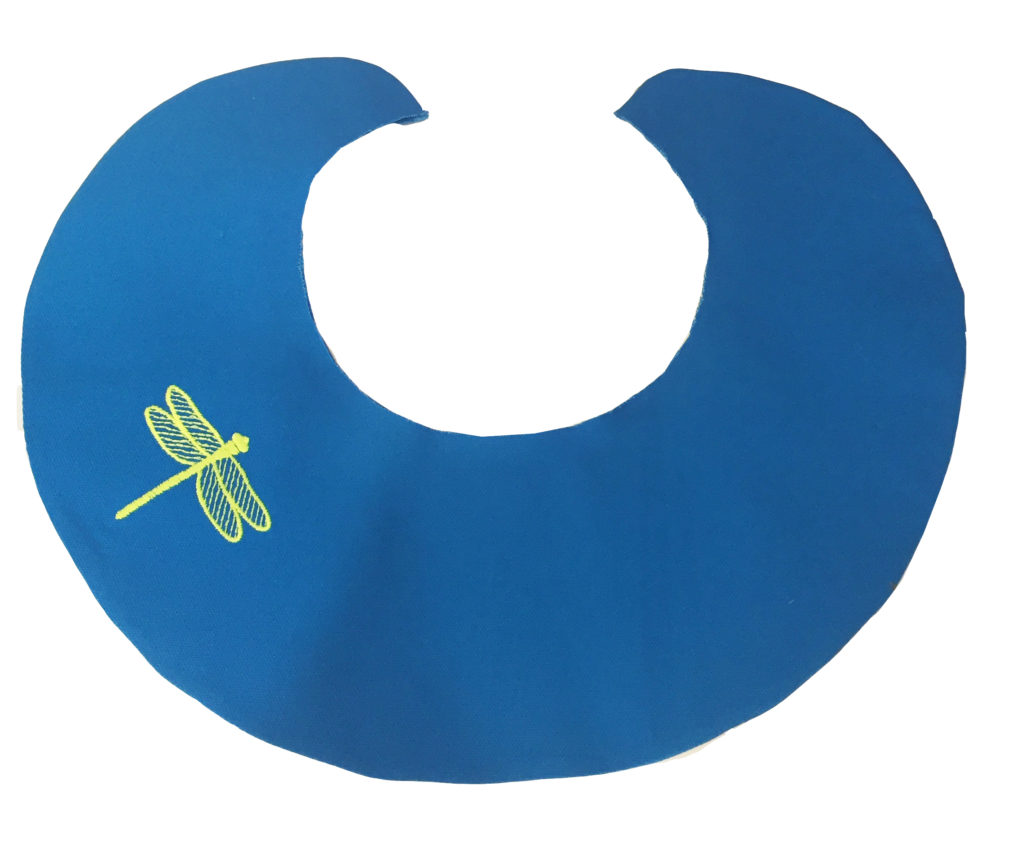
The sun hat brim pattern piece represents just half of the brim. So you will need to cut 2 sun hat brim pieces in your fabric on fold.
Cut 2 sun hat band pieces out of fabric
Mark the inside center point of the hat brim and the hat band as shown on the fabric on both pieces.
If you are adding an embroidery design, mark the location of the design center (as shown on the pattern) on one of the right side of the fabric of one of the brim pieces.
Embroider the design on the brim piece, orienting the design so that it’s the top of the design is closest to the inside of the brim. For my hat, I stitched a funky dragon fly machine embroidery design. But, I think any bug design like a big bumble bee machine embroidery design would be cute as well.
Cut 1 piece of interfacing on the fold of the brim pattern (cutting on the interfacing cut line).
Cut 1 piece of interfacing of the band pattern on (cutting on the interfacing cut line)
Sewing the Sun hat
Prepare the sun hat brim
With right sides facing, pin the two brim pieces together along the outer edge of the brim.
Stitch along the outside edge of the brim leaving 5/8” seam allowance
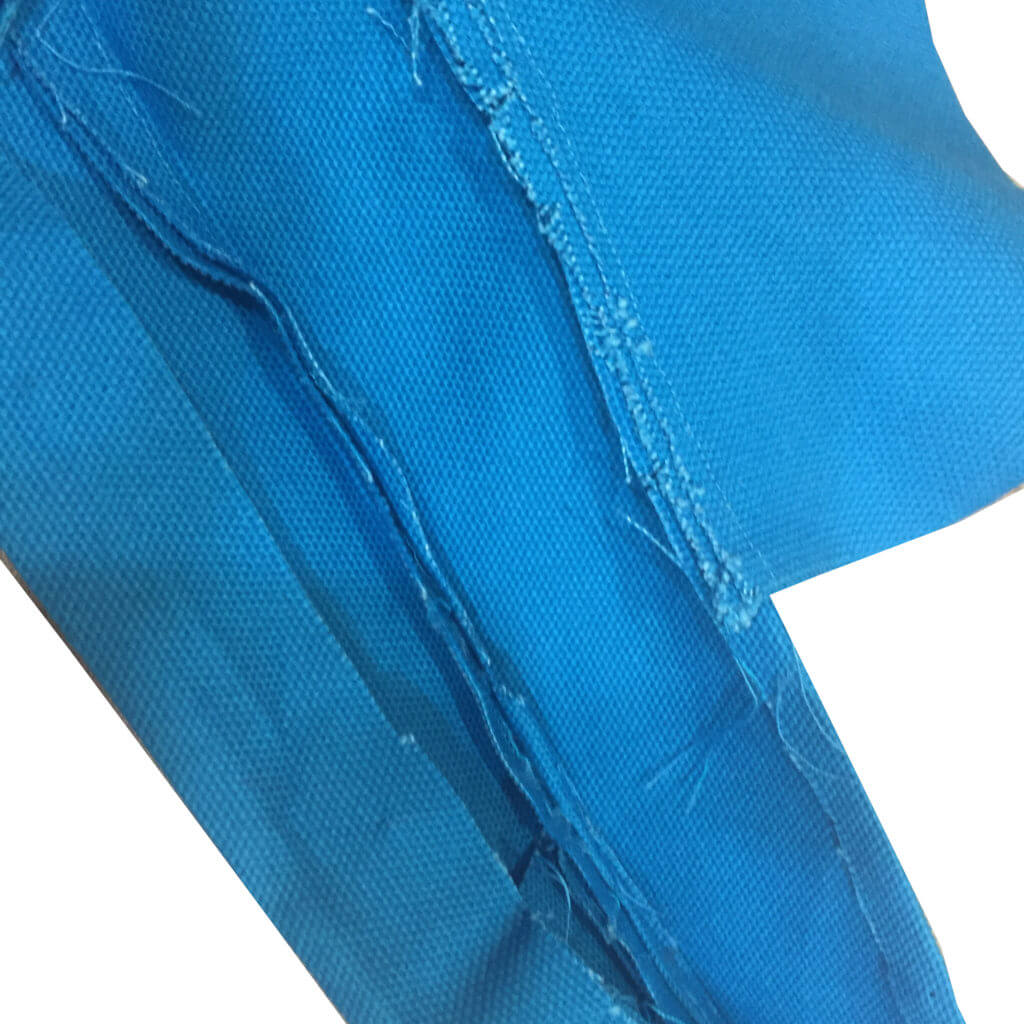
Trim the seam allowance to about 1/4″, then make small notches in the seam allowance about every 1/2″ being careful not to cut the stitching. This will give you a smoother curve when you turn the brim right side out.
Turn the sun hat brim right side out and press.
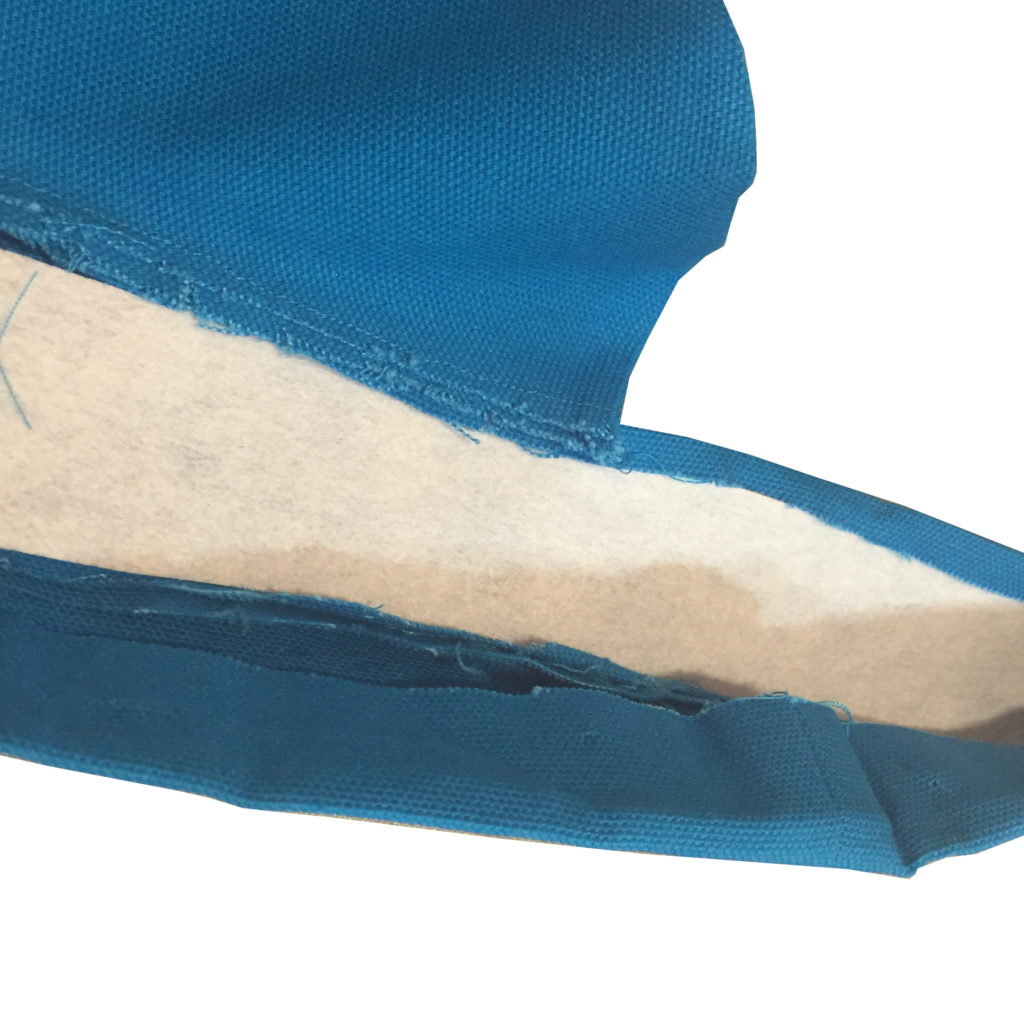
Insert the brim interfacing piece between the two brim layers and smooth it out. Fuse the “sandwich” of fabric / interfacing / fabric together.
Prepare the sun hat band
With right sides together pin together the two band pieces around 3 sides (one long side and 2 short sides).
Stitch together the two band pieces along the 3 sides you just pinned leaving 5/8” seam allowance.
Trim seam allowance to about 1/4″, turn it right side out and press.
Connect the the sun hat brim and band
Line the inside center point of the brim up with the center of the band.
Pin the band to the inside of the brim pieces. You will start by lining up the center of the band with the center of the brim inside. Pin together both layers of the brim to one layer of the band. When you are pinning, the right side of the band will be touching the outside of the brim piece (the piece with the design stitched on it.
Sew together the band to the inside of the brim piece leaving 5/8” seam allowance.
Trim the seam allowance to approximately 1/4″ and notch it every 1/2″.
Finishing the sun hat
On the band piece that is not stitched to the brim, turn up 5/8” of the fabric to create a finished edge and press. This will cover the raw edge of the brim/band seam.
Insert the band interfacing piece between the two band pieces and fuse together the “sandwich” as you did with the brim pieces.
Generously pin the inside band piece to the brim with pins on the outside.
Hand baste in place. Then top stitch along band about 1/8″ from where the brim meets the band.
Finally, stitch the two pieces of velcro to the two ends of the band so that the hat fits snugly. Of course, the velcro will allow the hat to be adjustable, but try the hat on to make sure that it will be appropriate for a head like yours (or the lucky recipient.)
Ready to make your sun hat?
The FREE PDF sun hat pattern is available in the resource library.
Good luck + happy stitching!
Love free machine embroidery designs and PDF patterns?
“This course was such a blessing. I didn’t know all the things the software was capable of, and now I do. The material was presented well. The interactive presentation kept my attention…I recommend it to anyone interested in learning more about Embrilliance”


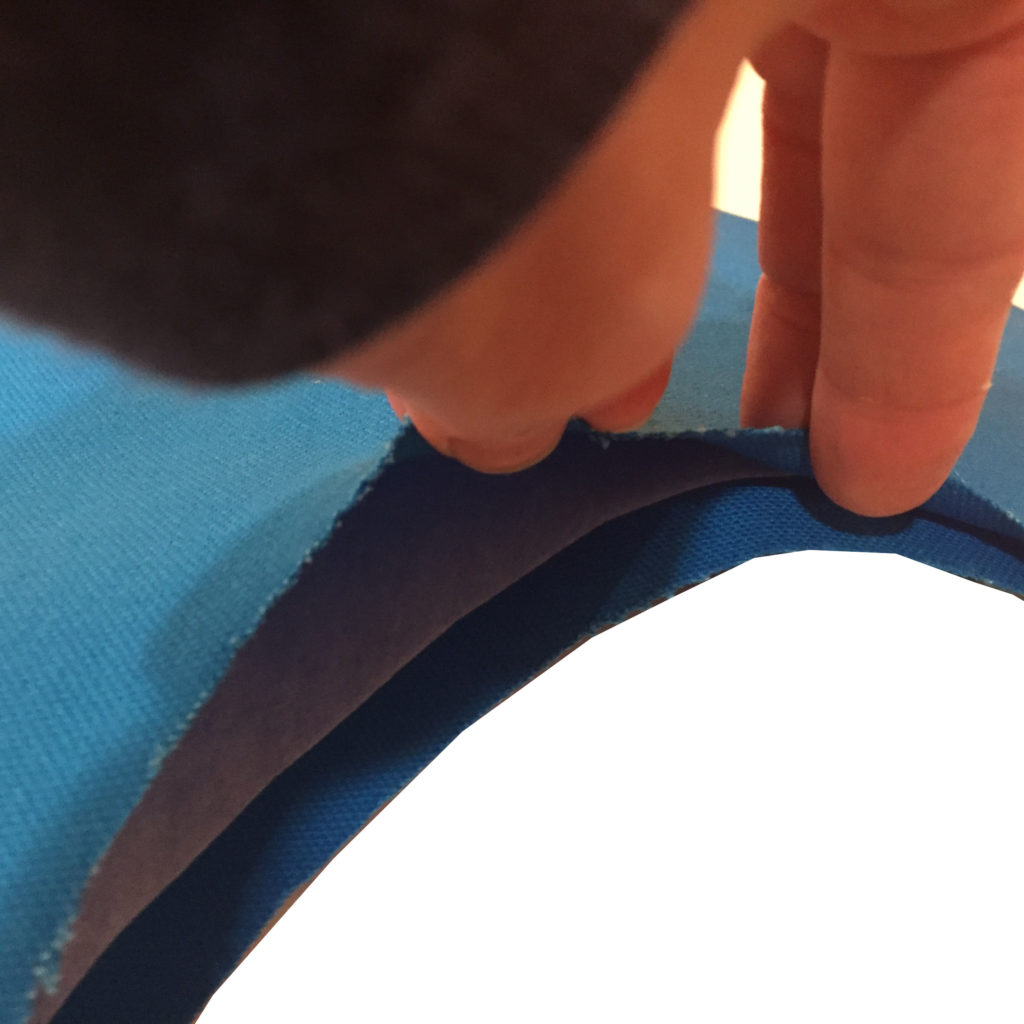
 Generously pin the inside band piece to the brim with pins on the outside.
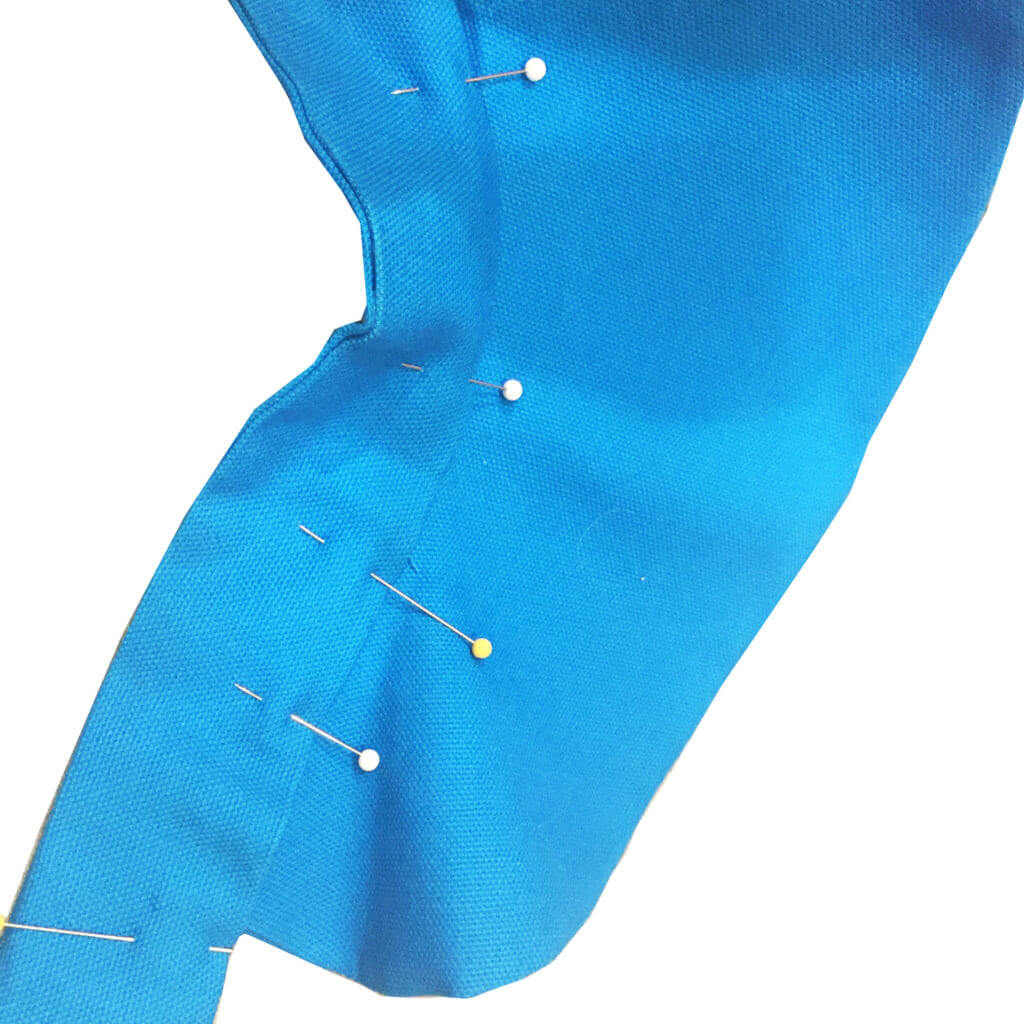


I wanted to download your free sun hat pattern. I have searched your patterns and am not finding it. Please help.
Thank you.
If you just subscribe to the blog – you will be emailed a password to access the resource library. It is in there.