By Julie on November 18th, 2021 This site contains affiliate links to products. We may receive a commission for purchases made through these links.
Looking for FREE embroidery designs and PDF patterns?
Subscribe to the Machine Embroidery Geek newsletter
For tips, how-tos, loads of inspiration and access to the resource library full of free machine embroidery designs and PDF patterns.
Thank you!
You have successfully joined our subscriber list.
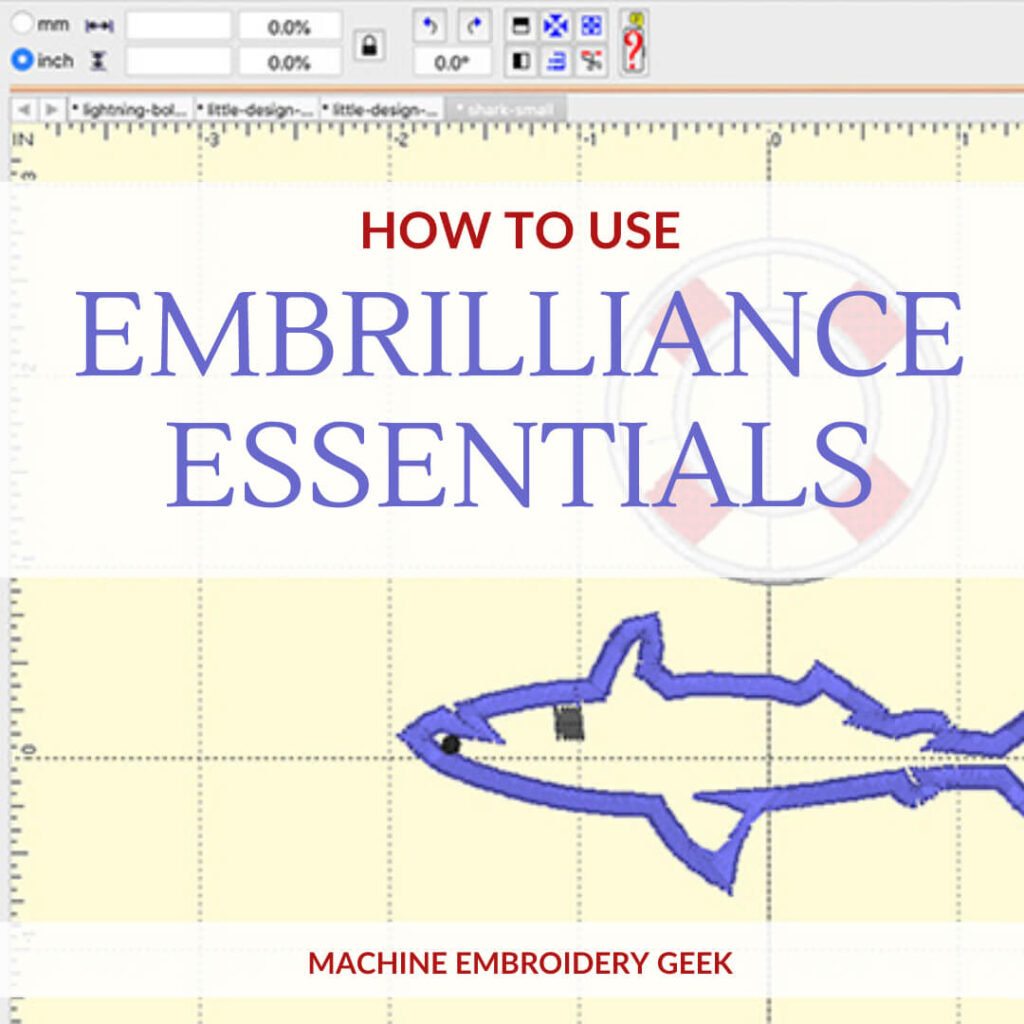
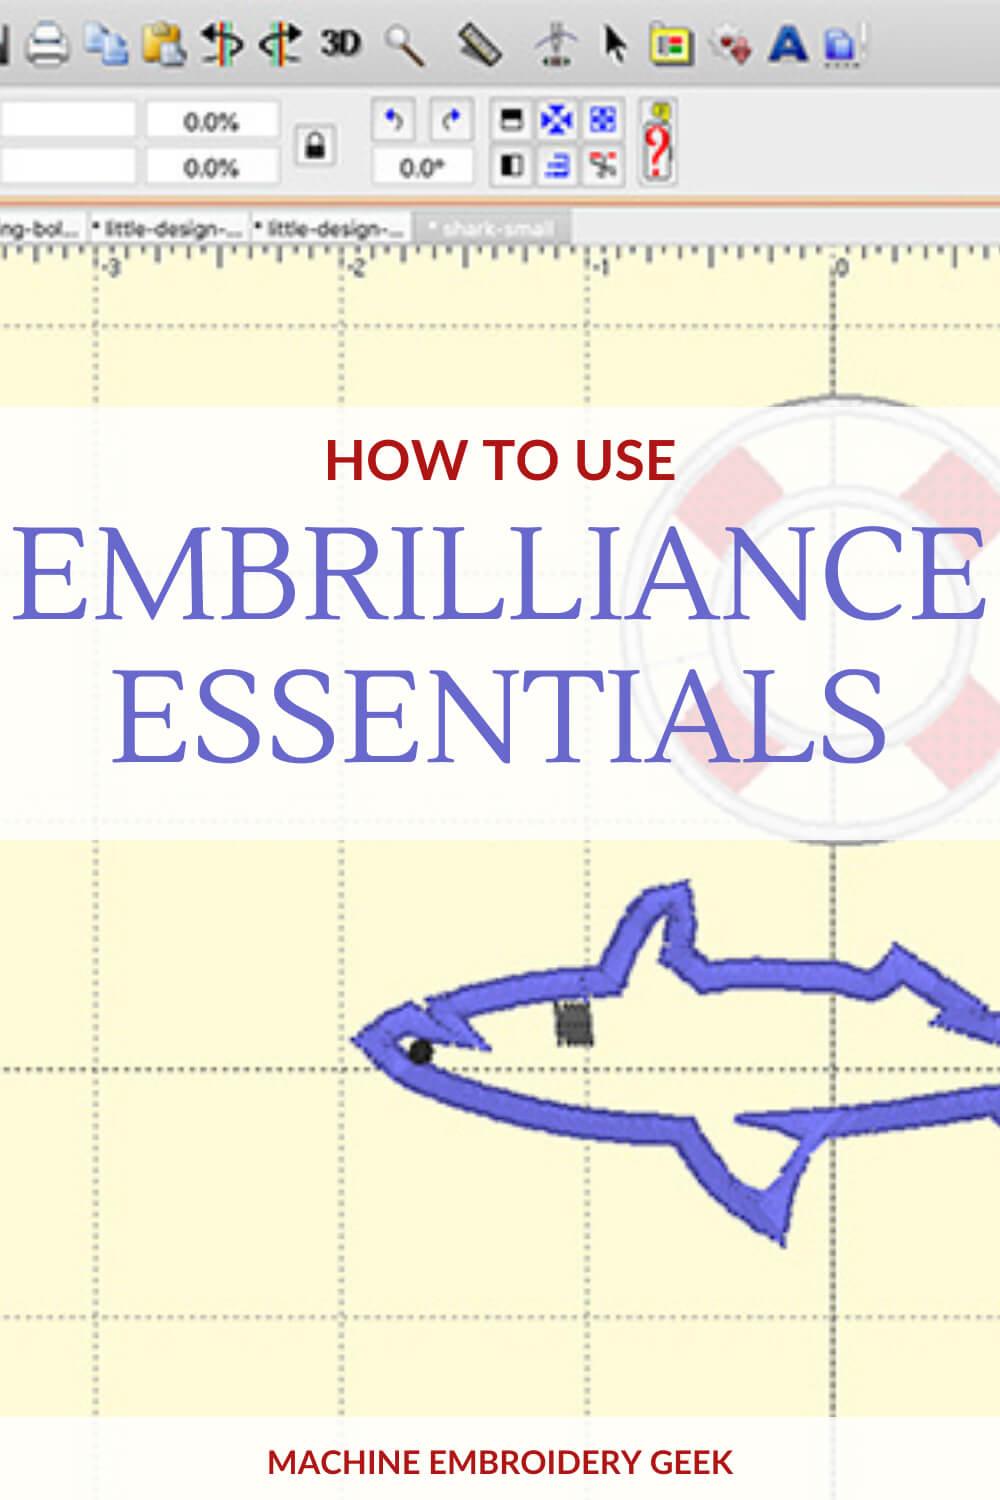
Perhaps you have heard of Embrilliance Essentials and aren’t sure what it does. Or maybe, you just purchased it and you need to know how to get started. Either way – this blog post will cover some of the basics of the program in a simple and concise manner, demonstrating what you can do with it just for beginners. I hope it helps!
Embrilliance Essentials is a program whose function is to manipulate embroidery designs. It can be used to resize, recolor, rotate, merge and more. It is a good program for machine embroidery enthusiasts who would like to be able to manipulate the embroidery designs that they own.
To be clear – Embrilliance Essentials is not a digitizing program. You can not create original embroidery designs with it. It is simply a program that can be used to manipulate designs. If you are interested in creating original machine embroidery designs, and you like the Embrilliance family of products, you would need to get StitchArtist in order to create original embroidery designs.
There are many reasons people love using Embrilliance Essentials. It is inexpensive, it runs natively on a MAC (as well as a PC), and it is easy to learn to use. Another benefit of all the Embrilliance products is that it doesn’t require a dongle (a piece of hardware you need to have plugged into your computer to get the program to run) and, with just one license, the program can be installed on any number of your computers.
What are the Requirements for Embrilliance Essentials?
Unlike many embroidery programs that only run on a PC, Embrilliance Essentials runs on both a PC with the Windows operating system or a Mac. You need to have at least the following hardware specs in order for it to run:
Mac OSX 10.9 – MacOS 11.6
Windows (32, 64): XP, Vista, 7, 8, 10, 11
Things you can do with Embrilliance Essentials
Convert embroidery file format
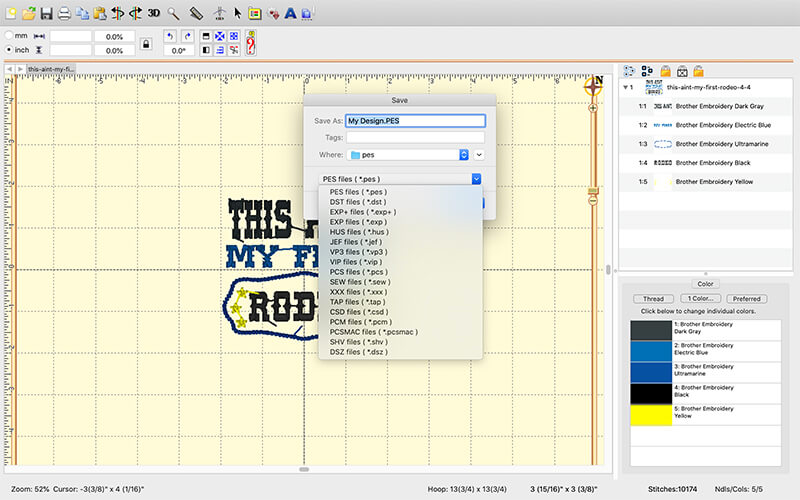
It is possible to convert embroidery designs into different formats using some free programs. However, Embrilliance Essentials makes it very easy. You simply open the embroidery file in the format you have and then save it out in the format you want using “Save Stitch File As” from the File menu. You can select the format (.CSD, .DST, .DSZ, .EXP, .EXP+, .HUS, .JEF, .PCS, .PCM, .PES, .SEW, .SHV, .TAP, .VIP, .VP3, .XXX) you want to convert to from the drop down menu.
Resize
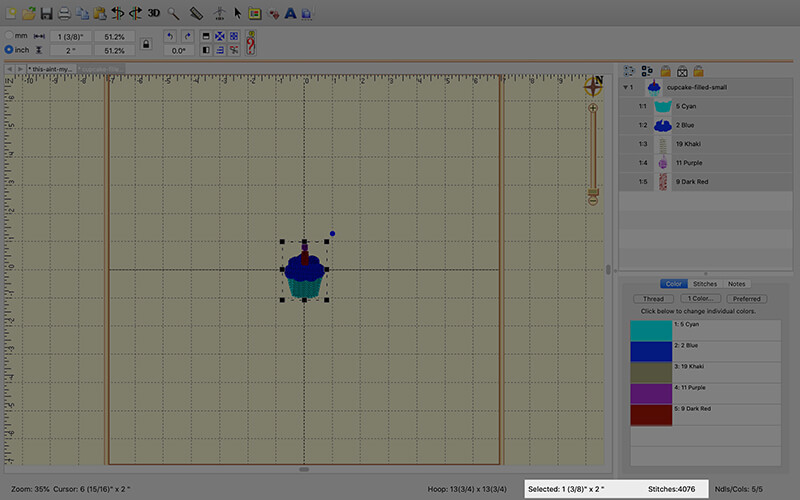
If you can resize designs on your embroidery machine, why would you bother to do so in Essentials? Well – Essentials allows you to resize a design AND it automatically adjusts the design’s density. Why is this important? Well – if you don’t adjust the density when you resize a design, you will either get a design with very minimal coverage or a stitch out with a very thick layer of stitches.
Let’s say, for example, I want to make a design 50% of it’s current size. If Essentials did not automatically adjust the density, it would be twice what you want it to be.
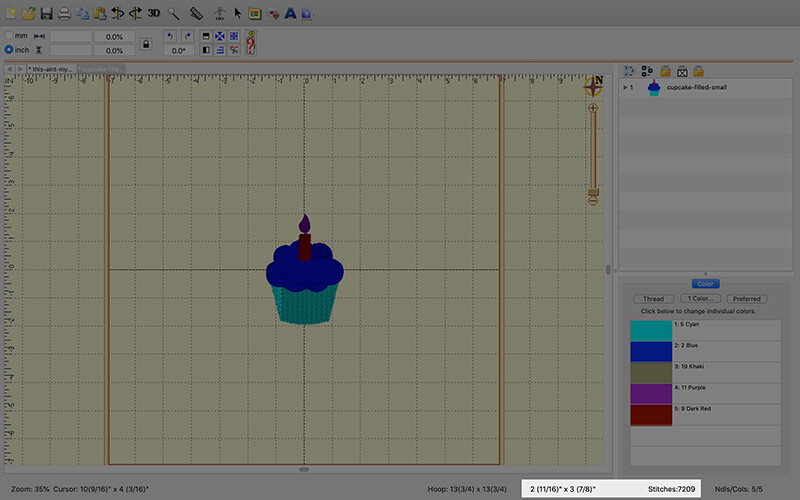
In the following example, you can see that I opened a cupcake embroidery design that was 2 – 11/16″ x 3 – 7/8″ and comprised of 7209 stitches. When I scaled it down to 1 – 3/8″ x 2″, the software automatically adjusted the density so that the design contained only 4076 stitches.
Rotate
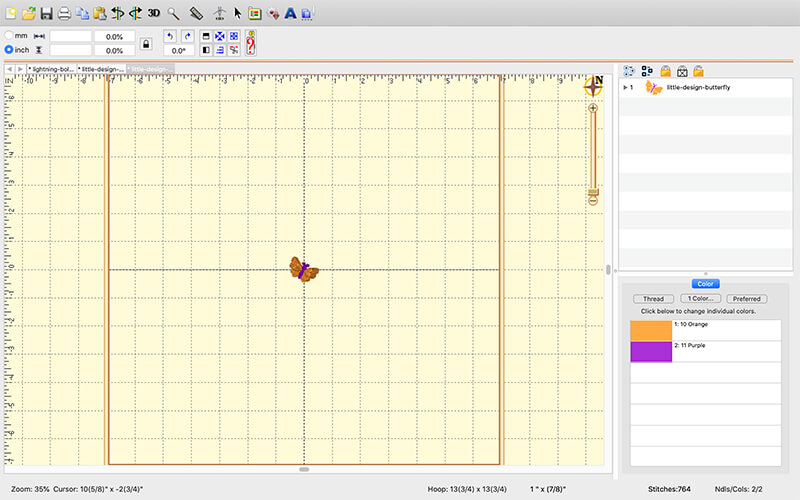
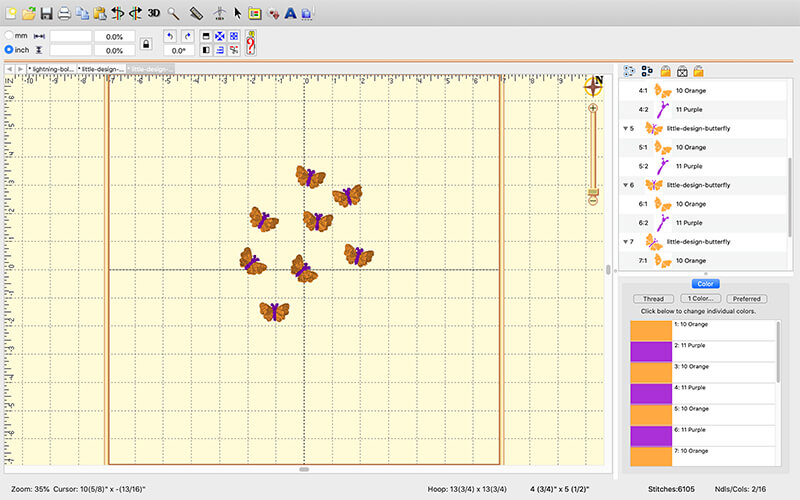
One of the most popular uses for this program is to rotate embroidery files. Why would you want to do that? Let’s say you hand a single heart. If you duplicated it and then rotated it, you could create a circular wreath of hearts. In the example below, you can see how I duplicated a simple butterfly design several times and slightly changed the rotation on each instance of the butterfly to create a design comprised of scattered butterflies.
Change thread colors
Of course, you can choose whatever thread you want when ever your embroidery machine comes to a stopping point, but it’s nice to be able to preview what the design would look like if you made different thread color choices BEFORE you stitched it out.
Embrilliance allows you to assign different thread colors to different parts of a design, which will give you a nice preview of what it would look like with different thread colors. You can also preview the design on different fabric colors to get an ever more precise sneak peek.
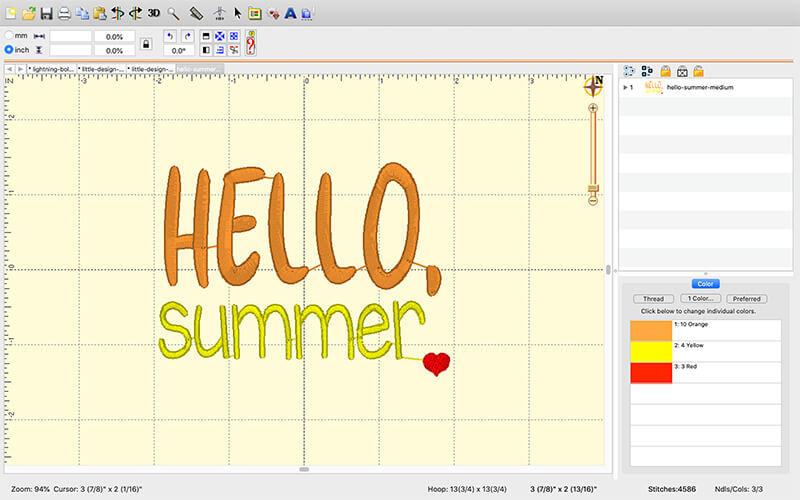
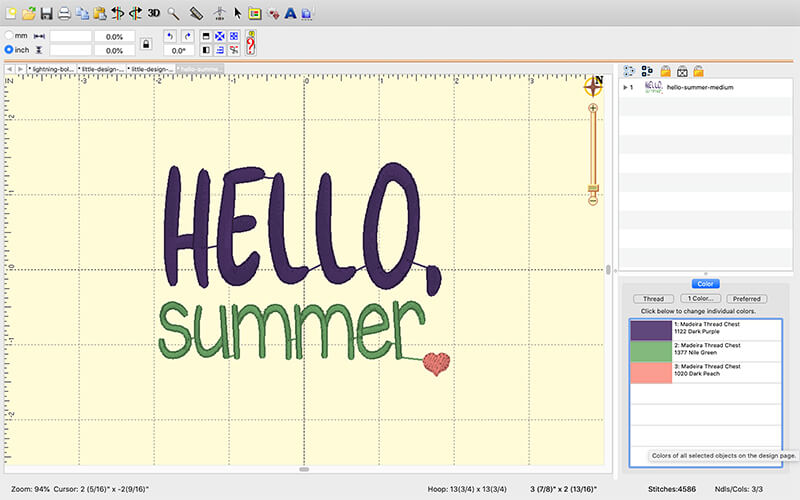
In the following example, you can see that the “HELLO, Summer” embroidery design was comprised of orange, yellow and red threads. In Essentials, I was easily able to select each object, then double click on the thread color at the bottom right of the screen and change each element to a different color.
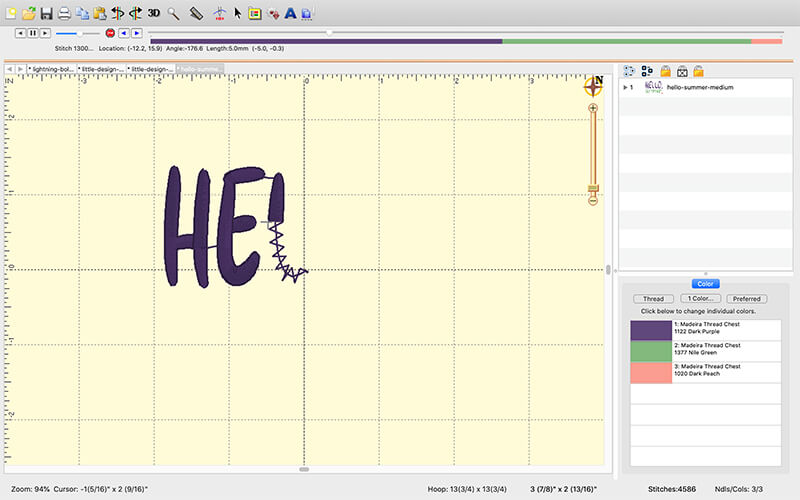
Simulate the stitch out
Essentials has a stitch simulator. Simply hit the needle button (that is pointing towards a red object) in the top bar, and you will encounter a play button that you can hit. Then sit back, relax and watch your design being stitched out. You will also see controls that allow you to speed up and slow down the pace of the stitch out.
Combining two or more embroidery designs
If you want to stitch out two different designs at once, its a lot easier if you can combine them into one file before sending it to your embroidery machine. Essentials makes it easy to do that as well.
To combine two or more different embroidery designs, you simply start by opening one of the files. Then you select the “Merge Stitch File” option from the File menu, navigate to the second design and select it. Now you have both embroidery designs together. Save them out as a new embroidery design in the format of your choice.
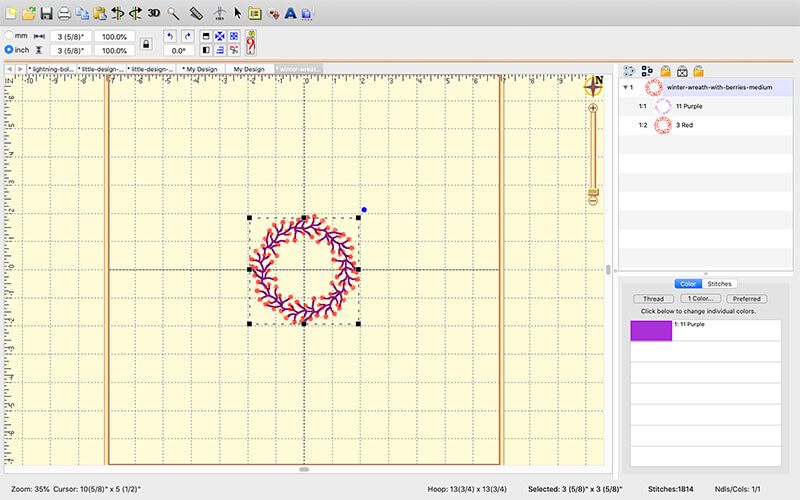
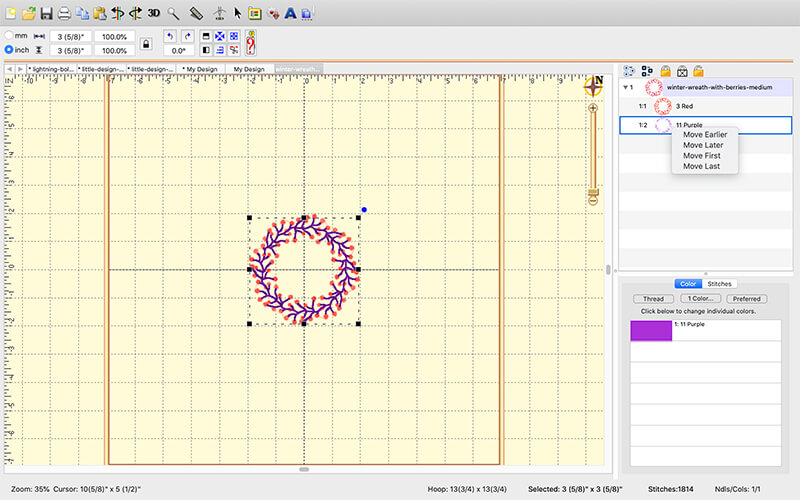
Reorder thread colors
In addition to allowing you to assign different thread colors to different parts of a design, Embrilliance Essentials also allows you to rearrange the order in which thread colors are used. This is very useful for when you want to stitch out designs in a different way that the digitizer intended.
All you have to do is select the color stop on the right and then right-click on it and select “Move Earlier” or “Move Later” to reorder the elements. Alternatively, you can select each element and drag it before or after another element. In the example below, you can see how I swapped the order of the twigs and the berries of this two color embroidery design.
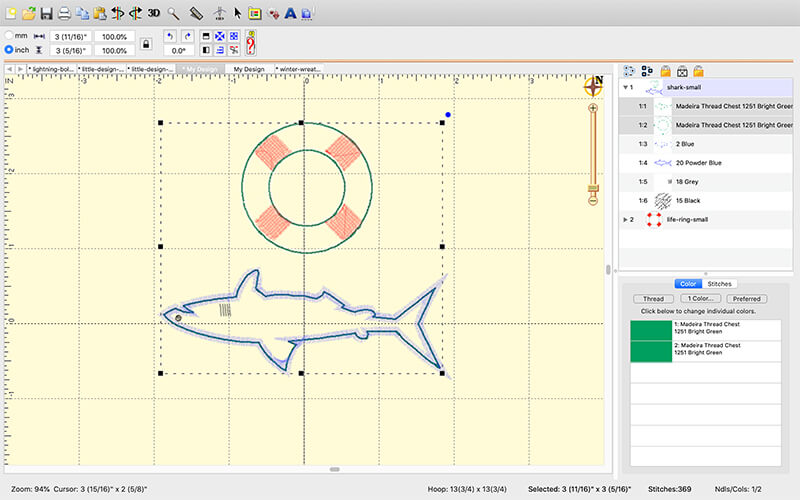
Merging thread colors
One of the benefits of merging two different embroidery designs together is to be able to reduce the number of thread color changes. However, when you merge two designs together, Essentials does not automatically reorder and combine your threads. And you probably don’t want it to anyway as this is something you want to have control over.
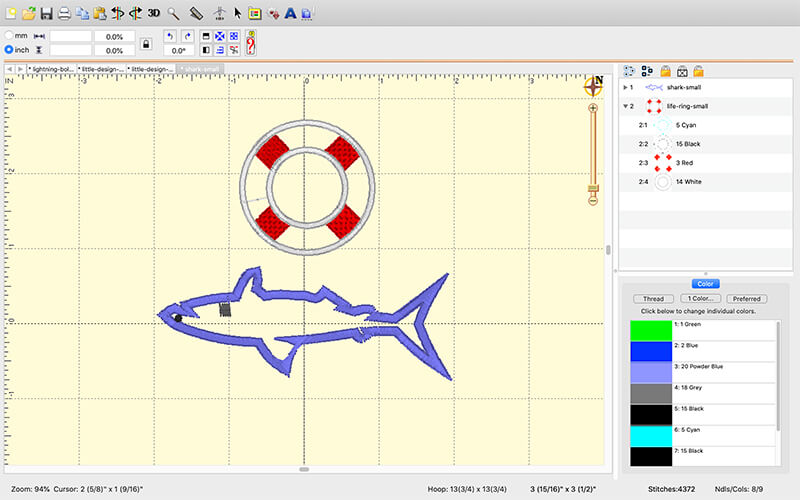
To gain a better understanding of what I mean, let’s look at the combined designs of the shark and the life raft. Both are appliqué designs and both have placement stitching and tack down stitching. If you are going to stitch out these two designs together, it makes sense to stitch all the placement stitching at once, then the tack down stitching. However, if you merge these two designs together in Essentials, all parts of the shark are stitched first then all parts of the life raft.
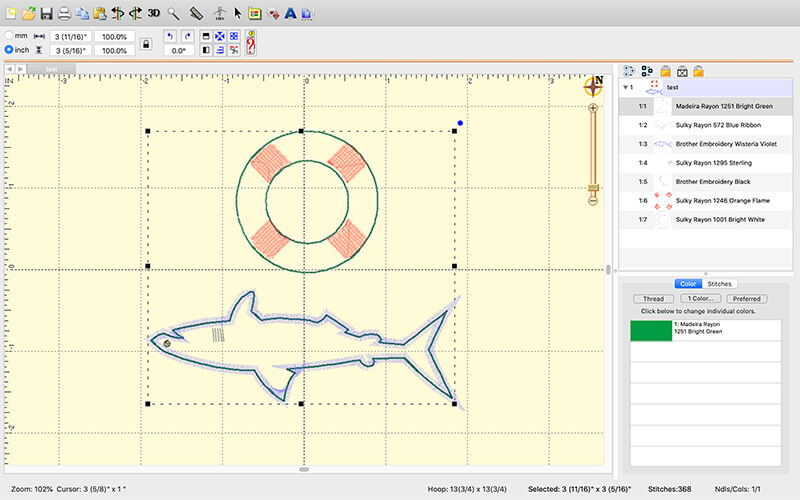
First you need to move the two placement stitching threads together. You do this by dragging one element up next to the other one. Once you have the two threads together that you want to merge, you select them both and choose “1 Color” at the bottom and then pick a new thread color.
While it may not appear that these are now one thread color and will all stitch together without the machine stopping, it will actually work. To test it, save the combined design as a new embroidery design and then open it back up in Essentials. You will see that these two elements are now one thread color.
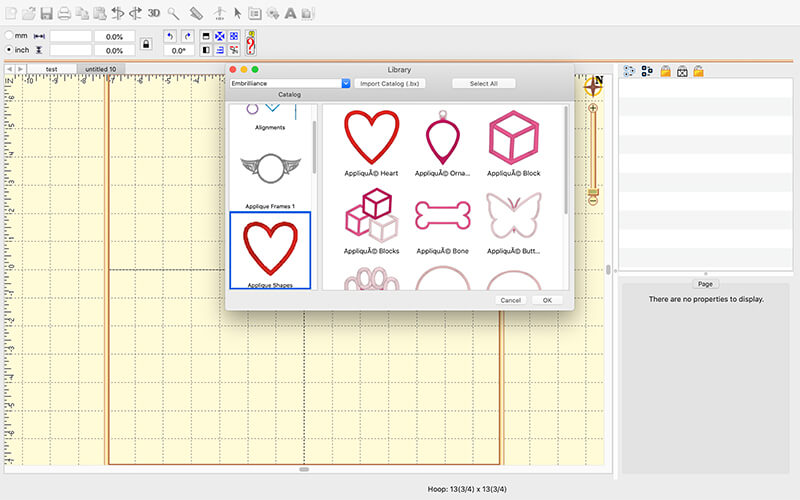
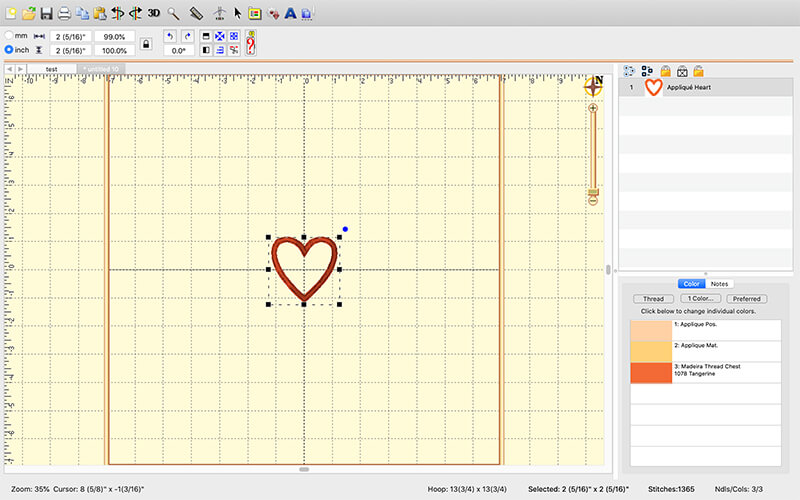
Access some free designs
Embrilliance actually includes some freebies within the software. For example, there are several appliqué “frames.” One is a Christmas tree. There are some other basic motifs as well. They are all scaleable so you can use them at any size.
To access these free designs, click on the button that looks like gear with a downward arrow next to it. In the example, below, I’ve opened the heart appliqué design.
Type out words, names and monograms
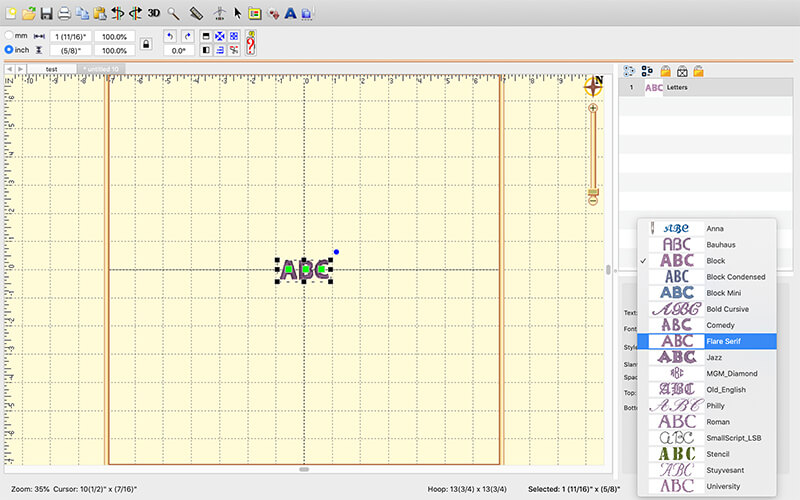
All of the Embrilliance programs work with BX fonts which are digitizer created fonts that can only be used in Embrilliance programs . There are thousands of BX fonts available for download from the internet. Just look at any embroidery font for sale to see if it is offered in BX format.
You can import any BX font that you already own into the software and then select it and type out anything you want. In addition, Essentials actually comes with several fonts already installed. So, just by owning the program you will start building your BX font collection.
To see what fonts you have available, simply select the type tool and then look in the bottom-right corner. You will see all the built-in BX fonts. If you buy a BX font or download one for free, all you have to do is drop the BX file into the program and it will appear in this list.
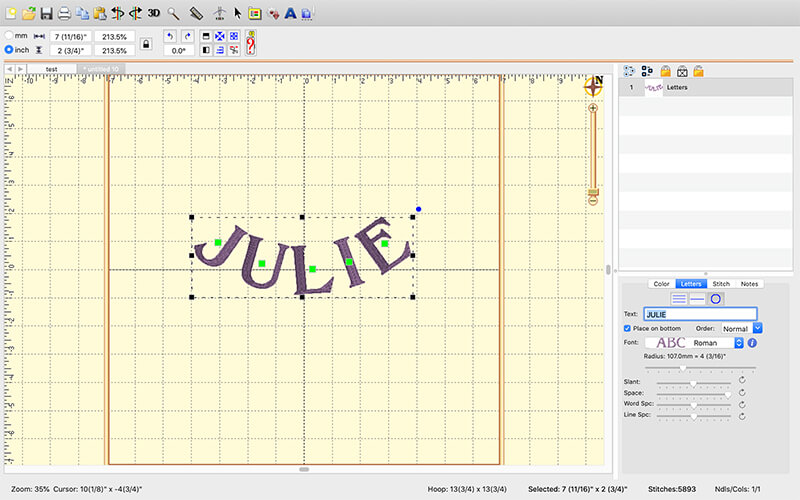
Manipulating text
In addition to allowing you to build words, phrases and monograms with BX fonts, Essentials also provides you with tools to manipulate those words. For example, you can make the text flow on a curve. By manipulating the setting underneath the font select area, you can distort, slant, increase the spacing, etc.. of any words. See (below) how I put my name on a curve.
Ready to try out Embrilliance Essentials?
If you are machine embroidery enthusiast, Embrilliance Essentials may be just what you need to customize your machine embroidery projects. The software provides features for resizing and rotating designs as well as changing thread colors, reordering threads, simulating stitch outs and more. It even includes some free designs and fonts that can help jump start your creativity!
Embrilliance Embroidery Software
Love free machine embroidery designs and PDF patterns?
“I am so happy to have found Julie and Machine Embroidery Geek. I have taken a couple of classes like SewArt/SewWhatPro and Master the Machine. I am amazed at how down to earth the explanations in the class are. In the past people treated me as if I should already know everything and I was too proud to admit I didn’t. Julie takes you where you are and is very patient. I have even had some questions I could not work through on my own and she is a great resource. Thank you Julie for all your help.”
Ready to learn more about Embrilliance Essentials? Sign up to receive 3 bite-sized lessons that will give you a better understanding of what you can do with this software.
Thank you!
Check your email. Your first Embrilliance Essentials lesson is on the way!


Julie, please teach a class.
OMG – thank you for your encouragement. I’m getting ready to launch this “Essential Essentials.” It should be fun.