How to embroider on a onesie
This site contains affiliate links to products. We may receive a commission for purchases made through these links.
A few days ago, I helped my machine embroidery buddy, Rosselyn, set up her embroidery machine. It was actually quite satisfying. In the course of less that an hour – we went from her embroidery machine sitting in the box to personalizing a towel! Are you wondering why the embroidery machine was still in the box? Well – she had tried embroidering on a onesie and it went really really badly – so much so that she decided to put the machine away. But, now that Rosselyn is rockin’ and rollin’ on her embroidery machine, I promised to show her how to embroider on a onesie. So… here we go.
Products mentioned in this post
- DESIGNS
- Hola Mama / Hola Papa
- Milestone months – a design to mark every month
- Chinese year symbols
- Astrological symbols
- Hello world!
- Mute button
- Angel wings (to stitch on the back of the onesie)
- Diaper loading
- Good at naps
- SUPPLIES
What is a onesie?
Before we get too far down this rabbit hole, let’s make sure we are all speaking the same language here. Perhaps you don’t even know what I’m talking about when I say “onesie”.
A baby onesie is probably the most essential garment for a baby. It’s a little undershirt that snaps at the bottom (for easy access to the diaper). Babies wear them under just about everything, and when it’s really hot – sometimes that’s all they wear!
You can find them in just about any color or pattern imaginable. They come in long sleeved, short sleeved, and even sleeveless versions. You can find them with ruffles, or without. You can even find them with hoods!
Why embroider on a onesie?
Babies spit up and poop quite a bit, so they tend to need A LOT of onesies! If you stitch a set of onesies as a baby shower gift, they will very very likely get worn.
Plus, there are tons of adorable and snarky embroidery designs out there that only really a baby could pull off. (You won’t catch me wearing a “just hatched” shirt.
Another reason to embroider on a onesie is that they are usually made of a cotton blend fabric which is ideal for machine embroidery.
Finally, when you embroider on a onesie, the stakes are pretty low. You can buy onesies for a few dollars a piece, so if you mess one up – it’s not the end of the world.
Why is it difficult to embroider on a onesie?
Stitching on a baby onesie can be a bit tricky if you are trying to do so on a single needle home embroidery machine. Onesies are tiny, so it’s hard to flatten out the embroidery area and keep the rest of the material out of the way.
Onesies are also stretchy. And, any stretchy fabric is challenging to embroider on because… IT STRETCHES! And, if a fabric stretches during the embroidery process, you can get some pretty unattractive results.
Where to buy onesies
You can get baby onesies just about anywhere: baby stores like BuyBuy Baby (of course) have them, but you can also pick up packs of baby onesies at stores like Walmart and Target. There are also tons of different onesie multi-packs on Amazon.
What to embroider on a onesie
The first step is to choose the right design. There are a few things to keep in mind when choosing an embroidery design for a baby onesie. First, because onesies are small – you want to choose a design that is not too intricate or detailed. A complex design with lots of tiny pieces is just going to be too hard to stitch on such a small garment.
You also want to make sure that the design you choose will fit in the area you want to embroider. Onesies have limited surface area, so you need to be mindful of that when choosing a design.
Finally, you want to make sure that the design you choose is appropriate for a baby. If you are making a onesie for a friend’s baby shower, you probably want to avoid anything too controversial or risqué. I mean… I guess it depends on the friend.
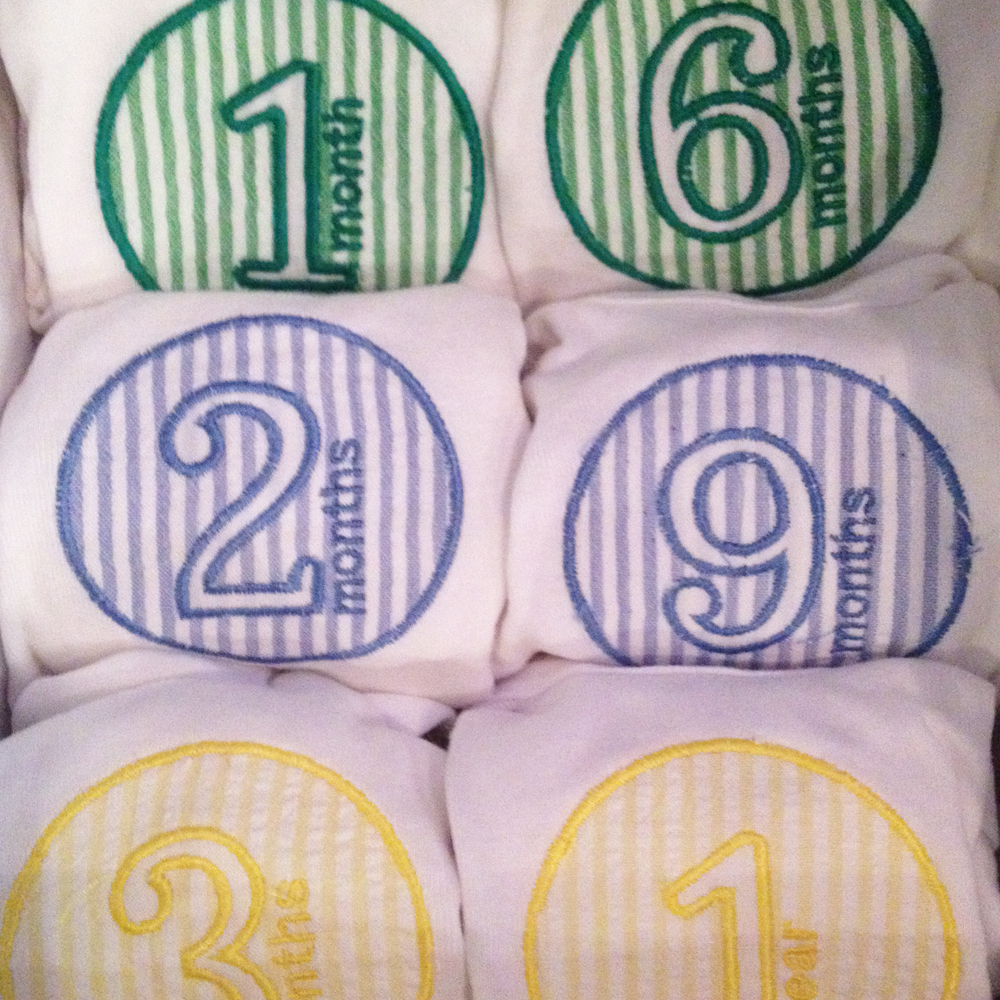
I’ll admit, I’m a bit partial to my own designs. Here are some of my favorites that I’ve digitized and stitched out on onesies:
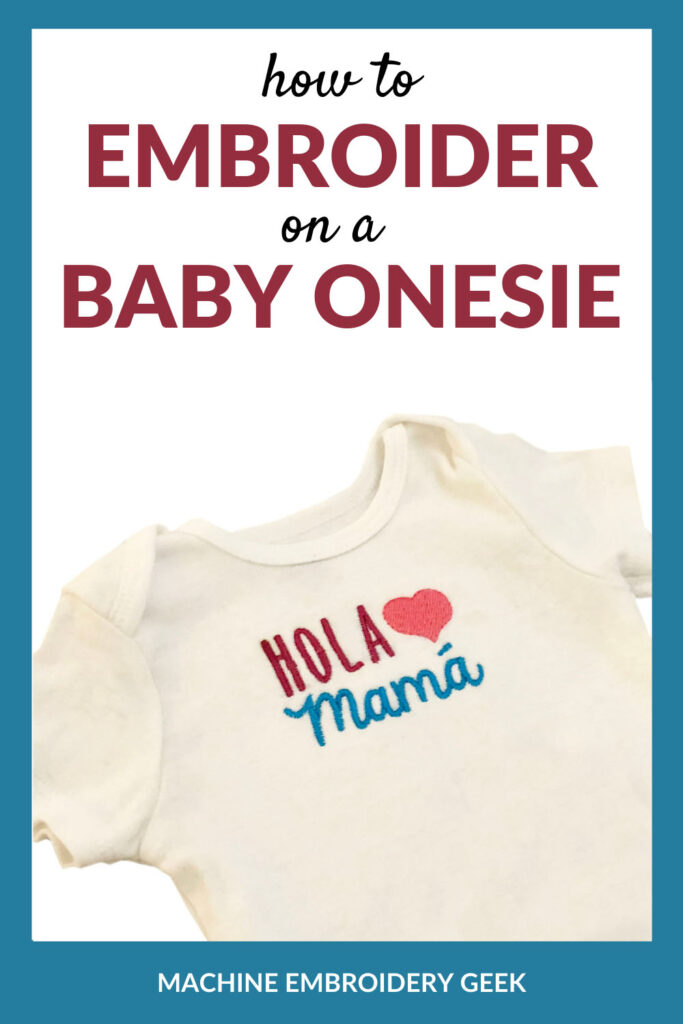
- Hola Mama / Hola Papa
- Milestone months – a design to mark every month
- Chinese year symbols
- Astrological symbols
- Hello world!
Hey, but I’m not the only one with cute machine embroidery designs for onesies. There are a lot of other options out there. Here are a few of my favorites.
- Mute button
- Angel wings (to stitch on the back of the onesie)
- Diaper loading
- Good at naps
How to embroider on a onesie.
Supplies you need to embroider on a onesie
- baby onesie
- chopsticks
- blue painters tape
- The Hoop Skirt
- ballpoint embroidery needle
- adhesive-backed stabilizer
- pins
- disappearing ink pen
- fusible poly mesh stabilizer
- water soluble stabilizer
- Cloud Cover
Tips for embroidering on a onesie
- If you are stitching out an appliqué on a onesie, be sure to wash and dry the appliqué fabric. If it shrinks after you stitch it onto the onesie, the appliqué will look buckled.
- Keep some chopsticks near by to gently move fabric out of the way when your machine is stitching. This is a much better idea than using your fingers.
- Use blue painters tape or a device like the Hoop Skirt to hold back the excess fabric.
- Don’t forget to switch your needle to a ballpoint needle. The ballpoint needle gently pushes through the fabric instead of tearing it.
Step by step: embroidering on a onesie
Because onesies are stretchy – and quite tiny – I float them instead of hooping them. Therefore, my first step is to hoop a piece of adhesive-backed stabilizer.
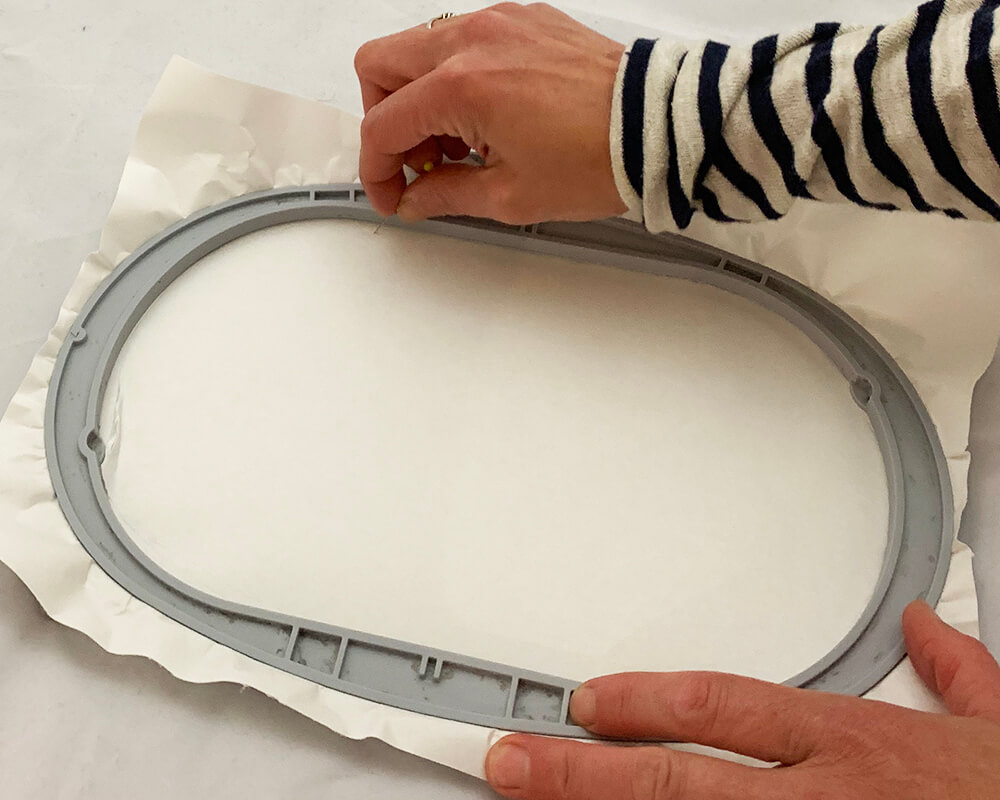
You always want to hoop the sticky back stabilizer with the shiny side of the paper up. Make sure that it is very taut.
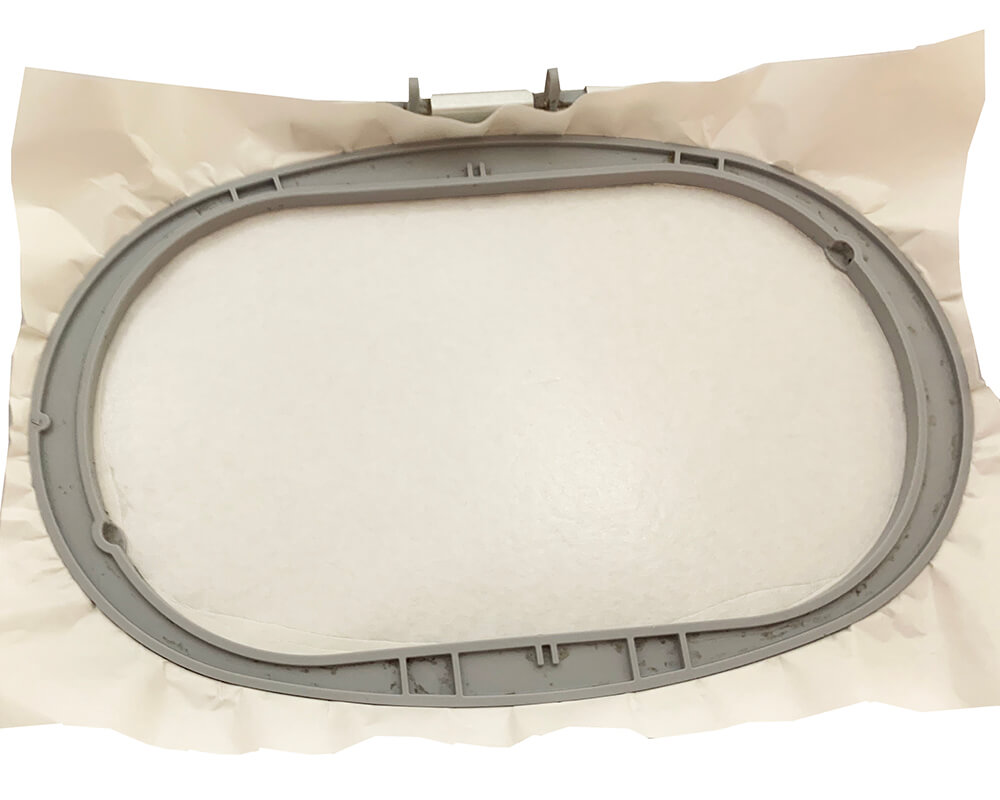
Next, use a pin to score around the inside edge of my hoop. This creates a small tear in the paper which will allow you to peel it away, exposing the sticky surface.
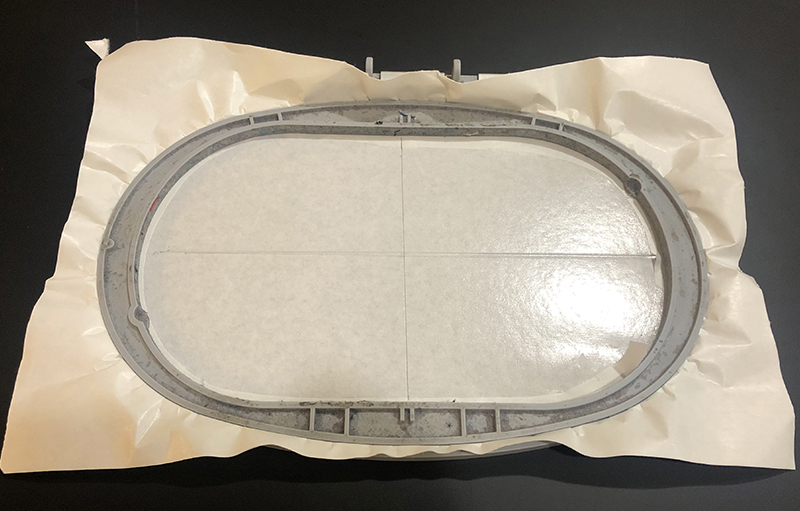
After you remove the paper and expose the sticky surface, use a disappearing ink pen to draw a horizontal and vertical line on the hooped stabilizer.
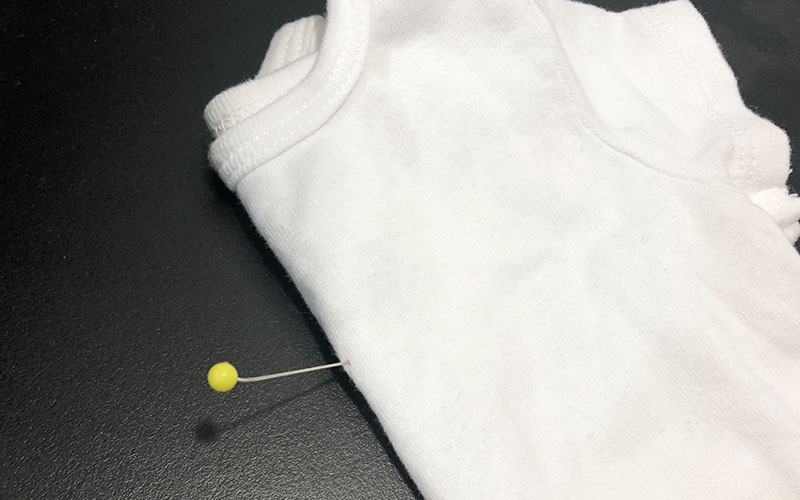
Now mark the intended center of your design on the INSIDE of the onesie with a pin.
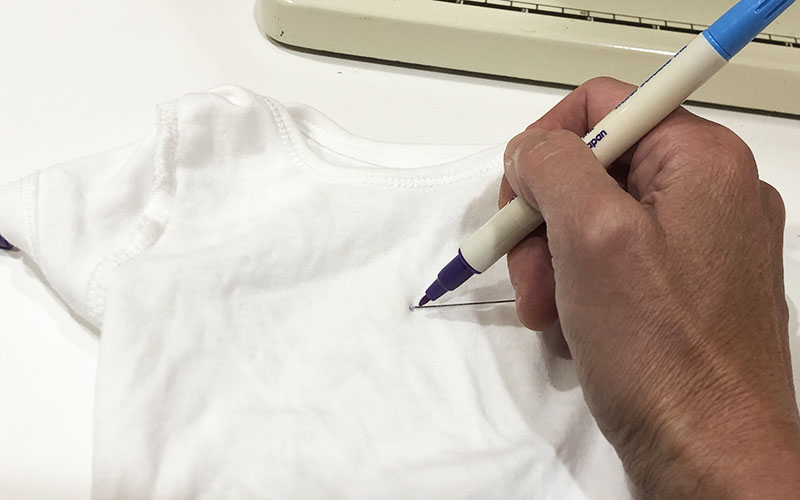
Turn the onesie inside out and mark the location of the pin with your disappearing ink pen. Draw a horizontal and vertical line through this point.
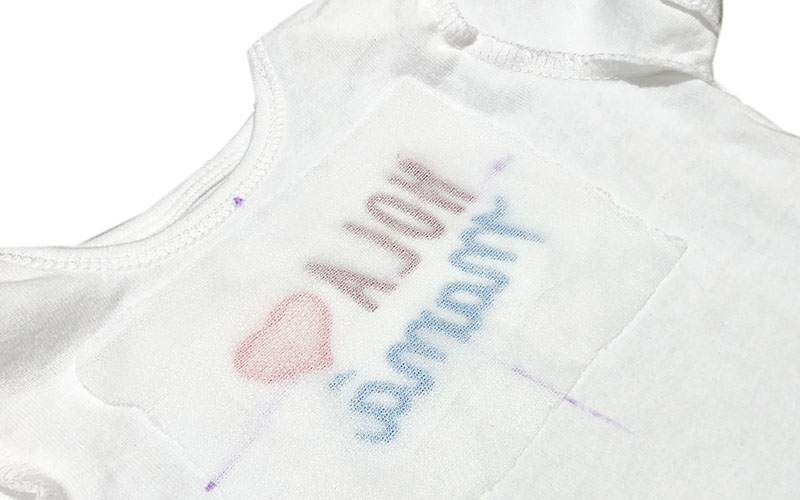
Fuse a piece of fusible poly mesh stabilizer (larger than the design you are stitching out) onto the inside of the onesie, centered on the center point you drew on the onesie.
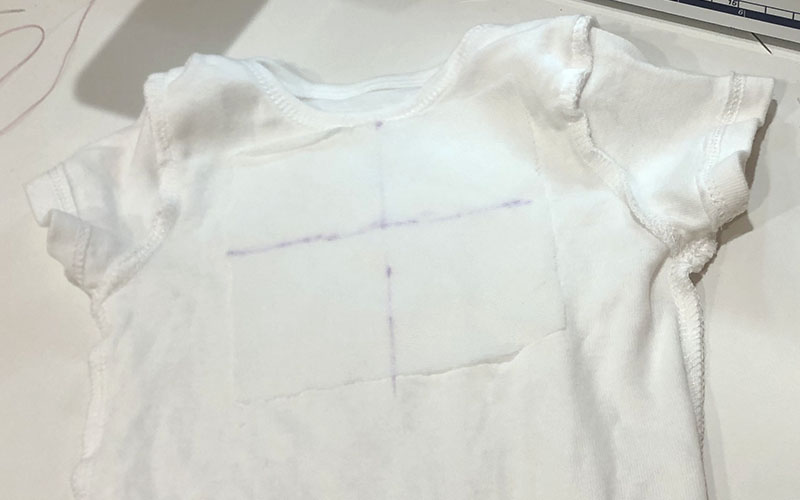
Fold the onesie in half along the vertical line you drew onesie. Then stick it onto the hooped stabilizer, aligning the fold with the vertical line on the stabilizer. Then spread the other half of the onesie onto the other side of the stabilizer.
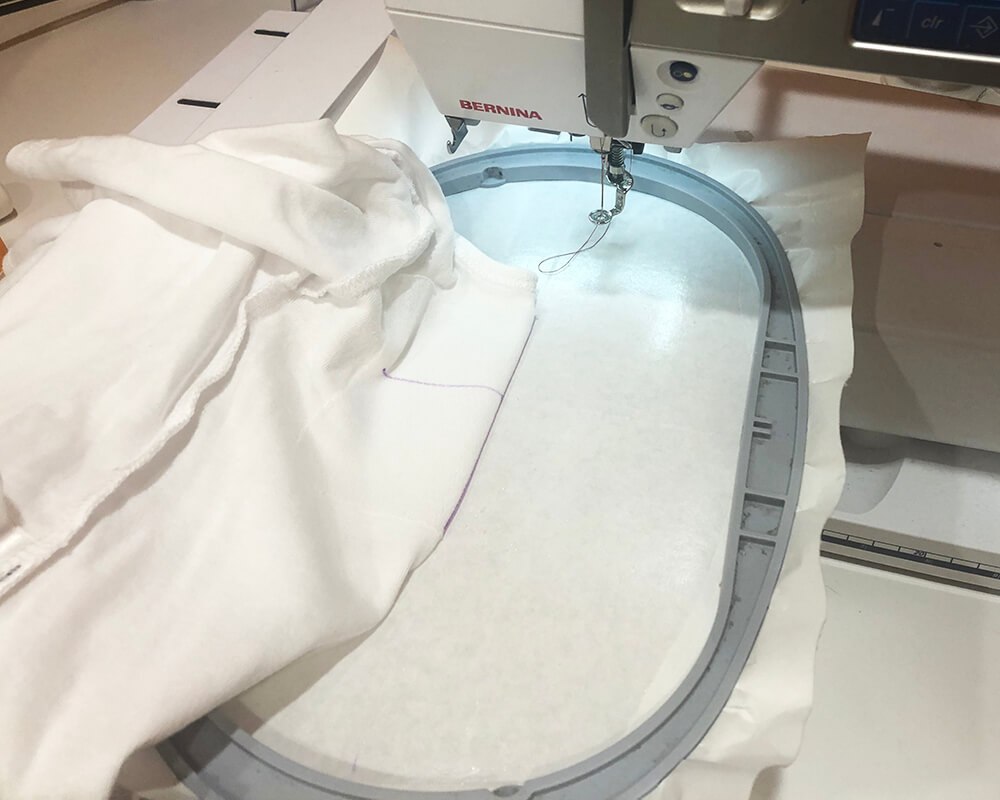
Now, unsnap the bottom of the onside and push the fabric away from the center the design.
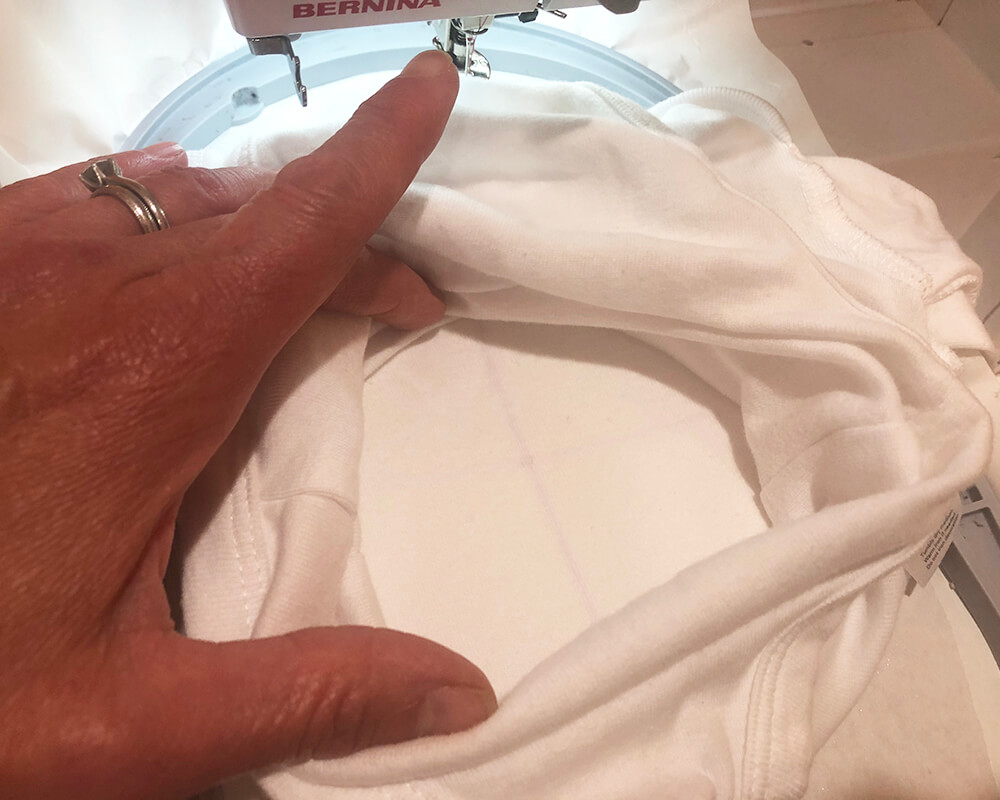
Use blue painters tape to hold the excess fabric out of the way or a device designed especially for the purpose of keeping excess fabric out of the way while you are embroidering like my Hoop Skirt!
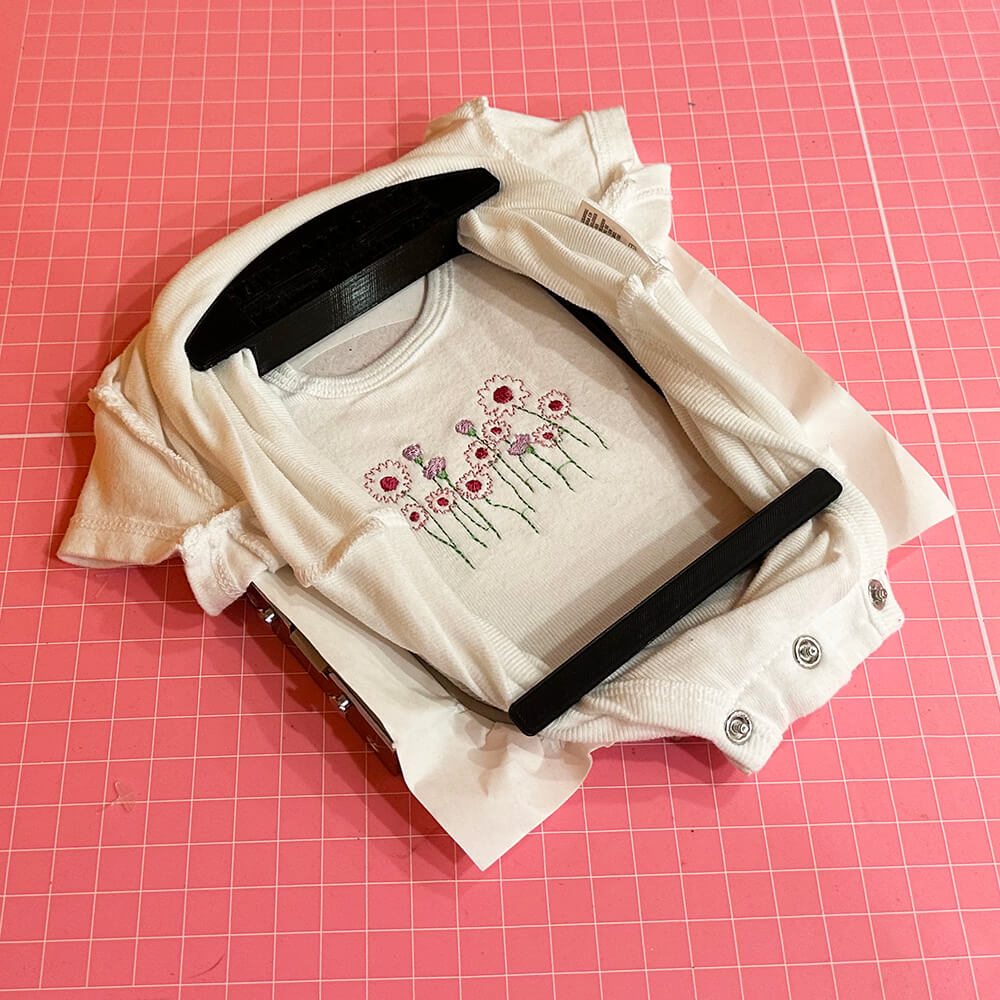
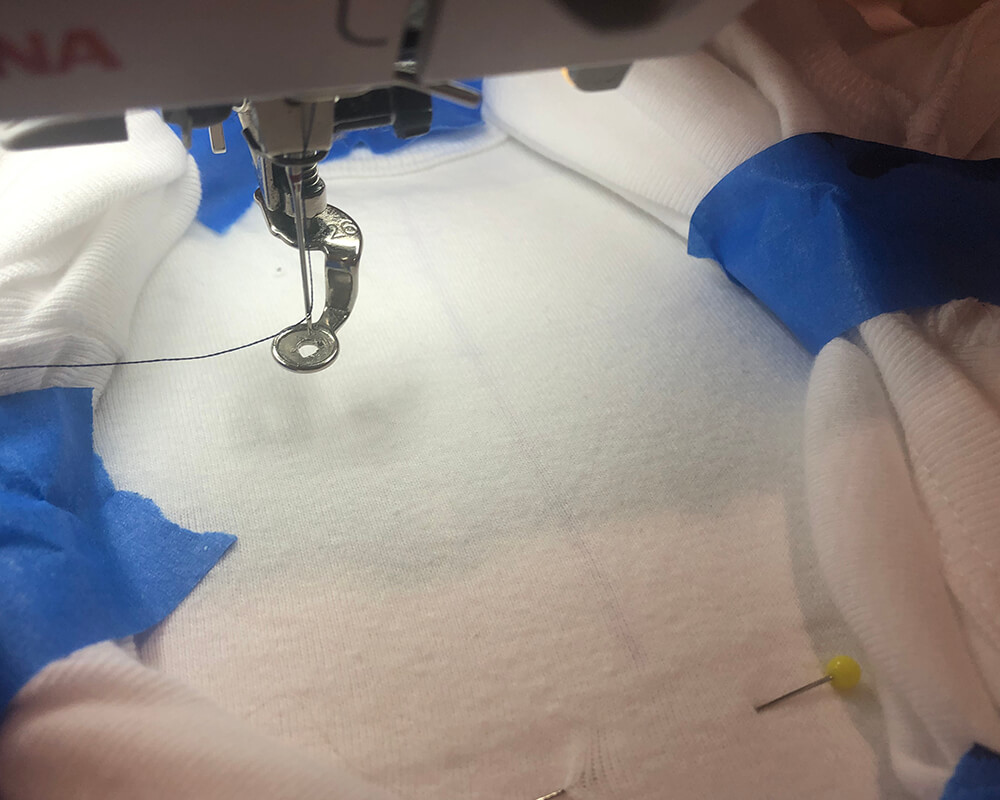
Lay down a piece of water soluble stabilizer over the top of the onesie.
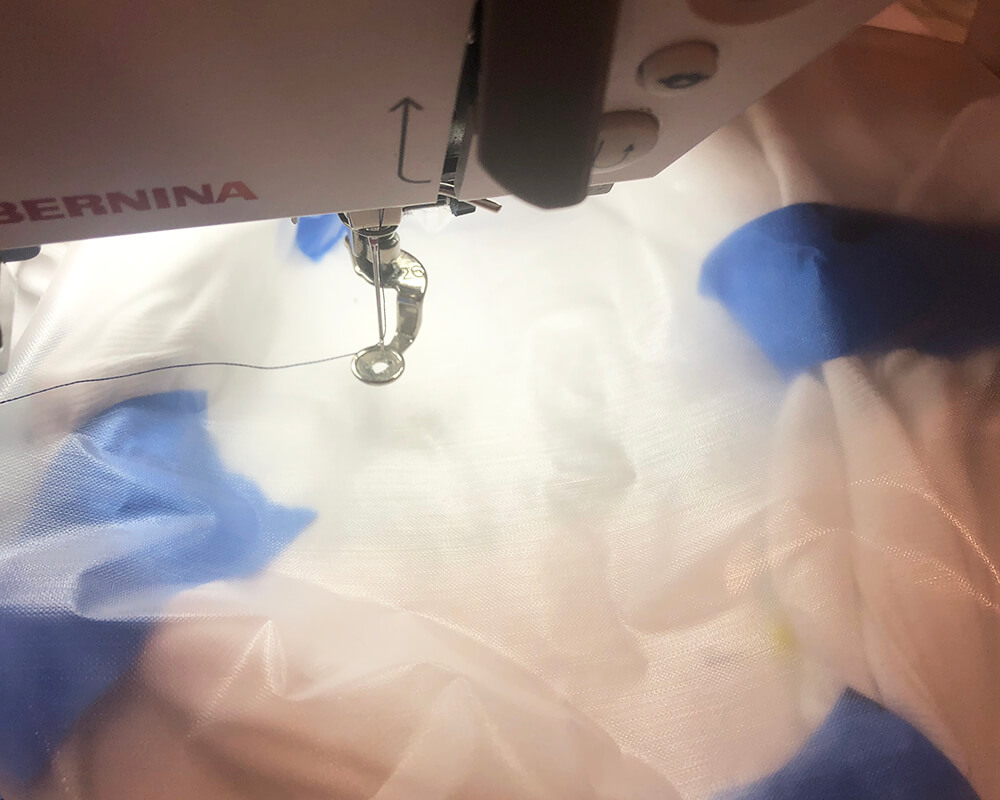
Start stitching your design. Slow the machine down so that you can stop it if it goes haywire. Keep a chopstick close by so you can push excess fabric out of the way if necessary. You may need to tape different areas away as you stitch different parts of the design.
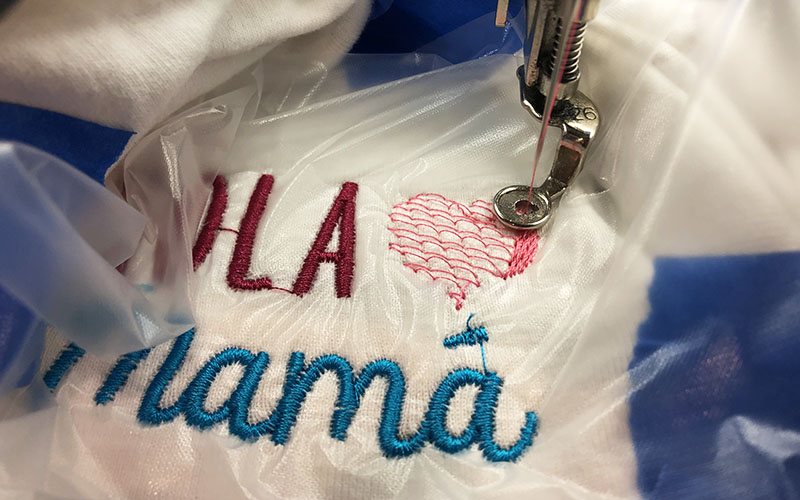
When the stitching is done, remove the onesie from the hoop. Trim your connector strings and remove the tape and water soluble stabilizer.
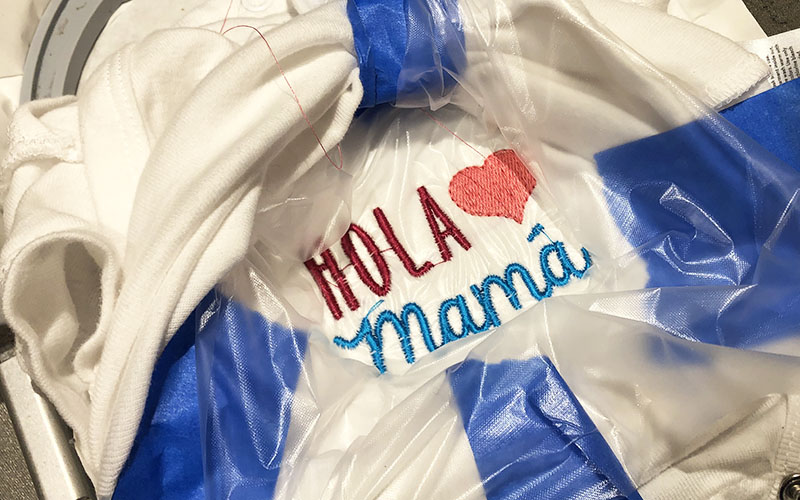
Turn the onesie inside out and fuse a piece of Cloud Cover over the wrong side of the design. This will keep the design from rubbing on a baby’s delicate skin.
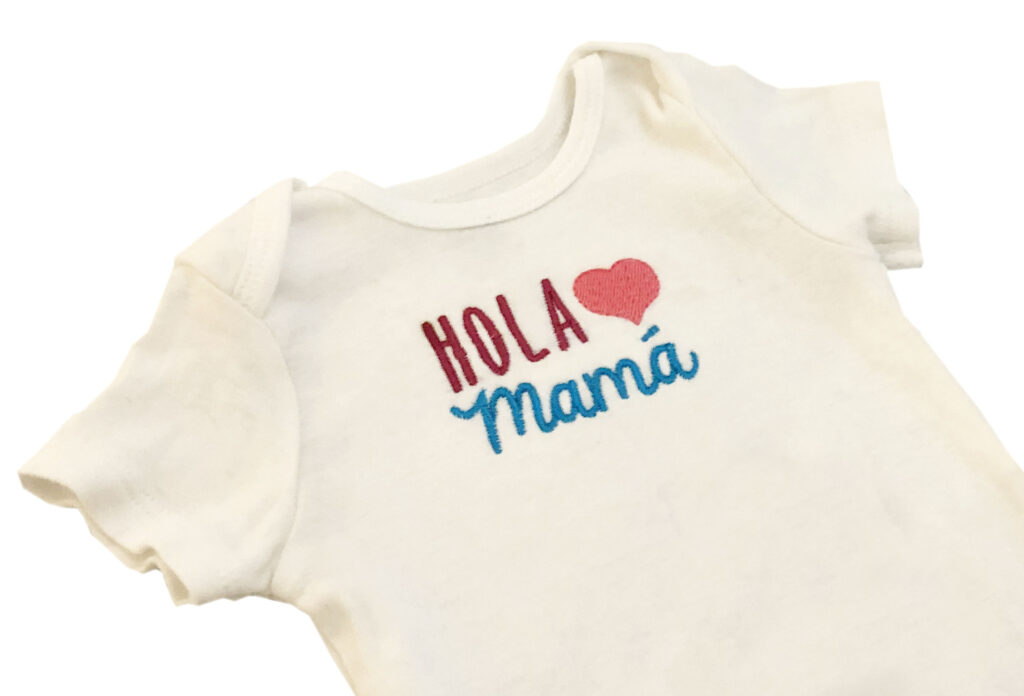
Now turn it right side out and there you go! All done.
Frequently asked questions re: embroidering on a onesie
What type of needle do you use for embroidering on onesies?
I use a ballpoint needle. The ballpoint needle has a rounded tip that pushes the fabric out of the way. A regular embroidery needle rips through the fabric.
How do I keep the excess fabric from getting in the way when embroidering on a onesie?
You can use blue painters tape to hold back the excess fabric. There are several other tools and techniques you can used to keep the excess fabric out of your embroidery area.
How do I hoop a onesie?
You don’t! Because onesies are stretchy, you will want to float them on top of the adhesive-backed stabilizer.
Do I need to wash the onesie before embroidering on it?
It is always a good idea to wash the onesie before embroidering on it. If you are applying appliqué to a onesie, t’s imperative that you wash both the onesie as well as the appliqué fabric. The reason is that they can shrink at different rates, so you want them to get all their shrinking out of their system before you connect these two pieces together.
Do I need to use a backing when embroidering on a onesie?
Yes, you will want to fuse a product called Cloud Cover over the wrong side of the design.
What type of stabilizer should I use for embroidering on a onesie?
Fuse a poly mesh stabilizer on the inside and then float it on a sticky back tear away stabilizer.
How do you keep the onesie from puckering when embroidering?
Float – don’t hoop. Hooping a onesie will just stretch it too much.
So, what do you think? Ready to embroider on a onesie?
Just take your time, babysit your embroidery machine and use plenty of painters tape.
Good luck and happy stitching!
xo
Julie
Want to remember this? Save “How to embroider on a baby onesie” on your favorite Pinterest board.
