Disclosure: Some of the links on this site are affiliate links. This means that if you click on them and make a purchase, I may earn a small commission at no extra cost to you. Please know that I only recommend products and services I trust and use myself.
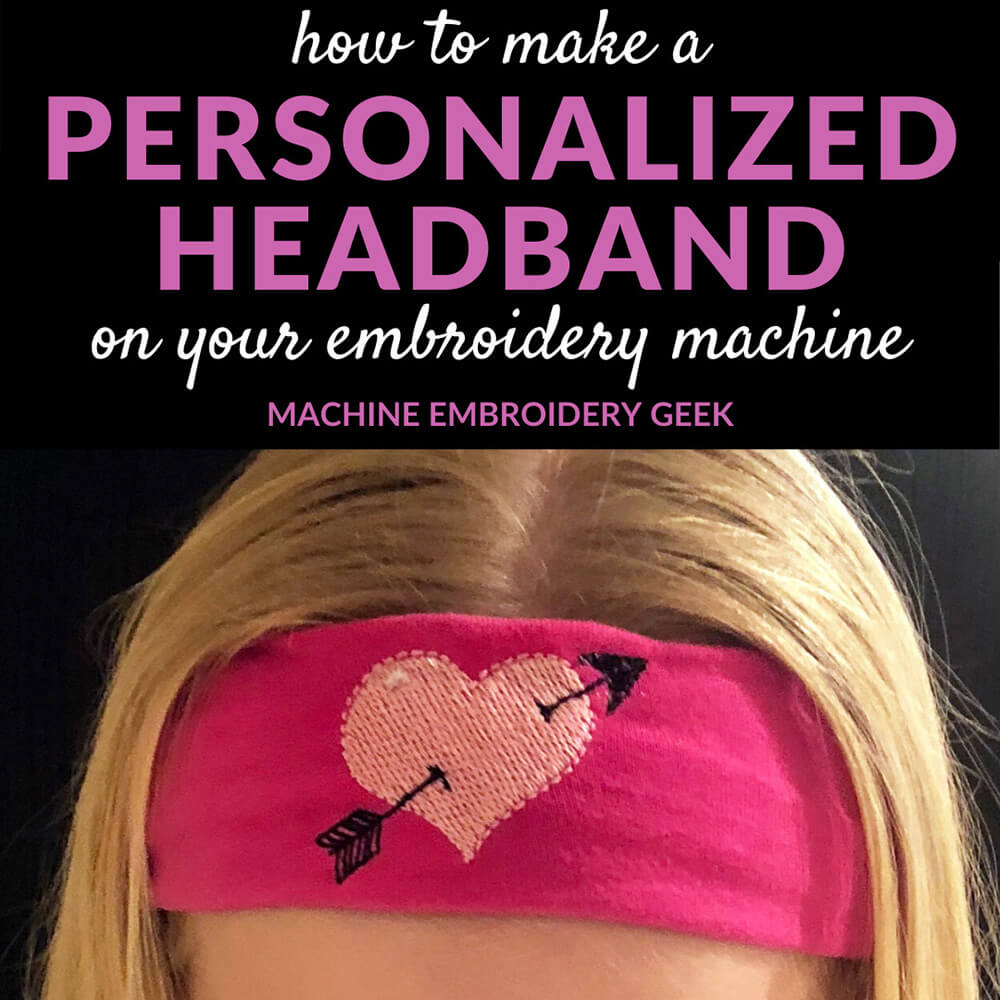
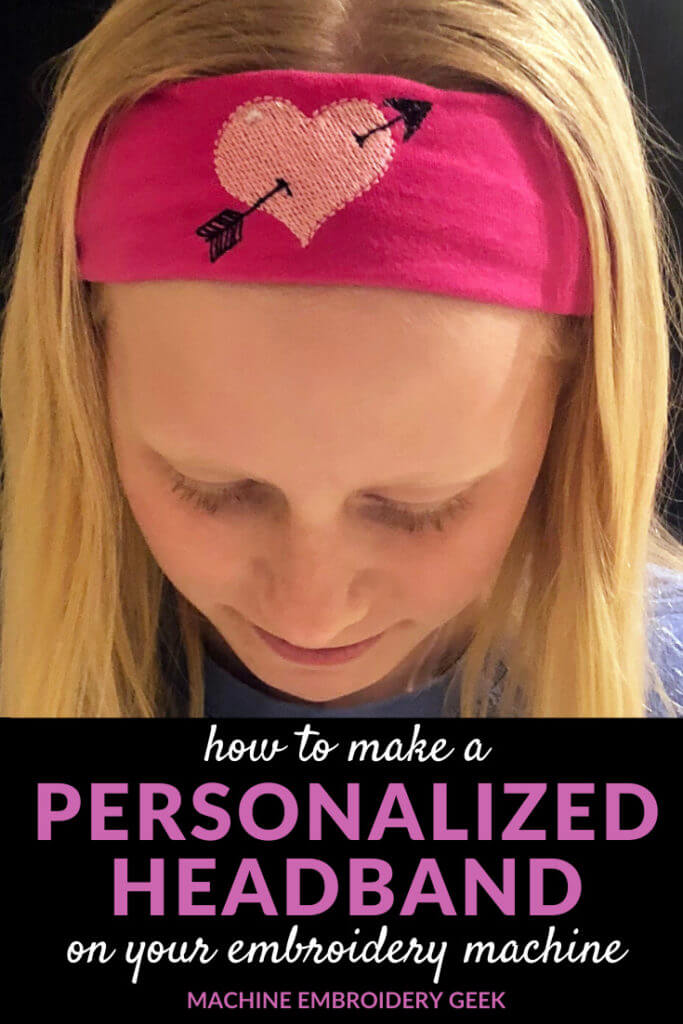
Need a cute, cheap gift for a little girl? Or an inexpensive and unique party favor to make on your embroidery machine? Learn to make an embroidered headband.
Maybe you’ve seen the popular brand of knit headbands, Logo Loops? They’re adorable and come in a variety of colors featuring cute embroidered designs and girl-power themed sayings. But the retail for around $15-$20!!
The first time I encountered them at a local store, I was flabbergasted that people actually paid so much for a headband. But apparently they do. All I kept thinking was “oh my gosh, I could make these for SOOOOO much less.” (And of course… why didn’t I think of this idea???)
It makes sense to DIY
Embroidered headbands themselves are simply a scrap of fabric and embroidered design. So, the materials would only cost a few cents, and because the embroidered area is so small, the embroidery would only take minutes. Also, headbands are pretty much one-size fits all, so no need for special fittings.
Of course – you don’t actually need to make the headband part yourself. You can buy pre-made headbands on the cheap from just about any retailer, and then stitch out a design on them. But, if you go this route, the backside of the embroidered design might get exposed and you have rough stabilizer rubbing the wearer’s hair.
If, on the other hand, you make a headband from scratch, you can stitch out the design on the headband before stitching the headband together and achieve a much more polished look. And, the whole process is pretty quick and easy.
[do_widget id=custom_html-5]
Before you make the embroidered headband, there are just a few things you want to keep in mind…
- Use the right type of fabric! A two-way stretch fabric is ideal for this project, meaning that the fabric stretches in both directions. A lycra suitable for swimwear or exercise would be great. Or use a piece of an old t-shirt. It works great. To make sure the fabric is two-way stretch, pull it in both directions and make sure it stretches before getting started.
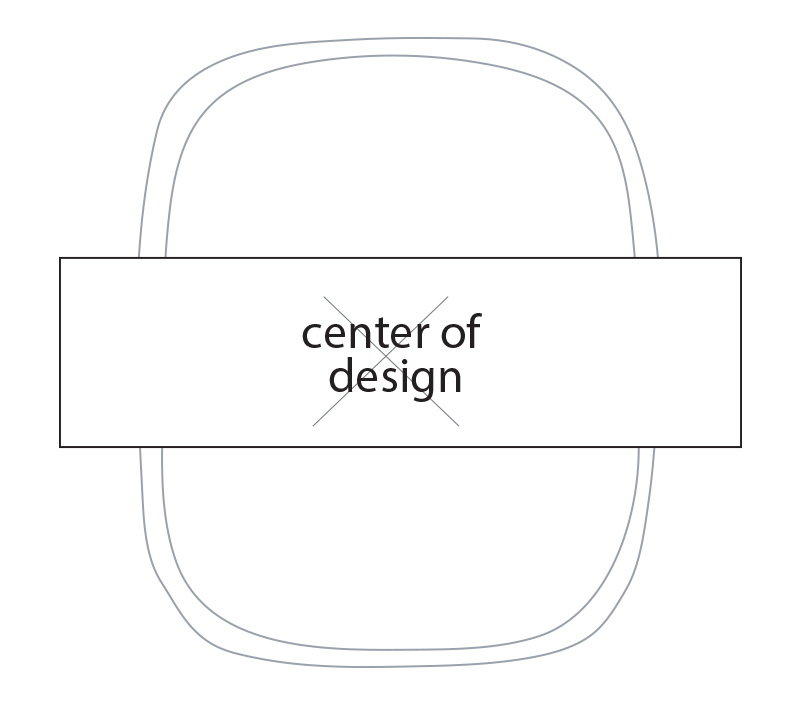
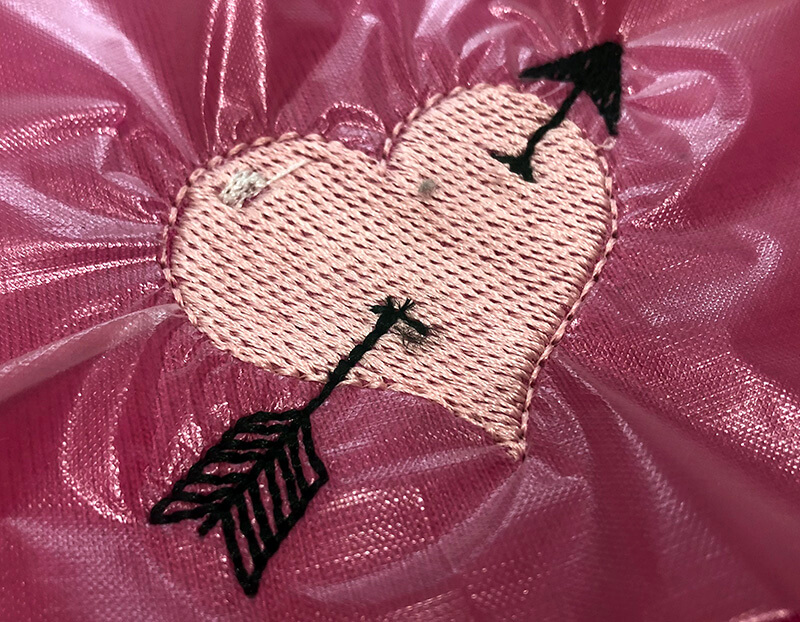
- Use an appropriately sized embroidery design. For this particular headband, you will want your design to be no taller than 2″ ( 51 mm) and a width of about 6″ (152 mm)
- Stitch out the design with a ball-point jersey needle. When embroidering on stretch fabrics, you should always use a ball-point jersey needle because the round point does not damage or break knitted fibers. Learn more about needles for machine embroidery.

- Stitch together the headband using a serger or zig zag stitch on a regular sewing machine to allow the fabric to stretch without popping the stitches.
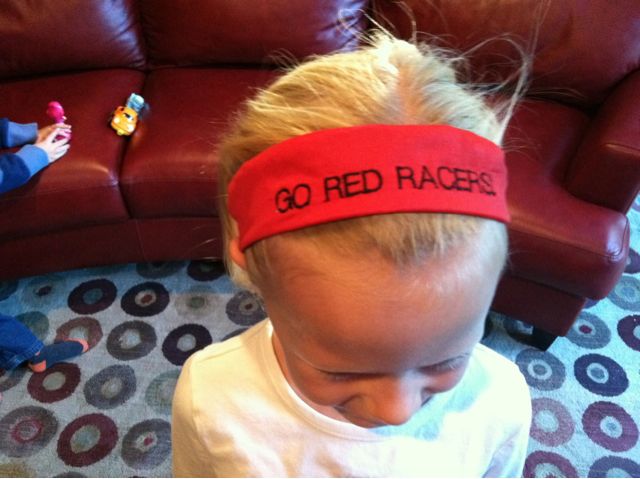
Old t-shirts – even an oversized soccer uniform shirt – can be the perfect material for a stretchy headband.
In fact, one of my daughter’s most loved embroidered headband came from the bottom half of her soccer uniform shirt. I had signed her up for kindergarten soccer thinking – she’ll love it. Her sisters play, her cousins play, some of her classmates are playing, but… not so much.
The first practice was hot and buggy and dominated by boys who were a bit more aggressive than her. She told me she HATED soccer and never wanted to play again. Then she found out one of her new best girl-friends was on a different team and soccer looked slightly more intriguing. After an inter-league transfer, she became a member of the Red Racers and everything was looking up.
Until we got the uniform. At age 5, my kid was a scrawny 35 lbs and very particular about her clothing. So, when she saw her red polyester soccer shirt that could easily be worn by a 6th grade boy, she had a fit. She almost refused to get her team picture taken in it. We made it through pictures – but she swore up and down that she would ABSOLUTELY NOT wear it to her first game.
Now here’s where my creative genius comes in. I suggested she wear her own shorts – solving problem number 1. And for the shirt – I suggested we trim it off a bit. And then to pull the whole look together I thought – why not turn it into a headband?
I followed the steps outlined below, adding an embroidered “GO RED RACERS” across the top. And guess what? Someone liked soccer a whole lot more. In fact, the headband was such a hit that I had to make a second one for her little friend.
Here’s what you need to make an embroidered headband
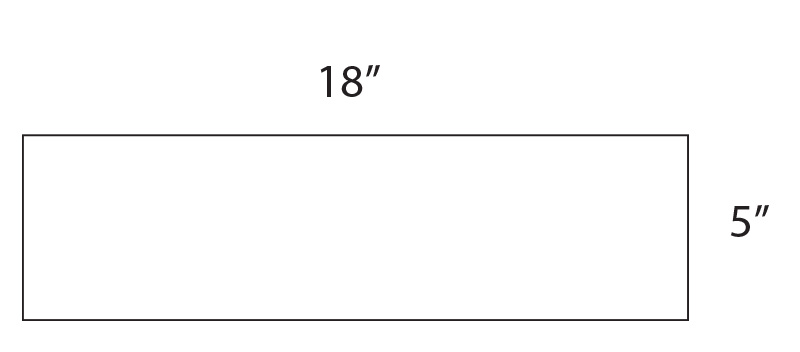
- 1 piece of two-way stretch fabric – 18″ x 5″
- An embroidery design no taller than 2″ ( 51 mm) and a width of about 6″ (152 mm)
- Embroidery stabilizer – I prefer adhesive backed tear away
- Water soluble topper
And here’s how to make the headband
1) Cut out a piece of knit fabric 18″ x 5″
2) Lay fabric centered on hoop. In this case I added a layer of sulky because this particular knit was a bit textured and I did not want fibers from the fabric popping through the stitching.
3) Stitch out design on the fabric using a water soluble topper. Remember to use ball point needles when embroidering on knits. Ball point needles push through the fabric as opposed to piercing it.
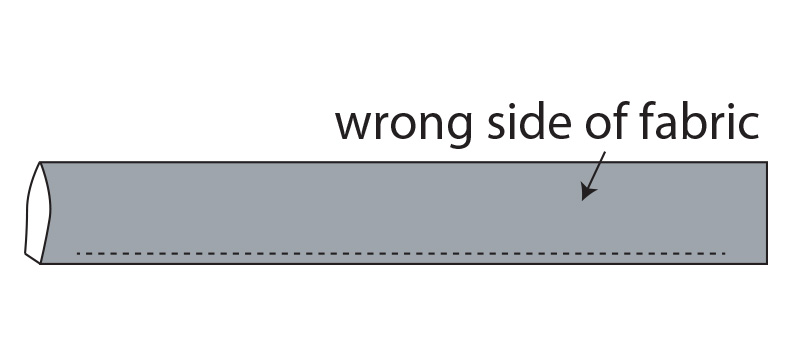
4) With right sides together, stitch the long sides of the fabric together. Do NOT stitch all the way to the end. Leave at least on inch on either end unstitched.
5) Turn the fabric right-side-out. Then pin the short ends of the tube together right side to right side to form a circle. Stitch them together.
6) Now slip stitch the remaining hole together, and the headband is complete!
So, wait, you don’t have any knit fabric, only cotton broad cloth? Check out my previous tutorial on how to make a personalized headband with a non-stretchy fabric.
Enjoy!
Julie
[do_widget id=custom_html-10]
[do_widget id=custom_html-9]
Helpful Shopping Links
Want to remember this? Post “How to Make a Personalized Headband Using Your Embroidery Machine” on your favorite Pinterest board!
