Disclosure: Some of the links on this site are affiliate links. This means that if you click on them and make a purchase, I may earn a small commission at no extra cost to you. Please know that I only recommend products and services I trust and use myself.
When my two girls were little, I made a lot of cutesy embroidered hair accessories, including personalized knit headbands, woven headbands and even embroidered button ponytail holders. But, now that they are teenagers, they’ve kind of grown out of such things. Fortunately, I’ve got two little nieces whose personal styles have not transitioned into “truck driver chic.” So, when I get the urge to whip up some little girl in-the-hoop hair accessories, they are the lucky recipients.
In the hoop hair accessories are a great project for a beginner. In this post, I’ll show you how to make an in-the-hoop hair bow from scraps you likely have in your sewing room already. Then I’ll show you some other in-the-hoop hair accessories that you can whip up on your embroidery machine.
Products mentioned in this post
- Holiday plaid fabric
- Water soluble stabilizer
- Machine embroidery thread
- Embroidery bobbin thread
- HeatnBond Lite
- Ponytail holder
- In-the-hoop hair bow pattern *
- Metal hair clips
- These three-dimensional feltie flowers
- Free feltie heart hair clip topper
- Standard headbands
- Scribble heart headband slider free standing lace hair clip
- Little hair stick
- Modern in-the-hoop hair clips
- In-the-hoop headband.
* Design used in this post
What are in-the-hoop hair accessories
An in-the-hoop hair accessory is a project that you can make completely in your embroidery hoop. Just follow the instructions, lay down the fabric as directed, and stitch out the design. When you are done, you will have a completed project – and – in this case – one you can wear in your hair.
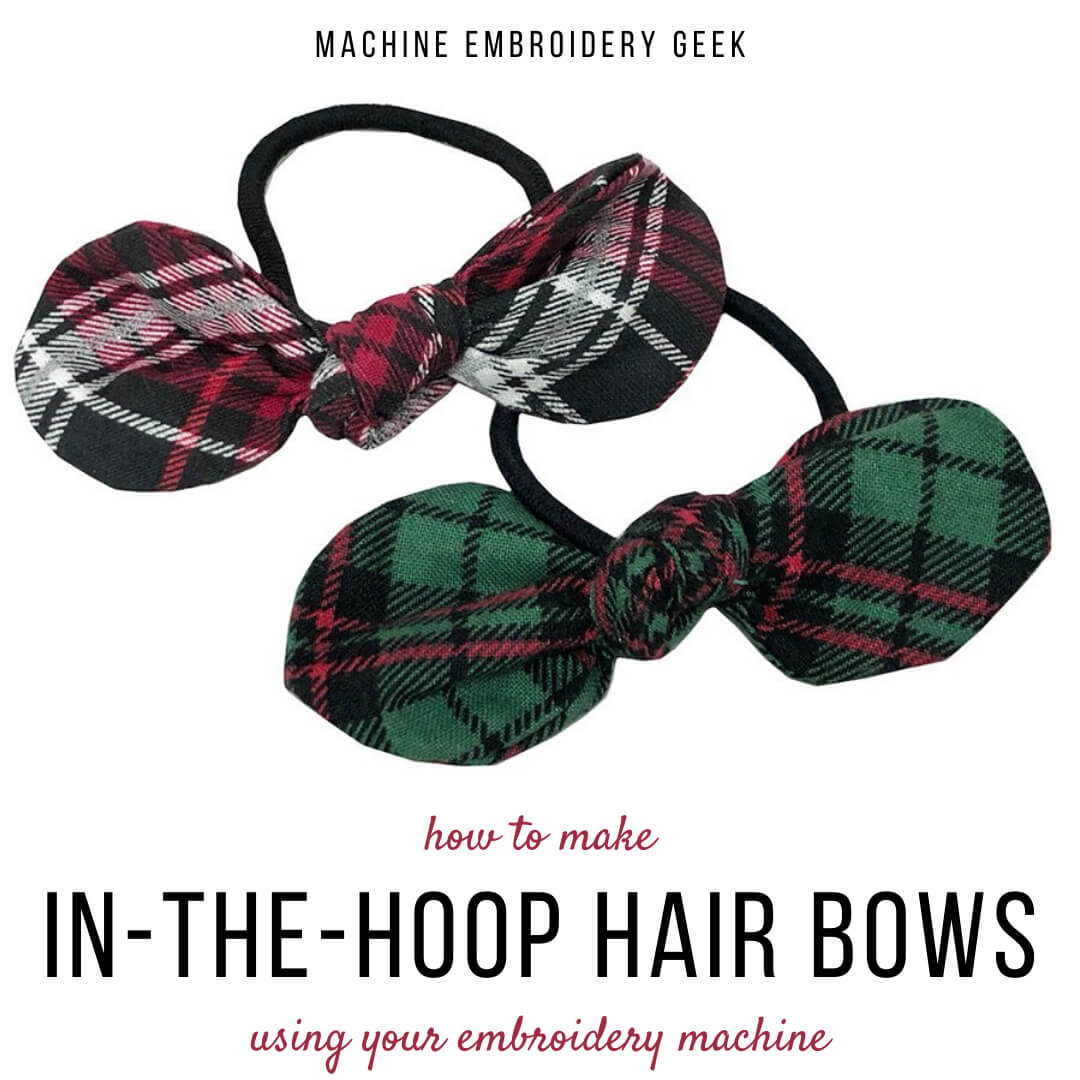
In the example, below, we will be making a bow that can be attached to a ponytail holder. However, you can make headband covers, hair clip covers, bun holders, headbands, etc… all in-the-hoop on your embroidery machine. The only limitation is the size of your embroidery hoop.
Why make in-the-hoop hair accessories
I recommend trying out this project for a variety of reasons. First – these bows are pretty cute. They dress up any ponytail or braid, and can be the perfect addition to an outfit, tying the whole look together. Let’s say you make a dress out of some plaid fabric. You can easily make a coordinating hair bow using this pattern.
Secondly, they are a great way to use up scrap fabric. You only need two 3″ x 7.5″ pieces of fabric to make this project. So, you could probably make a whole set of bows from the scraps laying around your sewing room.
And, finally – this is a perfect little gift. You can attach it to the top of a present as a cute little topper or use them as a Christmas stocking stuffer. Or, what about using these as a party favor?
How to make in-the-hoop hair bows
I wish I could tell you that you could make these in-the-hoop hair bows on a 4″ x 4″ hoop. I tried, and unfortunately you can’t. When I stitched out this design at a very small scale, the resulting bows were so tiny that they were difficult to work with and didn’t turn out looking like a bow. You must have at least a 5″ x 7″ embroidery hoop to be able to stitch out this design.
Supplies needed
Very few materials are needed to make this project. In fact, you probably already have most of these items already.
- Two 3″ x 7.5″ pieces of just about any fabric. I used a holiday plaid.
- Water soluble stabilizer
- Any machine embroidery thread
- Any embroidery bobbin thread
- HeatnBond Lite
- Ponytail holder
- In-the-hoop hair bow pattern
Steps
Hoop the stabilizer
I actually used water soluble stabilizer for this project, but in retrospect, I don’t think that’s necessary. The stabilizer will ultimately be encased within the bow, so you won’t see it in the finished product. However, if you use a stiff stabilizer will make the bow hard to tie. Regardless of what type of stabilizer you use, choose one on the light side.
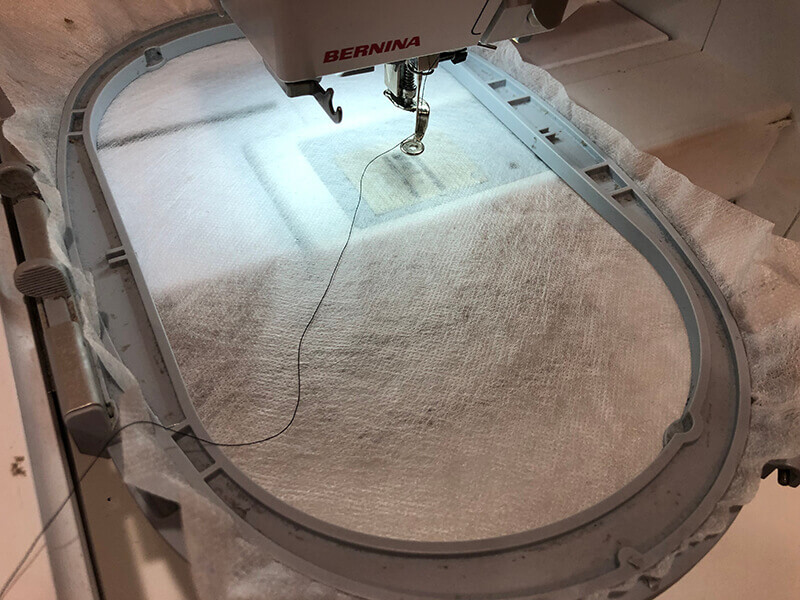
Load the design and start stitching
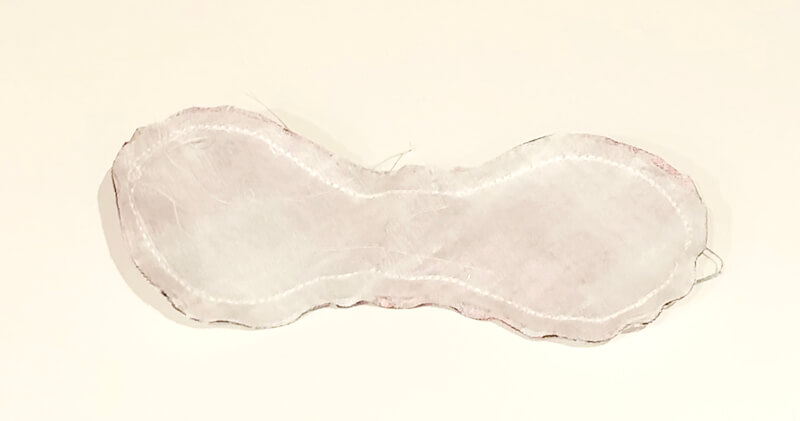
The first round of stitching will be a placement line. This will show you where to lay down the fabric. In the example below, you can see that I stitched out two instances of the design.
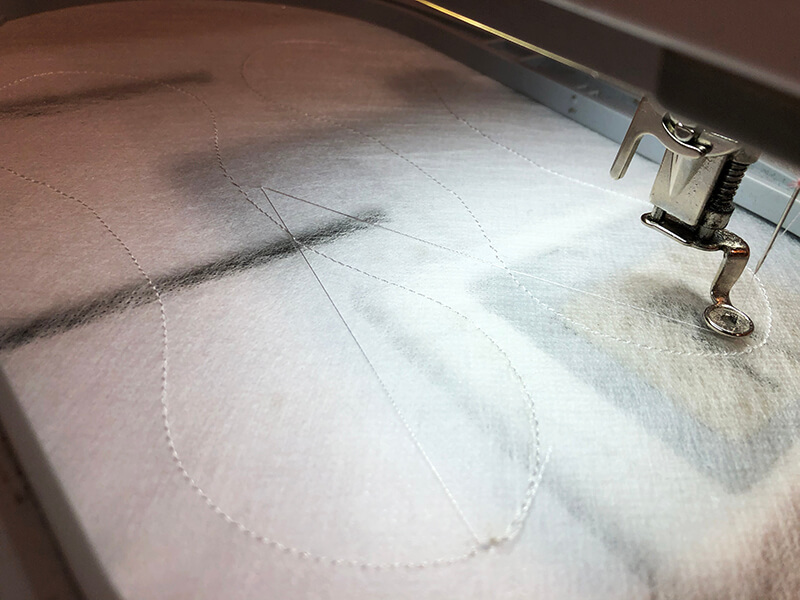
Lay down two instances of the material
Each bow is 2.31″ x 6.88″, so you will need two pieces at least this size. (Or, you can fold one larger piece in half with right sides together like I did below). Lay the two pieces with right sides together over the placement stitching. Use blue painters tape to hold the fabric in place.
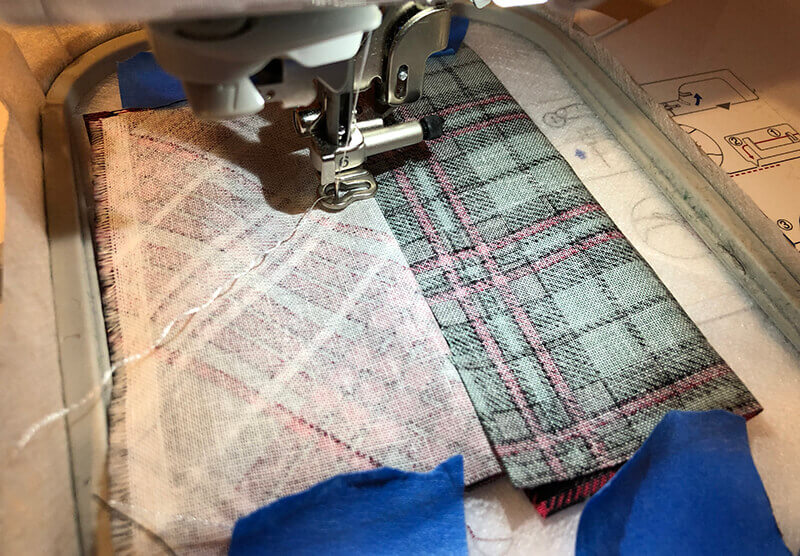
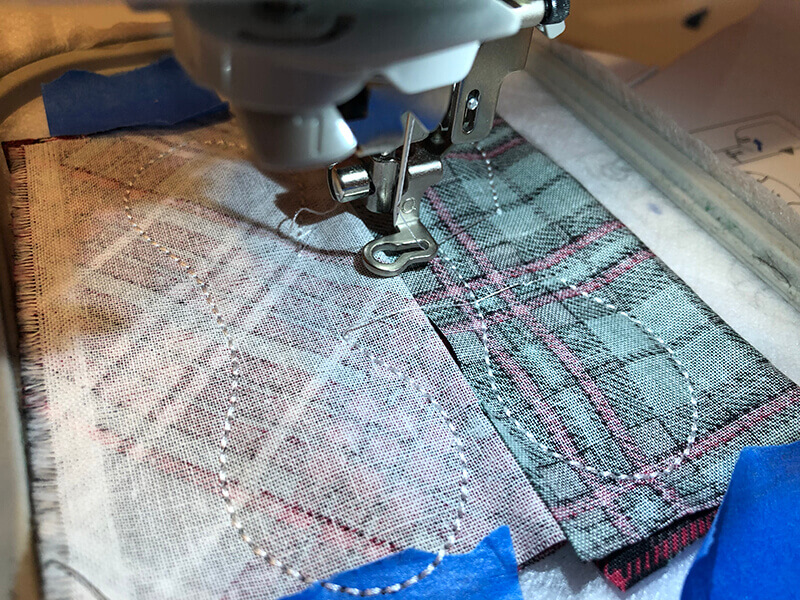
Start the next round of stitching
The next round of stitching is intended to stitch the two pieces together. The stitching will encompass the entire shape with the exception of one small opening to allow you to turn the bow right side out.
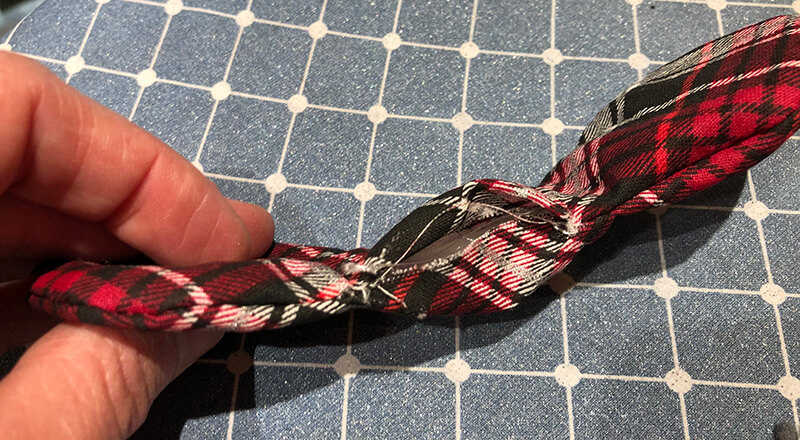
Remove the project and trim
When the machine has finished stitching, you can remove all layers from the hoop and cut out the bows. Leave at least 1/4″ of fabric beyond the stitch lines. You may want to leave some additional fabric around the opening to ensure the raw edges of the fabric don’t poke out.
Turn right side out
Turn the bow right side out. I used a chopstick to help push the fabric out. When you are done, you will be left with an unsightly hole.
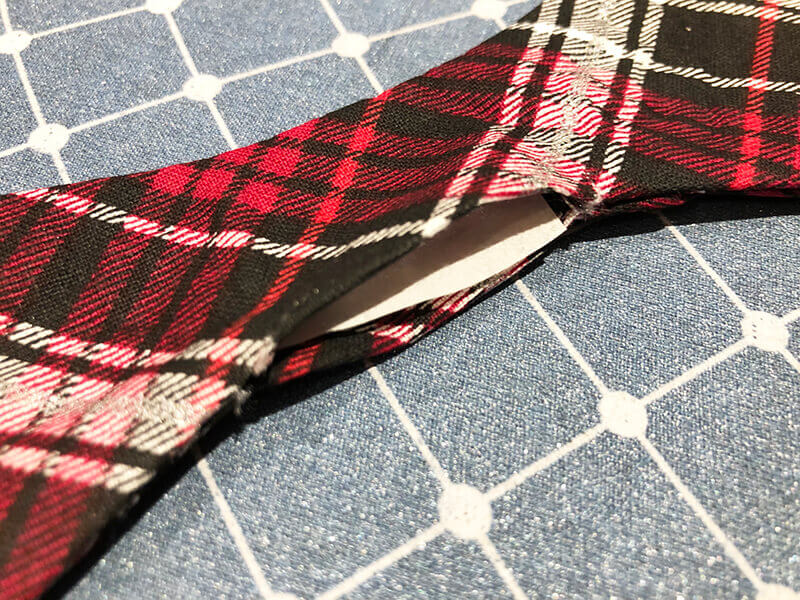
Press and seal
Iron the bow to flatten it out. Then use a tiny piece of HeatnBond Lite to seal the hole back together. You simply press the HeatnBond Lite onto one side of the opening, remove the paper backing and press again. The hole will be sealed up.
Alternatively, you can stitch the hole closed as the stitching will not be noticeable once you tie the bow into a knot.
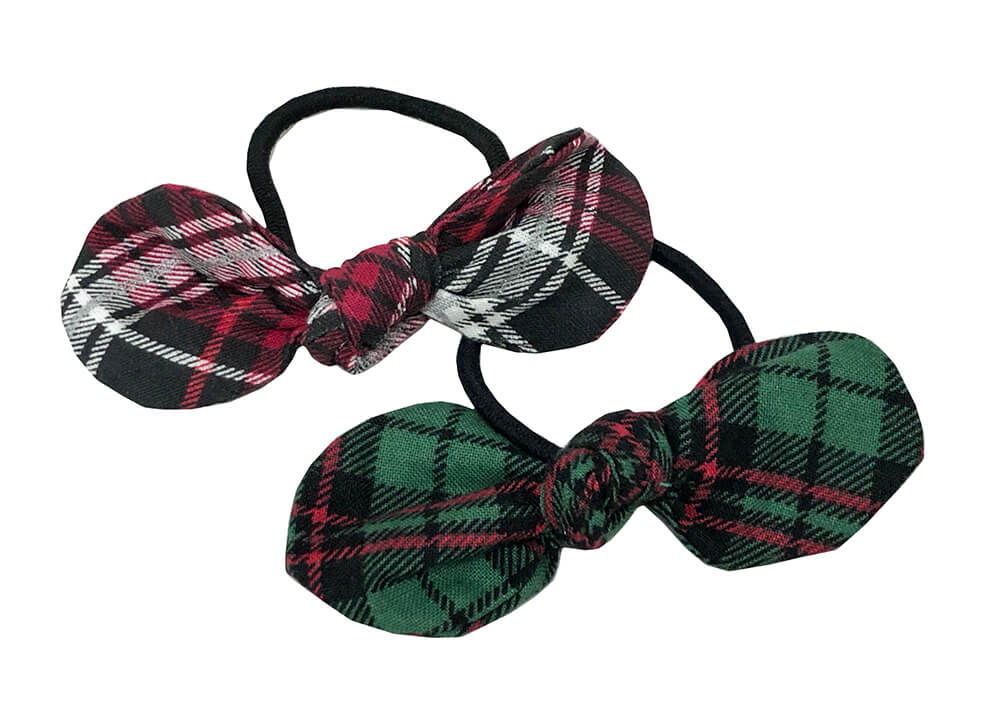
Tie your bow
Tie your bow around a ponytail. You don’t need to do anything fancy with regards to the bow. It is simply a knot and it looks pretty good as is.
All done!
And now you are done. Ready to stitch out a bunch more?
But wait! There are lots of other in-the-hoop hair accessories you can make.
Additional in-the-hoop hair accessories
If you are not crazy about my design, or simply want to expand your in-the-hoop hair accessory repertoire, check out some of these other cool designs.
Feltie flower hair clip toppers
Metal hair clips can be pretty boring. But, you can easily solve that problem by adding one of these three-dimensional feltie flowers. Stitch them in every colored felt combination you can imagine and you’ll have a little hair accessory to match any outfit.
Heart headband slider
Standard headbands can be pretty ho-hum as well. Turn them into a statement piece by adding an in-the-hoop headband slider. This version features a series of scribble hearts, but you can find a variety of styles.
FSL hair clip
Admittedly most of these in-the-hoop hair accessories are designed for the younger set, which is why I love this free standing lace hair clip. It’s super elegant and easy to use. Just add a little stick to secure it in place.
Mod hair clips
These modern in-the-hoop hair clips are also big girl appropriate – and you can make them with your favorite fabrics which means endless possibilities.
Soft in-the-hoop headband
You’ll need a larger embroidery hoop to be able to make these in-the-hoop headband. So, if you are lucky enough to own one, you should definitely check out this design. Just imagine – you can make a modern, soft and personalized headband from any fabric you want.
Free in-the-hoop feltie hair clip topper
Check out these cute little feltie hearts with slots built right into the design. They only take a sec to stitch out. And when you are done, you just stick the barrette through the openings, and BAM – cute heart feltie hair clips.
Feeling inspired?
With all these fun designs available – how can you not want to make some in-the-hoop hair accessories? Your head will thank you.
Happy stitching!
xo
Julie
[do_widget id=custom_html-68]
[do_widget id=custom_html-10]
Want to remember this? Save “How to make in-the-hoop hair bows” on your favorite Pinterest board