Disclosure: Some of the links on this site are affiliate links. This means that if you click on them and make a purchase, I may earn a small commission at no extra cost to you. Please know that I only recommend products and services I trust and use myself.
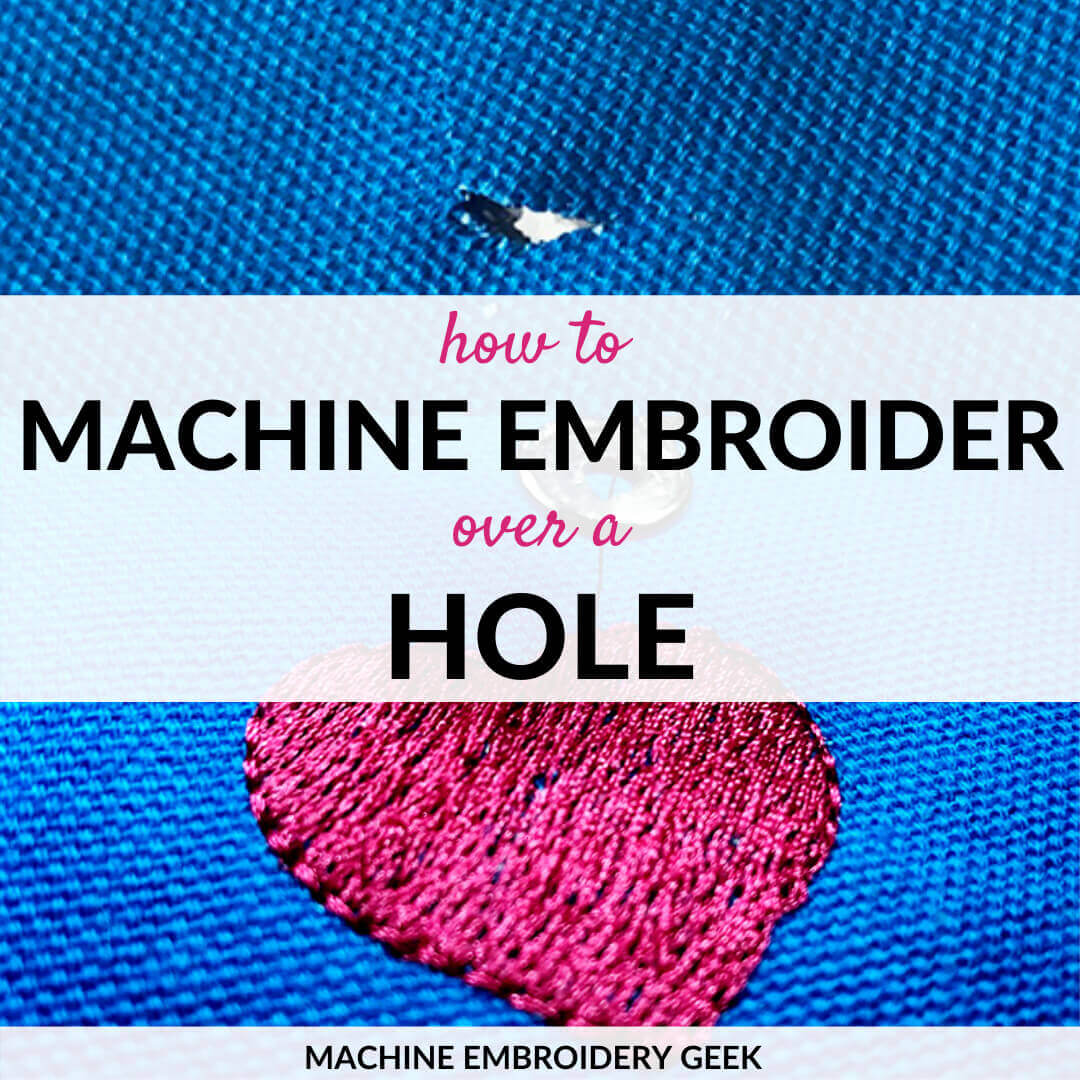
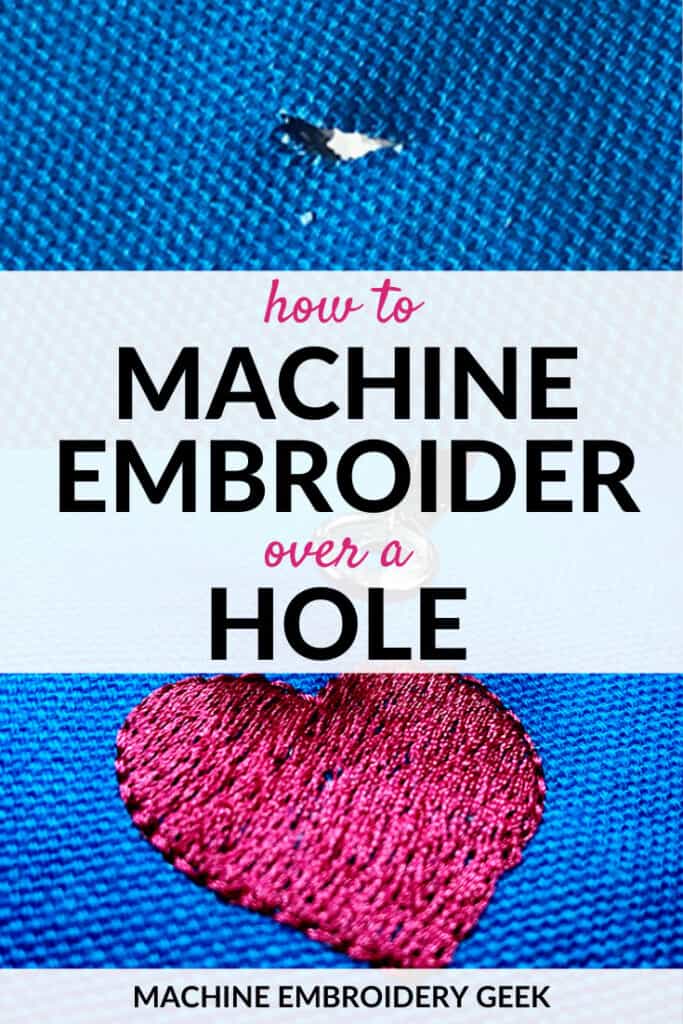
Did you know that you can hide a hole in a garment with machine embroidery? This is one of the most fabulous things you can do with an embroidery machine – embroider over a hole and make it disappear.
Products mentioned in this post
Why would you want to embroider over a hole?
If you don’t have kids, maybe you don’t realize how tough they can be on their clothing. I know this my sound sexist but my little boy TRASHED all of his pants when he was younger, but my girls… not so much. Nevertheless, almost any kid manages to put a hole in their clothes from time to time. And, oftentimes when a hole appears on a kid’s garment, the rest of the piece is in pretty good shape. So, it can be hard to throw it away.
Holes can also be caused by the embroidery process. I’ve made a lot of dumb embroidery mistakes which resulted in a hole through the item I was trying to embroider. Either I snagged the garment on something, or I stitched through multiple parts of my garment accidentally and created a hole while trying to tear it out.
Fortunately, your embroidery machine may provide you with the perfect fix. Of course, you can always apply a patch over the hole or cover the hole with an appliqué. And, this may be your only option if the hole is very large it is in an area that can be accessed by your embroidery machine. But, if the hole is small, and easily accessible, you may be able to just be able to embroider over it.
Think of it as a design opportunity!
[do_widget id=custom_html-26]
Preparing your hole
Before you start embroidering over the hole area, you want to apply some type of adhesion to the wrong side of the affected area to hold the fabric together. Think of this like a bit of wood glue before you nail the pieces together. The “glue” you choose should be dictated by the fabric you are embroidering on.
Choosing the right embroidery design
When you choose an embroidery design to stitch out over your hole, you want to make sure that there will be pretty solid stitching over the area you want to hide. In the examples below, I used a heart comprised of a fill stitch because it offered complete coverage over the torn area.
How to embroider over a hole
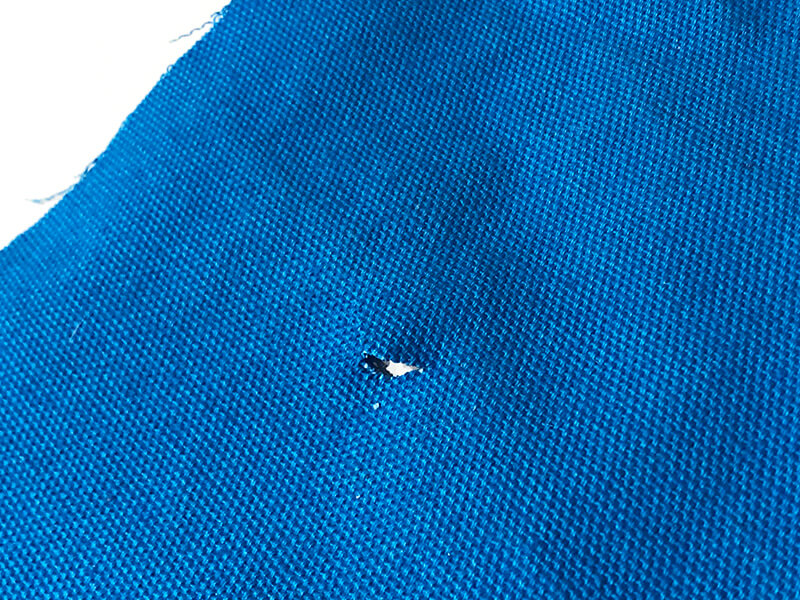
For this experiment, I created holes in two different types of fabric: a durable woven fabric (similar to a denim) and a stretchy knit fabric (like a t-shirt). As you will see, the methods were only slightly different and both yielded great results.
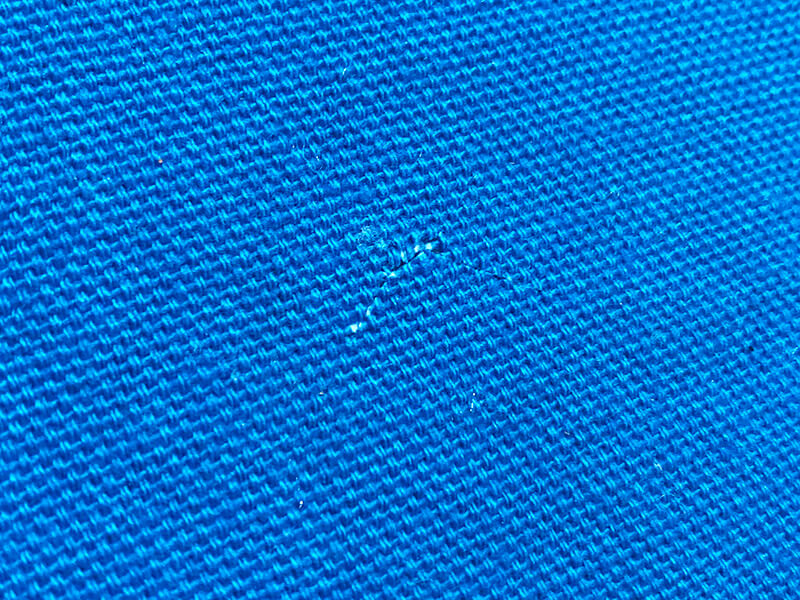
Embroidering over a hole in a woven fabric
The hole I started with was about 1″. But using this method, you could “repair” much larger areas.
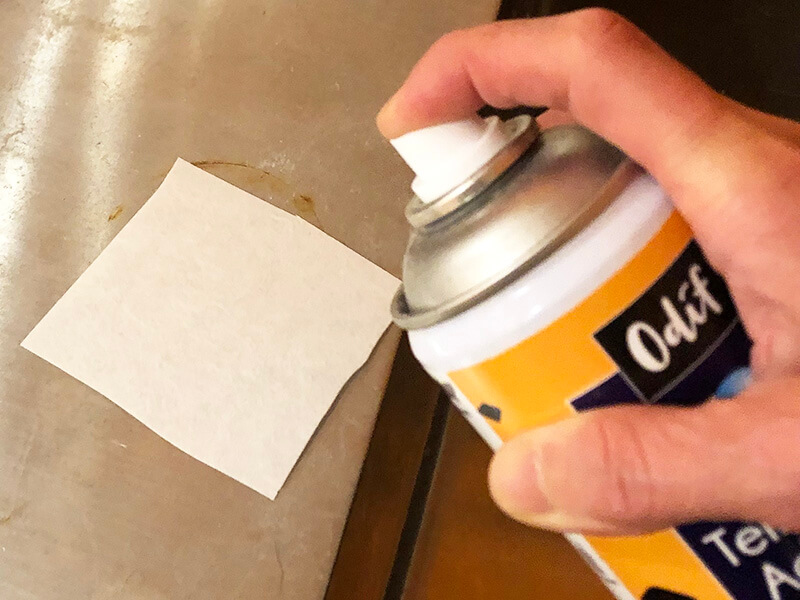
Sealing the area shut
The first thing you need to do is to seal the area shut. I cut a piece of medium weight cutaway stabilizer about twice the size of of my hole and the embroidery design I was stitching over the hole. Then I sprayed one side of the cutaway with temporary adhesive spray. I was careful to spray the cutaway far away from my embroidery machine and hoop as it can really gunk up anything it comes into contact with.
Next, I stuck the cutaway on the back of the affected area. The cutaway acts like a bandaid and holds the torn fabric together.
Positioning the torn fabric on the hoop
To adequately cover the hole, you need to make sure that your embroidery design will actually be stitched in the right spot. The easiest way to do this is to float the fabric you are repairing on a piece of hooped tearaway stabilizer.
If you are not familiar with floating, here’s how you do it. Just hoop a piece of tearaway stabilizer, making sure it is taut. I prefer to use adhesive-backed tearaway stabilizer which needs to be hooped shiny side up. Then you use a pin to score around the inside edge of the hoop. This creates a tear in the paper covering the sticky area allowing you to peel it back and expose the sticky surface.
You don’t have to use adhesive-backed tearaway. You can also hoop a piece of regular tearaway and spray it with temporary adhesive spray to get your fabric to stick on the hooped stabilizer.
Whatever method you choose, you simply need to position your fabric so that the embroidery design will cover the hole.
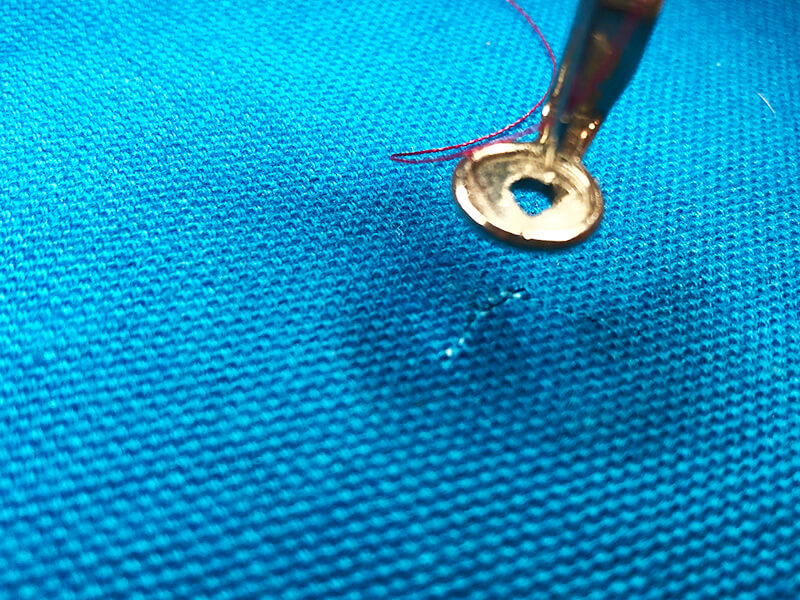
Embroidering the area shut
Once your fabric is in place – you can start stitching! If the hole has a very rough tear, you may want to lay down a piece of water soluble stabilizer to keep those frayed pieces flat while you stitch over them.

Once the stitching is done, you’ll never know the hole was there!
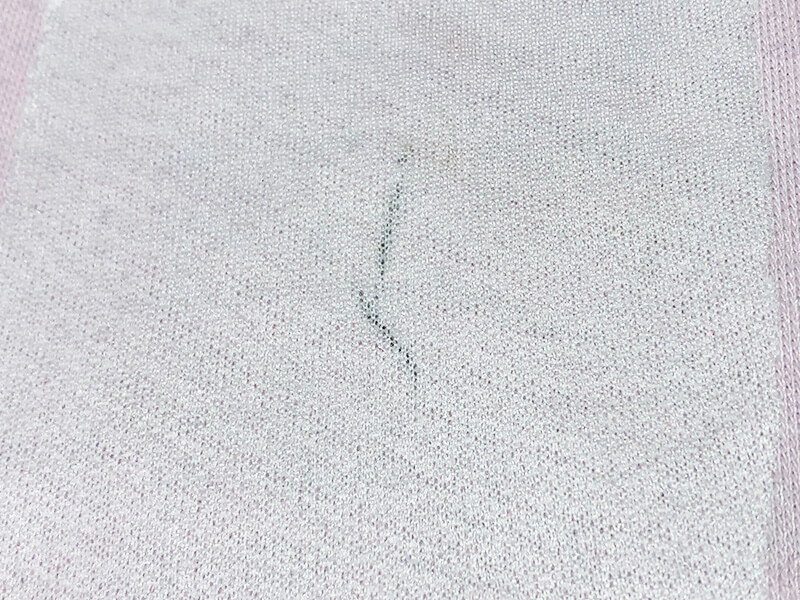
Embroidering over a hole in a knit fabric
I followed the same steps with embroidering over a hole in a knit fabric. The only difference is that I sealed the hole shut with a piece of fusible poly mesh stabilizer. This materials is more flexible than standard cutaway which is appropriate for a stretchy fabric.
In the example below, you will see that the hole in the fabric is still apparent, even after I sealed it shut with the fusible poly mesh. Nevertheless, I was still successful in covering it with an embroidery design.
Below you can see the repaired hole on the knit fabric. For best results when embroidering on knits, you should use a ballpoint embroidery needle.

And once again, your embroidery machine has saved the day! Next time you encounter a hole, embrace the challenge and use your embroidery machine to stitch it right back together!
Happy stitching!
xo
Julie
[do_widget id=custom_html-27]
[do_widget id=custom_html-10]
Want to remember this? Save “How to embroider over a hole” on your favorite Pinterest board


Wonderful way of covering a hole. Thanks 😊❤️