Disclosure: Some of the links on this site are affiliate links. This means that if you click on them and make a purchase, I may earn a small commission at no extra cost to you. Please know that I only recommend products and services I trust and use myself.
New to machine embroidery? Well, here’s a great place to start. Personalizing a throw using your embroidery machine is a great project for a beginner. Plus, when you use your embroidery machine to embroider on a throw, you will have the perfect gift this holiday season.
Products mentioned in this post
Why gift an embroidered throw?
It has never been a more perfect time to embroider on a throw as 2020 may just be the year of the couch. These days, we do everything from working to Netflix binging (and sometimes even both simultaneously) from the comfort of our couches. And – looking at the way COVID is going – it doesn’t look like we will be getting up from our couches anytime soon. But, a cozy throw can make cuddling up on a couch SO. MUCH. BETTER.
So… being that couch time is still in full swing, throws are in demand. And I think this season retailers have figured that out. There are gorgeous cozy throws at stores like Marshalls and T.J. Maxx, and, actually even Walmart. And even the ones that look the most cozy and luxe, can be gotten for next to nothing.
But, what makes a throw truly special, is an added bit of personalization. And – lucky you – with your more embroidery machine you have the perfect tool to do it.
Who to gift an embroidered throw?
A personalized throw makes a perfect gift for almost any recipient. I have made monogrammed throws for couples as holiday and thank you gifts. And I’ve gifted personalized throws to teens and tweens in colors and styles that coordinate with their bedrooms.
And why is this such a great project for a beginner?
The upside of embroidering on a throw is that it is flat. You will have absolutely no struggle getting the throw to stay in place on your embroidery hoop.
But, the downside is that throws can be quite plush, especially the ones that are the coziest. And within all of that bulky nap, it’s easy for letters and embroidery designs to get lost.
So, if you have never embroidered on the throat before, and since the holidays are just around the corner, it is the perfect time to learn. Here is how to embroider on a throw.
[do_widget id=custom_html-36]
Decisions to consider before you embroider on a throw
Monogram
If the throw is for a couple, the monogram should be comprised of the woman’s first initial, then the shared last initial (larger than the other letters), and then the man’s first initial. If it’s a same-sex couple who shares the same last name, I suppose you can go either way on the order of the initials. But, if you are monogramming a throw for a couple where the woman doesn’t not share the same last initial as the man, I’m not sure a couple’s formal monogram is the right answer. You may opt to do something creative with the couple’s two last initials.
Embroidery font choice
Throws can be fairly large. Therefore, a dinky monogram with thin letters can get easily get lost. Opt for a typeface with thick strokes. And make the size of your letters at least 3 1/2″ high.
Placement
There is really no hard and fast rule about the perfect location for a name or a monogram on throw. However, it is pretty typical for the personalization to be located in a bottom corner. Embroidering the throw on the bottom corner allows the personalization to be visible when the throw is artfully draped over a couch or chair.
Orientation
If I am embroidering a monogram on a throw, I will often stitch it out at a 45° angle in the corner. To make sure it’s angled properly, you simply need to fold the two adjacent edges together
Stabilizer
Unless the throw is made of a loosely knit material, I would not use a permanent cutaway stabilizer on the throw. Most throws are sturdy enough not to need a permanent stabilizer. Throws get tossed around a lot so the back will often be visible. Therefore, it’s ideal to avoid a permenatent stabilizer if possible.
Topper
Many throws are quite fuzzy. To prevent the letters from getting lost within the nap of the fabric, it’s a good idea to use a water soluble topper underneath your embroidery. If the throw is really nappy, for example, a faux fur, or a super plush sherpa style throw, you should consider using a knockdown shape underneath your primary embroidery design.
How to embroider on a throw
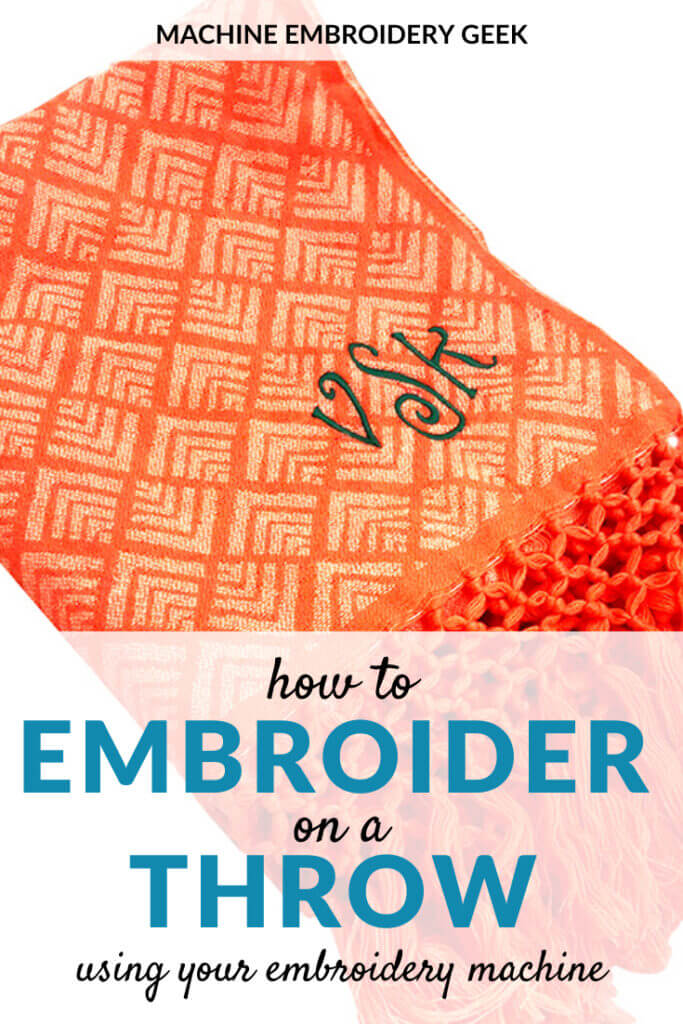
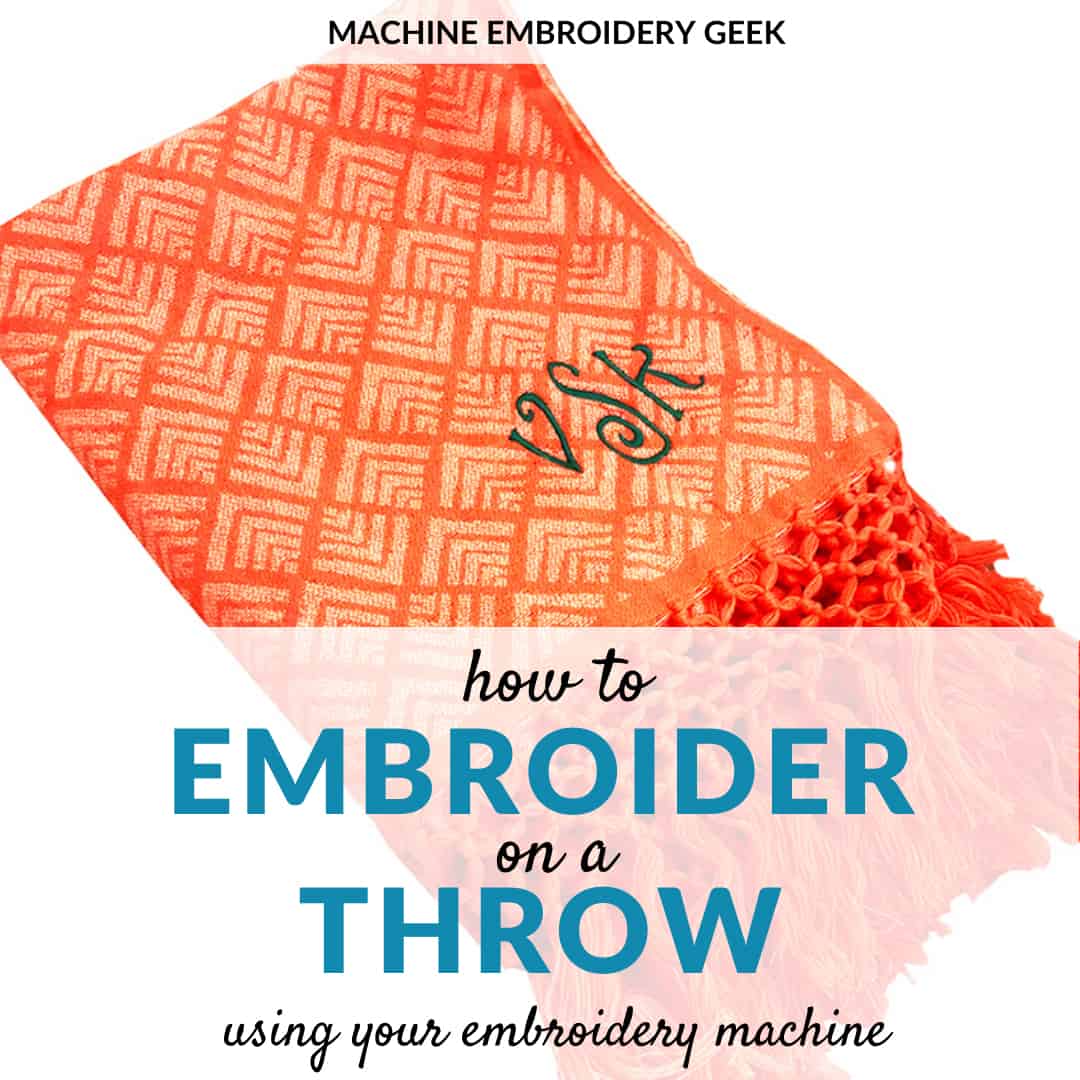
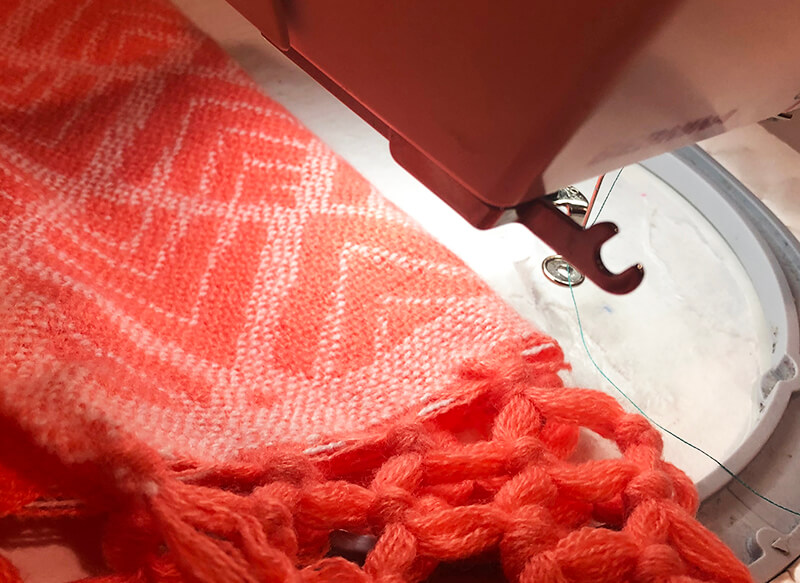
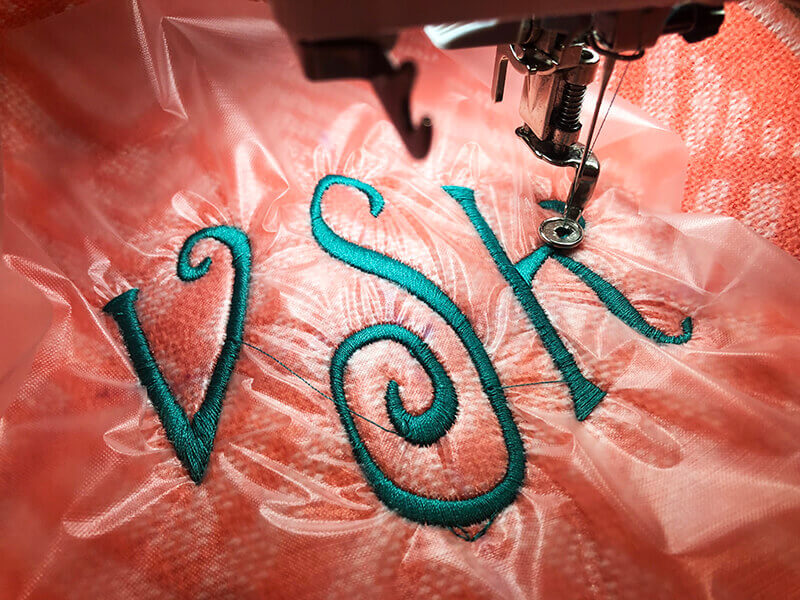
I recently purchased a really fun-looking throw at Marshalls with the intention of monogramming it and giving it as a gift to our neighbors. Unlike many of the other options, the one I chose was not the plushest of the group. I chose it for it’s boho vibe and fun orange color. I decided to embroider our neighbor’s monogram in turquoise. Here’s how I did it
Preparing the hoop
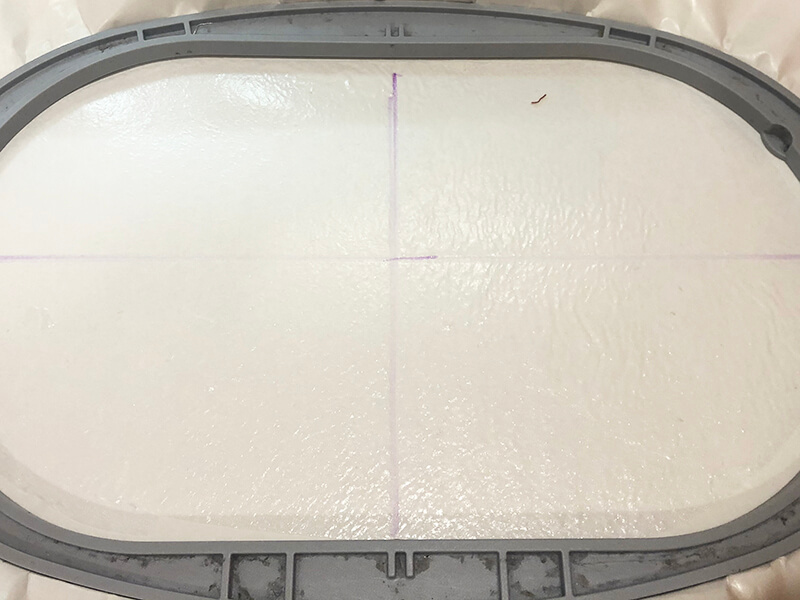
Since throws can be quite bulky, I suggest floating instead of hooping. Therefore, you will need to hoop a piece of adhesive-backed tearaway stabilizer with the shiny side up. Score around the inside edge with a pin and then peel back the paper. With the sticky surface exposed, draw a horizontal and vertical line through the center of the hoop with a disappearing ink pen.
Floating the throw on the embroidery hoop
Using the folding method, you can precisely place the embroidery design (monogram, name or design) in the appropriate spot on the throw. If you want the design to be set at a 45 degree angle, simply fold the adjacent sides on top of each other to locate the diagonal line that should run through the center of the monogram.
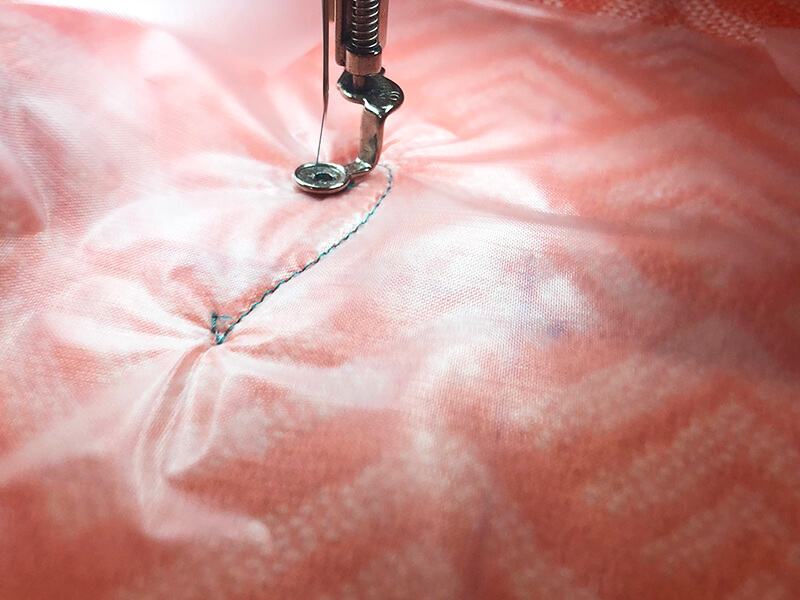
For this particular throw, I thought the monogram would look better not being set on an angle. The long fringe on the throw seemed to dictate the direction in which the monogram should go. Since I decided to not stitch the monogram on an angle, I simply folded over about 6 inches of the side of the throw on top of itself (right sides together) in order to position the center of the monogram 6″ in from the edge. I then aligned the fold of the throw with the center line I drew on the stabilizer, making sure that the desired center of the monogram aligned with the perpendicular line I drew on the hoop. Finally, I unfolded it and smoothed it out.
Using the menu on my embroidery machine, I centered the needle on the center of the design which gave me a a preview of where the monogram would be stitched. I nudged the position around a bit to get the monogram center exactly where I wanted it.
If the throw is slick on one side and/or double layers, you may want to pin the throw onto the stabilizer, being careful to avoid the stitch area.
Preparing to embroider
Before you get started stitching out the design, you will probably want to lay down a piece of water soluble stabilizer. This helps keep the nap of the fabric down while you embroider on top. Once you do that, you are ready to start stitching!
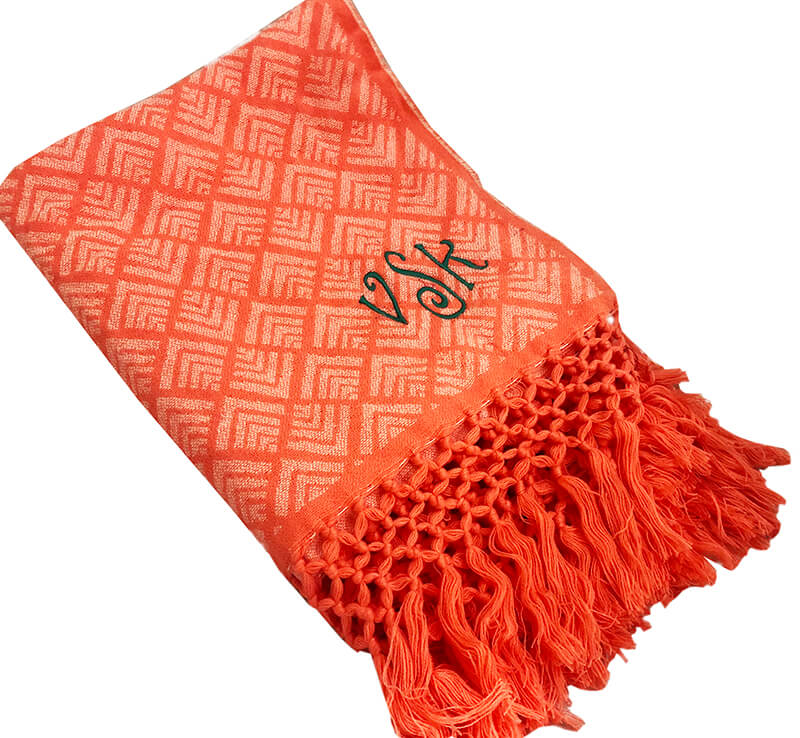
Wrapping it up!
After you are done stitching, all you need to do is trim your connector strings with embroidery nippers and peel away the water soluble stabilizer. And, then, you are left with the perfect gift!
Happy stitching!
xo
Julie
[do_widget id=custom_html-26]
[do_widget id=custom_html-10]
Want to remember this? Save “How to embroider on a throw” on your favorite Pinterest board