Disclosure: Some of the links on this site are affiliate links. This means that if you click on them and make a purchase, I may earn a small commission at no extra cost to you. Please know that I only recommend products and services I trust and use myself.
Neckline embroidery is a wonderful way to add a unique and personalized touch to a simple t-shirt, sweatshirt or sweater. And, with the help of an embroidery machine, you can machine embroider around a neckline in a matter of minutes. Look tricky? It’s easier than you think, and I’ll guide you through the process step-by-step in this tutorial. So, if you’ve been wanting to create beautiful statement necklines for yourself or your loved ones, read on!
Products mentioned in this post
- Embrilliance Essentials
- SewWhat-Pro
- Solid-colored sweatshirt for kids
- “Hollie Marie” script font
- Disappearing ink fabric pen
- Fusible poly mesh stabilizer
- Free little daisies design
What is neckline embroidery?
Firstly, let’s define what neckline embroidery actually is. It refers to any design or pattern that is machine-embroidered around the neckline of a garment. This could be a simple name set on a curve or a more complex elaborate design, depending on your preference and skill level. It provides an interesting and unique touch to any garment, making it stand out from the rest. Plus, it’s a great way to repurpose old or plain clothing into something new and exciting.
Neckline embroidery has gotten quite popular over the past couple of years. I’ve seen it done on little girl sweaters and sweatshirts and even on garments for adults. One common style is a “nana” around the neck with the names of the grand kids on the sleeves. It’s a really sweet and thoughtful way to show off your family pride.
Setting up your embroidery design
The key to successfully executing this project starts with your embroidery software. It would be nearly impossible to do if you don’t own Embrilliance Essentials or SewWhat-Pro. Both of these programs allow you to create text on a curve.
You also need an appropriate embroidery font for this project. While a variety of fonts will work for this project, you most often see a script embroidery font used when a name or a word is embroidered around a neckline. However, this is your personal preference.
How to embroider around a neckline
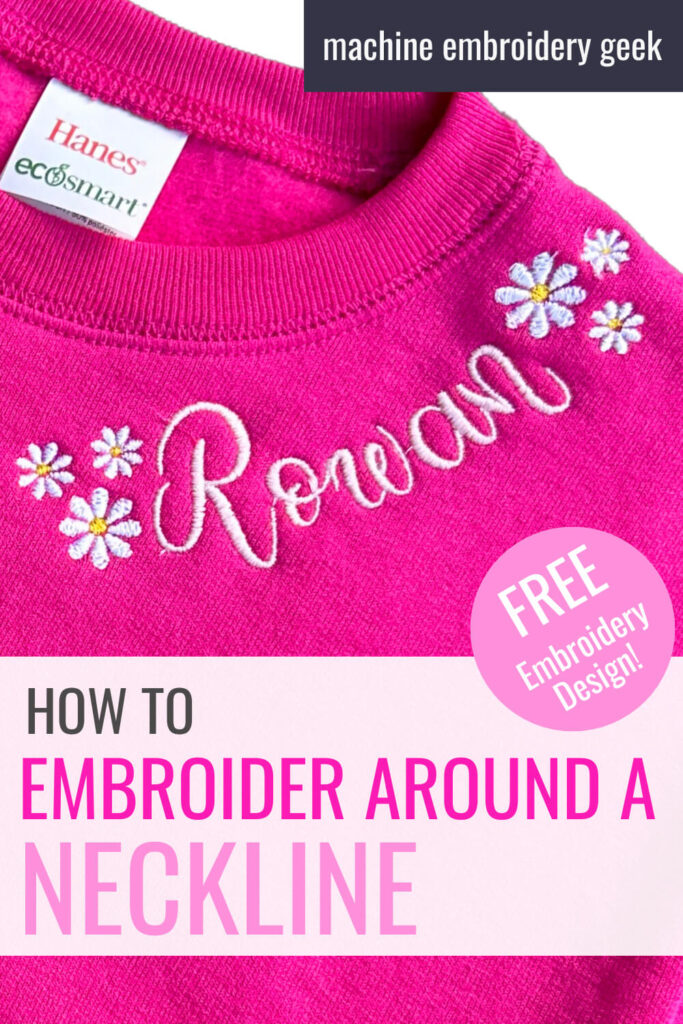
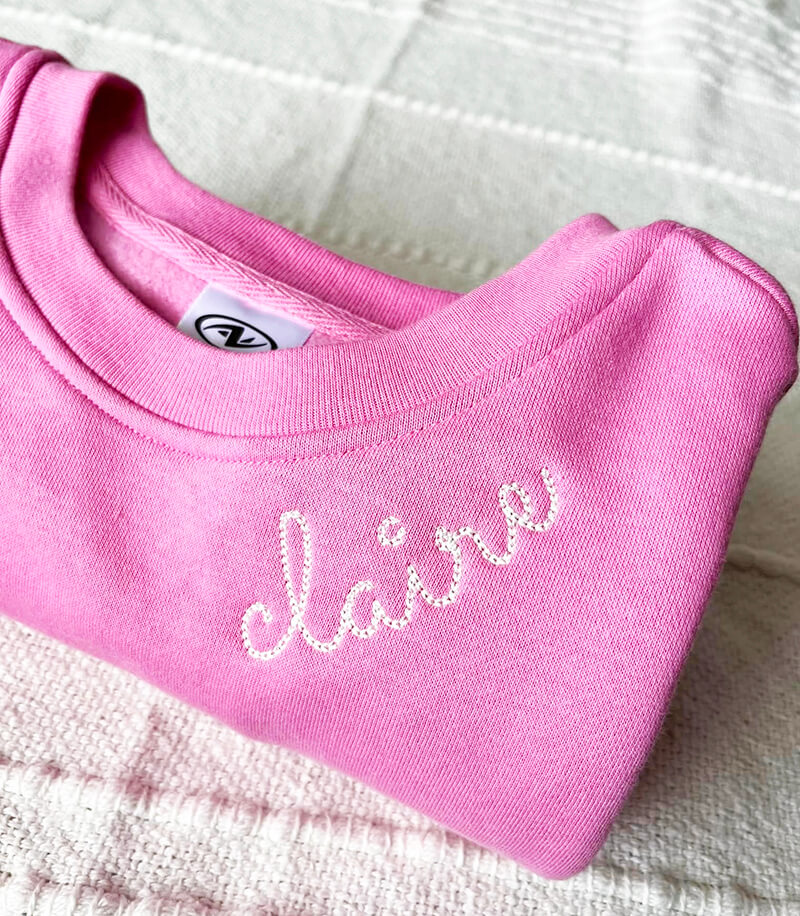
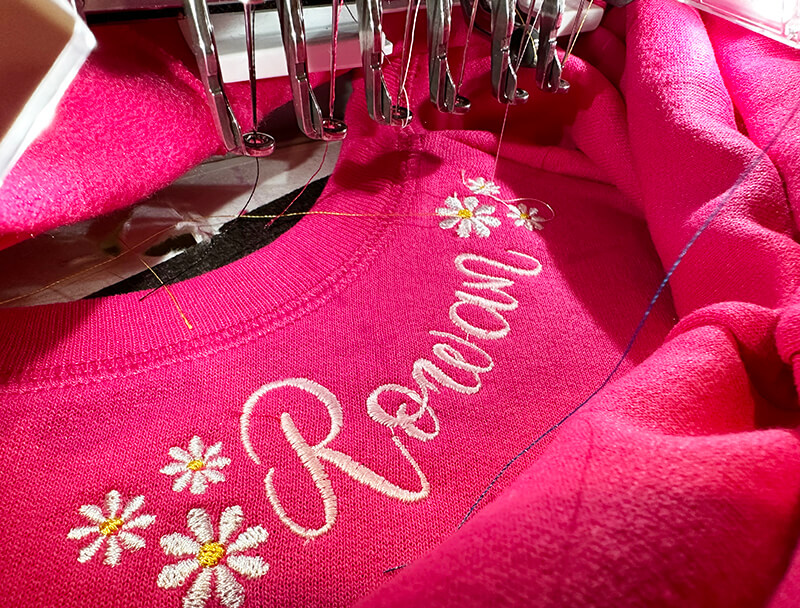
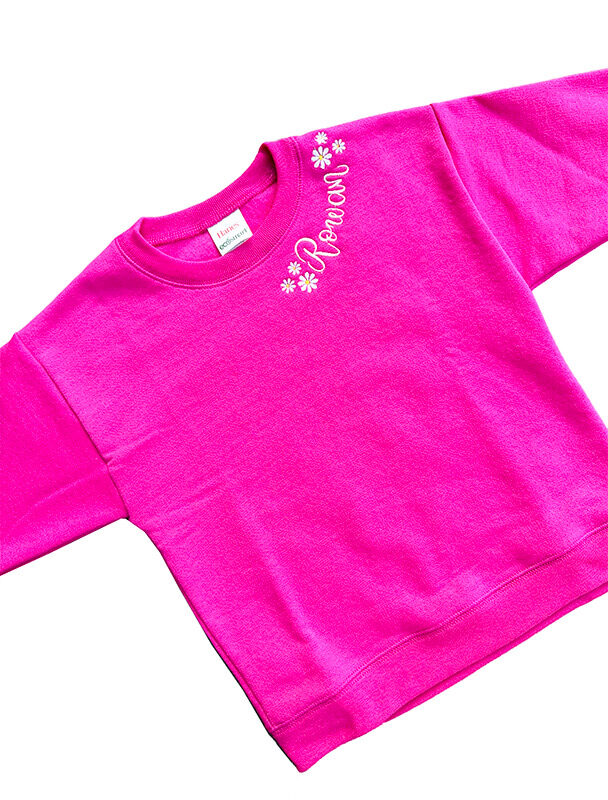
In order to show you exactly how to tackle embroidery around a neckline, I decided to create a personalized, neckline-embroidered sweatshirt for my little pal, Rowan. I wanted to make something sweet and feminine, but also something she could wear every day.
Obtaining your garment
I hit the easy button on this one. I headed over to Amazon and found myself an inexpensive solid-colored sweatshirt . She’s a tiny little thing, but I still went up a size or two just so that it would last a little bit longer.
Choosing your font and design(s)
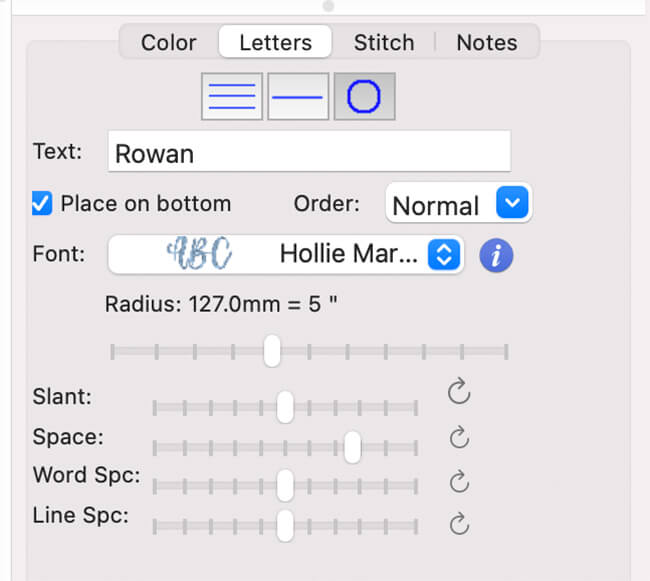
In keeping with spirit of the project, I chose a pretty script BX font that I made a while back called “Hollie Marie.”
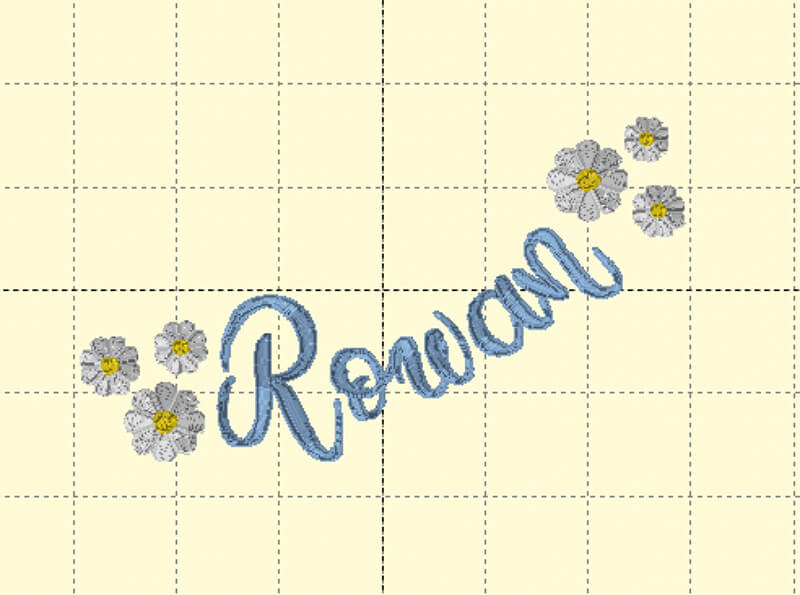
And, to add a little extra flair, I also added a few small daisy designs on either sides of her name. Head over resource library to grab that free design.
Creating the text on a curve
After opening my Embrilliance software, I created a new New Page. I selected the big “A” at the top which starts a new lettering design. Then I selected the Hollie Marie font in my font drop down list and started typing out the name.
After I created the name, I considered how large I wanted the letters to be. Since this was a small sweatshirt I thought that a letter size of about .75 inches would be perfect.
In Embrilliance, to create the curve, all you have to do is select the third button within your letting options. This is a button with a big circle on it. As soon as you select it, you will likely notice some changes to your lettering.
Adjusting your lettters
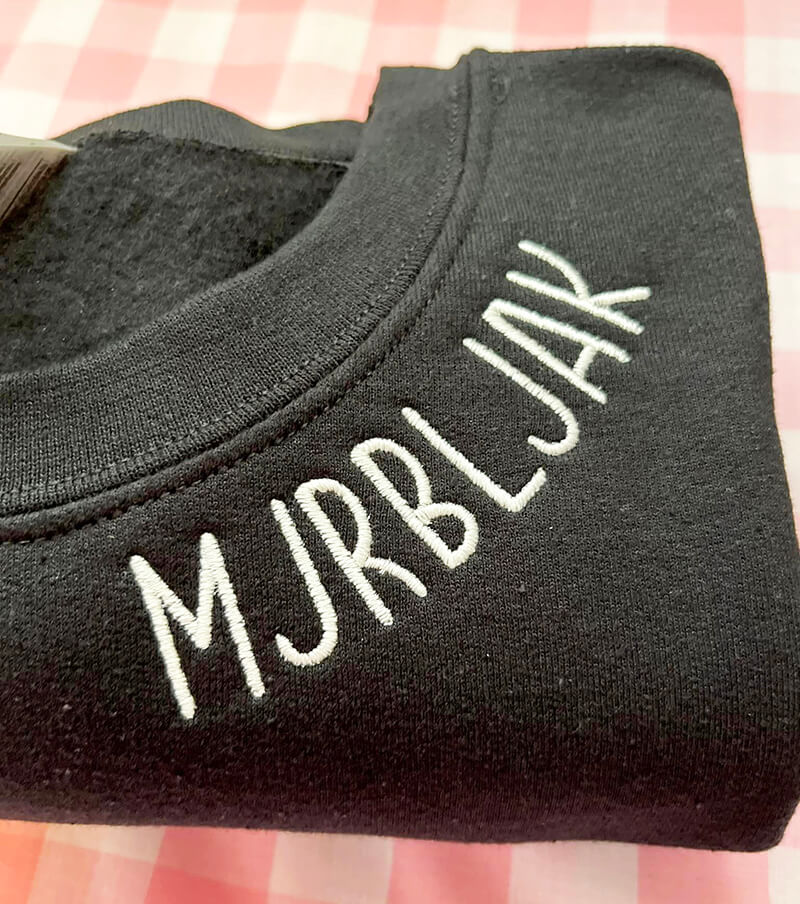
Now you just need to make some adjustments. The biggest question you may have is how much of a curve do you need. That is going to totally depend on the size of your letters and the size of your sweatshirt. A smaller sweatshirt is going to have a more dramatic curve than a larger one because the neck hole is larger.
The radius that ended up working for me was 5″ or 127mm. In addition to playing with the radius of the curve, I also moved my letters around. I wanted the script to look continuous so I pushed my letters closer together.
Once I found a radius and letter spacing that looked acceptable to me, I merged in little daisies design, rotating it and placing a few instances on either side of the name. Before saving out my design, I color sorted it. If I hadn’t color sorted the design, each daisy would have been stitched out one by one: white then yellow. It was much more efficient to stitch all the white first, then the yellow.
Previewing your design
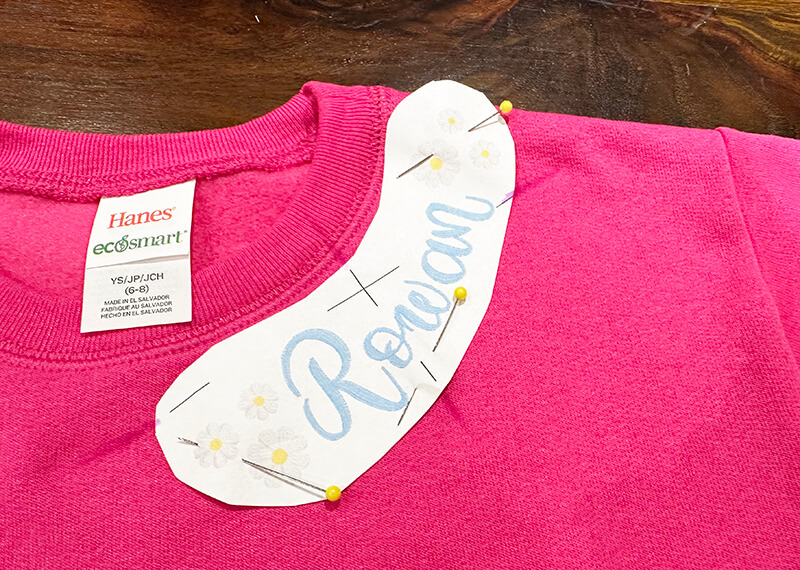
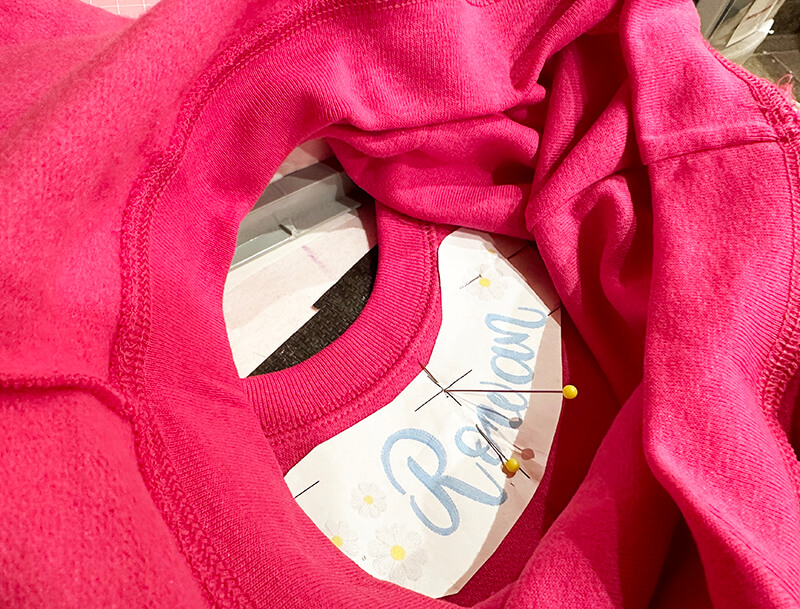
The best way to see if your overall design works on your neckline is to print out your design, trim around the letters and place it on the neckline of your garment. If you need to add more of a curve or scale your letters, repeat the previous steps and print it out again until you are satisfied with the design.
Orienting your design
One of the trickiest aspects of this project is orienting the design on the garment. The easiest way to get everything lined up is to use your print out of your design to mark your center point as well as the horizontal and vertical lines that extend out from the center. I used a disappearing ink fabric pen to extend these lines off the paper and onto my garment. Then, I removed the paper and drew in the lines from the center point to these lines. These served as an essential reference for orienting my curved design on the curved neckline.
Stabilizing your garment
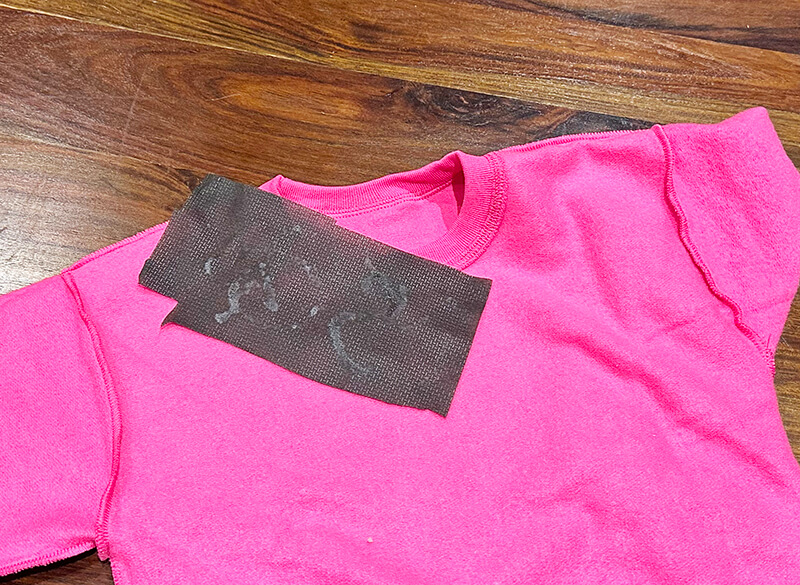
Since a sweatshirts is definitely a wearable, it needs some type of permanent stabilizer to remain in the garment. Knowing the center point and the overall size of the design, I fused a piece of fusible poly mesh stabilizer onto the wrong side of the garment that was slightly larger than the entire design.
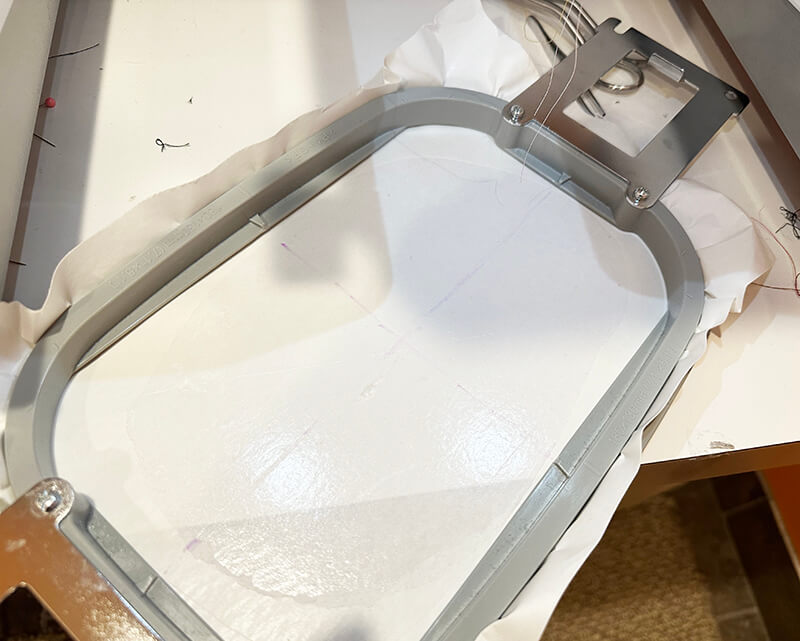
Next, I hooped a piece of sticky back tearaway stabilizer. Using a pin, I scored around the inside edge of the embroidery hoop to create a tear in the top paper layer. Then I peeled it away to expose the sticky surface and I drew lines on the hooped sticky surface with a disappearing fabric marker, indicating the center of the hoop and extending lines out horizontally and vertically to the edges of the hoop.
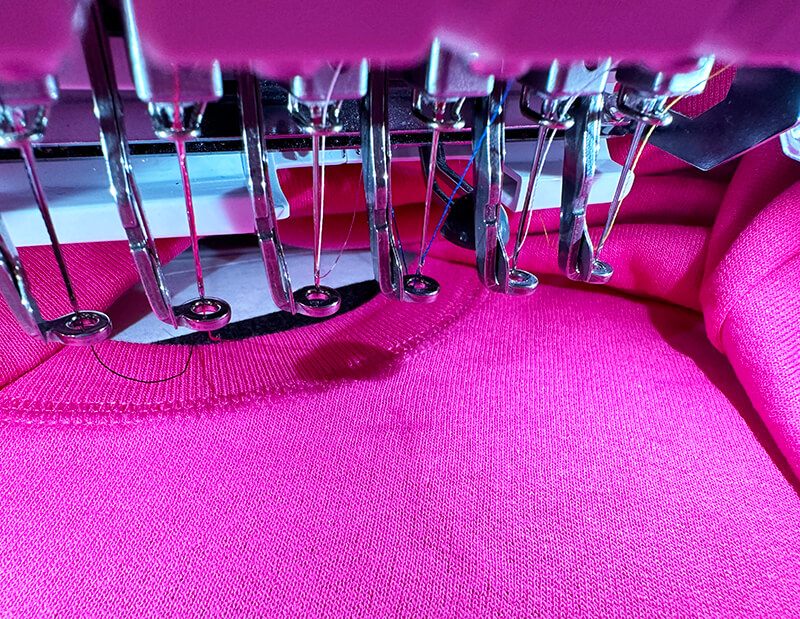
Finally, I placed the sweatshirt onto the hoop , lining up my center and horizontal/vertical lines from the sweatshirt to those on the hooped stabilizer. If you are struggling to line it up, try using the folding method outlined in this post.
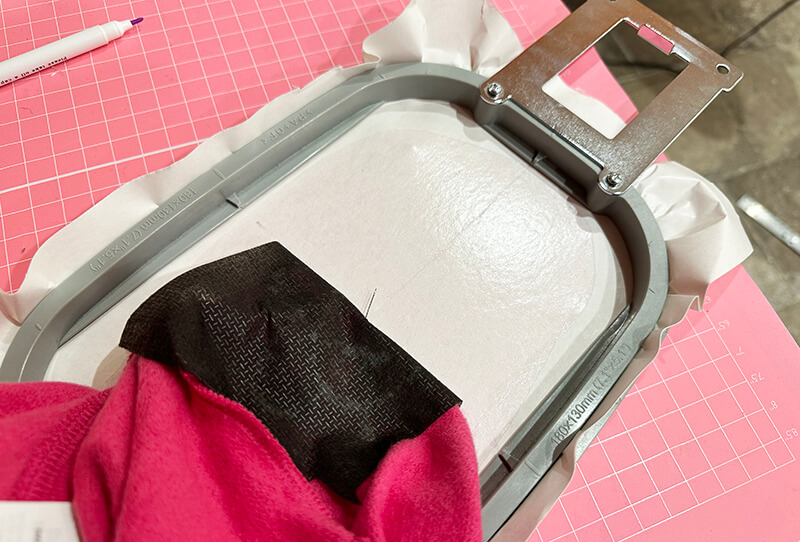
When the sweatshirt is placed properly onto the sticky surface, It may look a little funny to you since the alignment looks crooked, but as long as your lines on the sweatshirt are lined up with the lines on your shirt – you are good to go.
Embroidering your garment
Once your design is all lined up and centered on the hooped stabilizer, you are ready to embroider. When embroidering on knits, it’s often recommended that you switch to a ballpoint needle. I don’t typically do this as I think It’s more important to do when you are stitching on materials like spandex as opposed to a standard sweatshirt.
Another precaution you may want to take is to slow down your machine a bit. Neckline embroidery makes for pretty easy embroidery as the access area is quite large and you don’t have much of a risk of other parts of the garment getting caught up in your embroidery.
Enjoying a personalized garment
After completing my sweatshirt embroidery project with Hollie Marie font and daisy design, I was thrilled with the results. The font and designs added a touch of personalization and flair to an otherwise plain sweatshirt. So go ahead and try out different fonts, designs, and curves to create your own unique neckline embroidered garment.
Want to remember this? Save “How to Machine Embroider a Neckline” on your favorite Pinterest board