Disclosure: Some of the links on this site are affiliate links. This means that if you click on them and make a purchase, I may earn a small commission at no extra cost to you. Please know that I only recommend products and services I trust and use myself.
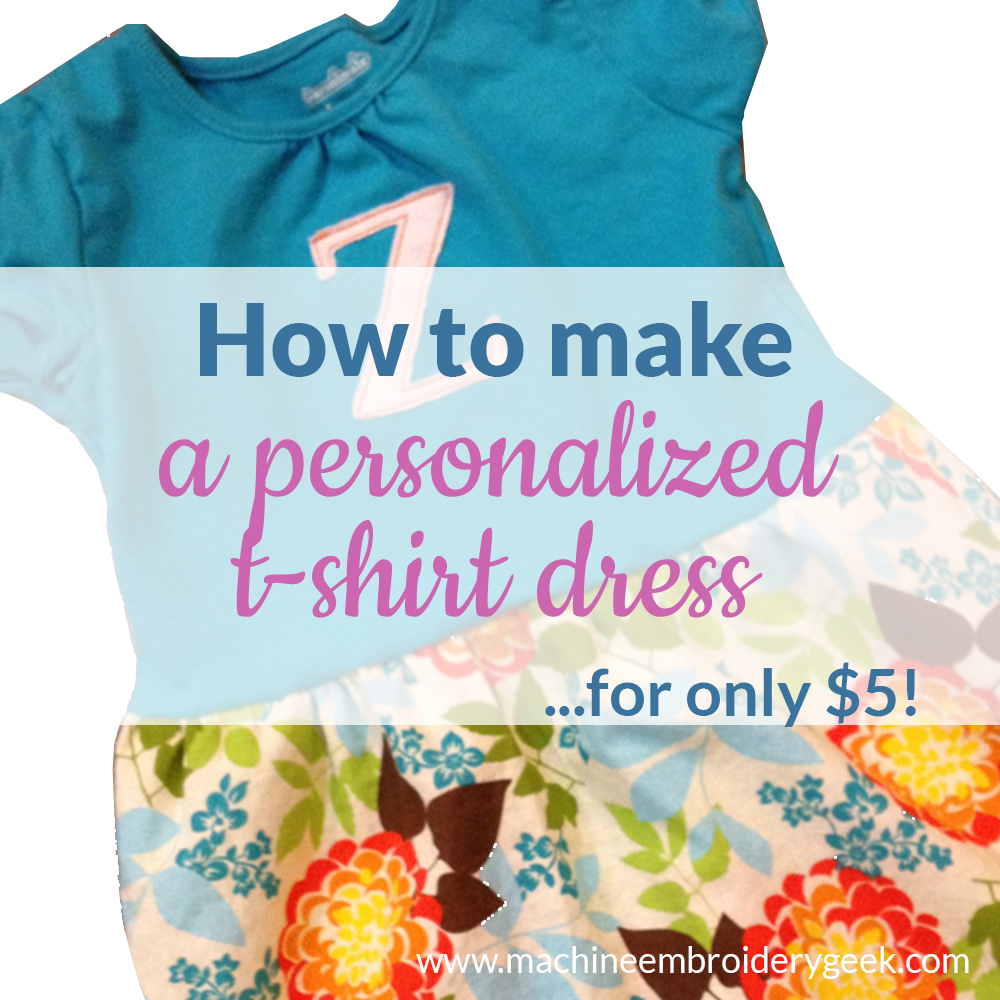
Hey there! Are you lucky enough to have little girls in your life who are willing to wear wacky dresses? Well – I used to, but now my girls are teenagers and are a bit less tolerant about wearing some of the things I make. Fortunately I have two young nieces who are right in the sweet spot for appreciating my crazy creations, and this little “Z” dress that I whipped up in less than an hour was a favorite of hers for a few years. And why wouldn’t she love it? How many other little girls have a “Z” dress???
Why the single initial monogram?
I personally am a fan of the single initial monogram because, unlike a traditional monogram, the single initial monogram can be passed down more easily. To me, it just feels a bit less wasteful. Big Zoe can hand-it-down to a little Zoe, or Zelda or Zadie.
Where to find a single initial monogram suitable for this t-shirt dress?
There are a lot of great single letter appliqués that would be appropriate for a project like this. I digitized my own Z that I used in this project. This particular Z is a raw edge appliqué, meaning that it should be appliquéd with a knit fabric (think old t-shirt) and trimmed around the stitches after the final round of stitching is complete. It has a casual look to it that is appropriate for kids wear. I have a few other single initial designs that I think look cute on a t-shirt appliqué, for example, one with a flower and a single initial in the middle, and one with whimsical dots around the outside. You can also personalize an appliqué design that has a large unadorned area with a single initial, like this darling ice cream cone appliqué design.
Another great aspect of making this dress is that it’s super simple and cheap to make. If you do a lot of embroidery and appliqué, you probably have plain t-shirts lying around and more than your fair share of fabric. For this dress I used some fabric that I bought at (gasp!) Walmart. And, actually, the t-shirt came from Walmart too, and I believe it cost $3.48! I like how this particular shirt has puckered sleeves as it gives it a more feminine, girly look.
[do_widget id=custom_html-5]
So… here’s how you make the monogrammed single initial t-shirt dress.
What you will need:
- 15″ of a 45″ wide lightweight cotton fabric for the dress skirt. 15″ is appropriate for a size 2T-3T dress. For a larger size, make the skirt piece slightly longer. Also – make sure the fabric truly is light. I have made the mistake of using not-so-light fabric and it really weighed the dress down. I love some of the retro florals available from various Etsy sellers. Check out these three for a whimsical look!
- An appropriately sized t-shirt
- Appliqué design,
- Appliqué fabric (like a piece of your husband’s undershirt that is in a rag pile)
- embroidery thread
- adhesive backed stabilizer
- cut away stabilizer
What to do:
- Stitch your single initial appliqué onto the center front top of a plain t-shirt that coordinates with the fabric of the dress bottom. Check out my centering tips!
- Trim about 25% of the length of the t-shirt off the bottom. This will give the dress more of an empire waist.
- With right sides together, fold the skirt fabric in half along the short edge. Mark the fold point of the skirt at the top edge with a disappearing ink pen.
- Stitch the skirt fabric into a tube by stitching along the 15″ edge.
- Create two rows of stitching all along the top edge of the skirt tube using a long stitch length of about 4. Do not back stitch when you create these rows of stitching, and you want to leave long tails on either end. Knot the front and back of both of the rows of stitching on one end, then gently pull on the other end to gather the fabric. If you are not familiar with how to gather fabric, check out this tutorial. Your goal is to reduce the skirt fabric down to the width of the bottom edge of the t-shirt by introducing gathers. Once you have gotten the skirt to be about the width of the t-shirt, knot of the tails of the stitching to keep the gathering in place
- With right sides together, pin the bottom edge of the t-shirt to the gathered edge of the skirt. Start by pinning the fold point and the seam you stitched on the skirt to the two side seams of the shirt. Then continue to pin the shirt to the skirt, distributing the gathers of the skirt along the edge of the shirt. Try not to stretch out the shirt as you are connecting the two pieces.
- Now, stitch the shirt to the skirt. Oftentimes when I stitch a gathered edge to another piece, I create some awkward folds. So I simply check out how my seam looks and use my seam ripper to undo any small ugly portions and then restitch in those areas.
- Hem the bottom of the skirt.
- Voila! You are have made a darling, appliqué t-shirt dress!

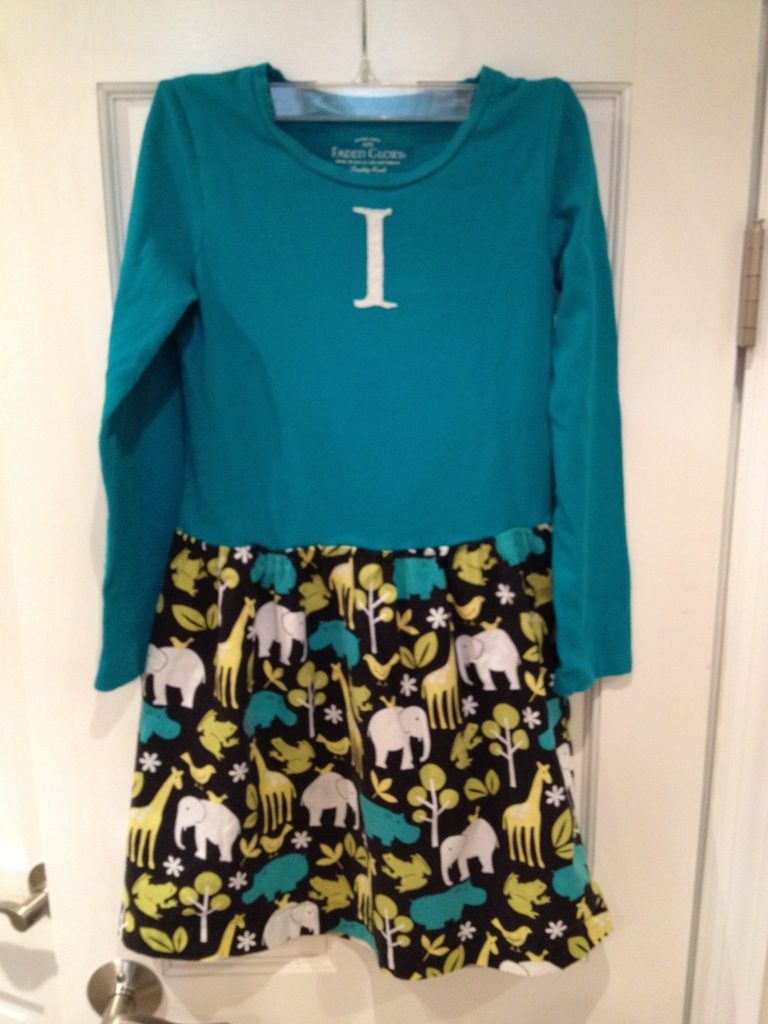
Just writing this post is making me long for the days when my girls would wear these dresses. Let me indulge for a minute and share some of my previous creations. I made a long sleeve version back in the day for my wacky daughter, Ilse – which, by the way, she wore every week in 1st grade.
Ah, time flies! Make the wacky, monogrammed t-shirt dresses for your girls when you can!
Want to remember this? Post “How to make a sweet, personalized monogrammed t-shirt dress using your embroidery machine” on your favorite Pinterest board!