Disclosure: Some of the links on this site are affiliate links. This means that if you click on them and make a purchase, I may earn a small commission at no extra cost to you. Please know that I only recommend products and services I trust and use myself.
I only live a few miles from my mom and dad which and they actually still live in the home where I grew up. Great, right? Yep – it’s great until your kids discover all your old stuff that’s still lingering around in your childhood bedroom. One of the treasures my two girls recently uncovered was my old pink, gingham tooth fairy pillow from the 1970s, and they confiscated it. I hadn’t seen that thing in YEARS….
I vaguely remember my mom buying my sister and me these tooth fairy pillows at a craft show in the 1970s. She must have pre-orded them from the artist because our names were stitched on the front of them. I have no idea. But the bottom line is, my mom DEFINITELY got her money’s worth. Those little pillows sat on our beds long after we lost all our teeth.
After a short trip down memory lane, inspiration struck. Jeez – i could totally make a tooth fairy pillow and even personalize it on my embroidery machine!
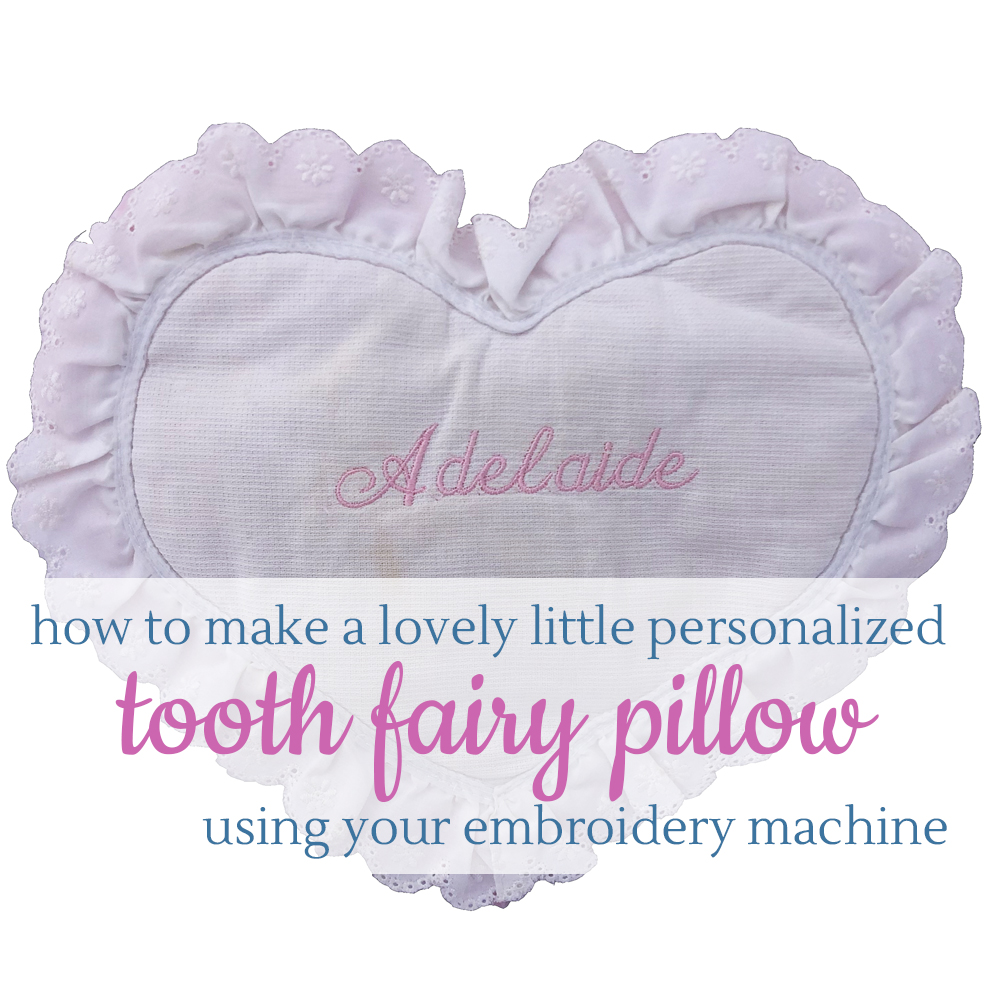
If those 1970s tooth fairy pillows were good enough for my sister and me, they were good enough for my two little girls! I decided to recreate those tooth fairy pillows and personalized them with my embroidery machine.
[do_widget id=custom_html-5]
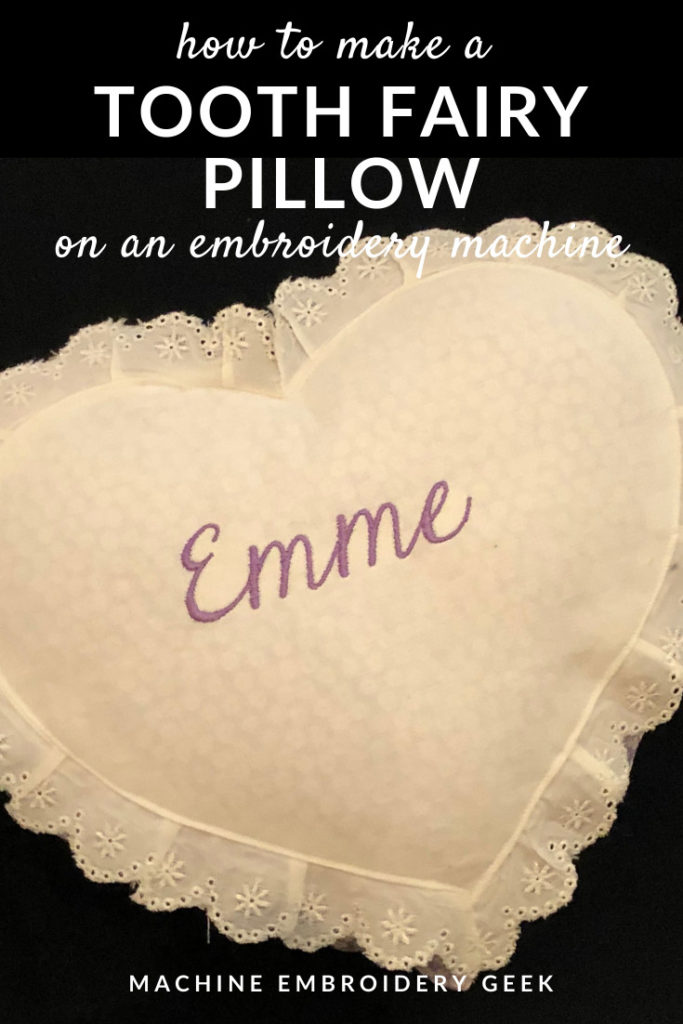
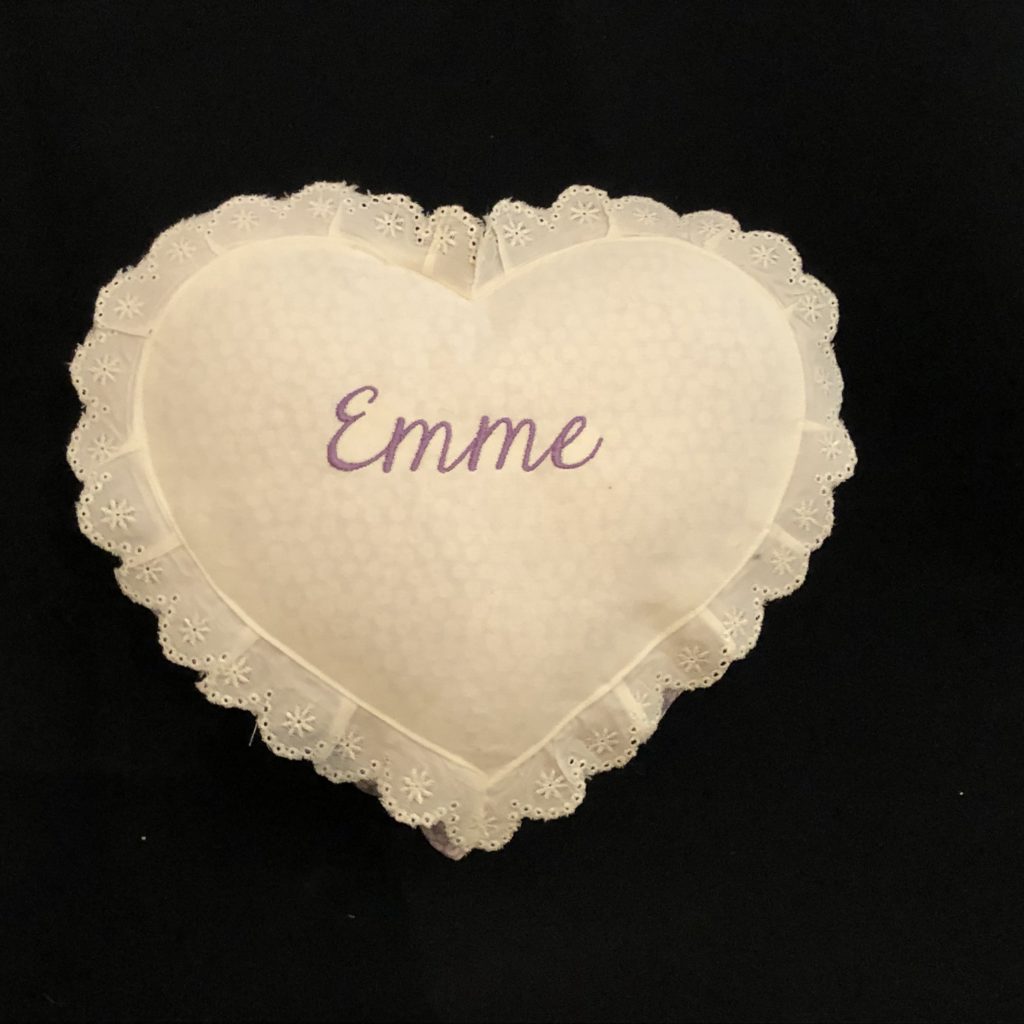
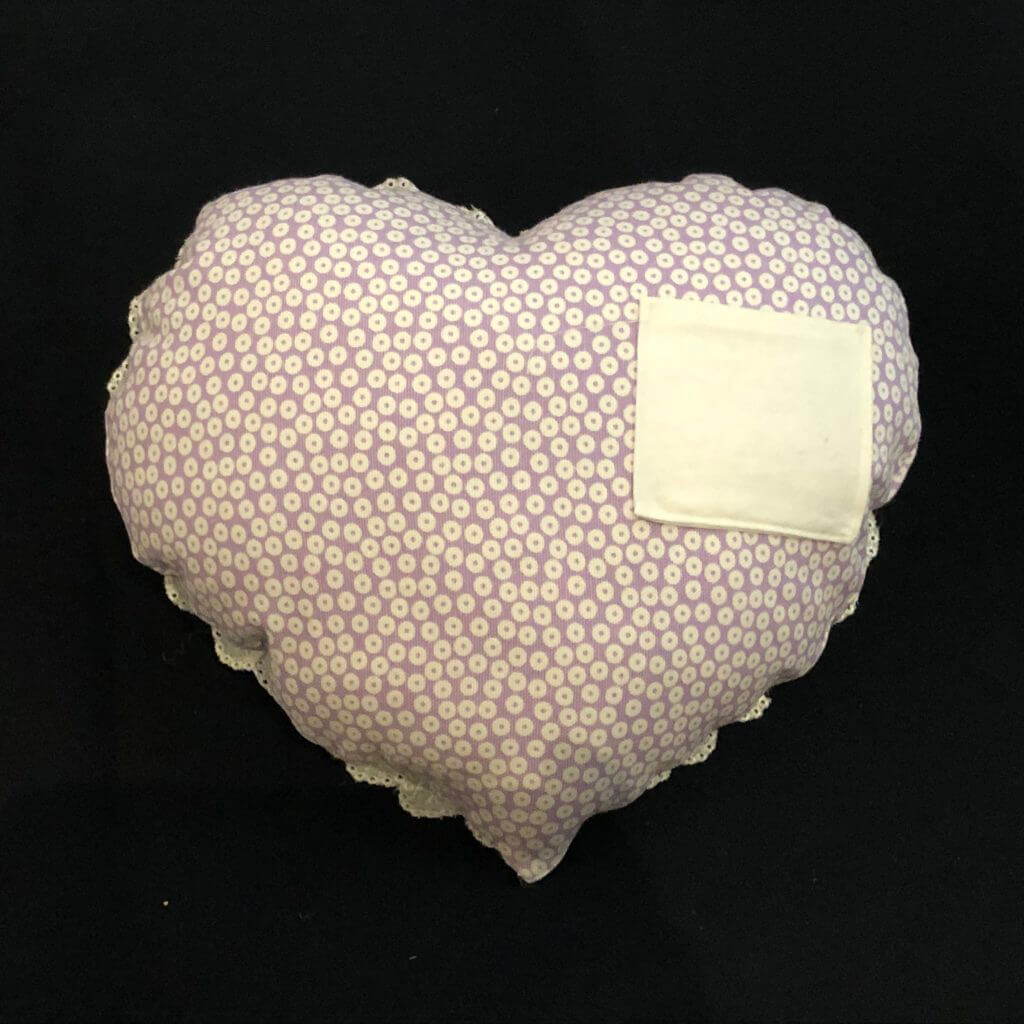
My redesign of the original tooth fairy pillows
I based the design of my tooth fairy pillow on the original pillow: pink and white gingham heart shaped and lace trimmed with a white panel on the front on which their names are embroidered. And, most importantly, just like my original pillow, I put a small white pocket on the back to store the tooth and collect the cash.
My girls loved their tooth fairy pillows and still use them as they lose their last few teeth. Although I’ve gotten a bit lazy these days. Instead of putting cash in the back pocket, I just Venmo them. Seriously, they are teenagers now.
Tooth fairy pillows make a great gift
For the friends and family members who are still enthralled by the notion of a tooth fairy, these sweet tooth fairy pillows make a great gift. My updated versions of the tooth fairy pillows were such a hit with my girls that I decided to make some for the daughters of my childhood best friend who immediately recognized the inspiration. After all, she had seen the original pillow on my bed for years. Her daughters loved them too.
I’ve also realized that tooth fairy pillows make a great gift for a new baby because:
- The baby probably doesn’t have a tooth fairy pillow yet. I mean – who is thinking of losing teeth when a baby is just born?
- Tooth fairy pillows are cheap and quick to make
- They are easy to embroider (because you are embroidering on a flat piece of fabric and not inside some teeny tiny onesie).
- This tooth fairy pillow personalized – and everyone loves a personalized gift, right?
Have I convinced you yet? Are you ready to make one yourself for the sweet little person in your life? Here’s how.
How to make a tooth fairy pillow and personalize it with your embroidery machine
Supplies Needed
- 1/3″ yard of gingham (or other) fabric
- 1/3″ yard white cotton broadcloth fabric
- 1/3″ yard interfacing
- 1 yard eyelet trim
- white sewing thread
- embroidery thread for stitching out the name
- fiberfill
Steps
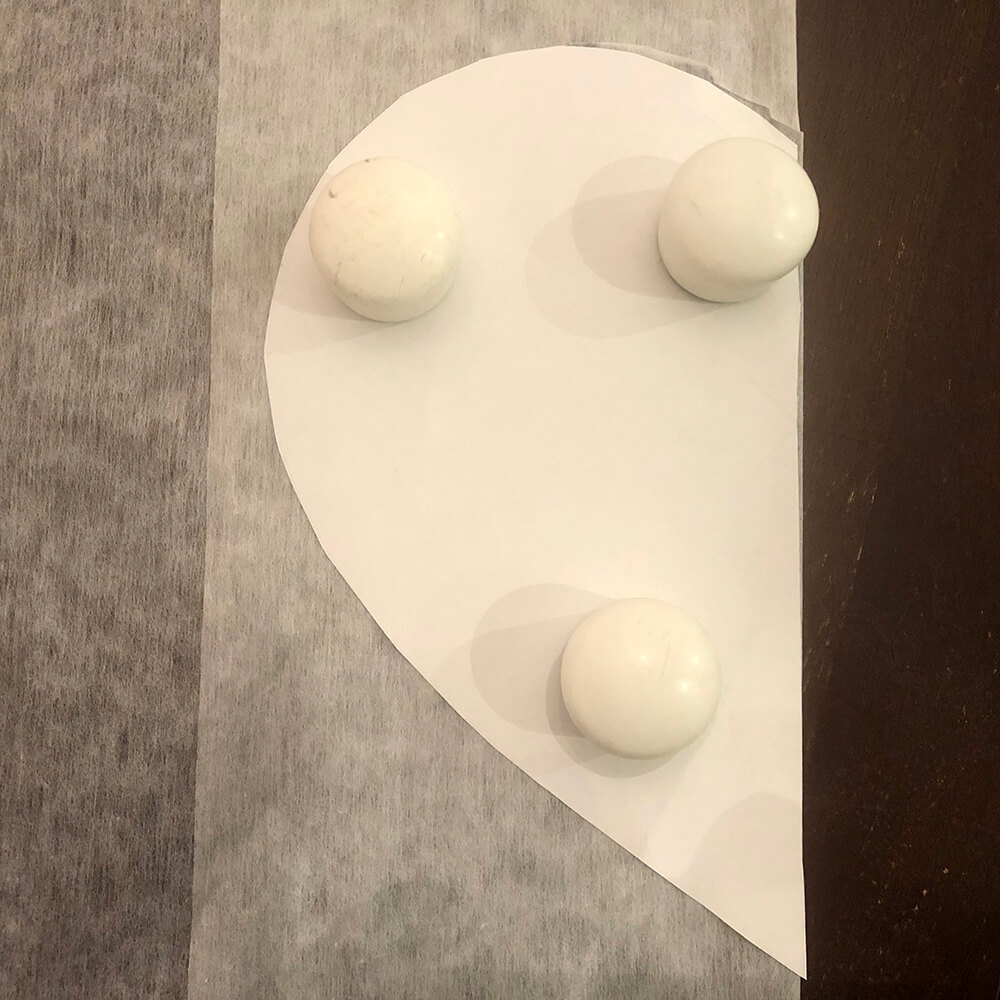
Download and print the PDF pattern. Note: to access the PDF pattern, please subscribe to the blog and a link to the resources page will be emailed to you.
1) Cut two pieces of gingham (or other) fabric on the fold
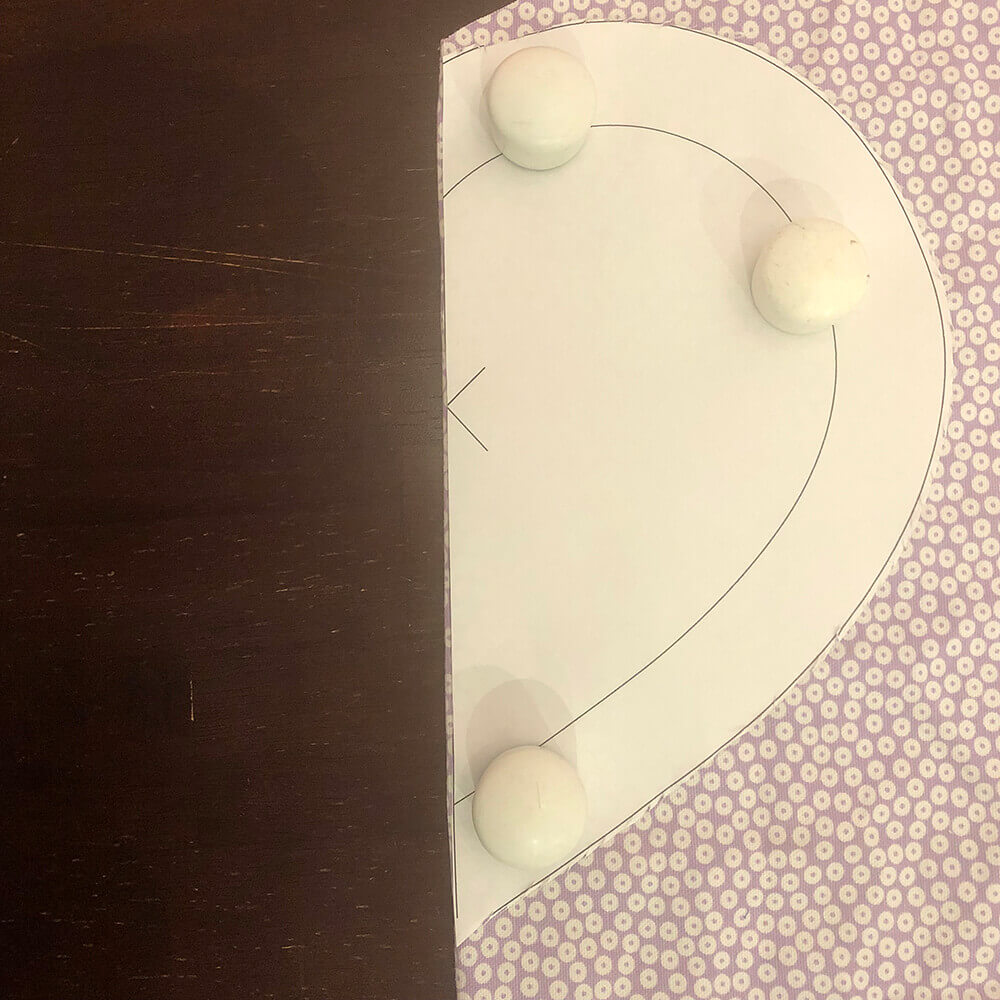
2) Cut one piece of white cotton broadcloth fabric for inset
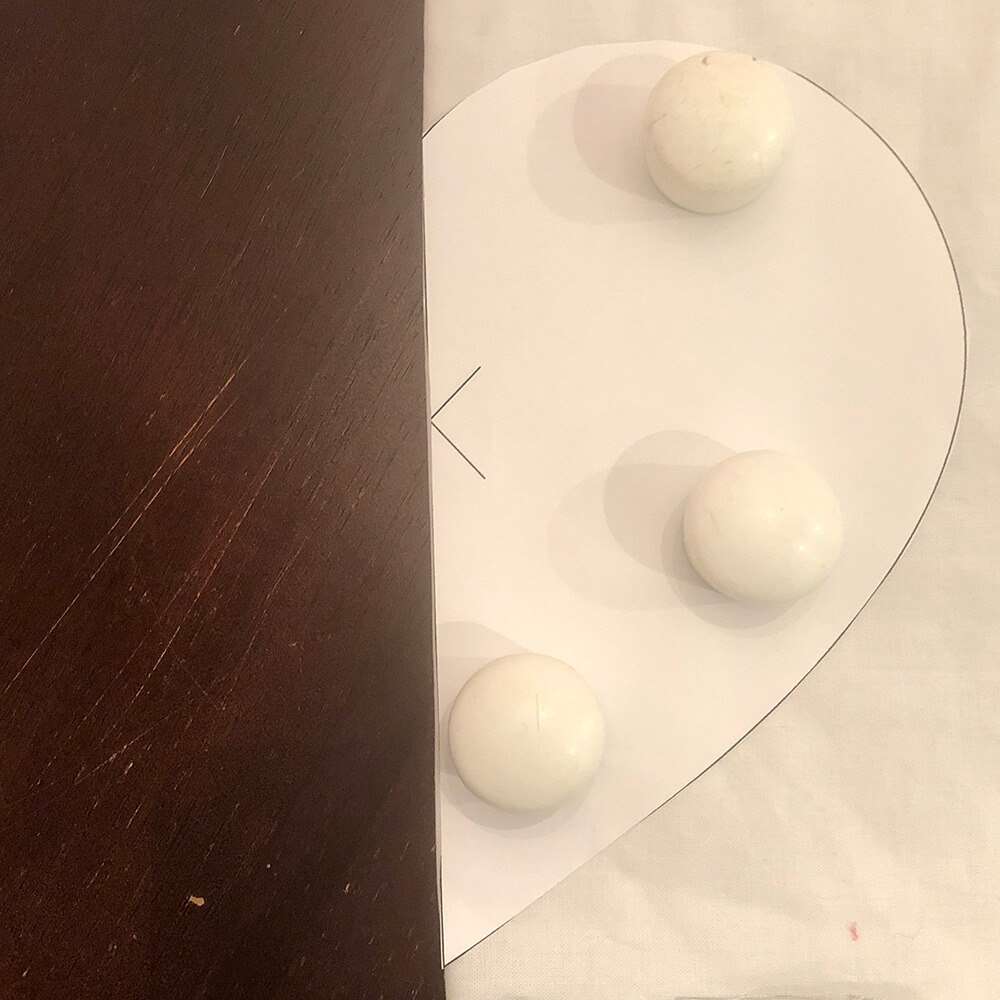
3) Cut one piece of interfacing using inset cut line
4) Fuse interfacing piece to the wrong side of the white broadcloth
5) With high sides together, pin the trim around the outside of the white cotton broadcloth fabric / interfacing heart. At the point of the heart, stitch the two ends of the trim together, then pin down.
6) Stitch the eyelet trim to the white cotton broadcloth fabric heart
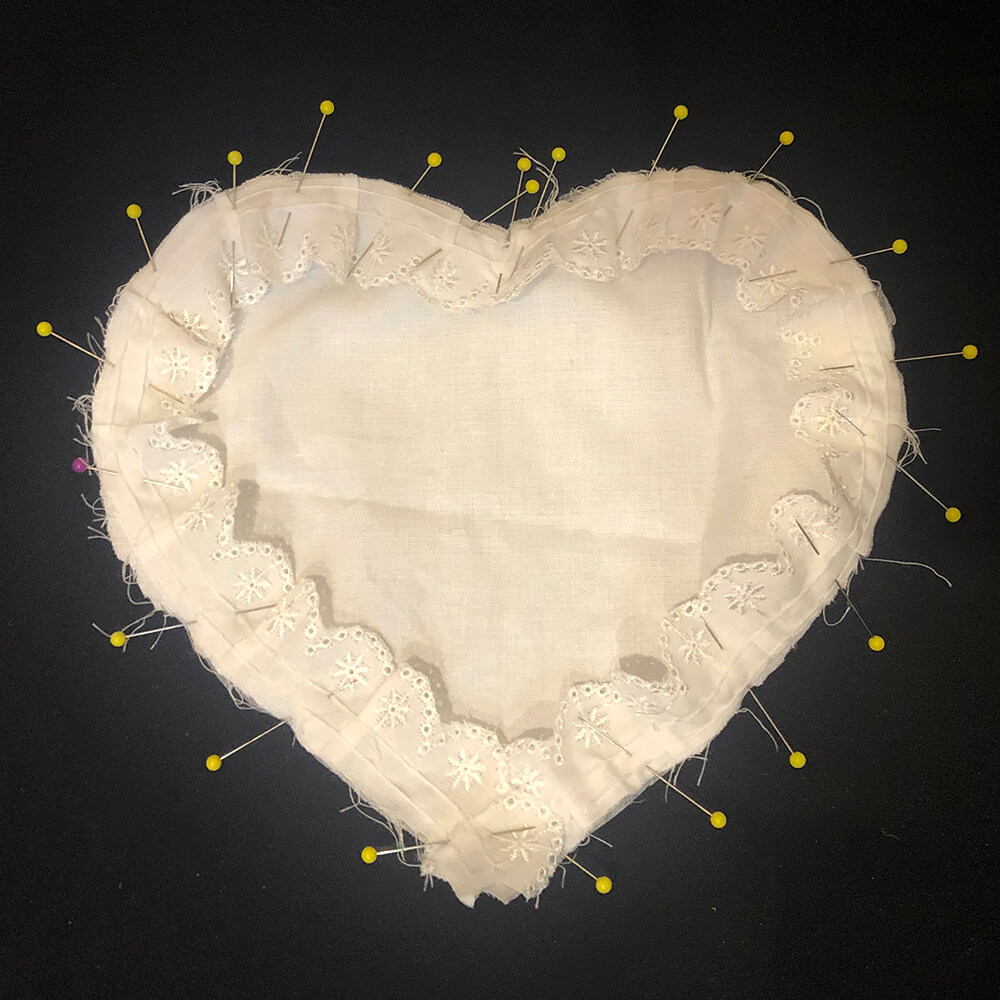
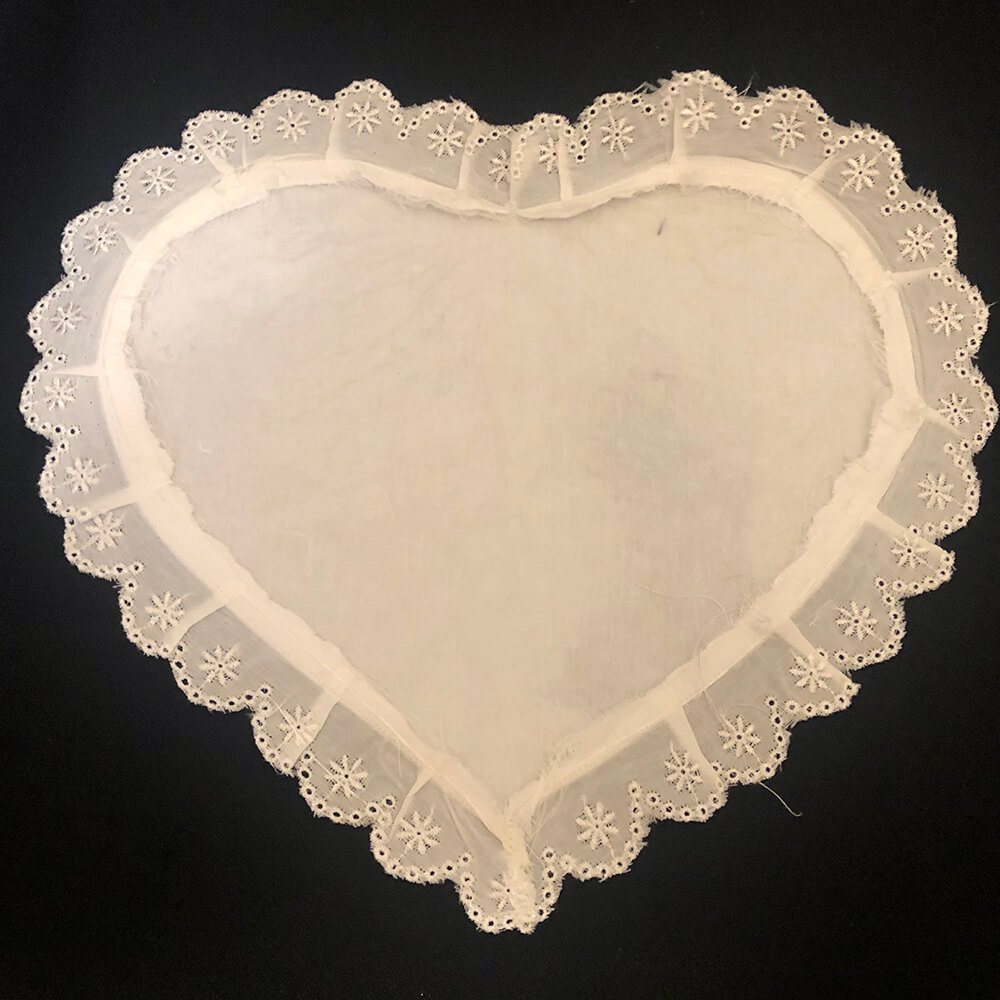
7) Trim seam allowances and press seam toward the center. Create a small slit in the seam allowance at the top of the heart to press it flat.
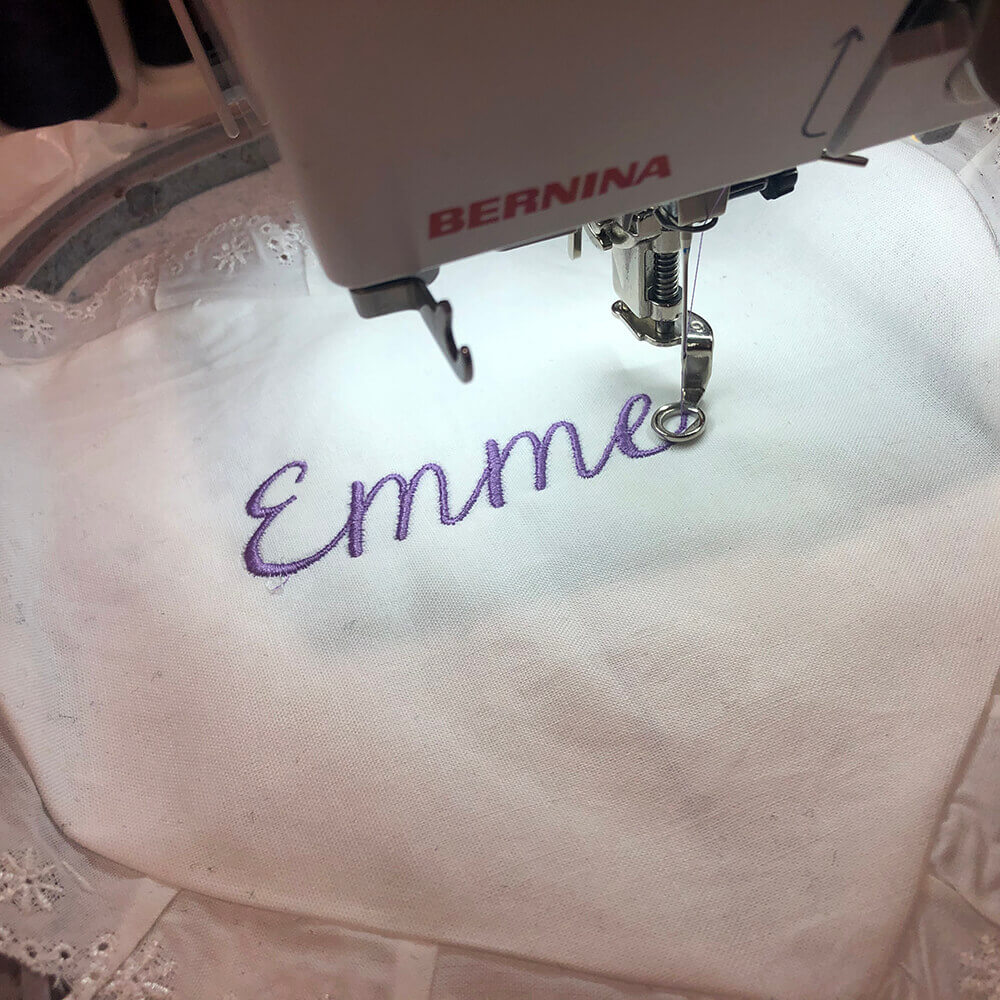
8) Stitch out name on front of white panel.
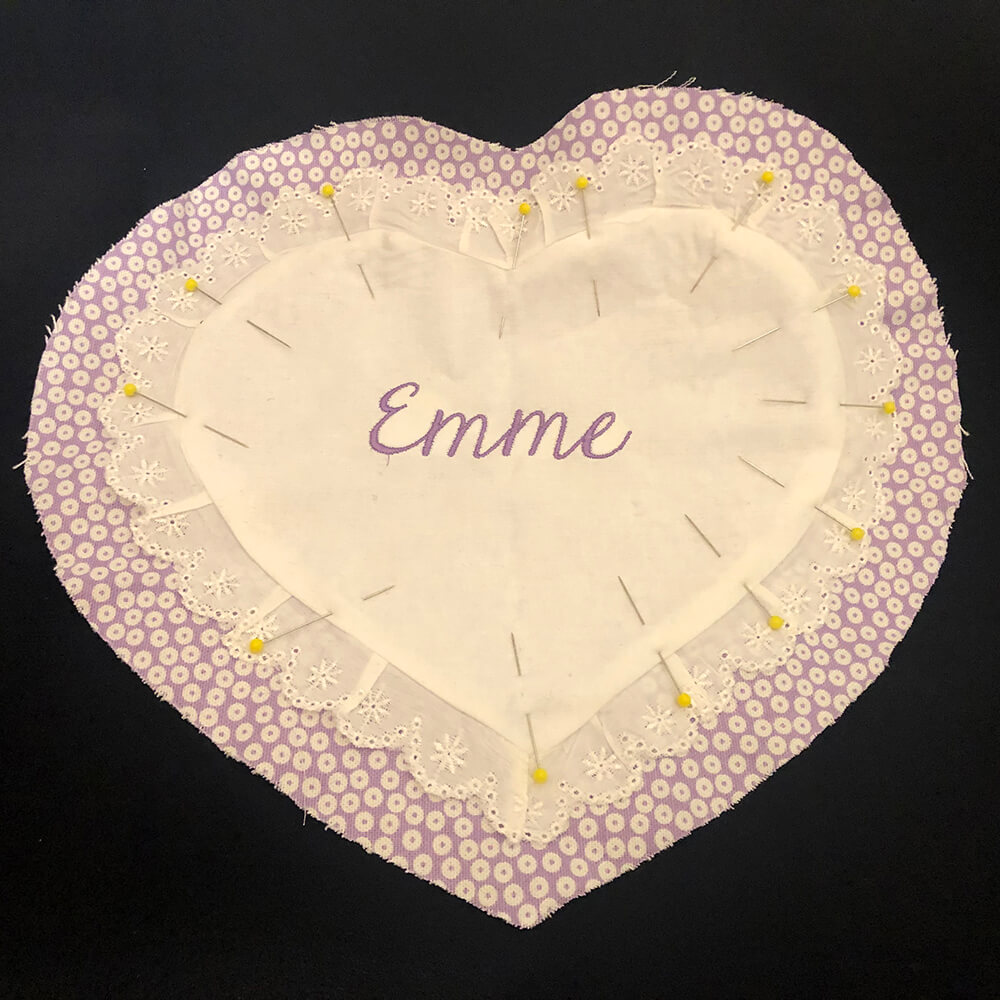
9) Pin white panel to gingham (or other) fabric front piece. Top stitch down approximately 1/4″ in from seam of trim and white fabric.
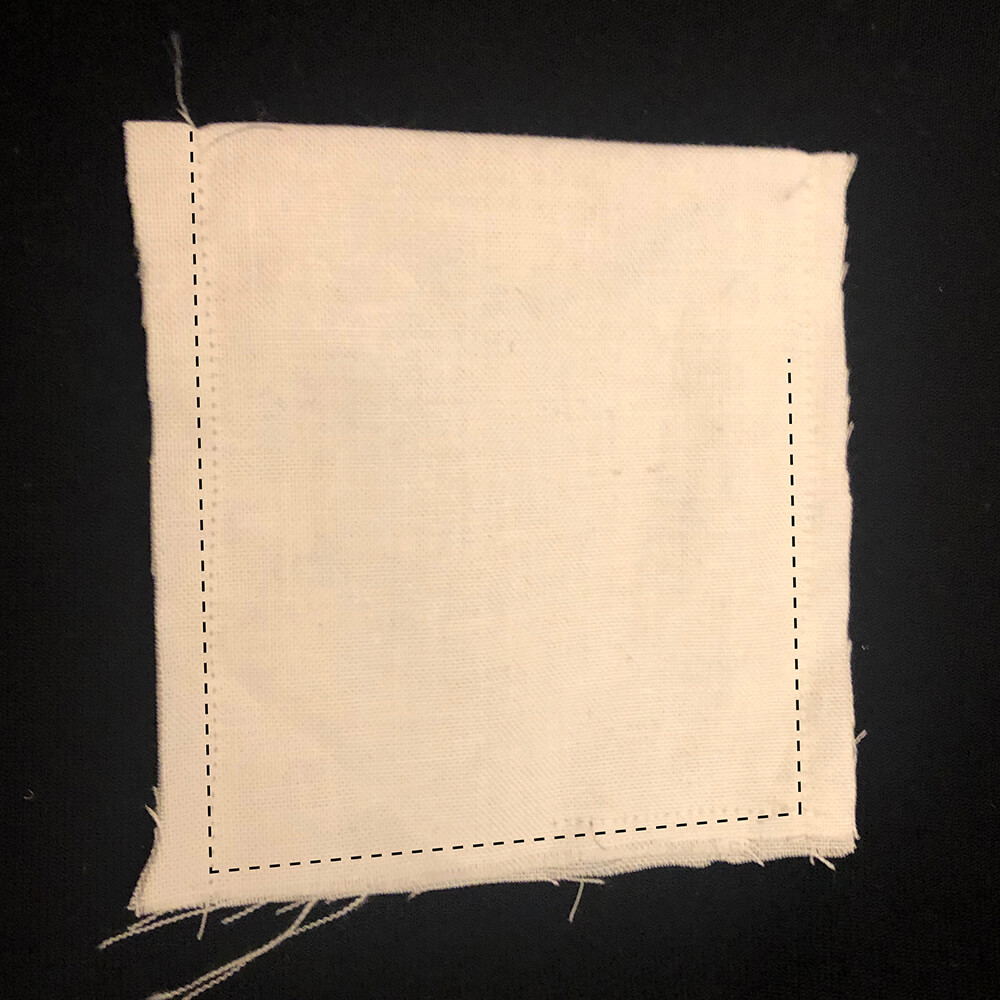
10) Fold pocket in half, press and stitch together leaving at least 1″ to turn it right side out. Then press. You don’t need to slip stitch the pocket closed because you will top stitch over it which will secure it in place. Note: in this picture, I have already trimmed the seam allowances. The pattern piece is designed to be stitched with a 5/8″ seam allowance.
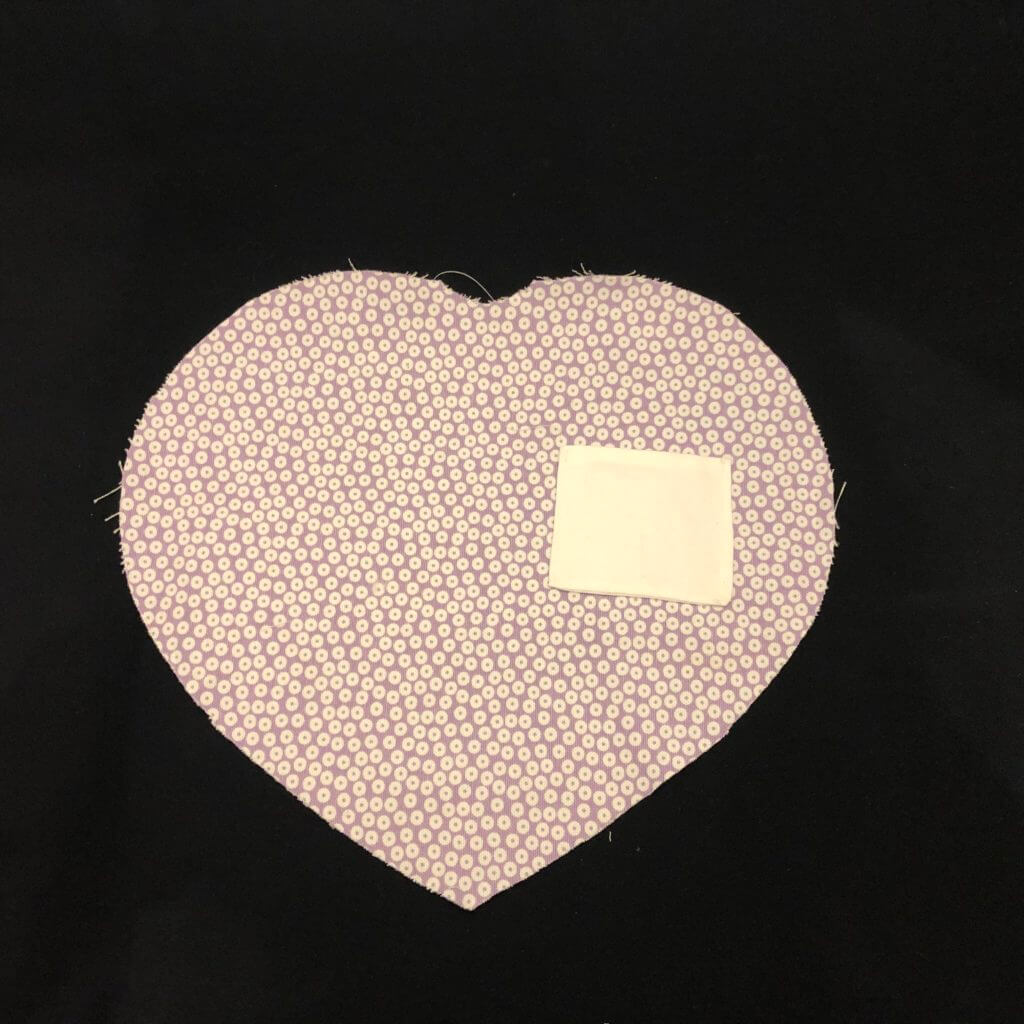
11) Pin the pocket onto the back piece of the gingham (or other) fabric pillow, using the guide on the pattern for placement. Top stitch the pocket onto the back pillow piece, leaving the top edge open. Reinforce your stitching at the top edge of the pocket. This pocket will get tugged on quite a bit with all the teeth and money going in and out of it.
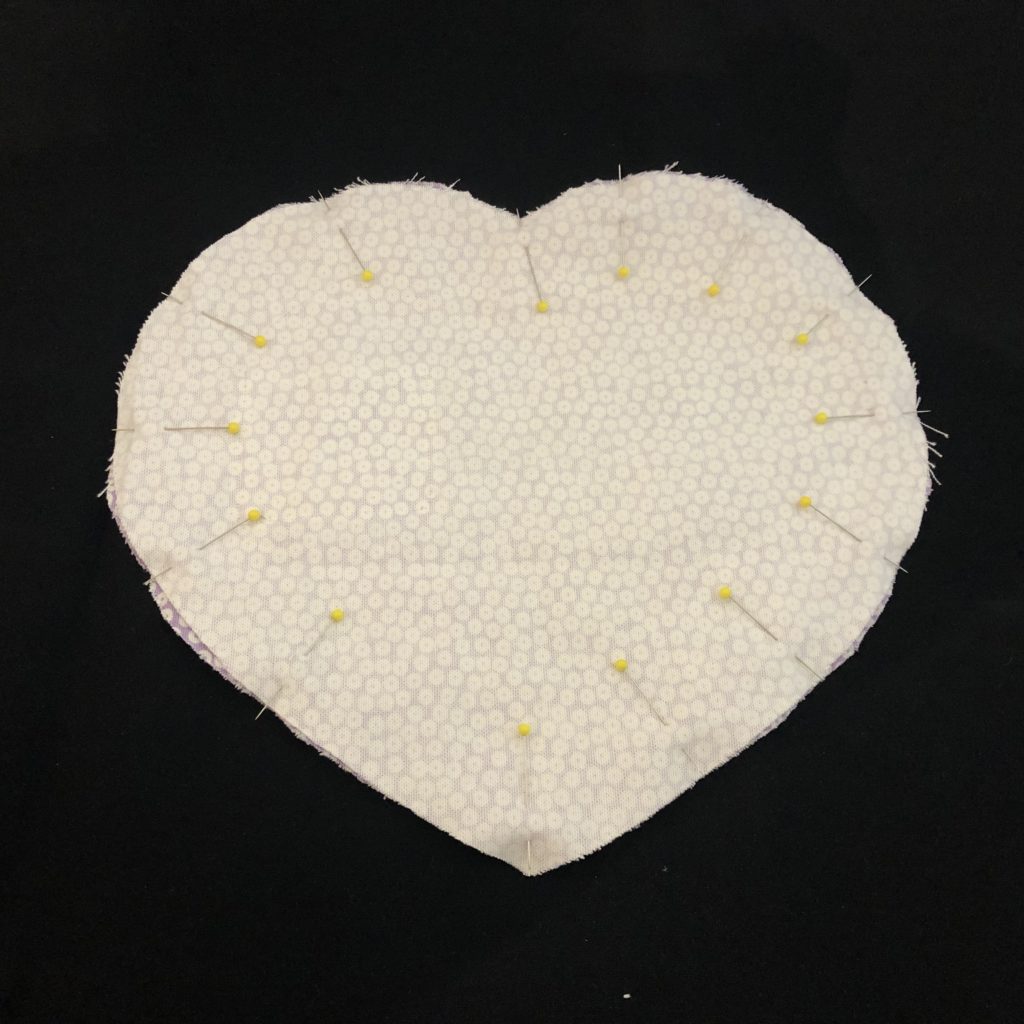
12) With right sides together, pin the front gingham (or other) fabric to the back gingham (or other) fabric . Pin. Then stitch them together, leaving 2″ unstitched for turning the pillow right side out.
13) Stuff the pillow with fiberfill. Slip stitch hole closed
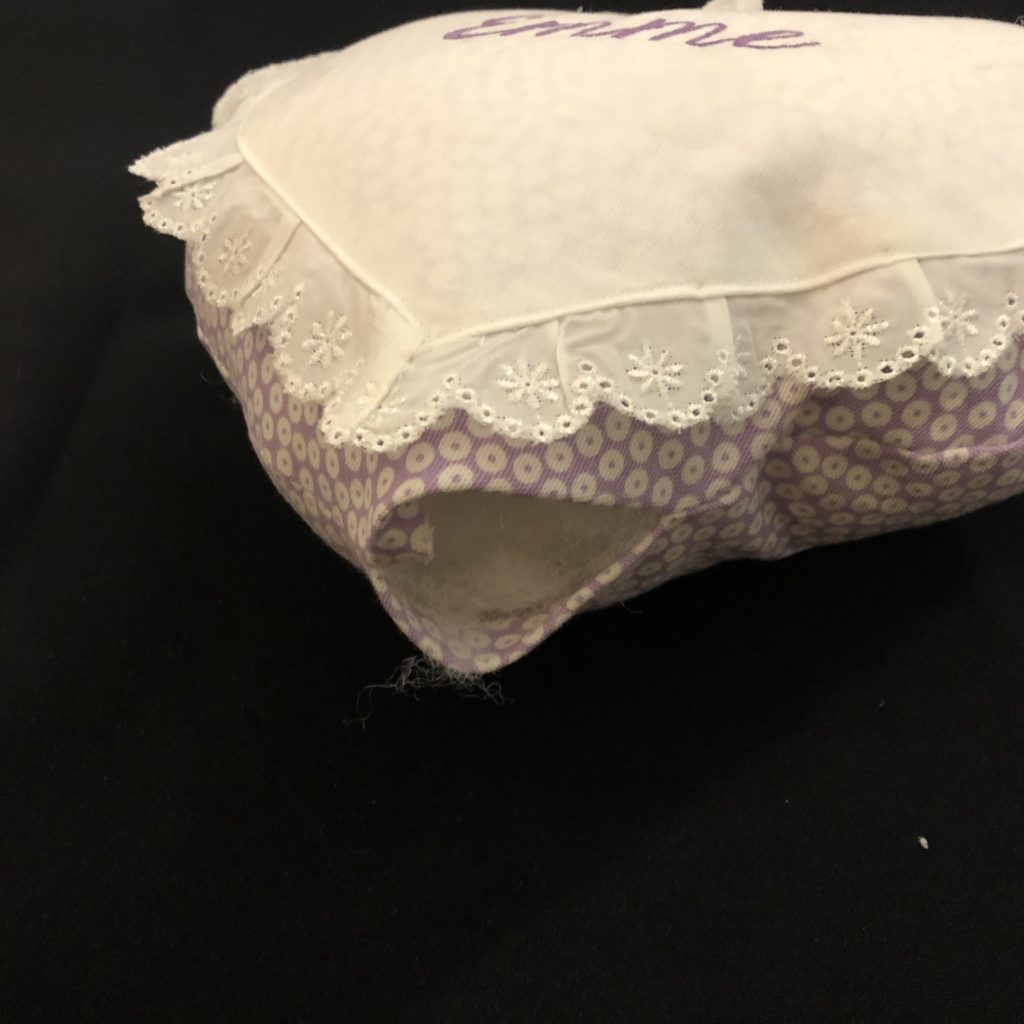
14) Enjoy your new tooth fairy pillow!
Want to remember this? Post “How to Make a Tooth Fairy Pillow Using Your Embroidery Machine” on your favorite Pinterest board!