Disclosure: Some of the links on this site are affiliate links. This means that if you click on them and make a purchase, I may earn a small commission at no extra cost to you. Please know that I only recommend products and services I trust and use myself.
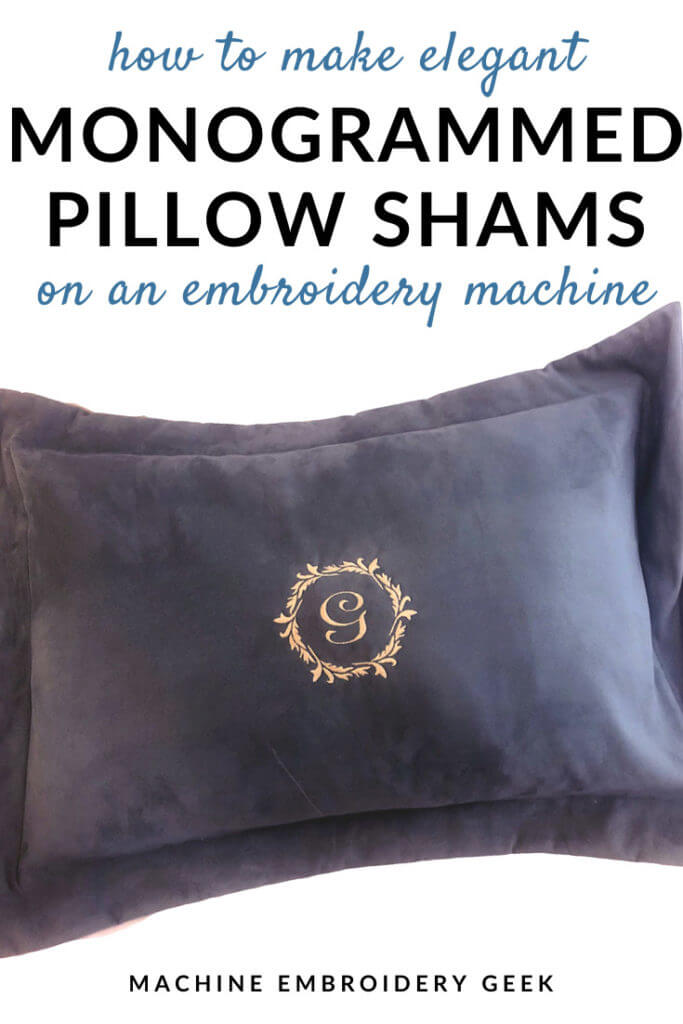
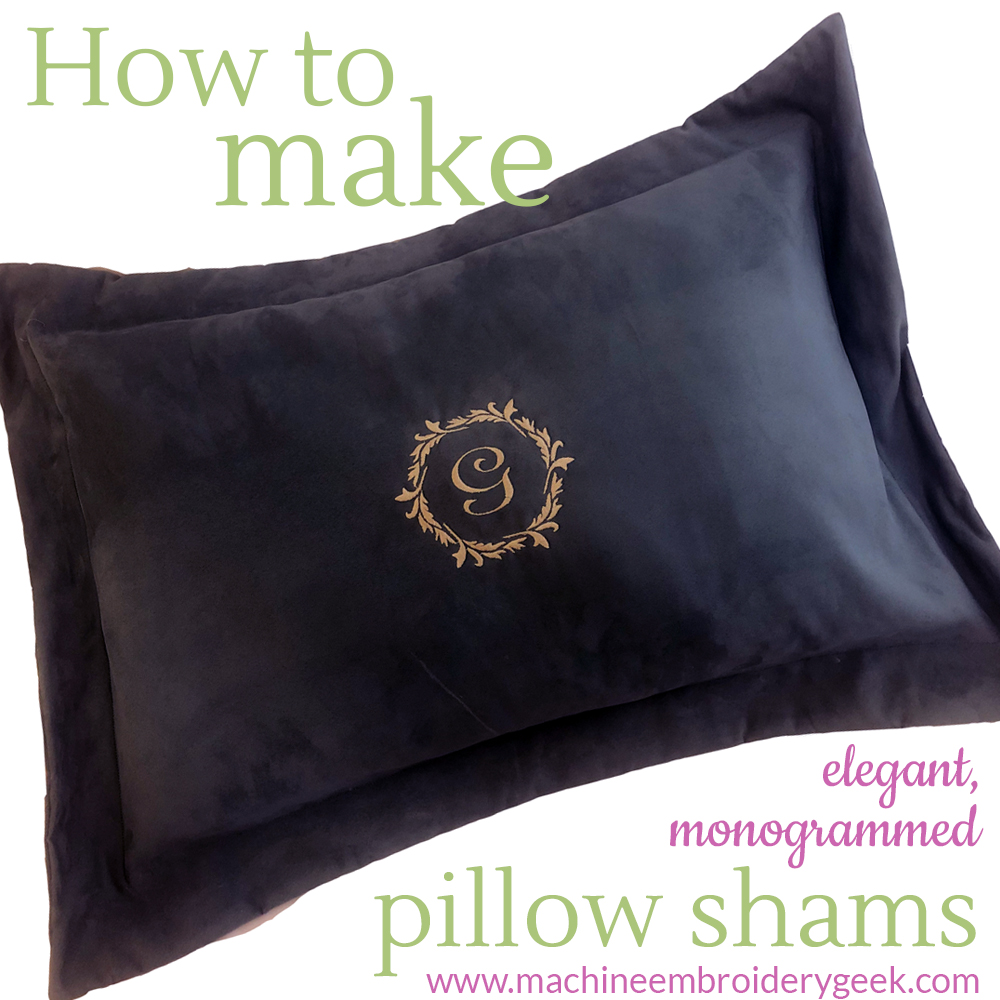
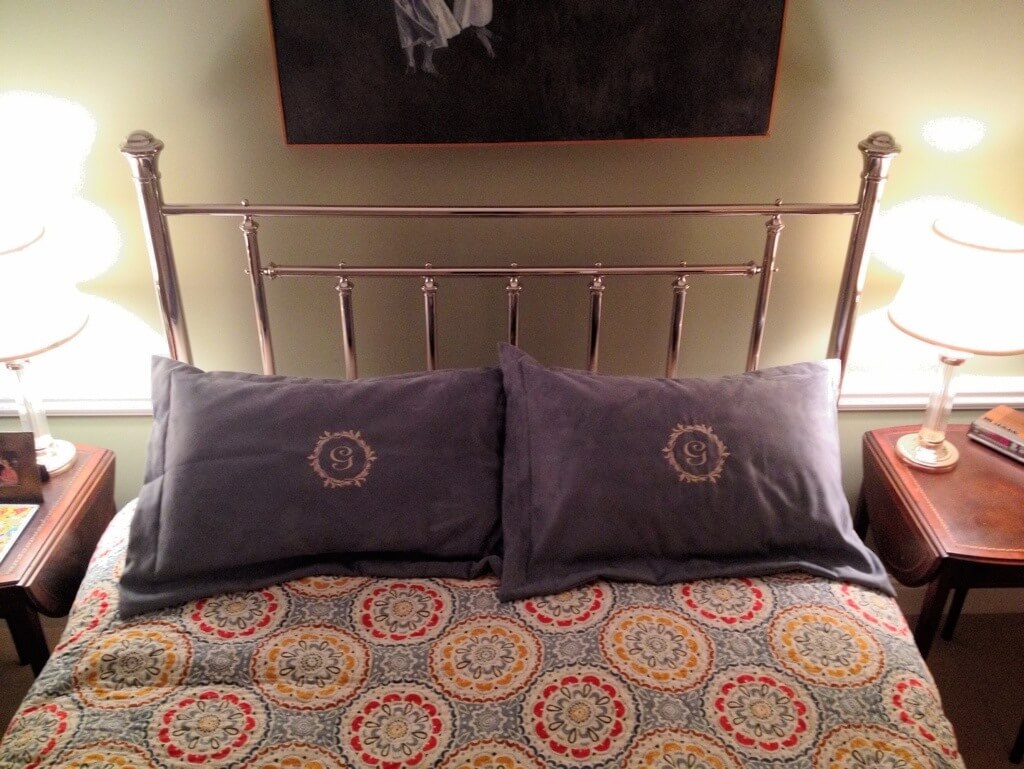
Do you ever have one of those projects that turns out better than you could have ever imagined? For me, those experiences are few and far between. It’s such a bummer to overspend your money and time on a project that turns out like crap. But when it all works out better than expected, that is THE BEST – which is EXACTLY why I’m especially grateful for this project and want to share how to make monogrammed pillow shams.
The pillow shams I made reside in my guest room, providing a pop of color and a touch of elegance to a room filled with leftover furniture from other parts of our house. The best part about this project is that I bought the fabric from the remnant bin at my favorite local decorator fabric store (Anatol’s fabric outlet) for less than $10.
Products mentioned in this post
- 9″ of 5/8″ wide velcro
- Elegant single initial embroidery design
- Basic tools: Thread, pins, fabric scissors, sewing and embroidery machine
- King or queen-sized pillows for inside the shams
Why make pillow shams?
Pillow shams serve a few purposes. They look pretty, and they protect your pillow from getting dirty. A If you have expensive feather pillows or if you just want to prolong the life of your pillows, pillow shams are a great way to do it.
Pillow shams also can be used to cover less desirable looking and feeling pillows. I have a few feather pillows that I love but they have seen better days. I cover them with pillow shams and they look fabulous.
An extra set of pillows on a bed covered in pillow shams also can be used for support if you want to sit up in bed and read.
Why not buy pillow shams?
Pillow shams can be expensive, ranging anywhere from $20 to $100 each. If you have several pillows that need shams, the expense can really add up. Making your own pillow shams is a great way to get the look you want without spending a lot of money.
It’s also a lot easier to monogram flat pieces of fabric rather than trying to access the front of a pillow sham that has already been sewn together.
What kind of fabric should I use?
For this project, I used an upholstery remnant with a velvet feel. I love the way it feels – it’s soft and smooth, but is much more stable than regular velvet so much easier to sew on.
If you plan to wash your pillow shams often, look for a fabric that is machine washable and wrinkle resistant. I would avoid using silk or other delicate fabrics unless you plan to have them dry-cleaned.
I would suggest choosing a fabric that lends itself well to embroidery. The upholstery fabric I chose was super easy to embroider on. It didn’t pucker or stretch at all.
Finally, I would choose a solid colored fabric for this project. You want the monogram to take center stage. A patterned fabric might detract from the embroidery.
How to make the monogrammed pillow shams
These pillow shams have an extra border around the outside. This will make the pillows – covered with the pillow shams – a bit larger than the pillows themselves. I feel like this gives them a bit more presence for a more formal look.
Materials needed (to make 1 pillow sham):
- Fabric to match your bedroom decor 1 -1/3 yards of fabric. This length of fabric will be enough for regular sized pillow shams or king size pillow shams.
- 9″ of 5/8″ wide velcro
- Elegant single initial embroidery design
- Basic tools: Thread, pins, fabric scissors, sewing and embroidery machine
- King or queen-sized pillows for inside the shams
Cut out your fabric
Cut 3 pieces of fabric. 1 front piece ( 34-1/4″ x 24″), and two back pieces (18-5/8″ x 24″).
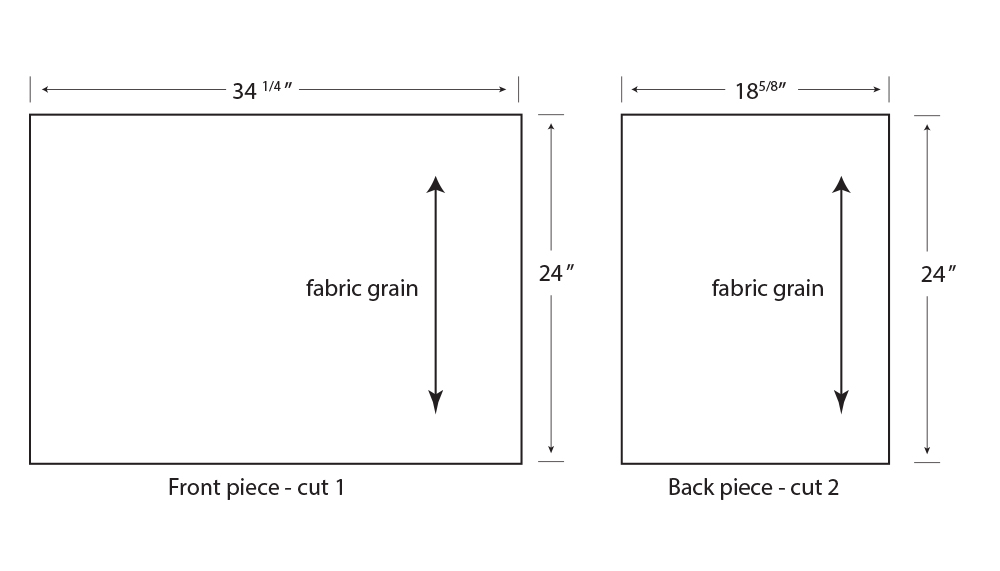
If you are making a king size pillow sham, the shams will need to be wider. For king sized pillow shams, cut the front piece 10″ wider (44-1/4″ x 24″) and the back pieces 5″ wider (23-5/8″x 24″).
Monogram the front piece of your pillow sham
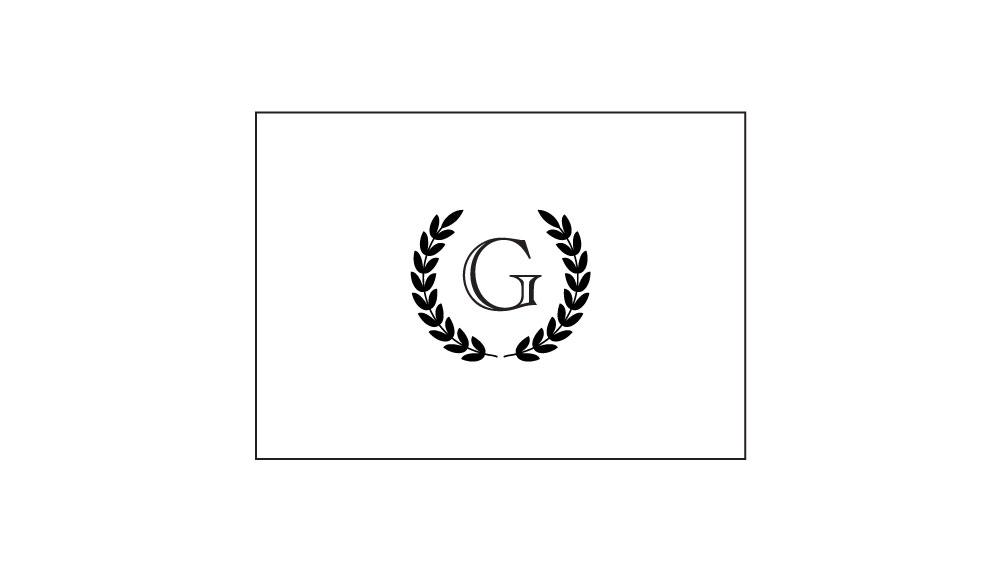
Stitch out an elegant monogram design in the center of the front pillow sham. I used the Roman Wreath design by Meringue Designs, but this was prior to me digitizing a few elegant monogram wreaths of my own which would be suitable for this project. Check out the elegant wreath with decorative branches and modern single initial wreath. Both of these designs would work great for this project.
If you are new to machine embroidery and struggle with centering designs properly on your project, check out how I center an embroidery design on a t-shirt using the folding method. Once you master this method, perfect placement is a cinch.
The decision to either hoop or float your project on your embroidery hoop should be driven by the fabric you are working with. Personally, I float just about everything, so that’s what I did with this project as well.
Stitch in your velcro

Finish inside edges of back pieces by folding over 1/2″, pressing and stitching, then folding again 1″ and pressing and stitching.
Cut the velcro into 3 separate 3″ pieces. Separate the hook side of the velcro from the loop side of the velcro.

Stitch them down (hook and loop facing up) as pictured below. The hook side of the velcro should be stitched on the finished edge of the wrong side of one of the back pieces and the loop side of the velcro should be stitched on the finished edge of the right side of one of the back pieces.
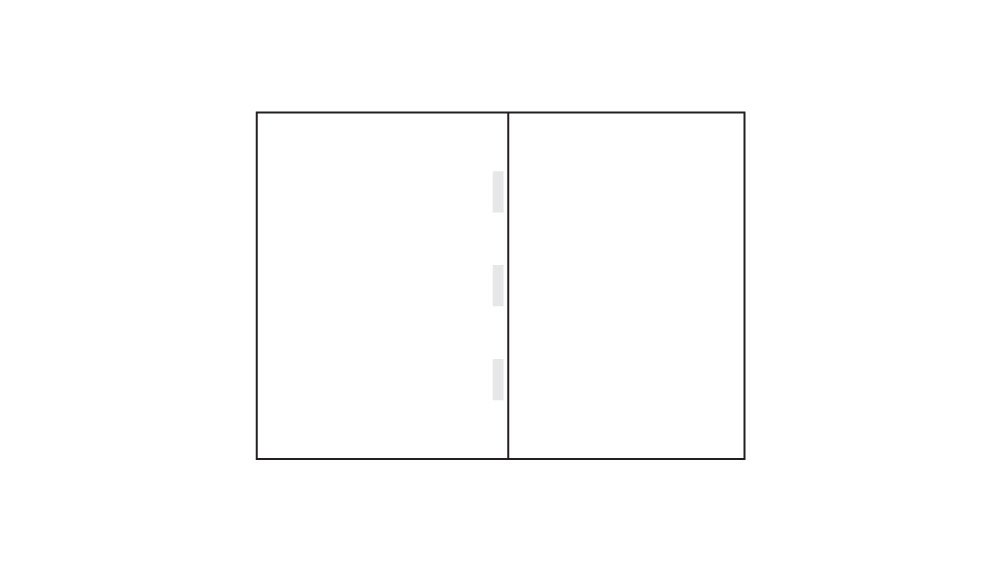
Flip over the back piece on which you stitched the velcro on the wrong side so that you can connect the two back pieces using the velcro to hold them together.
Attach the front of the pillow sham to the back
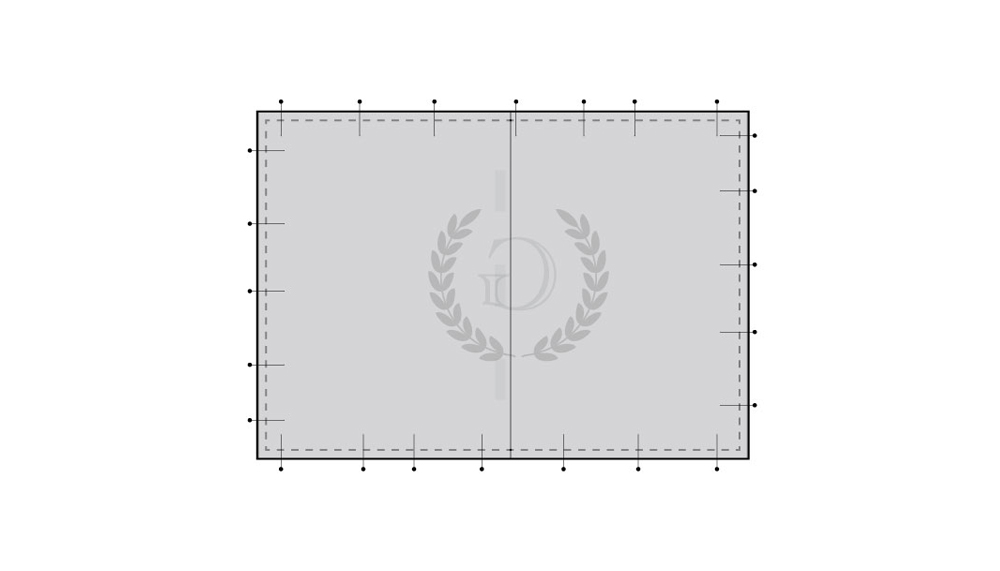
Now, place the front piece on top of the back pieces, with right sides together and pin all the way around the outside of the pieces. Stitch the pieces together, leaving about 1/2″ seam allowance.
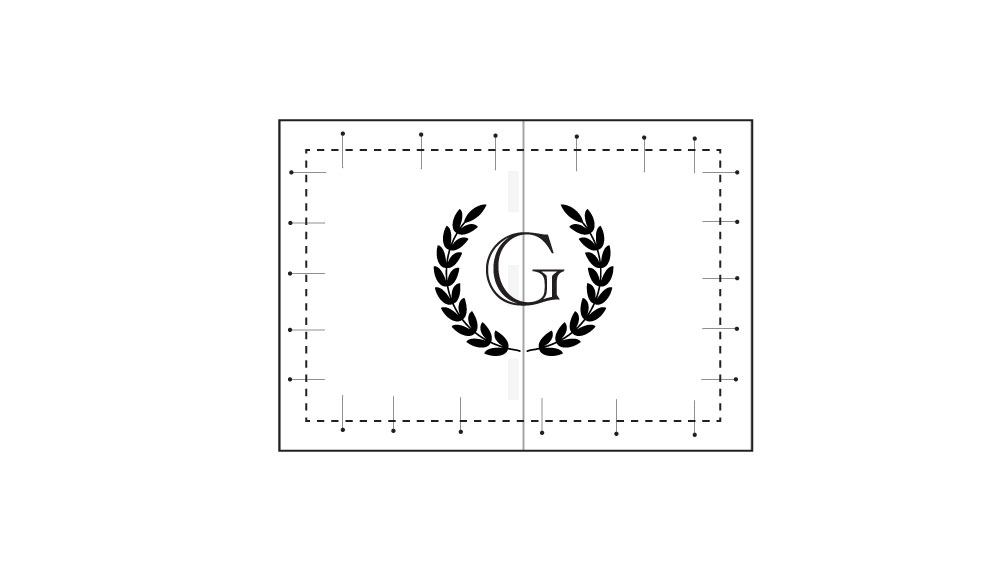
Trim corners of seam allowances, then turn sham right sides out (by undoing the velcro opening) and press. Using a disappearing ink pen, draw a line 2″ inset from the finished edge, and pin as pictured. Stitch along the line you drew.
Stuff pillow sham with pillows
Now stuff the pillow sham with your second tier pillows you have no interest in sleeping on (or buying some new pillows) and enjoy!
Want to remember this? Save “How to make monogrammed pillow shams with your embroidery machine” on your favorite Pinterest board!