How to combine embroidery designs using SewWhat-Pro
This site contains affiliate links to products. We may receive a commission for purchases made through these links.
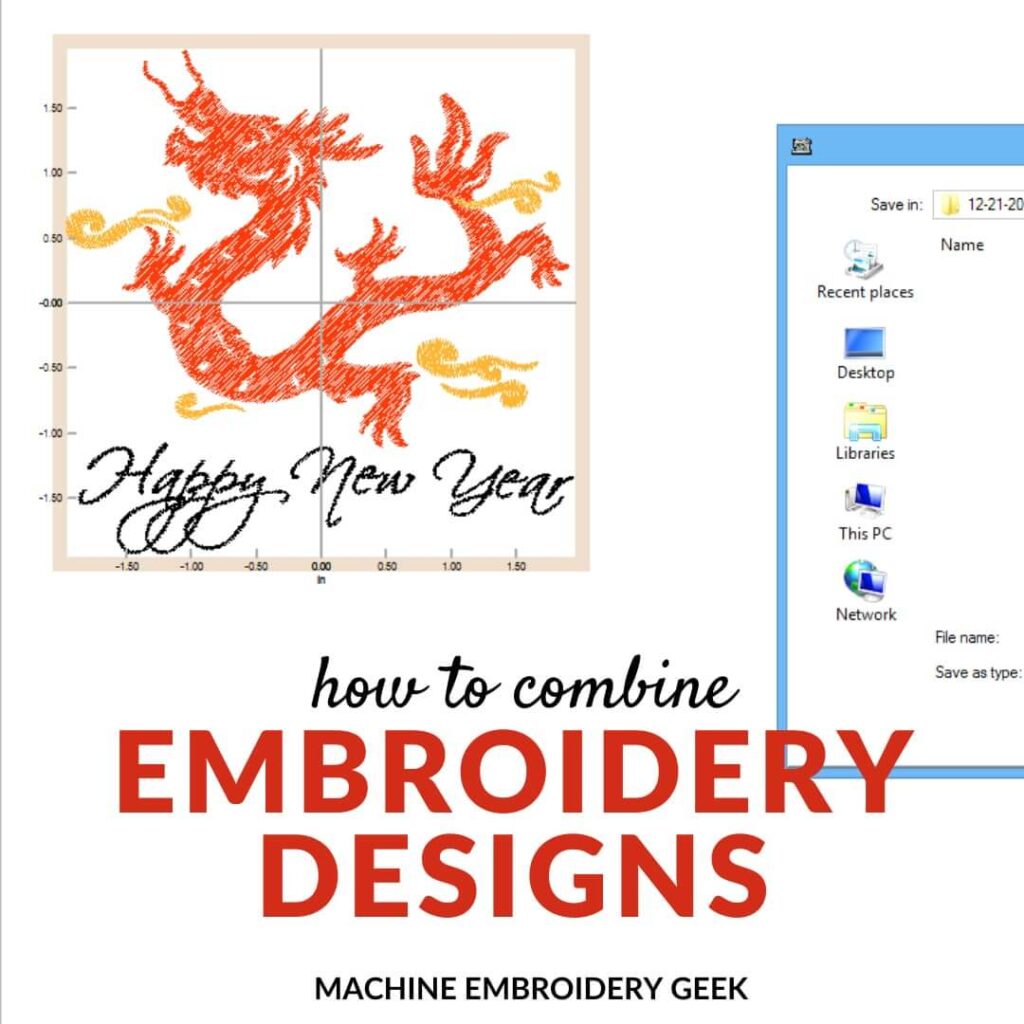
The other day I was digitizing a new set of designs for my latest monthly design bundle and it occurred to me that whoever downloaded these designs might want to add a name or a phrase to the design. For example, it might make sense to add a “Happy New Year” below the clinking champagne glasses design. Of course, you can load up the designs separately and stitch them out one at a time, making sure you don’t overlap the words and the design. But, it’s a heck of a lot easier to stitch the design and the words as one design. In order to do that, though, you will need to combine the embroidery designs. Fortunately, it’s pretty easy to do using some very basic software.
Products mentioned in this post
Benefits of combining embroidery designs within software
There are a couple of benefits to combining your embroidery designs into one file. The first is that you can experiment with size and style. If you are combining lettering with an embroidery design, you will likely want to preview how the words look with the embroidery design. Typefaces all have very different vibes and can have a radical effect on the feeling of the combined design. Experimenting with type and design before stitching helps ensure that your combined designs communicates the intended feeling.
Another benefit of combining designs within the software as opposed to stitching them out separately is precisely positioning them. I’ve made the mistake of stitching out a design and then going back to add a name underneath or next to it. When I do this, I have a hard time positioning the name exactly where I want it and making it relate appropriately to the embroidery design.
Finally, if you combine the disparate designs into one composite design within the software, you may be able to reduce the number of color changes. Let’s say, for example, you have a three color embroidery design, and you want to add a name underneath. If you want to stitch out the name using one of the thread colors in the primary embroidery design, you can specify this in the software. When you indicate this preference in the program, you will stitch out your words when you stitch out that color within the design, eliminating one thread color change. Obviously, fewer color changes means a quicker stitch out – which is always a plus in my book.
How to combine embroidery designs
There are many different programs that will allow you to import different embroidery designs and combine them. Some will even allow you to add text to your design in a variety of fonts. However, if you want to combine embroidery designs using some of the least expensive software possible, I would recommend SewWhat Pro.
SewWhat Pro is a machine embroidery design editor created by S&S Computing. It is not a full blown digitizing program, but is incredibly useful and inexpensive. The only caveat is that it only runs on PC (or a PC emulation program on a MAC).
In the following example, below, I will show you how to combine an embroidery design with a name or phrase using SewWhat Pro, and SewWrite (another program created by S&S Computing).
Open you your primary embroidery design in SewWhat-Pro
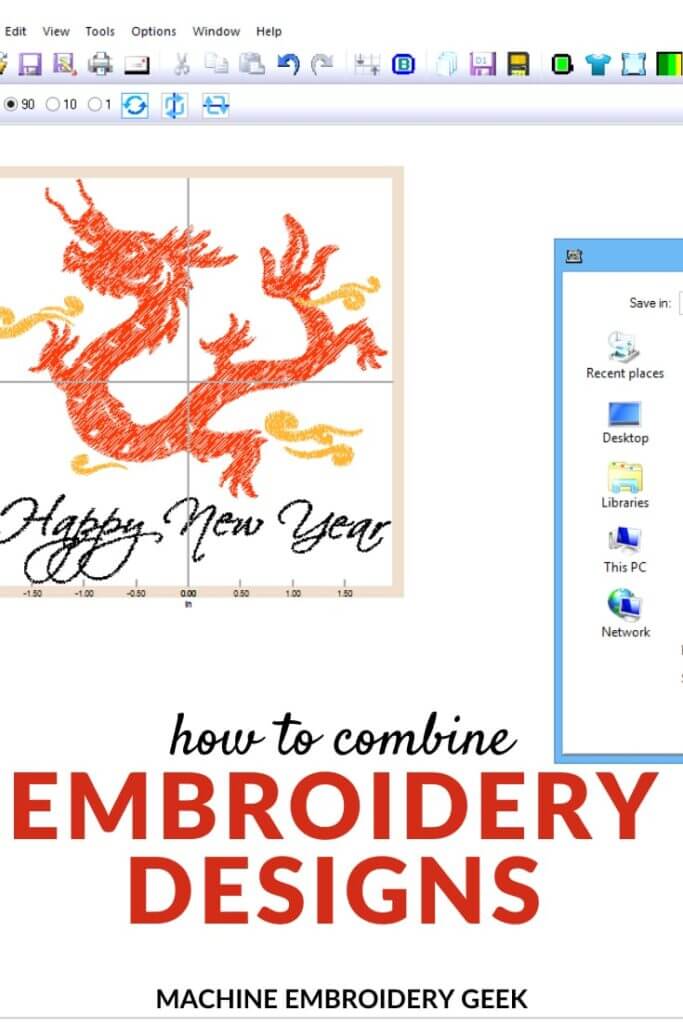
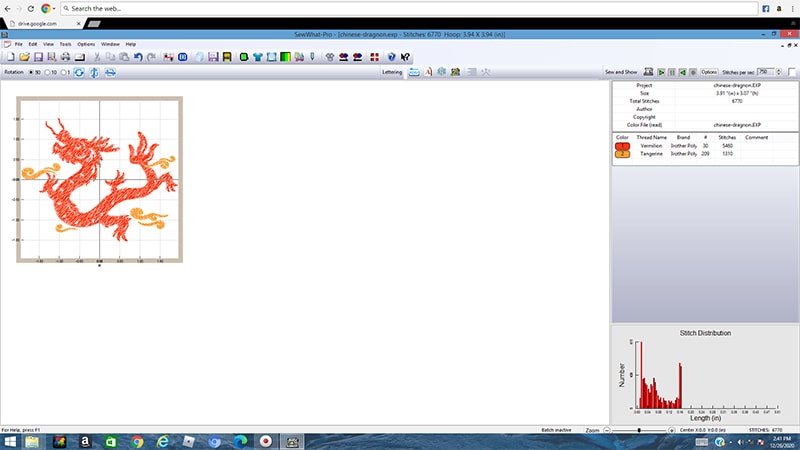
SewWhat Pro will open machine embroidery designs in just about every imaginable format. Even if you open it in one format, you can export it in a different format. (That’s another benefit of SewWhat Pro.) For the example below, I opened the PES version of my Chinese dragon machine embroidery design in SewWhat Pro.
Create your word or phrase in SewWrite
Although SewWhat Pro will allow you to create an embroidery file from any TTF file installed on your computer, it does not work very well. You can see my previous post, where I tried (unsuccessfully) to create embroidery files from TTF fonts using SewWhat Pro. It’s just not a very successful feature of the program.
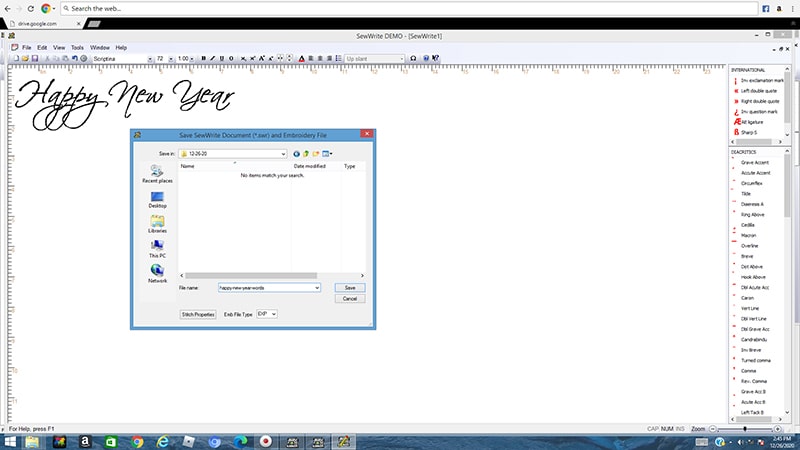
The best alternative to create an embroidery file from a font is to use SewWrite. SewWrite is another inexpensive program from S&S Computing with many different built-in fonts. When you create words or phrases using the built in SewWrite fonts, the resulting embroidery files stitch out very nicely.
In SewWrite, once you type your word or phrase in the typeface you like, you can export it as almost any embroidery design format. Keep in mind that if you are just using the trial version of SewWrite – you can only export words or phrases with 10 characters or less. This is not a big deal though, because you can export the words separately and then combine them all together in SewWhat Pro.
Alternatives to SewWrite for creating words as an embroidery design
Another option for generating words as embroidery designs is to create your word or phrase using BX fonts in the free version of Embrilliance or Embrilliance Essentials. Both programs will allow you to type out a word or phrase in the BX font, and then export the entire word as an embroidery file.
If you don’t have a typeface in BX format and just have letters as individual embroidery files, you can merge each of the letters you need into SewWhat-Pro to form the word.
Merging the text into SewWhat-Pro
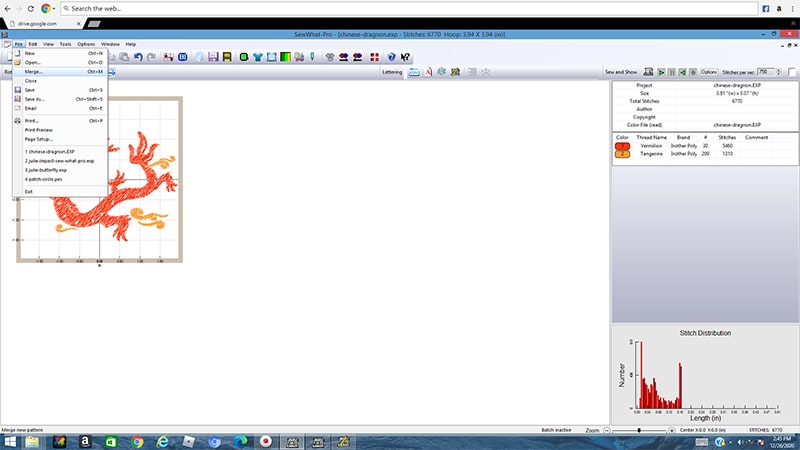
After you have your word or phrase created, you need to merge the text (as an embroidery design) into SewWhat Pro. Within SewWhat Pro, under the File menu, choose “Merge” then navigate to the embroidery design you created in SewWrite (or other program).
Combining the same thread colors
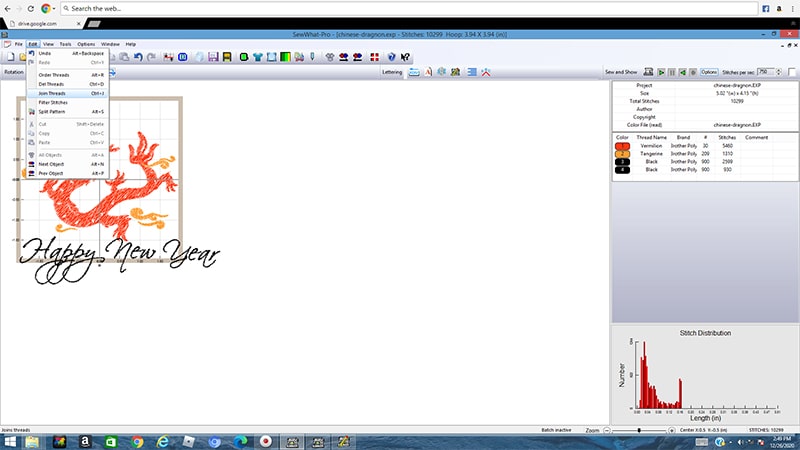
Once the words are inside of SewWhat Pro, you may need to resize the type. You can use the scale tool to scale the type up or down. Because I was just working with the trial version of SewWrite, I had to export the words “Happy New Year” as two separate files. You can see the thread order on the right side of the screen and that there are two separate rounds of black thread stitching. One of the thread colors was for the “Happy New” and the other was for the “Year.” I didn’t want these to be two separate color stops, so I needed to combine them. Fortunately, that’s pretty easy in SewWhat Pro.

To combine the two black thread color stops, simply choose “Join Threads” from the Edit menu.
Then choose the option to Join adjacent threads that are the same color.
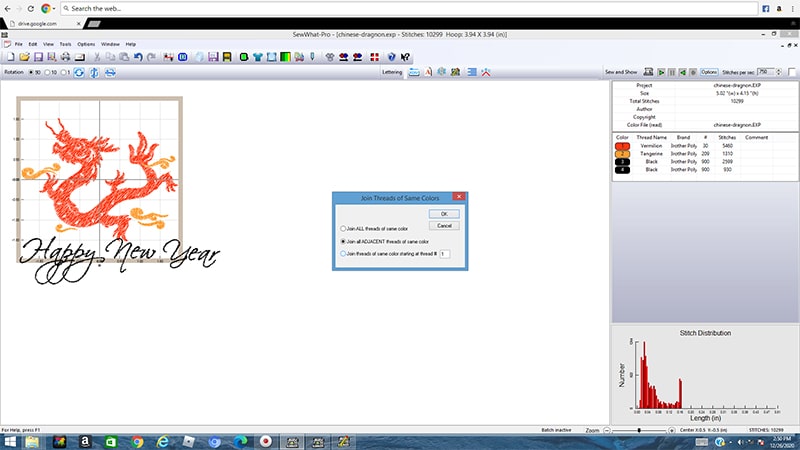
You will now see that there are just three color stops as opposed to four. You would use this same technique to combine your type thread color stop with an existing color in your primary embroidery design.
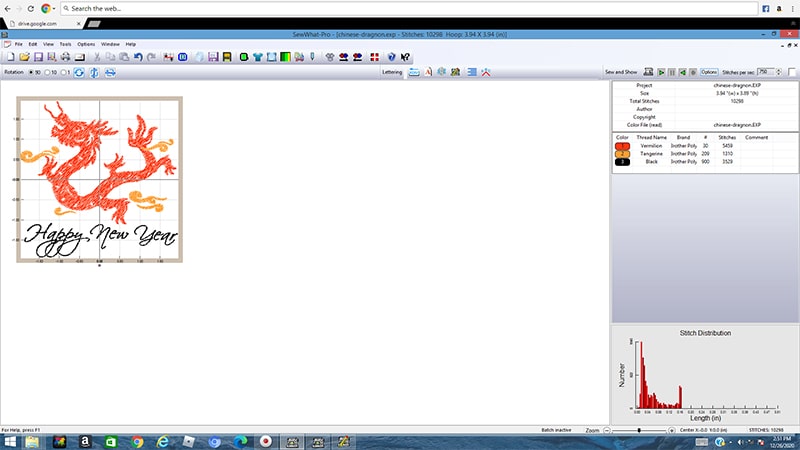
Exporting your combined embroidery design
Once you have your type in place, sized appropriately and same thread colors combined (if desired), then you are ready to export your combined embroidery design.
Just choose “Save as” from the file menu and you can save out the resulting combined embroidery design in just about any embroidery file format you want.
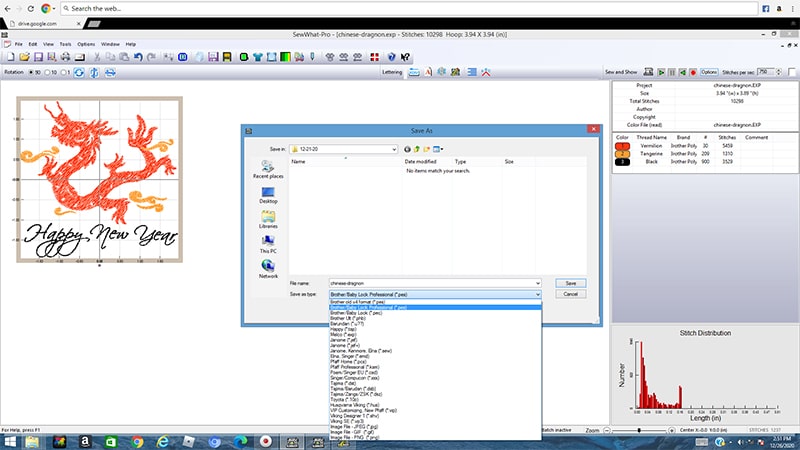
See? Easy. No big deal. A little bit of inexpensive software can go a long way in setting up your embroidery designs exactly the way you want them.
Happy stitching!
xo
Julie
Ready to master your software?
Check out my course: the SewArt, SewWhat-Pro and SewWrite Master Class: a comprehensive, step-by-step class with over 50+ video lessons designed for efficient and thorough learning.
Want to remember this? Save “How to combine embroidery designs” on your favorite Pinterest board.
