By Julie on May 21st, 2022 This site contains affiliate links to products. We may receive a commission for purchases made through these links.
Looking for FREE embroidery designs and PDF patterns?
Subscribe to the Machine Embroidery Geek newsletter
For tips, how-tos, loads of inspiration and access to the resource library full of free machine embroidery designs and PDF patterns.
Thank you!
You have successfully joined our subscriber list.
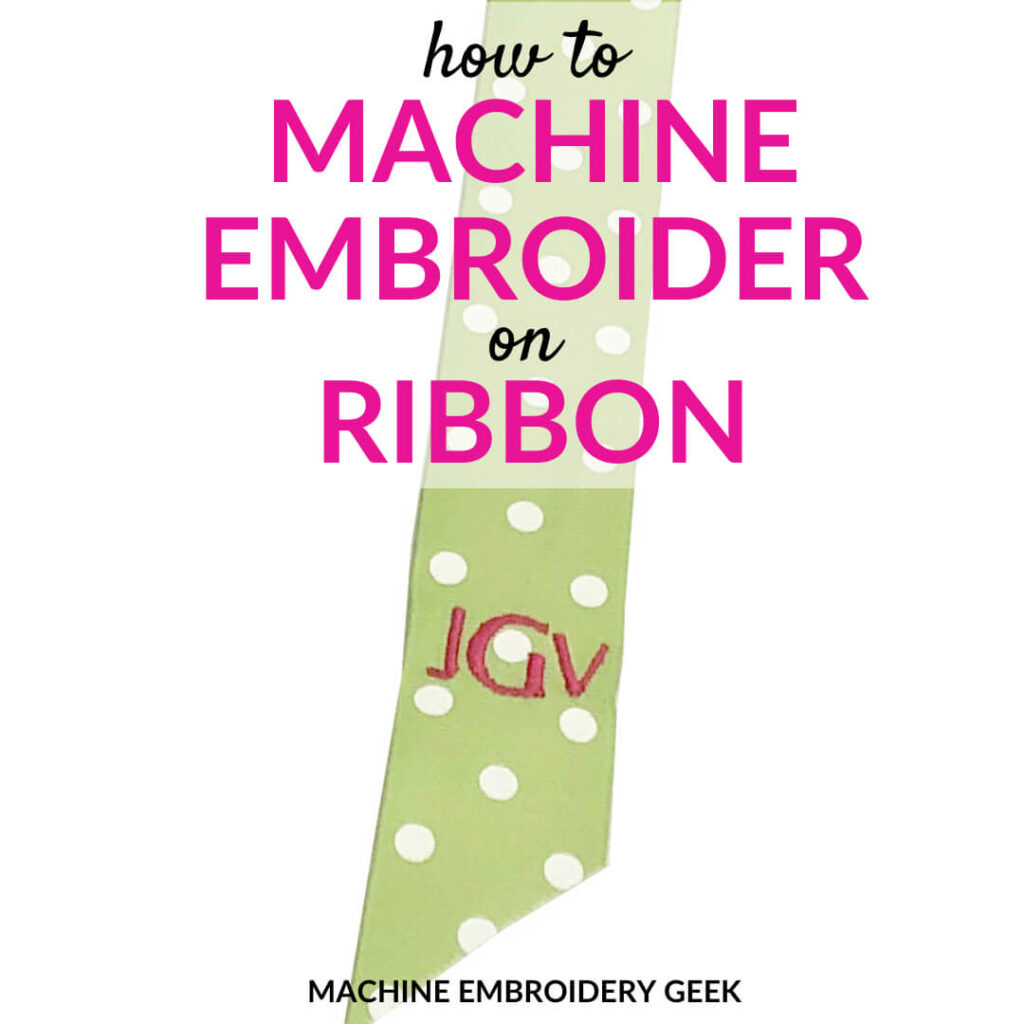
Ribbon is a versatile material. It can be used for ties, straps, trim, and probably countless other things I’m unaware of. It’s also fairly inexpensive and it comes in a wide variety of textures, shades and patterns. If you own an embroidery machine, it’s probably only a matter of time before you want to machine embroider ribbon. But, wait – how do you do it? Is there some special technique required? And why would you want to embroider on ribbon in the first place?
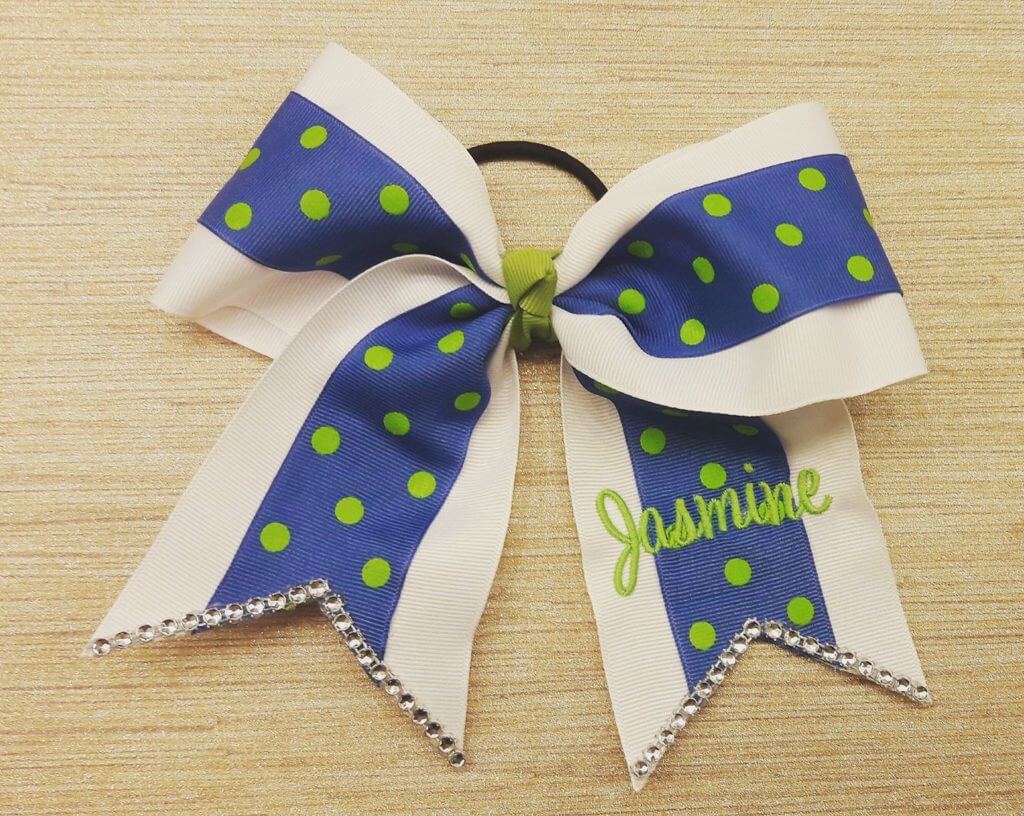
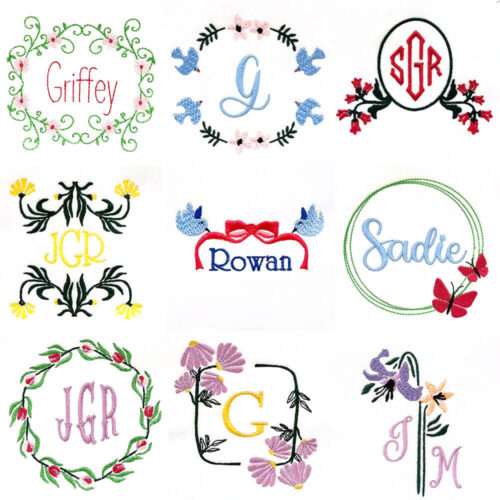
Monogrammed hair bows are probably the most obvious end use for machine embroidery on ribbon. My girls are way past the age of wearing big hair bows, but based on what I see in my Facebook groups, there’s still a huge market for them.
And, from what I’ve seen, the big bows are not just for the little ones. Collegiate and high school cheerleaders are all about the big bows in their school colors.
If you are thinking that machine embroidered ribbon belongs solely in the realm of oversized hair bows that coordinate with pint sized little girl dresses, I’m about to prove you wrong. There are many other clever and practical uses of machine embroidered ribbon.
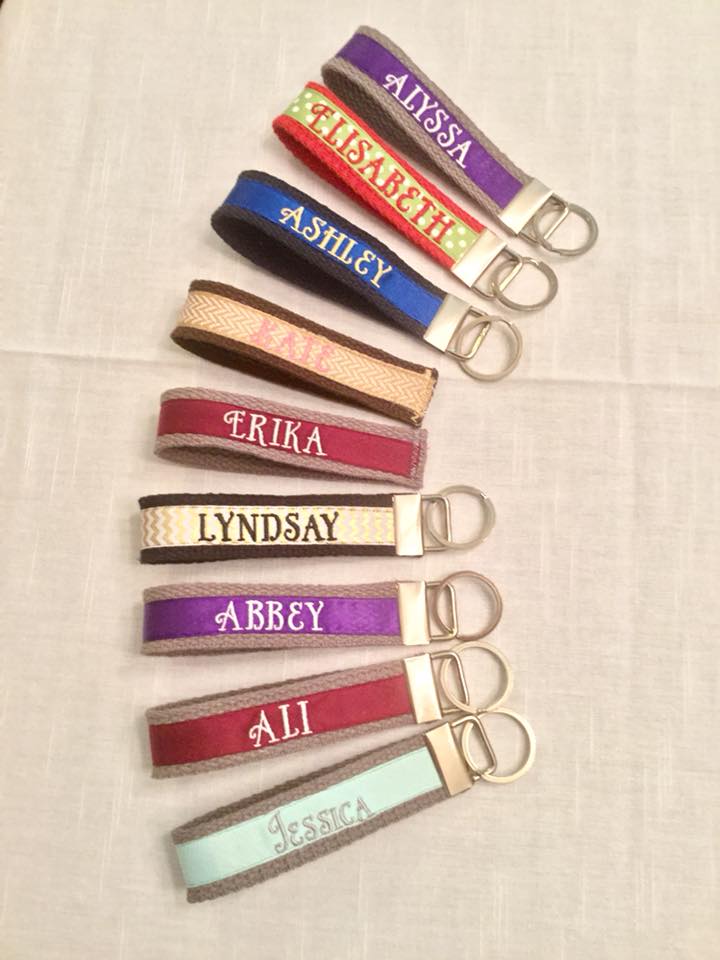
Key fobs
Personalized key fobs made from ribbon, webbing and key chain hardware are a craft show favorite, yet are really quick and easy to make. You can actually buy all of the materials and hardware to make them for next to nothing (1″ cotton webbing, 5/8″ grosgrain ribbon and key fob hardware).
Key fobs can be customized with different colored ribbon and webbing to represent the recipient’s college or sorority. Then you can stitch out a name on the ribbon which is wrapped around the webbing. You finish the key fob with a hardware clip and and a keychain attachment.
Photo provided by Lisa Gentile Eckhardt and used with her permission.
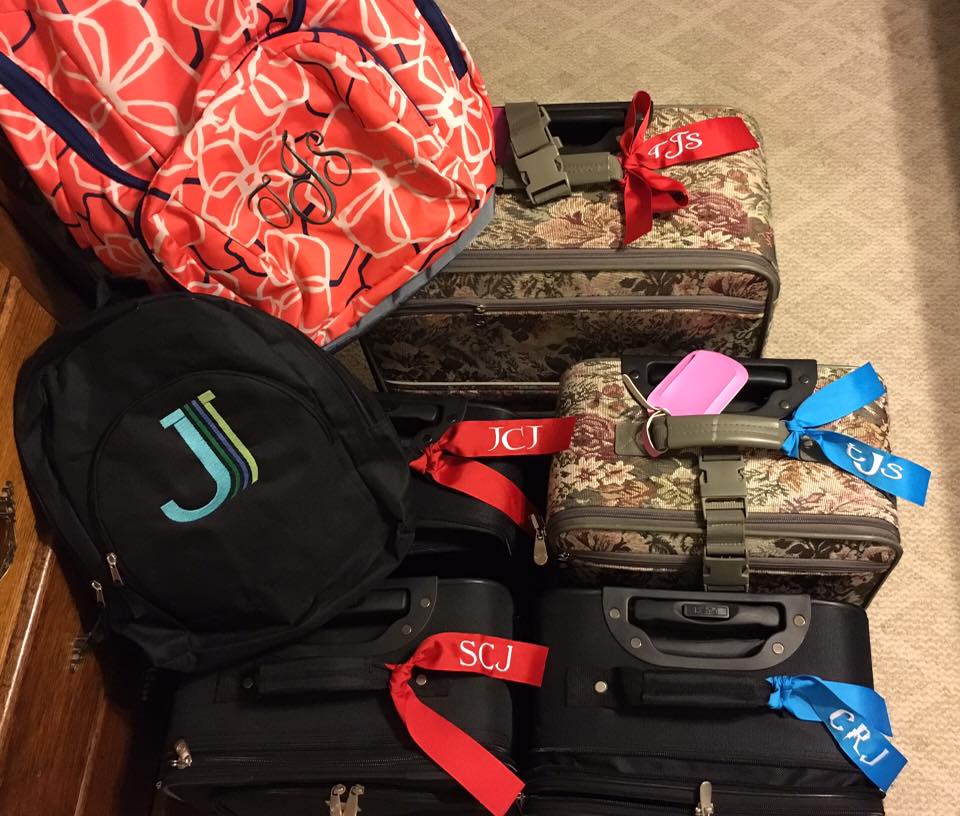
Suitcase Identification
A simple, yet effective use for machine embroidered ribbon is to help identify suitcases. These ties will certainly make your suitcase look distinct and the monogram will confirm it’s yours.
There’s nothing complicated about this project. Simply stitch out a name or monogram on a piece of ribbon and tie it on to a suitcase.
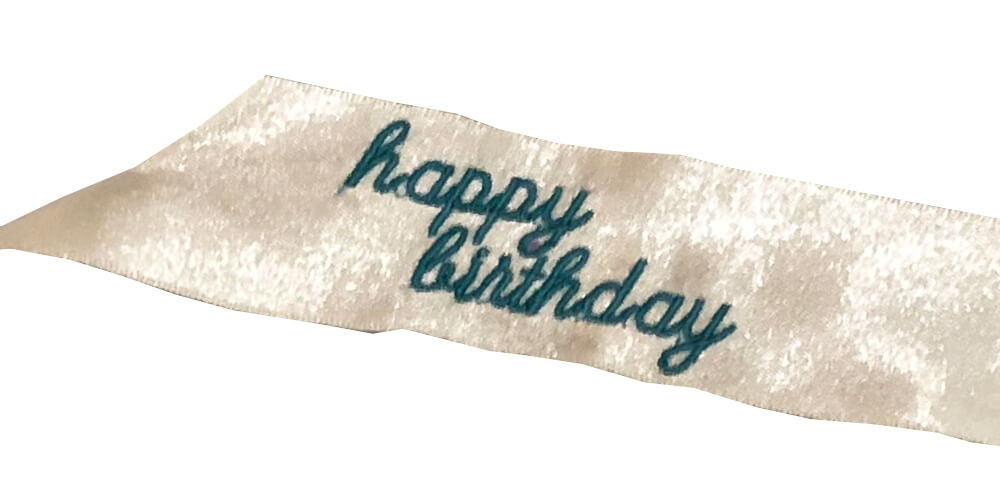
Gifts
Another fun use of machine embroidery on ribbon is to add a message to a package. There’s no need for a card when your stitch out your birthday wished on a ribbon!
Why is machine embroidery on ribbon difficult?
Machine embroidery on ribbon can be a bit tricky because ribbon can be slippery! And slippery fabrics can pucker like crazy. So, it is essential that you get the ribbon to stay put prior to embroidering.
Also, ribbon is typically long and thin, if the name or graphic you stitch on the ribbon is off-centered, then it’s really obvious. Therefore, it’s important to position the design or lettering carefully on the ribbon prior to stitching it out.
What kind of ribbon would you machine embroider?
There are basically two different types of ribbon you see most often: satin and grosgrain. Grosgrain ribbon is the kind of ribbon with horizontal ridges on it. is easies and wider is easier.
Grosgrain ribbon is slightly less slippery than its satin counterpart. But, honestly, if the ribbon is secured properly, puckering has not been a problem for me.
Where you may run into trouble is working with very sheer ribbon. Any type of sheer fabric can be challenging to embroidery on and sheer ribbon is no exception.
How to machine embroider ribbon?
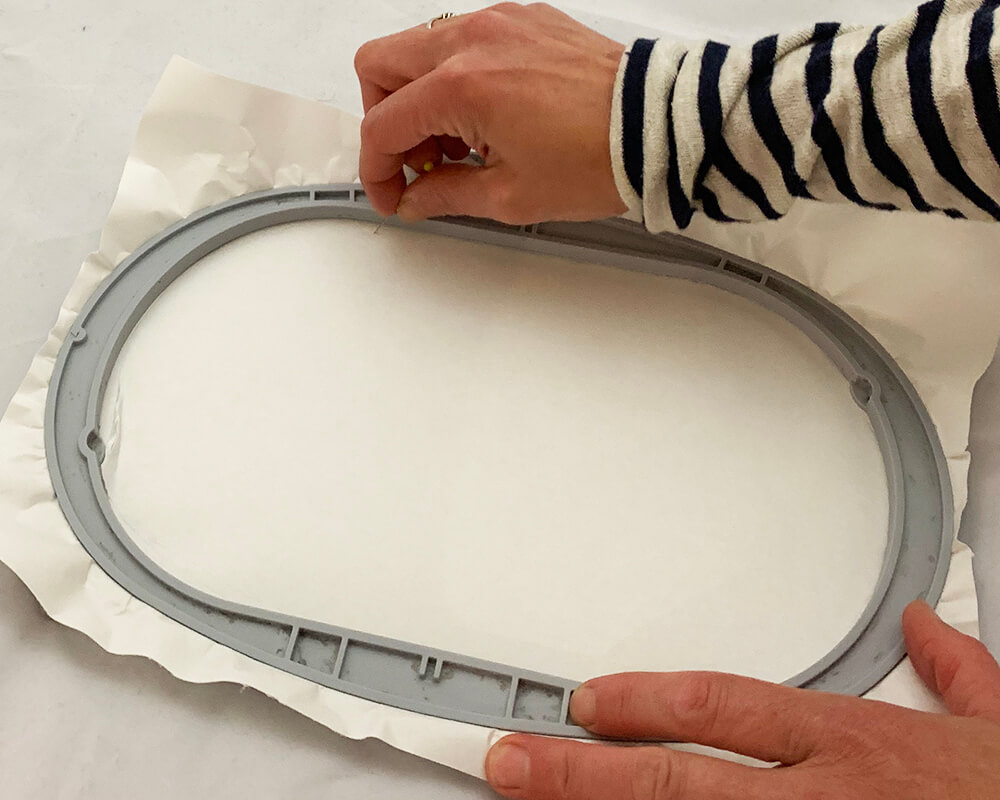
The first thing you need to do before embroidering on ribbon is to decide how you will secure the ribbon in or on the embroidery hoop.
Floating the ribbon
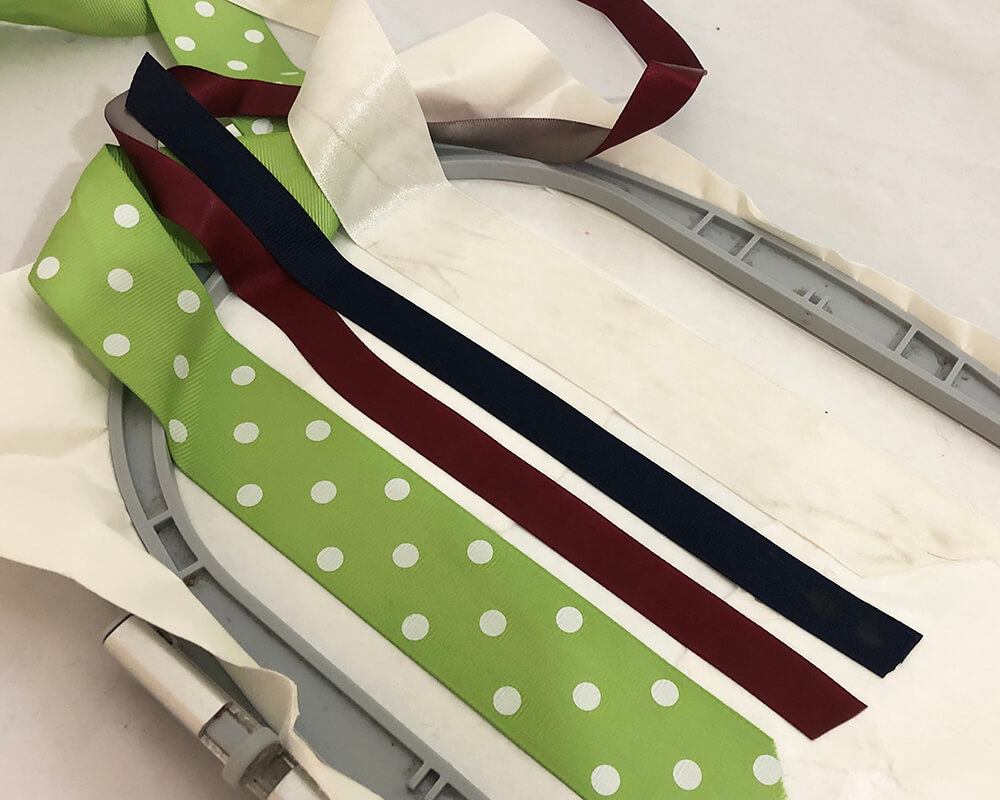
Most people suggest floating the ribbon on stabilizer since ribbon is long and thin and can’t be securely hooped.
My preference is to work with adhesive-backed tear away stabilizer. I hoop a piece of it tautly in my embroidery hoop. I then score around the inside edge with a pin and then peel back the paper to expose the sticky surface.
Next, I lay the ribbon on the sticky back stabilizer parallel to the edge of the hoop. In the example, below, you can see that I have several pieces of ribbon stuck to the hooped stabilizer.
Alternatives to adhesive backed tear away stabilizer
You can also hold down your ribbon to the stabilizer by stitching out a basting box. This can also help you with placement of your embroidery design.
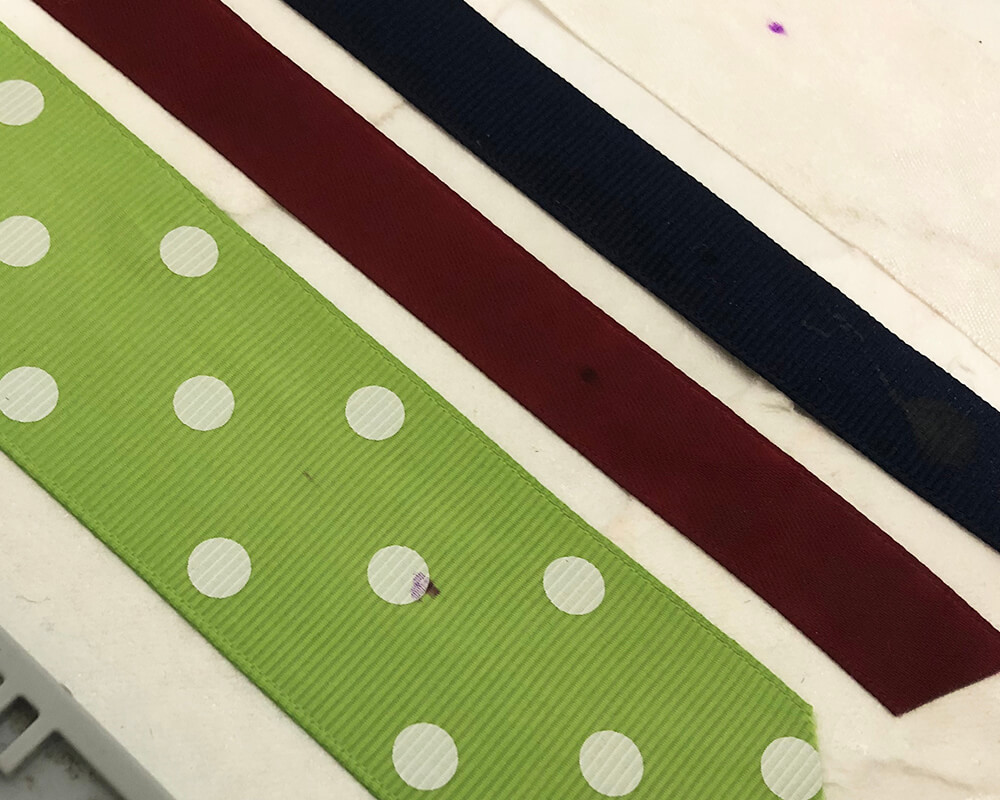
Marking the center of the design
On each of the ribbons, I mark the center of the design or the word I’m stitching out using a disappearing ink pen.
Adjusting the position of the design
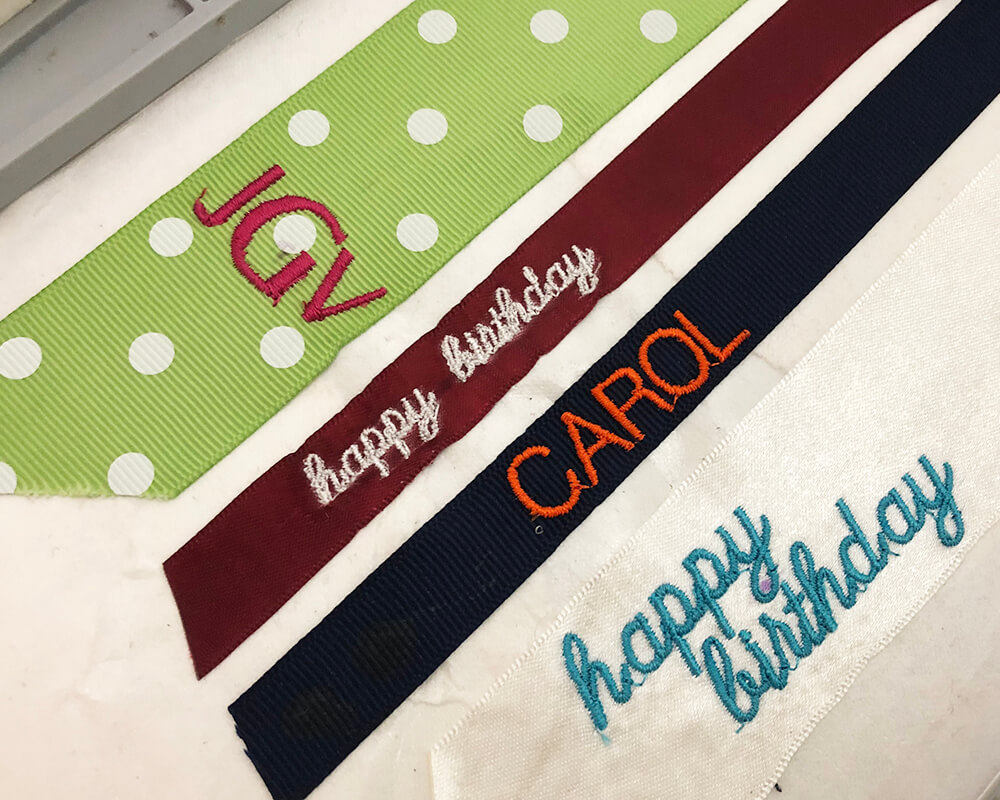
After I have the design loaded onto the machine, I press the button on the machine that positions the needle at the center of the design. Then I simply move the design around so that the needle lines up with the spot I marked on the ribbon.
Begin stitching
The final step is to just start stitching. Of course, you must be careful that the design or lettering you are stitching is appropriately sized so that it doesn’t run off your ribbon.
And that is pretty much all there is to it.
Frequently asked questions about embroidering on ribbon
What is the easiest type of ribbon to embroider on?
Grosgrain ribbon is the easiest type of ribbon to embroider on because it is less slippery than other types of ribbon. But other types of ribbon can easily be embroidered.
Why not give it a try? Ribbon is cheap. If the embroidery looks awful – you aren’t out much!
How do you prevent puckering when embroidering on ribbon?
If you secure the ribbon properly before beginning to embroider, you can usually prevent puckering.
What is the best stabilizer to use for embroidering on ribbon?
In my opinion, adhesive-backed tear away stabilizer is the best stabilizer to use for embroidering on ribbon. This will prevent the ribbon from moving while you are embroidering.
What is the best thread to use for embroidering on ribbon?
The best thread to use for embroidering on ribbon is polyester thread because it is strong and will not break easily.
But, honestly, you can embroider with specialty thread like metallics and glow-in-the-dark embroidery thread and achieve some pretty remarkable results.
What is the best needle to use for embroidering on ribbon?
The best needle to use for embroidering on ribbon is a size 75/11 sharp needle. This needle will be strong enough to penetrate the ribbon without breaking and is the proper size for most types of ribbons.
Ready to machine embroider on ribbon?
Embroidering on ribbon can be a challenge, but with the right tools and techniques it can be a fun and easy process. By following these simple tips, you too can create beautiful embroidered designs on your favorite pieces of ribbon.
Have any questions or suggestions? Leave them in the comments below – I would love to hear from you!
Good luck and happy stitching!
xo
Julie
Love free machine embroidery designs and PDF patterns?
“This course was such a blessing. I didn’t know all the things the software was capable of, and now I do. The material was presented well. The interactive presentation kept my attention…I recommend it to anyone interested in learning more about Embrilliance”


I am really happy with your blog because your articles are very unique and powerful for new readers.
Valuable article with several options for ME on ribbon. Your heatnbond idea may solve my problem.thx
AWESOME!