Disclosure: Some of the links on this site are affiliate links. This means that if you click on them and make a purchase, I may earn a small commission at no extra cost to you. Please know that I only recommend products and services I trust and use myself.
Looking for a new way for your embroidery to stand out? Then it’s time to try couching! This process will make a dainty redwork design a lot more bold while giving it some added texture. Ready to give it a try? In this article – I’ll show you exactly how to do couching with an embroidery machine. I’ll also give you a couple of free designs so you can try it yourself.
Products mentioned in this post
- StitchArtist Level 1
- StitchArtist Level 2
- StitchAritst Level 3
- Font designed for stitching out couched words
- Yarn
- Thin ribbon
- Embroidery thread
- Sticky back tear away
- T-shirt or sweatshirt of your choice
- Fabric glue pen
But first…
What is couching?
While you may not have ever heard of this term, I am pretty sure that you’ve probably seen it. Couching is a technique where you stitch down yarn or ribbon in a manner that creates a word or a design. A lot of retailers offer garments and home decor featuring this technique.
In fact, I remember a few years back when J.Crew was selling a t-shirt with a couched flower on the front. It was adorable, so I bought it and completely wore it out.
Couching with an embroidery machine
But from the moment I first saw this shirt, It seemed like something you might be able to create yourself. You would just need some ribbon or yarn that would be malleable enough to curve around into a design.
Obviously, you could stick the yarn or ribbon onto the t-shirt and then hand stitch it in place. But, that, of course would be quite tedious. I wondered if you could, perhaps, use your embroidery machine to do the stitching for you.
Turns out you can.
Choosing or creating an appropriate embroidery design for your couching project
The first step to create a successful, couching project is to choose or digitize a suitable embroidery design. You can obviously not use a typical filled embroidery design for this type of project. The design you choose will need to be a redwork style design that is comprised simply of a bean stitch or one one that is specifically designed for this technique.
You can actually find quite suitable designs if you search for couching embroidery designs on Etsy. If you want to stitch out multiple different words using this technique, consider getting a font that is designed to be stitched out using this couching technique.
But you can also try to do this technique with a generic redwork embroidery design, just be judicious about which one you choose. Any redwork design that’s overly detailed with too many sharp twists and turns may end up looking like a big blob when you integrate the yarn or ribbon. So when choosing a redwork design, think simple.
Embroidery designs provided for you to try couching
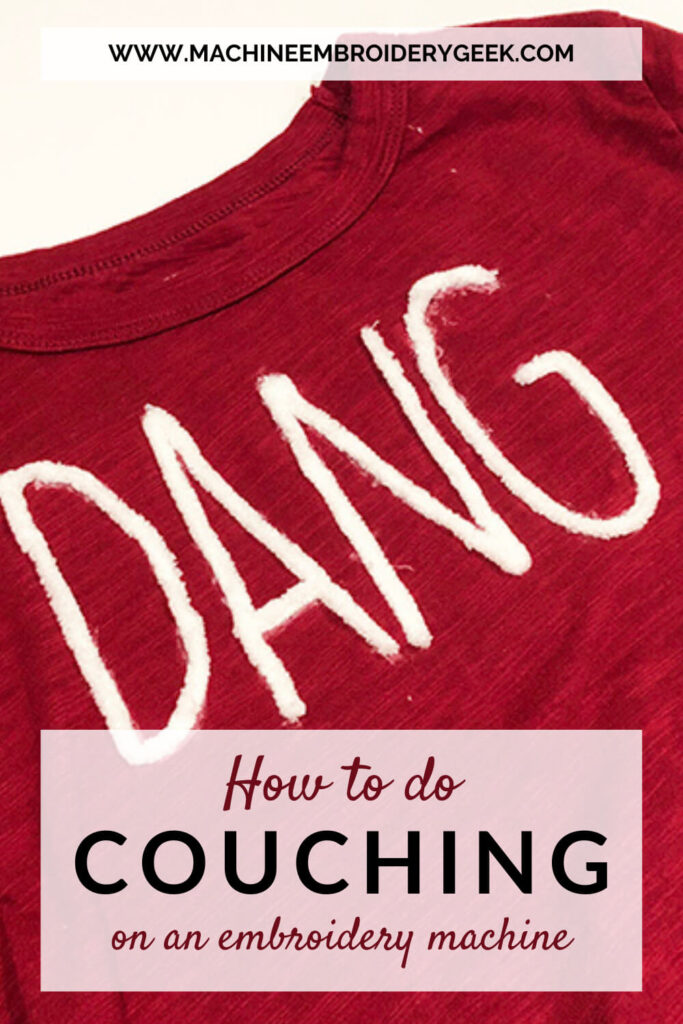
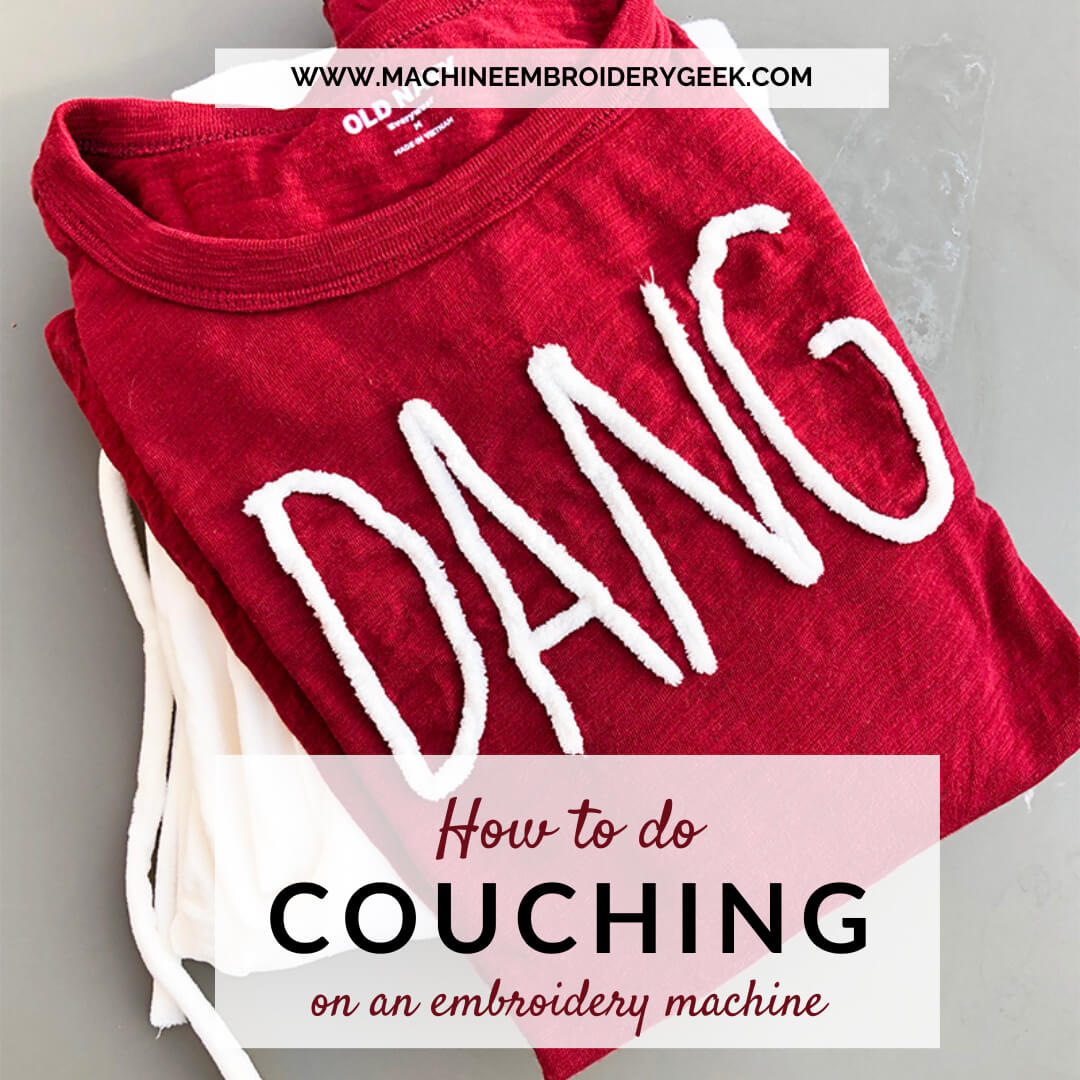
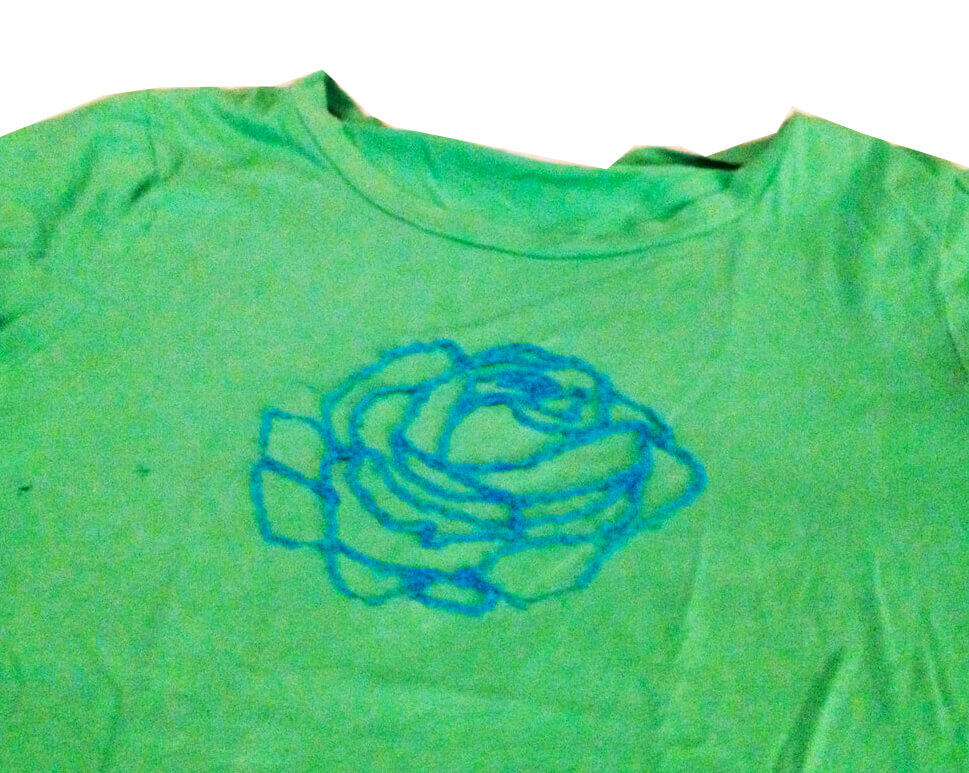
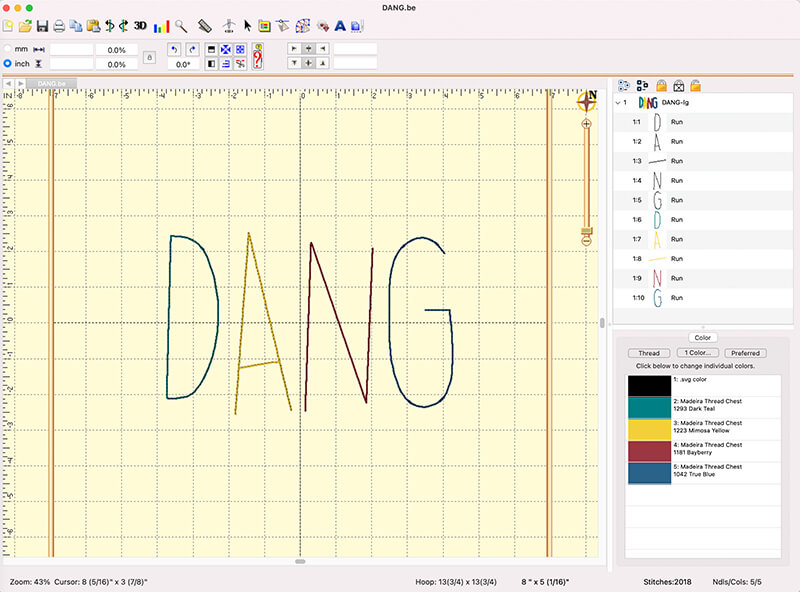
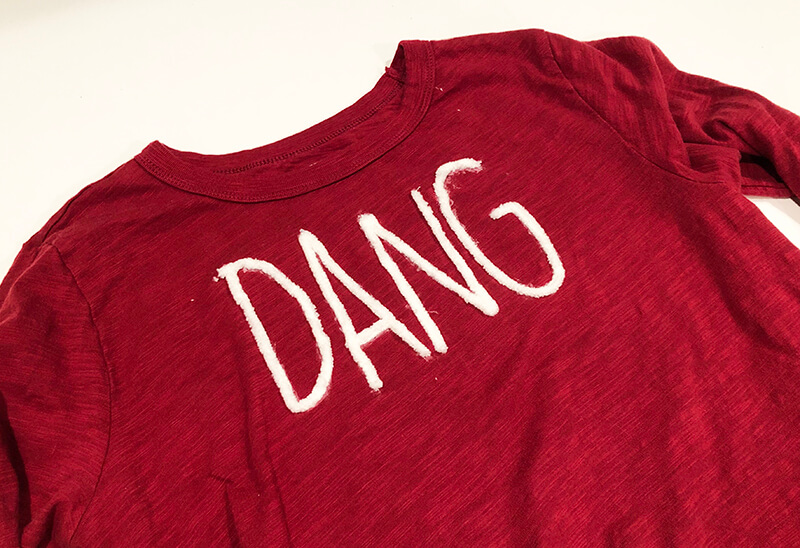
Fortunately, I have created a couple of designs for you to test out this technique. I created a simple shamrock design as well as the word “dang.”
Why a “dang” design you might ask? Well one of my most favorite t-shirts is from a restaurant in Austin, Texas that sold T-shirts emblazoned with the word “dang.” Unfortunately that restaurant has closed. So, now I suppose my dang shirt is a collectors item.
Anyway… a friend of mine admired my t-shirt recently, and being that her birthday was coming up I thought it was a great opportunity to make my own version. It was also a perfect opportunity to try out this cool technique.
Digitizing a couching design
If you are new to embroidery digitizing, creating an embroidery this suitable for couching may be a perfect project for you. You will see that both of the couching designs I digitized are simply comprised of a simple running stitch path that are duplicated. The first round of stitching is simply a running stitch used for placement purposes. The second is a bean or triple stitch path.
If you want to create your own design, you can draw these paths yourself in your digitizing program (like StitchArtist Level 1 ). Or, if your digitizing program allows you to import vector-based (SVG) files (such as StitchAritst Level 3), you can import an SVG file, and convert the path to a running stitch and the bean stitch.
Supplies needed for couching on an embroidery machine
This project does not require a whole lot of materials. Here’s what you need:
- Embroidery design suitable for couching. Visit my resource library to download my free “dang” and four leaf clover couching designs.
- Yarn or thin ribbon. Be sure to buy yarn or ribbon thin enough to handle the curves. Also avoid materials that will get frayed ends. I used chenille yarn for this project. If I were to use ribbon – I would melt the ends to that the ribbon would not ravel. There is a really neat product called Chenille It that is ideal for this type of project. It lays down flat but once you get it wet – it gets “blooms.”
- Embroidery thread in a color that coordinates with the yarn or ribbon.
- Stabilizer (sticky back tear away and fusible poly mesh cut away)
- T-shirt or sweatshirt of your choice
- Fabric glue pen
Prepping your garment
Once you have your gathered your supplies and created or purchased your embroidery design, it’s time to prep your project. The type of stabilizer you use will obviously depend on the material you’re working with. Since my embroidery was on a t-shirt, I needed to incorporate some type of permanent stabilizer.
My stabilizer preference when embroidering on t-shirts is fusible poly mesh. I fuse a piece (larger than the design) on the inside of the shirt and then float the shirt with the fusible poly mesh on some sticky back stabilizer.

I use the folding technique to ensure that my design is centered on my t-shirt.
It is also recommended that you switch your needle to a ballpoint variety when you are embroidering on knits like a t-shirt.

Stitching out your design
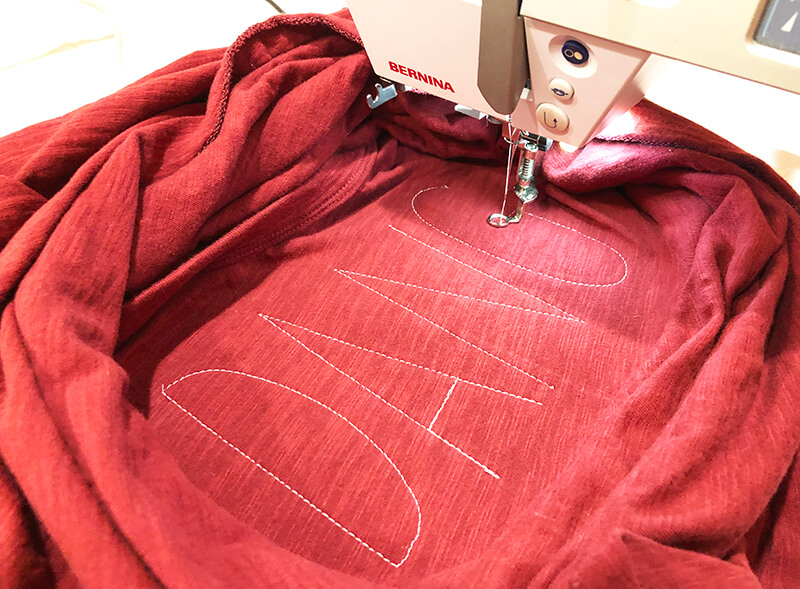
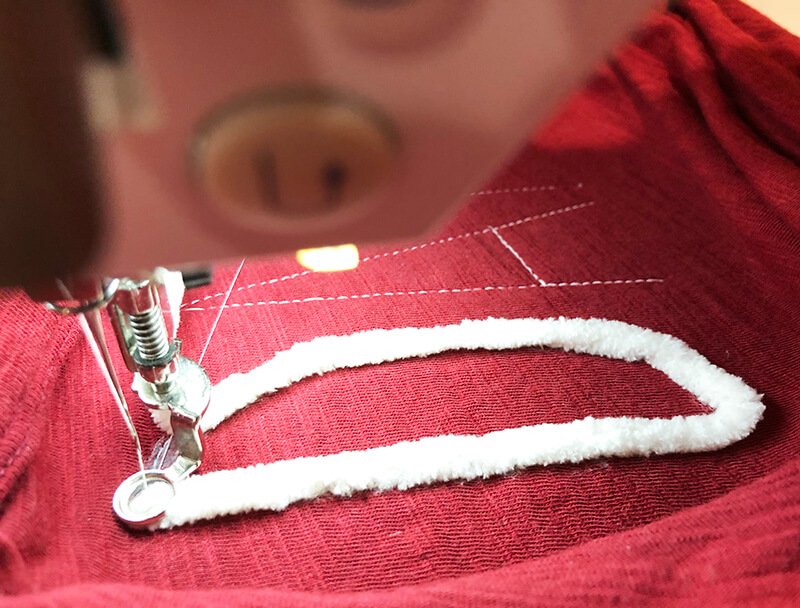
Now it’s time to stitch out your design! Begin by stitching out the first thread color which is just a basic running stitch. I would suggest using the same thread color as your yarn because you want your stitching to blend in with your yarn. This is important for the next step.
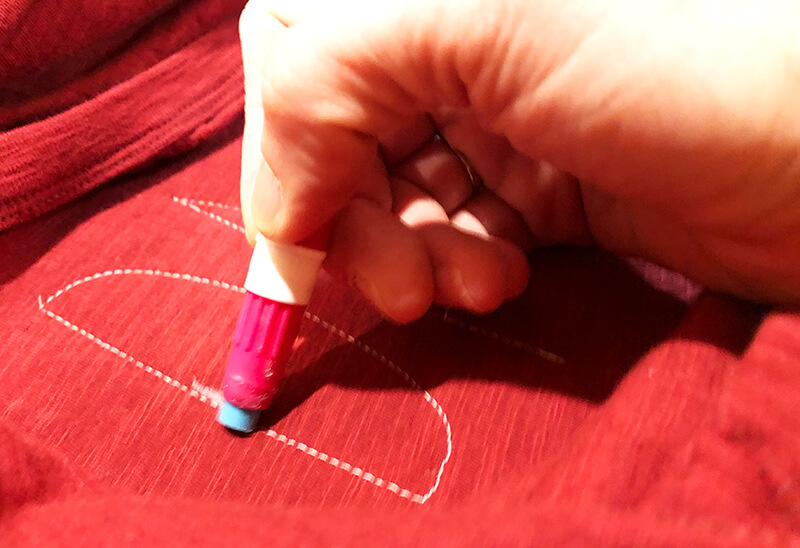
Next – remove the hoop from the machine and “paint” glue using your glue pen over the stitch lines. For a large design – I would suggest just painting a bit at a time. Then press down your yarn or ribbon over the glued area.
Since I made each letter a different color, my machine naturally stopped between each letter. This allowed me to paint one letter at a time.
Slow down your machine and begin stitching.
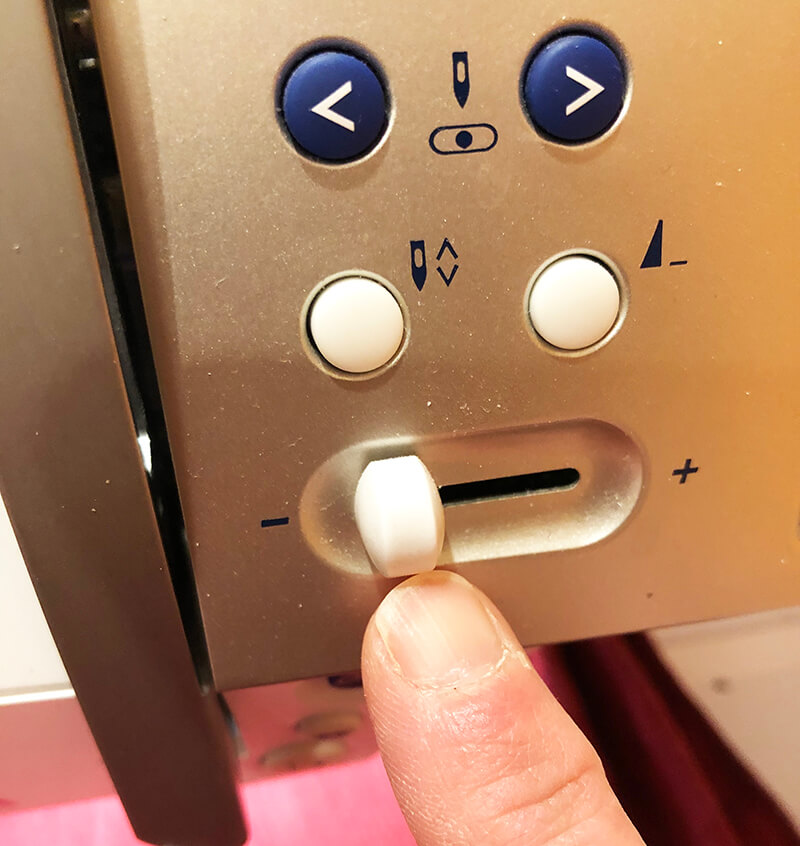
Let the machine stitch down the ribbon or yarn. If the yarn or ribbon begins to move, stop the machine and nudge it back into place. Then start stitching again, keeping your finger on the stop button.
Once you have stitched to the end of the glued area, paint a bit more glue on the path, press the yarn or ribbon in place and continue stitching.
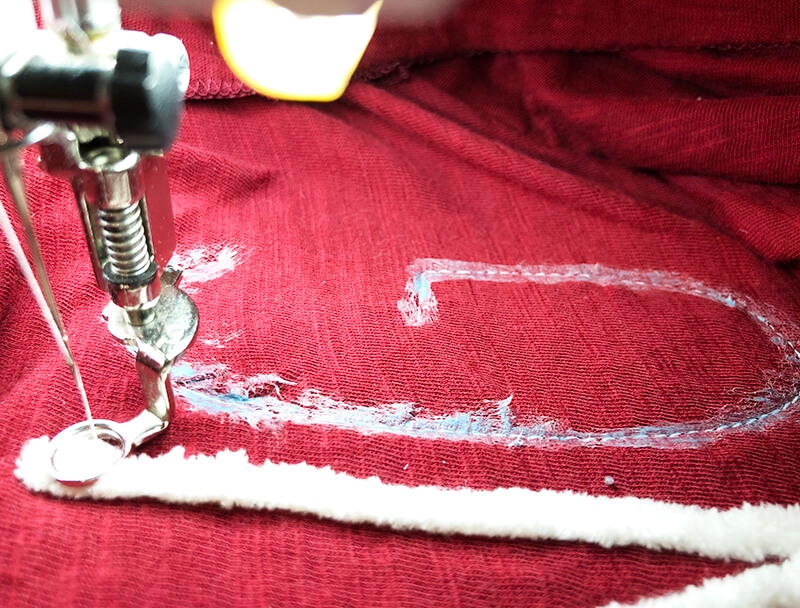
When you have traveled the entire path, your project is done! Remove the hoop from the machine and trim away any excess stabilizer.
Finishing up your project
Once your couching design is finished, you may have a few threads that need to be trimmed. Be sure to remove all of them before washing your project. Then turn it inside out and launder according to your fabric’s complete and ready to wear! Congratulations – you just created a beautiful couching embroidered design! Enjoy!
Frequently asked questions about couching using your embroidery machine
Do I need to use a different needle?
It depends. If you are stitching on a knit, it is recommended that you switch your needle to a ballpoint variety when you are embroidering on knits like a t-shirt.
What kind of stabilizer should I use?
A: The type of stabilizer will depend on the material you’re working with. The couching process does not dictate a special type of stabilizer.
Can I use any type of yarn or ribbon?
Yes, you can use different types of yarn and ribbon for this project. However, be sure to pick a material that is thin enough to handle the curves. Also, if you’re working with ribbon – be sure to melt the ends to that the ribbon would not ravel.
I’m having trouble keeping the yarn or ribbon in place – what should I do?
If the yarn or ribbon begins to move, stop the machine and nudge it back into place. Then start stitching again, keeping your finger on the stop button. This will help keep everything in the right spot!
Should I buy a design that has stops built in?
Some couching designs have stops integrated into the stitch outs. I don’t find that to be that helpful because I can just stop my machine when I need to. But, of course this is personal preference.
Want to remember this? Save “How to do couching on an embroidery machine” on your favorite Pinterest board