How to make an in-the-hoop Advent calendar
This site contains affiliate links to products. We may receive a commission for purchases made through these links.


Now is the time of year (in fact today is exactly the day) where you can open the first door of your advent calendar. Don’t have an advent calendar? Well, if you own an embroidery machine then it’s pretty easy to make one. In fact, when it comes to in-the-hoop Advent calendars, you have several different versions to choose from. But with so many cute in-the-hoop Advent calendars available, it might be hard to pick.
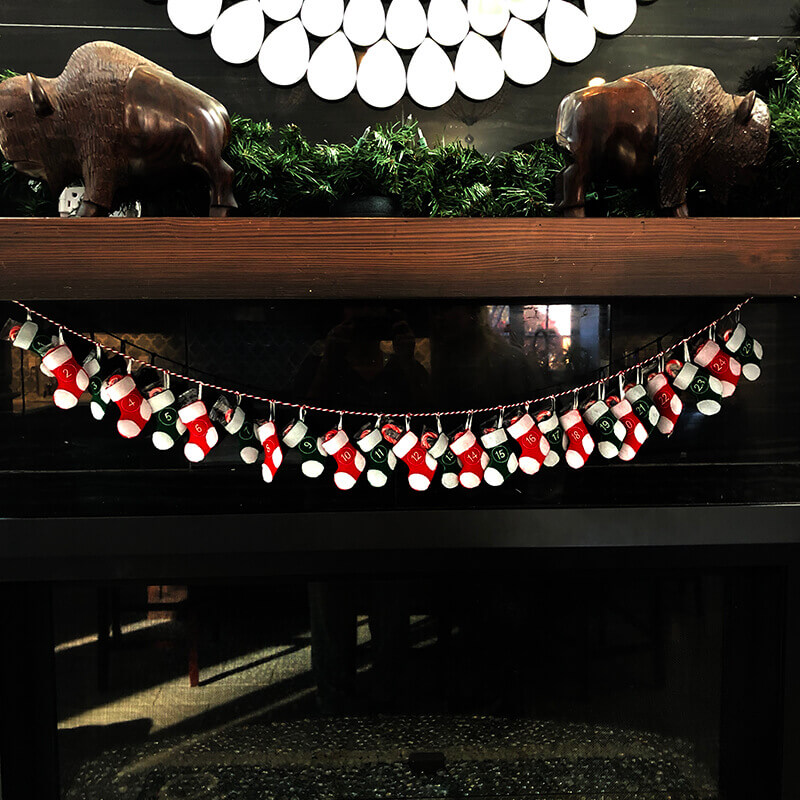
In this post, I’ll show you how to make an in-the-hoop advent calendar. The version that I’l demonstrate is comprised of a series of miniature Christmas stockings all numbered between 1 and 25. And each stocking is designed to hold a little treat.
Then, after we whip up this cute little advent calendar, we will take a look at some of the alternative in-the-hoop advent calendars available that you can make on your embroidery machine.
Products mentioned in this post
- Red, green, and white felt
- 1/8″ wide silver ribbon
- Red and white cording
- Water soluble stabilizer
- Miniature candy canes
- In-the-hoop Advent calendar stocking design
- Sack Advent calendar – in-the-hoop
- In-the-hoop Advent calendar comprised of simple little trees
- Traditional in-the-hoop Advent calendar with flaps
- In-the-hoop bear Advent calendar
- Traditional in-the-hoop advent calendar with pockets
- In-the-hoop pocket reindeer Advent calendar
Why make an in-the-hoop advent calendar?
Doesn’t everyone love an advent calendar? When Aldi introduced their miniature wine advent calendar, people stood in line outside the front door waiting for the store to open! Ok… maybe it had more to do with those cute little bottles of wine….
Anyway, my kids are all teenagers now, yet they are still slightly obsessed with our Advent calendar. They even witness us stuffing it with chocolate at the beginning of December, so there isn’t even an element of surprise. But they still obsessively remind each other to “eat their advent calendar chocolate.”
While the Advent calendar seems to hype my kids up for Christmas celebrations, for me, it’s a great reminder of the number of days I have left to prepare for the big day. And, yes, it also reminds us all to reflect and appreciate the beauty of the holiday season.
Is my embroidery hoop big enough to make an in-the-hoop Advent calendar?
Good question. There are several in-the-hoop Advent calendars that require you to have a large embroidery hoop. But, the one that I designed can actually be made entirely in a 4″ x 4″ embroidery hoop. You stitch out each stocking separately and then string them together on some ribbon or cording. So, even a dinky little embroidery hoop will work just fine for this project.
How to make an in-the-hoop Advent calendar
Supplies
Felt
I used red, green, and white felt to make my version of this in-the-hoop Advent calendar. You don’t need a ton since each stocking is quite small. A half yard of each color would be more than enough.
Thin ribbon or cording
In order to hang each small stocking, you will need to have a loop integrated into the design. I used a 1/8″ wide silver ribbon for my loops.
Cording or ribbon
If you want to hang your stockings on a ribbon or a piece of coding, then you obviously need to get that as well. I found some darling red and white cording that I used for my little stocking banner.
Water soluble stabilizer
The reason why you need water soluble stabilizer for this project is because you don’t want the stabilizer to be visible after you finish stitching out each of the stockings. If you used regular stabilizer, you would be able to see it along the edges of every stocking.
Treats
What’s the point of an Advent calendar if you don’t load it up with some treats? I thought that miniature candy canes fit perfectly in each stocking.
In-the-hoop Advent calendar design
You can get the in-the-hoop Advent calendar stocking design from my website.
Steps
You can either stitch out the stockings individually or group several of them together. My large embroidery hoop was able to accommodate eight stockings at once so I only had four hoopings total and then one solo stocking.
In my file set, I’ve provided a couple of different combinations so that you can stitch out multiple stockings in one hooping depending on the size of your embroidery hoop
Change your bobbin thread
The first thing you need to do is to change your bobbin thread. I stitched almost everything with white embroidery thread. Since I wanted the back side of each of my stockings to match the front, I used a white embroidery thread for my bobbin. I could have left the bobbin to be white embroidery bobbin thread, but since it’s a bit thinner, I thought it might look a little wimpy on the back of each one of my stockings.
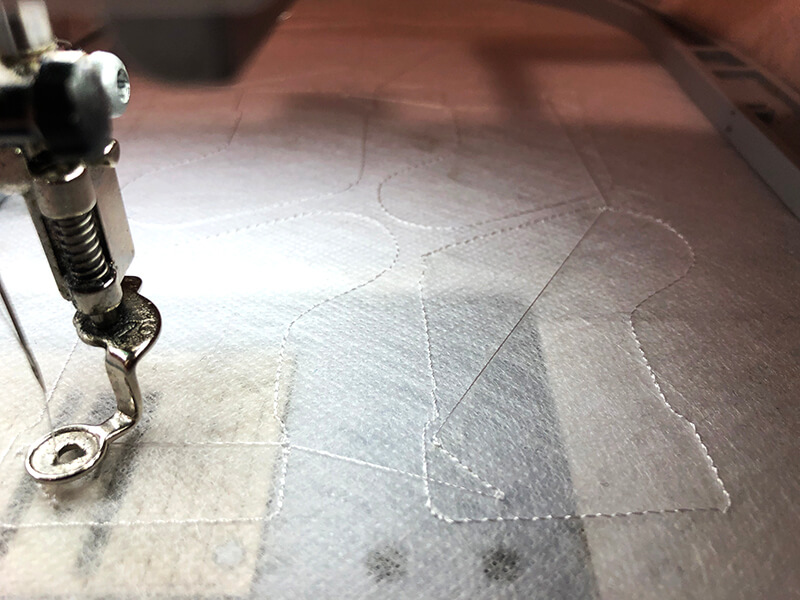
Hoop your stabilizer
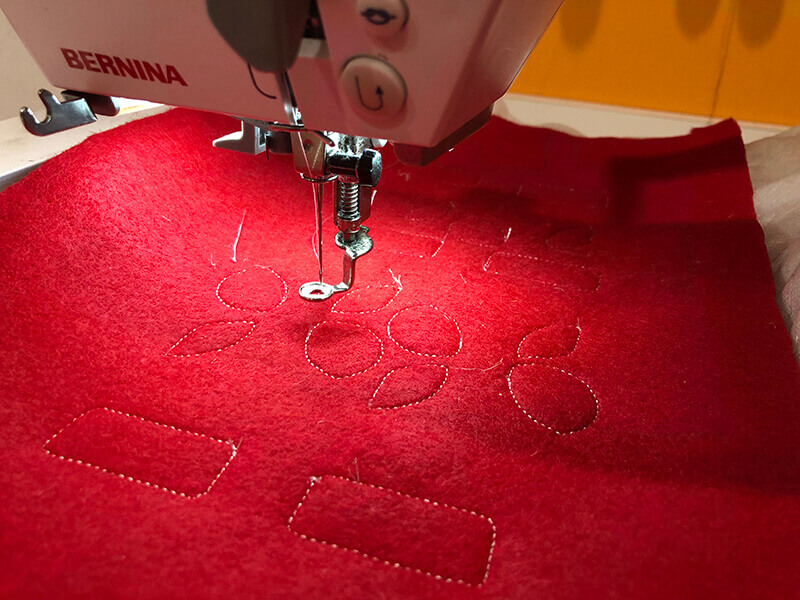
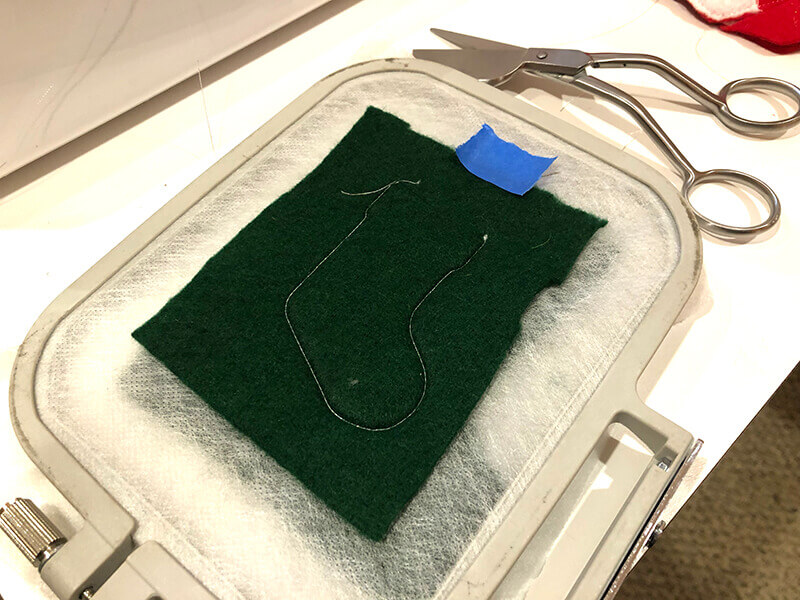
Next, hoop a piece of water soluble stabilizer in your embroidery hoop making sure that it is very secure. Begin stitching out the first thread color which will serve as your placement stitching line.
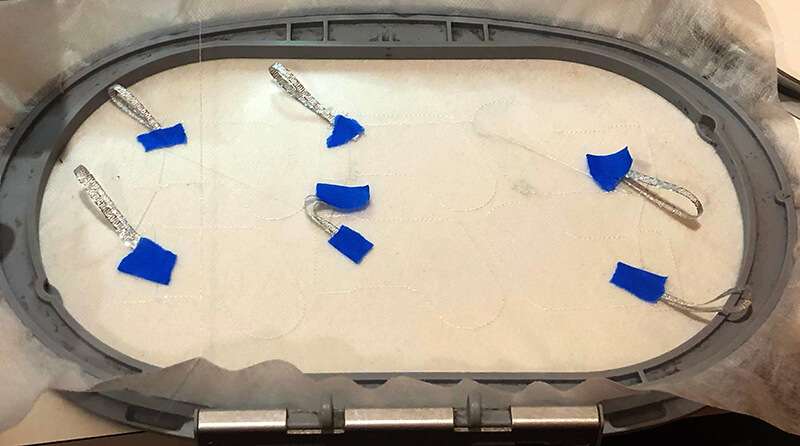
Tape down your ribbon loops
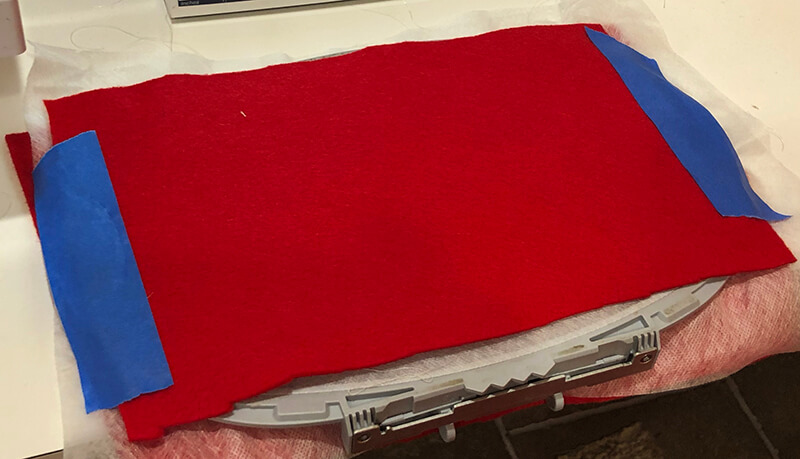
You will notice that in the back corner of each of the stocking silhouettes you will see a small diagonal line of stitching. This is a placement line for your ribbon loops. Tape down your 1/8″ wide ribbon loops so that a loop extends from the top corner of each stocking, making sure that your ribbons do not overlap any of the stitch lines. You don’t want these ribbons to get caught up in any of the other stitching.
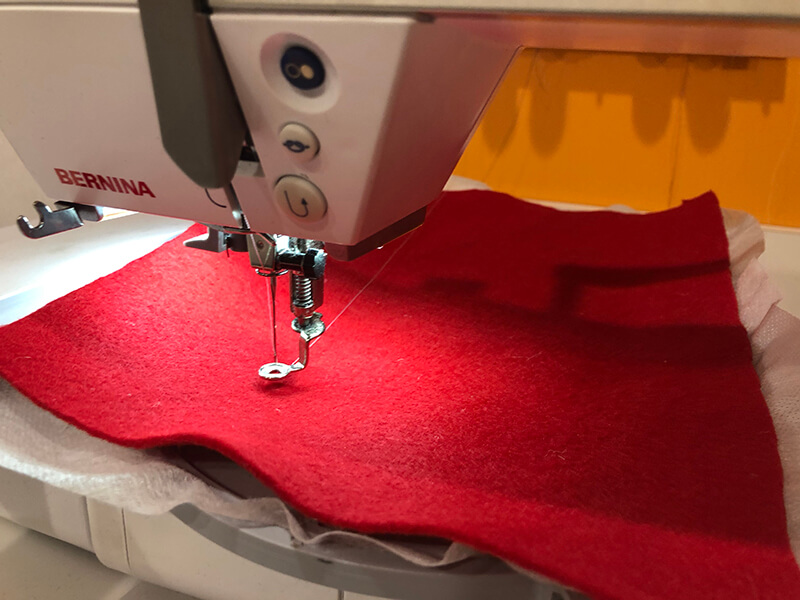
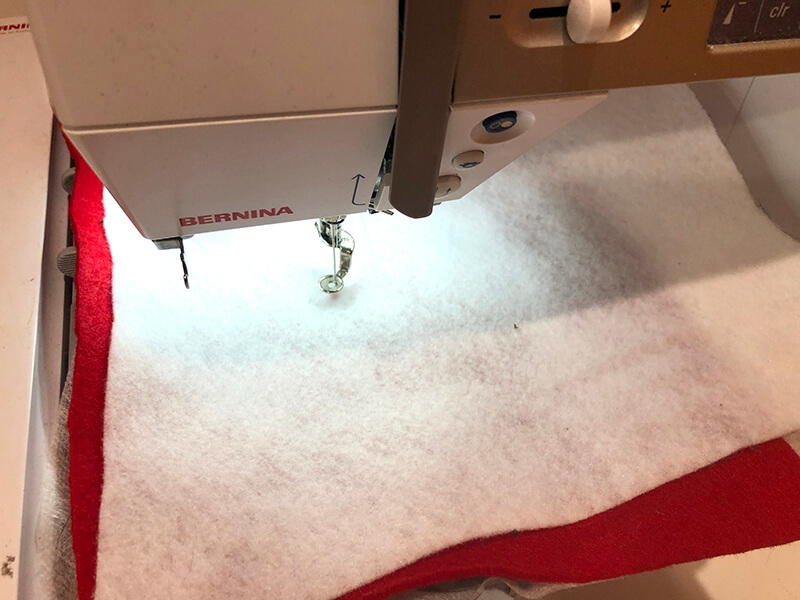
Float your felt
With your loops taped in place, float a piece of red or green felt over your hooped stabilizer, making sure that you completely cover all of the placement stitch lines.
Placement stitching for stocking details
Begin stitching your next thread color which is the placement line for the stocking cups, toes and heels.
Float your white felt
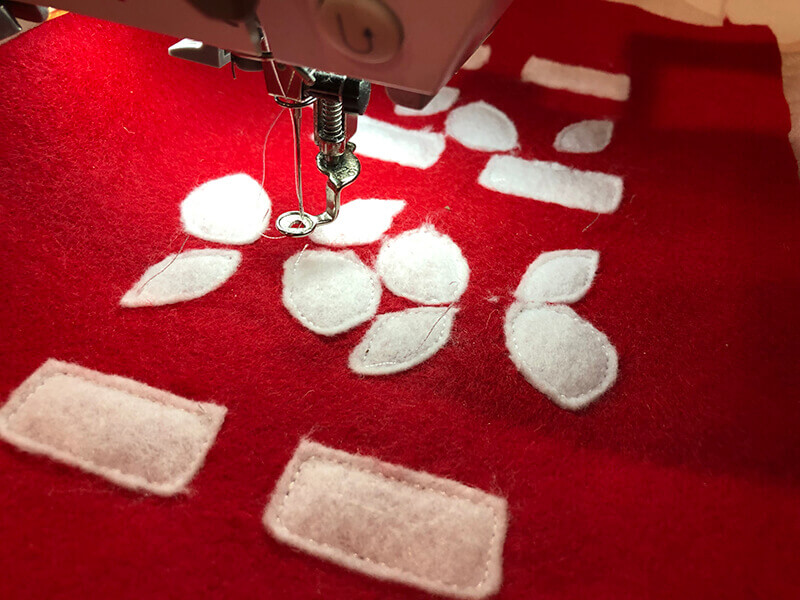
When this is done, float some white felt over all of these lines of stitching. Start stitching the next thread color which will tack down the white felt.
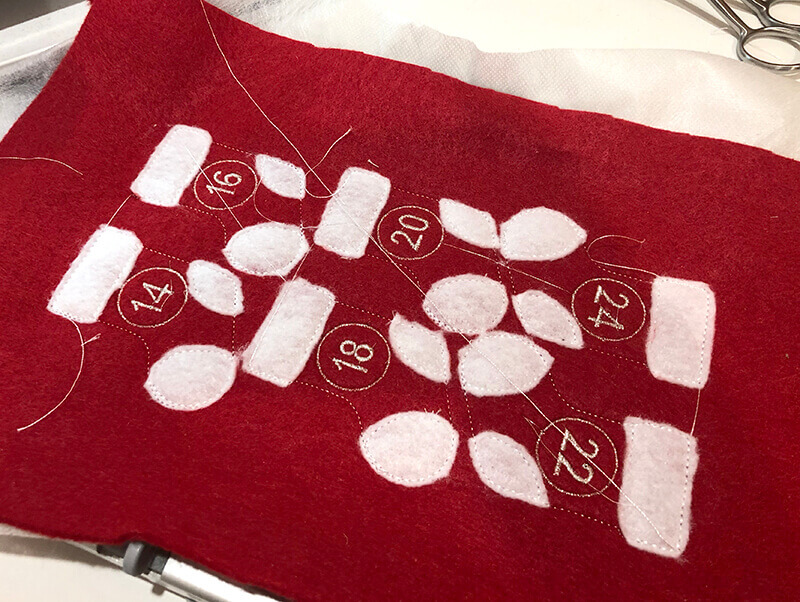
Trim stocking details
When this is done, remove the embroidery hoop from your machine and trim around all of the white components using appliqué scissors.
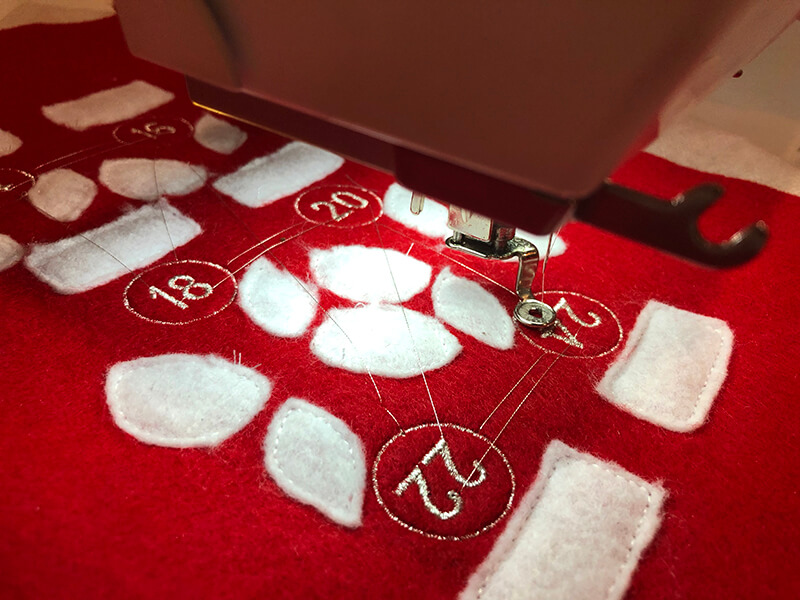
Stitch out the numbers and the circles
After you are done trimming, return the embroidery hoop to the embroidery machine and begin stitching the next thread color which is the number. I used a silver metallic thread for both the number and the circle around it.
Tape on your back piece
Once the numbers and the circles around the numbers are all done, remove your embroidery hoop from the machine and tape a piece of felt matching the felt color you started with onto the back of the hooped stabilizer. Then return the hoop to the embroidery machine.
If you’ve used a contrasting thread color for the number in the circle around it, you will probably want to change thread colors to back to white which is what I did. Finally start the machine again and begin stitching the final thread color.
Finishing details
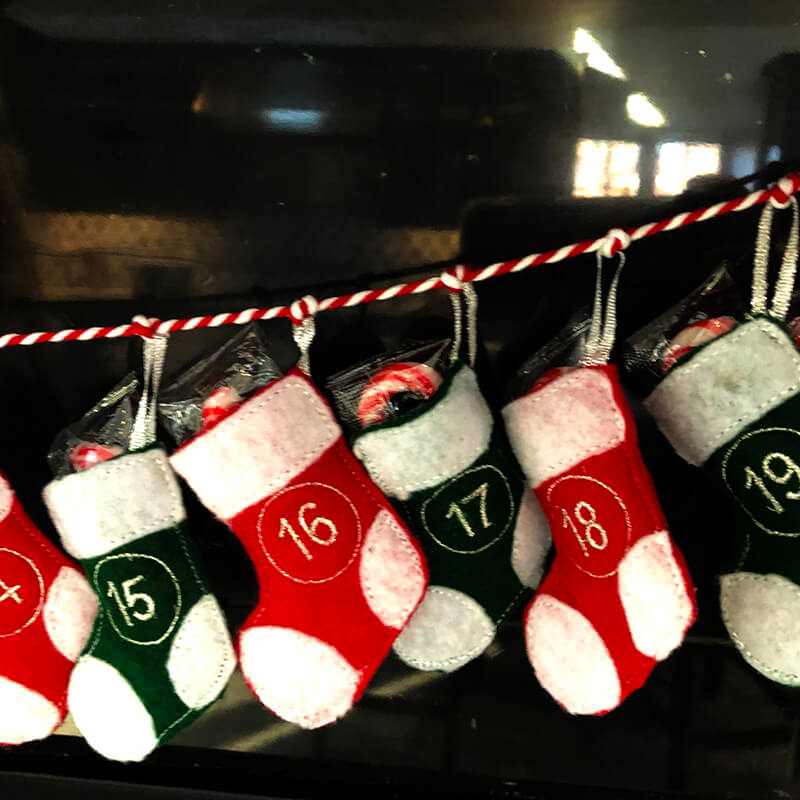
Now you are done stitching! At this point, you are ready to remove the project from the embroidery hoop cut around all of the little stockings through both layers of felt and stabilizer. Be careful around the top corner of each stocking where the loop is attached. You will need to trim the front and the back of the stocking separately around this area to prevent cutting off the loop. Trim your connector strings with a pair of nippers.
Hang your stockings on a piece of ribbon or cording. I knotted each, one by one, along my cording so that they would stay in place. I separated each stocking by about 2-3 inches.
Don’t forget to stuff your stockings with a little treat. I put a miniature candy cane in each one of mine.
Other in-the-hoop Advent calendars
It’s hard to imagine, but what if you are not crazy about this style of in-the-hoop Advent calendar? Not to worry – there are plenty of other styles. Here are some other cute ones.
In-the-hoop Advent sacks
If your treats tend to be a bit larger, stitch out some of these sacks in order to accommodate them. When you make 25 – you’ve got an Advent calendar!
In-the-hoop Advent trees
Here’s a more modern styled of in-the-hoop Advent calendar comprised of simple little trees with a pocket for treats.
Traditional in-the-hoop Advent calendar with flaps
If you prefer a more traditional style Advent calendar, you’ll love this version with flaps that hide the treats.
In-the-hoop Advent bears
This in-the-hoop bear Advent calendar is a cute twist on an Advent calendar. The in-the-hoop item is the treat! Stitch out 25 of these little bears and have each one be the daily treat.
Advent calendar with pockets
This in-the-hoop advent calendar with pockets is made in separate pieces that you connect together with ribbons or rings. Each treat goes in a numbered pocket.
Reindeer pocket in-the-hoop Advent calendar
I love how this reindeer is peeking out of the top of the in-the-hoop pocket reindeer Advent calendar. Watch out – don’t let him steal your treats!
Ready to make an in-the-hoop Advent calendar?
While an-in-the hoop Advent calendar may not be the quickest project to make, it may be the cutest.
Enjoy! And happy stitching!
xo
Julie
Want to remember this? Save “How to make an in-the-hoop advent calendar” on your favorite Pinterest board