Disclosure: Some of the links on this site are affiliate links. This means that if you click on them and make a purchase, I may earn a small commission at no extra cost to you. Please know that I only recommend products and services I trust and use myself.
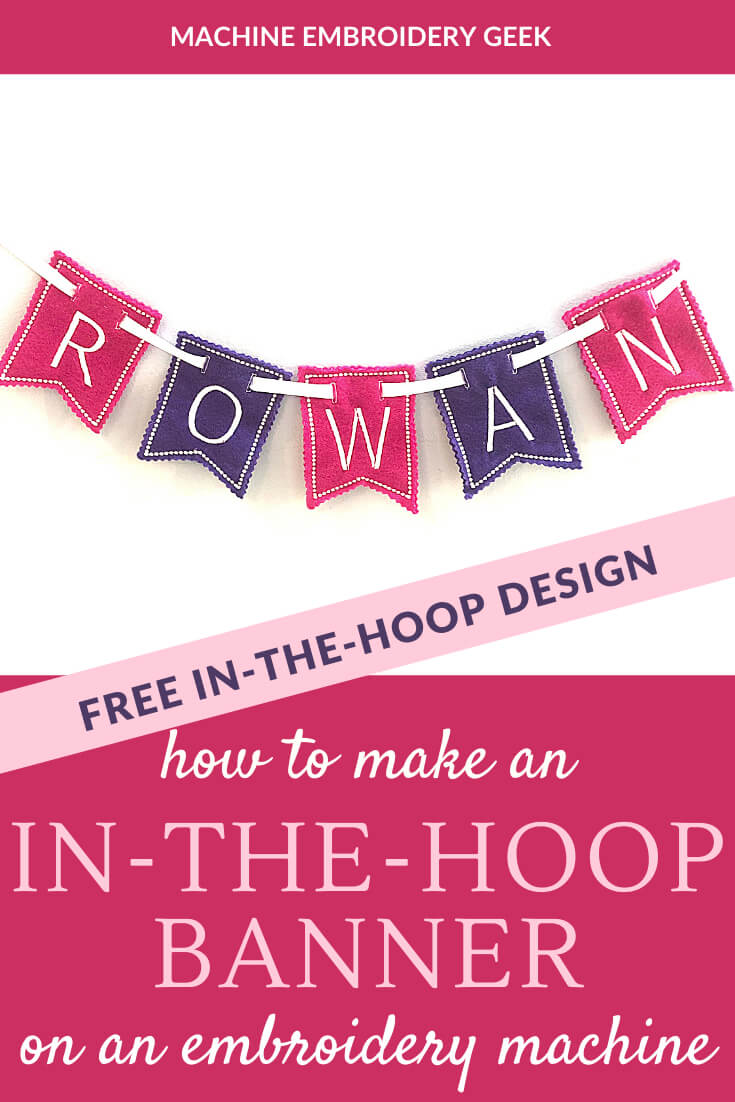
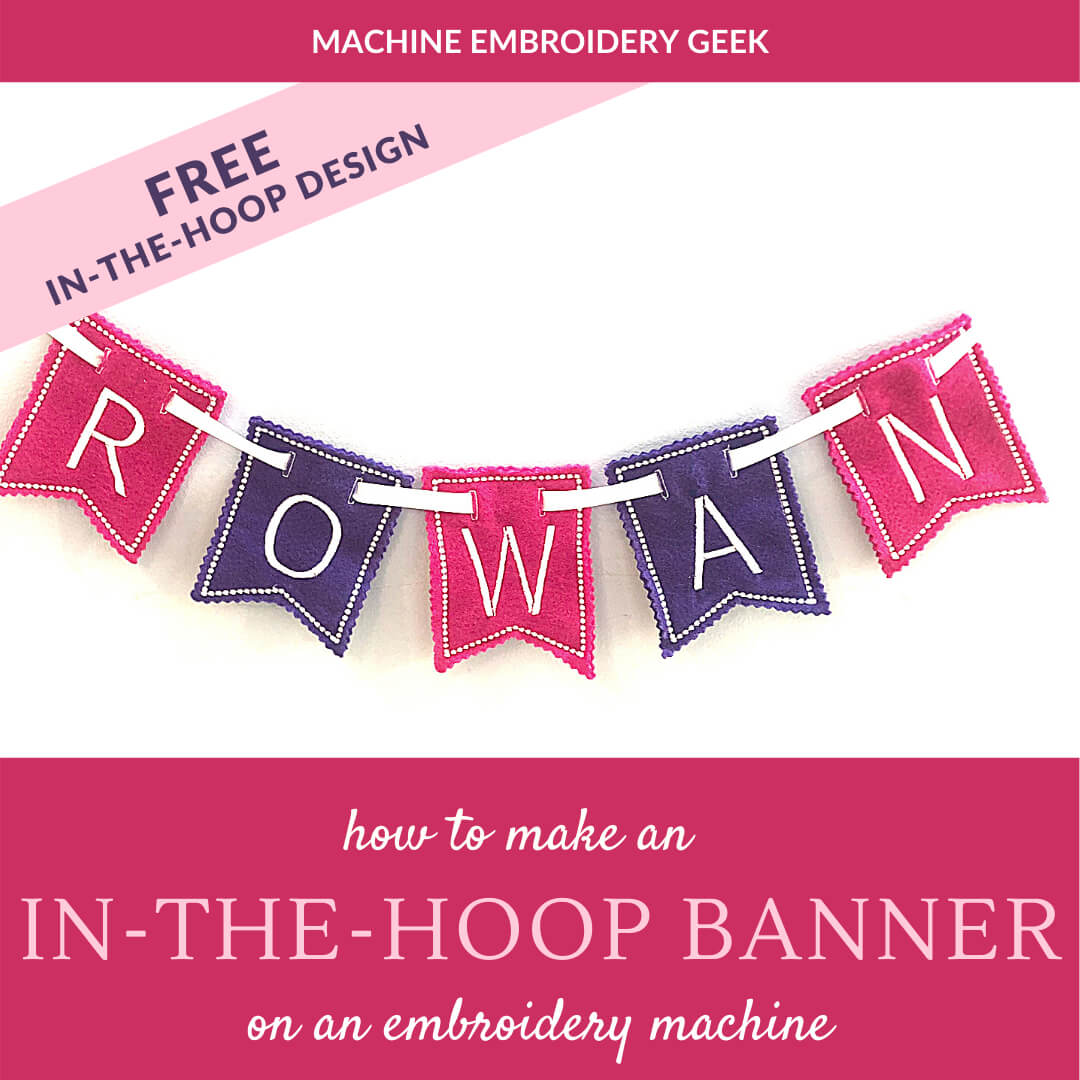
I’ve always wanted to make an in-the-hoop banner, but never got around to it – mostly because it seemed like A LOT of work. But, with my little friend, Rowan, turning three, I had the perfect subject for my birthday banner. And – BONUS – her name is not that long so maybe the project wouldn’t actually take that long.
Before I embarked on this project, I wanted to take additional measures to make sure I wouldn’t be stitching a birthday banner for weeks. I needed an in-the-hoop pattern that would be quick and easy to stitch out without a lot of extra finishing work. So, I took it upon myself to create one. And – I’m making it available here for you to use it as well.
So, in this post, I’ll not only show you how to stitch out the banner. I will also show you how to customize this file to make the banner say whatever you want.
But, before we get started. Let’s make sure you know what I’m talking about here.
What is an in-the-hoop project?
Never heard of an in-the-hoop project? Well it’s about time to change that. An in-the-hoop project is one that can be made entirely in your embroidery hoop. So, instead of adding embroidery to an item, with an in-the-hoop project, your embroidery machine actually puts together the project. Learn more about what exactly an in-the-hoop project is.
Sound scary? It’s not. This is a great in-the-hoop project for beginners. Check out some other awesome in-the-hoop projects for beginners.
Making an in-the-hoop banner
Supplies needed for this project
- SewWrite software to generate letters (or pre-digitized letters)
- SewWhat-Pro software to combine the letters and the in-the-hoop flag design
- In-the-hoop banner pattern (available in my resource library)
- Felt – the amount depends on how many flags you are making and which size your are stitching out. For 4″ banner pieces – each flag will require an 8″ x 4″ piece of felt. For 5″ banner pieces – each flag will require one 10″ x 5″ piece.
- Water soluble stabilizer
- Blue painters tape
- Pinking shears
- Ribbon (3/8″ wide or 1/2″ wide if you are stitching out the larger flag)
Setting up the in-the-hoop banner embroidery file
When it comes to preparing the embroidery file for this project, you have two options. Option number one is to add letters for each flag using the fonts that are built into your embroidery machine. If you go this route, you will stitch out the first two color stops in the flag design on your embroidery machine. But, then you will have to exit the design to stitch out your letter. When the letter is done, you will come back to the design and finish switching out the rest.
Option two is to integrate your letters within your file. While this takes a little bit of extra set up, it will make the process go much faster because you don’t need to exit the pattern just to add in the letter.
So for option one, there is no additional work that you need to do with the embroidery file but if you decide to use to go with option two, you will first need to prepare an embroidery file for each letter of the banner.
Creating a letter for each banner flag
To create the letter for each flag, I used SewWrite. I simply typed each letter and sized them to be about 2-1/4″ tall using the pre-digitized Arial typeface.
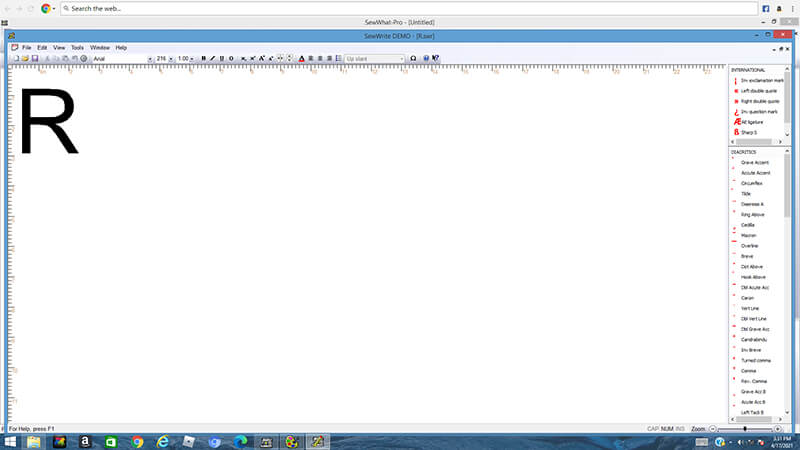
Once I created a letter, I then saved it out as an embroidery design. I did this for all five letters of the name. When you save each letter, it doesn’t really matter what embroidery file format you choose. This is because you’re going to be merging in the letter with another design and saving it out as you’re finished embroidery file.
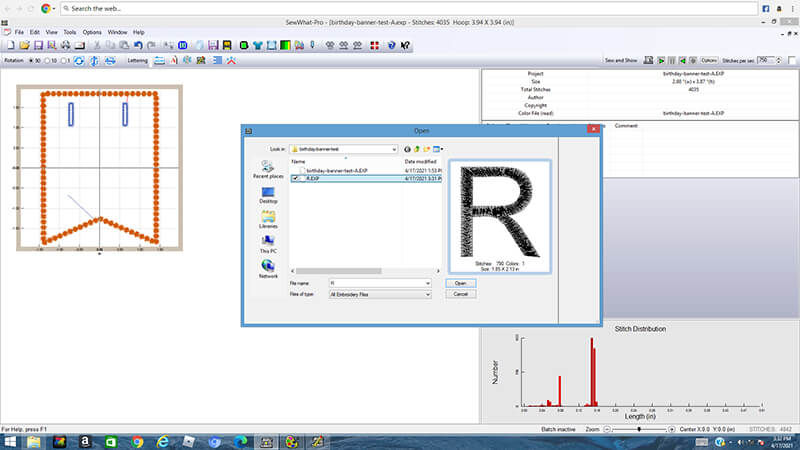
Merging a letter into the in-the-hoop banner design
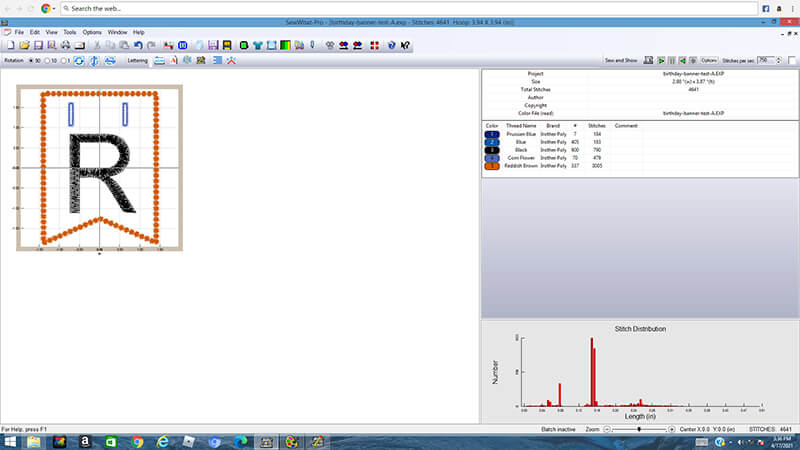
Once you have all your letters created and saved as individual embroidery files, you are ready to start working in SewWhat-Pro. First, open the banner file in any embroidery format. It doesn’t matter what format you choose because you are going to save it out as the file format you need once you are doing merging the letter in.
Select the Merge Files Option under “Tools”, then navigate to your letter file. By default, SewWhat-Pro will put the letter in the center. Feel free to move the position of the letter around a bit in the flag to wherever you feel looks right. But, just make note of how you move it, as you will want the other letters to have the same relative position on each of the banner flags. I actually did not move my letters at all. I thought my letters looked pretty good in the center of the flag, so I left them there.
SewWhat-Pro will also make the letter you just merged in the last thread color in your design. This is not where you want it to be. You want that letter to be stitched out before the last two rounds of stitching. So, go to the Edit menu and choose “Order Threads”.
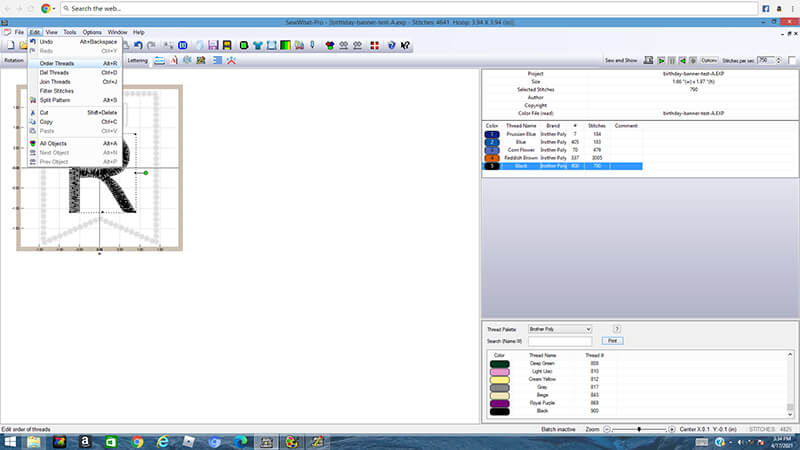
Then, enter the following numbers to make the letter be the third thread color.
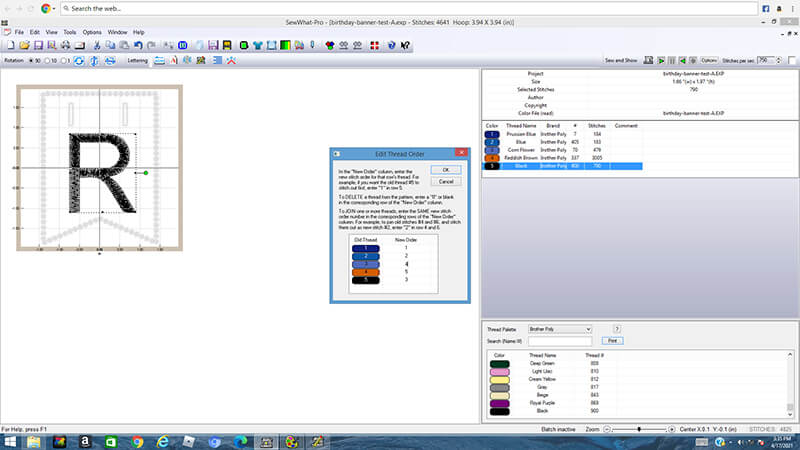
Once you have the letter merged in, properly placed and the thread colors ordered appropriately, then you are ready to save your design in the embroidery file format that your machine requires. You will need to repeat the steps for each letter in the name.
Preparing to stitch out the banner
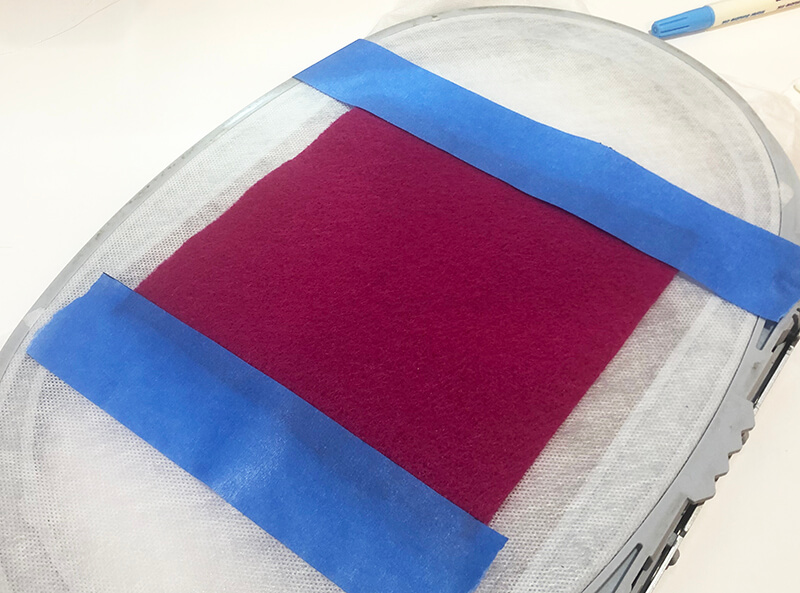
You first need to prepare your fabric for each banner flag. If you are making the 4″ version, you will need two pieces of felt (or other material) that are both slightly larger than 4″ x 4″. You really can use any type of fabric for this project. But, keep in mind that the outside edges of each flag will be left raw. For this reason, I chose a felt, because it doesn’t ravel. I also chose alternating colors of pink and purple, just because I thought it looked fun.
Now you need to prepare your hoop. Hoop a piece of water soluble stabilizer making sure it is taut.
And, finally, one last step for setup. Change your bobbin thread so that it matches your top thread. The back of your banner will be visible so you want the stitching to look as nice as possible.
[do_widget id=custom_html-48]
Stitching out the banner
You are now ready to start stitching. Start the first round of stitching. These stitching lines are intended to show you where to lay down the banner flag fabric.
When the stitching is done, lay your piece of fabric over the stitching lines, then start the next round of stitching.
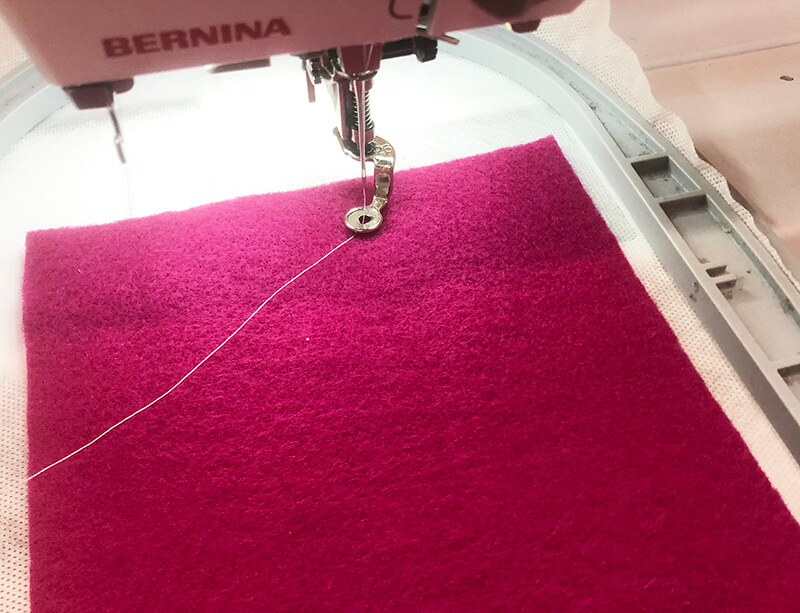
This next thread color is an outline of the flag to secure the fabric in place.
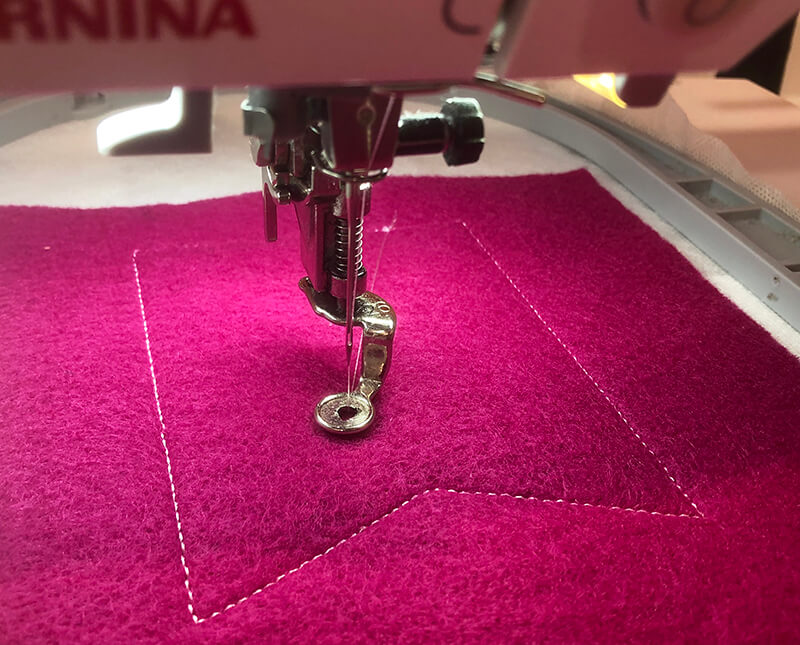
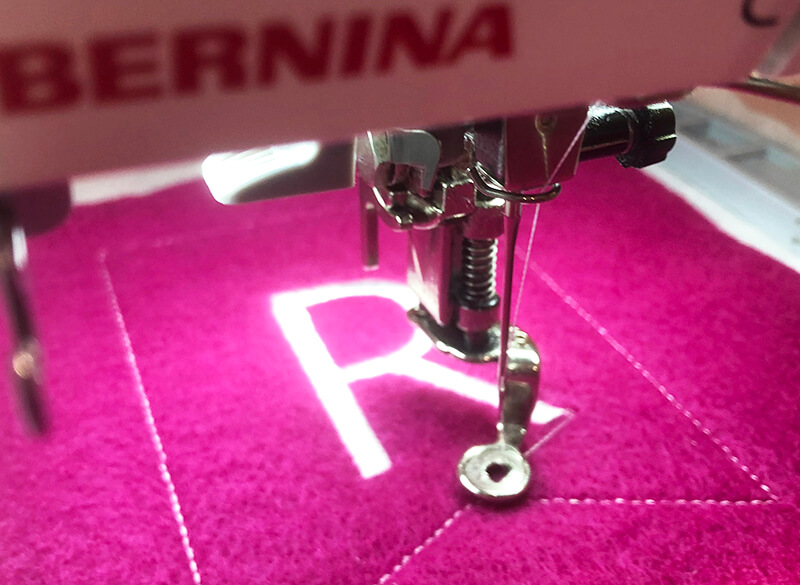
The next round of stitching will be the letter. Obviously you can change thread colors at any point in this process. Clearly, I did not – using white all the way through. Note that because we are just stitching the letter on the top layer at the fabric, the back of the letter will not show up on the back of the banner flag.
Once you are done stitching the letter, you need to remove the hoop from the embroidery machine. Tape a piece of felt onto the back of the hooped stabilizer, covering the stitching lines. I used blue painters tape to secure the felt in place and I actually taped all the way to the edges of the hoop, because I think the tape has a more secure bond with the surface of the hoop than the stabilizer.
Carefully return your hoop to your machine, making sure the tape is not sticking to anything it shouldn’t be and your bottom piece is still in place. Begin your next round of stitching which are the button holes at the top of the flag. Note that these button holes will go through both layers of the banner flag.
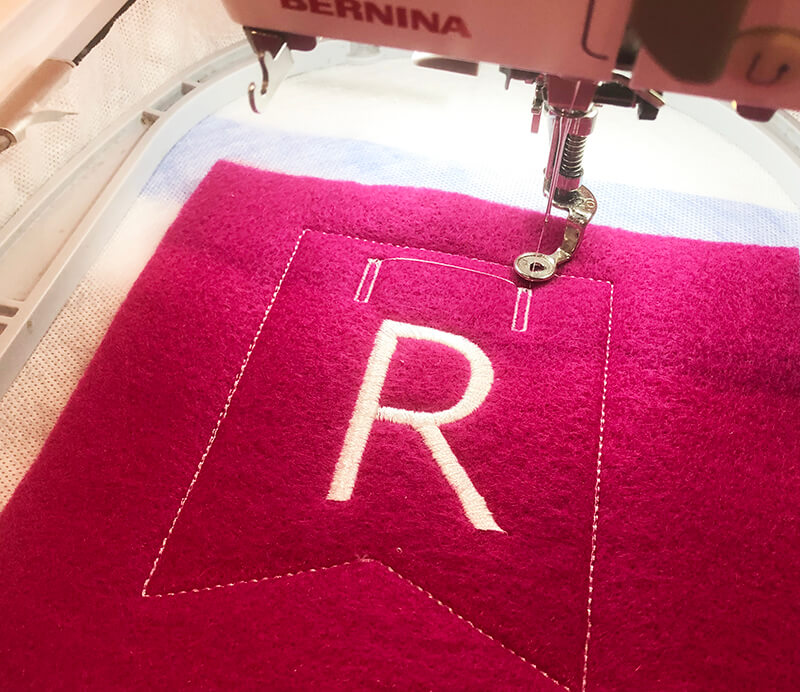
Start the last round of stitching which is the decorative border around the flag.

Finishing touches
When the stitching is all done, you can remove your hoop from the machine and remove your project from the hoop. I cut around each of my flags with pinking shears because I liked the whimsical look of the pinked edge. But, if you had made your flag out of material such as cotton broadcloth, the pinking would also keep the edges of the flag from unraveling.
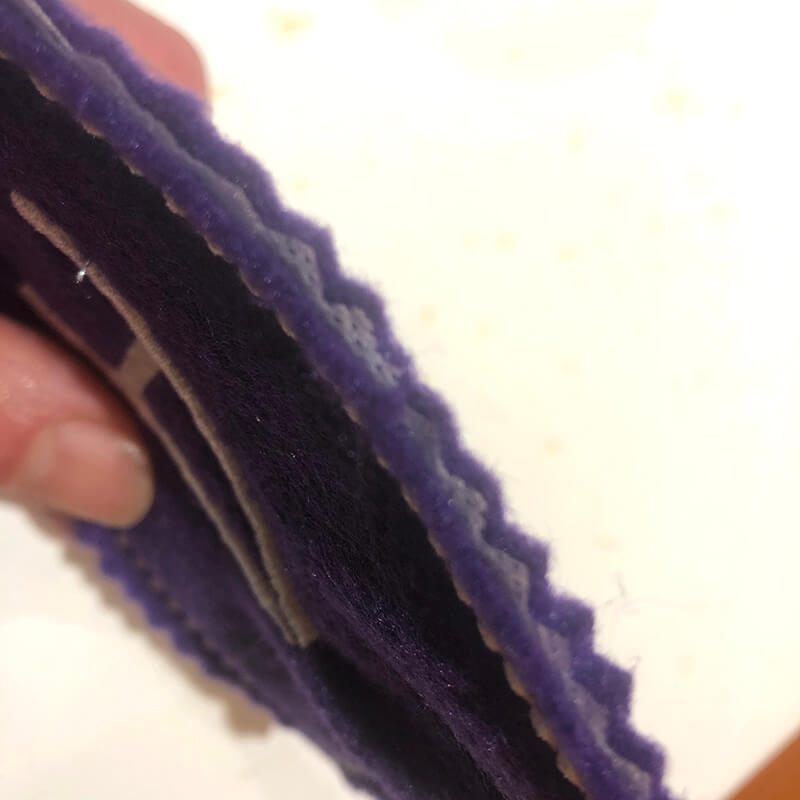
If you can still see the stabilizer between the two layers of fabric of your flag, you can gently tear it away or get it wet to make it dissolve. I got my fabric drenched in order to get rid of the stabilizer and it resulted in the flags being quite stiff. It didn’t bother me, but keep in mind that the water soluble stabilizer acts like a dried glue once it gets wet and trapped inside the two layers of fabric.
In order to feed a ribbon through the banner, you will need to cut holes where the buttonholes are stitched. I used very small appliqué scissors to make these slits.
Feed the ribbon through the button holes to string the banner flags together. For the 4“ x 4“ banner flags, you will need 3/8″ ribbon. For the larger banner you can use a little wider ribbon like 1/2″ width. In addition to threading the banner together, you can also add a little bow on each banner flag.
So there you have it. What a fun little banner. Ok – I’ll admit, my little buddy Rowan celebrated her birthday last week. But, honestly, I really don’t think this matters. I think it turned out so cute, she’ll want to hang it in her room year ’round.

Happy stitching!
xo
Julie
[do_widget id=custom_html-27]
[do_widget id=custom_html-10]
Want to remember this? Save “How to make an in-the-hoop banner on an embroidery machine” on your favorite Pinterest board