Disclosure: Some of the links on this site are affiliate links. This means that if you click on them and make a purchase, I may earn a small commission at no extra cost to you. Please know that I only recommend products and services I trust and use myself.
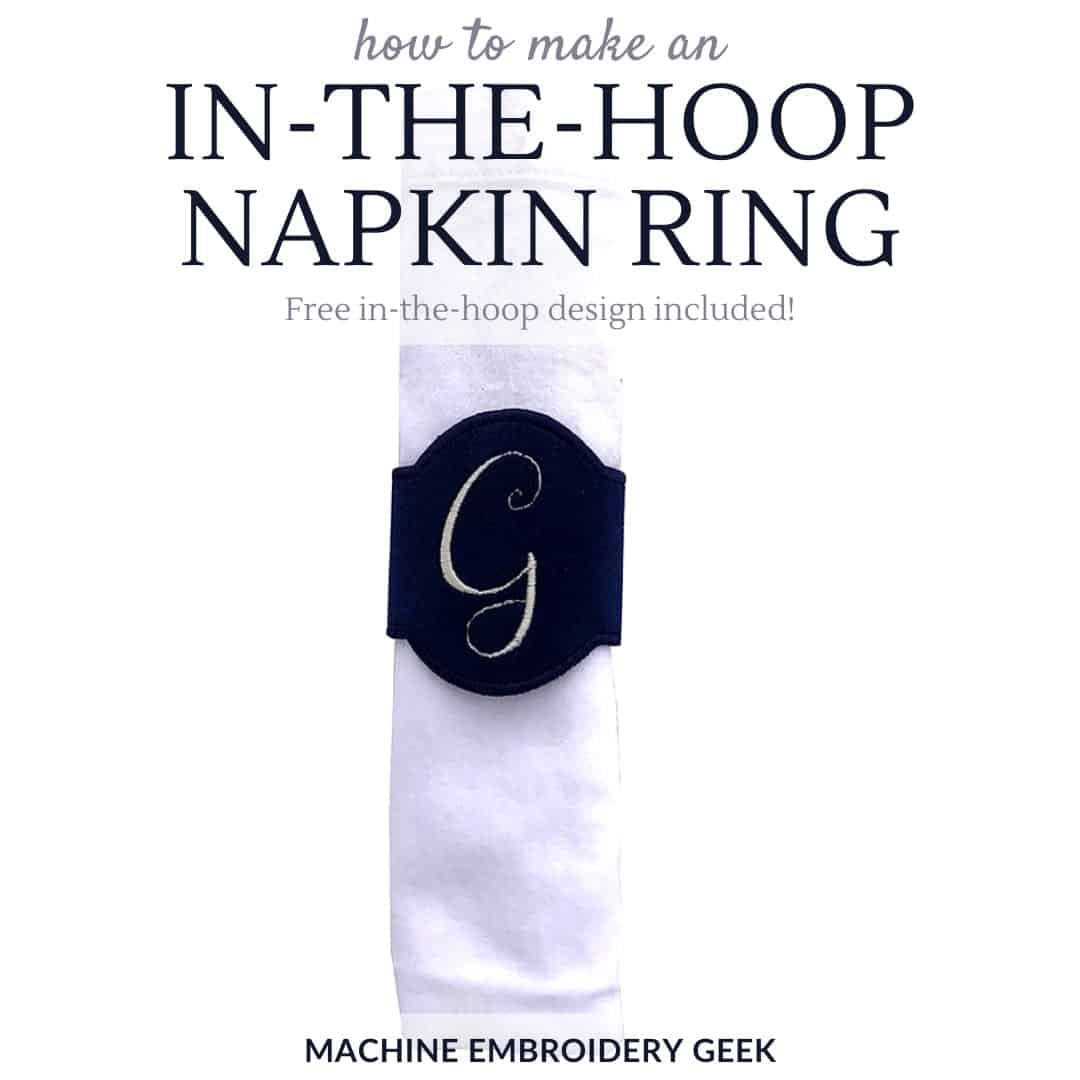
Napkin rings offer a touch of elegance to your place settings. You have probably seen them made of all different types of materials including metals, wood, plastic and ceramics. But have you considered making napkin rings out of fabric using your embroidery machine? Yep – you can actually make them entirely in your embroidery hoop. Here’s how to make elegant in-the-hoop napkin rings.
[do_widget id=custom_html-26]
Products mentioned in this post
- In-the-hoop napkin ring designs
- Star napkin ring – this one is a little different from the others as the napkin is designed to go through the star and not around it.
- Blank circle design – add whatever you want into the circle
- Circle style + band – simple self-closing style perfect for personalization.
- Single initial – a fancy, dramatic style
- Scroll shaped napkin ring to personalize
- Perfect Santa – adorable Santa face designed to be stitched out on white marine vinyl.
- Ginger bread man – great for Christmas time
- Santas belt – so adorable!
- Easter egg – decorative egg perfect for your Easter table
- Bunny – bunny stands up and the napkin goes right through
- Heart – perfect for Valentines day
- Turkey – stands up and the napkin goes through the turkey’s belly.
- Spring collection of ITH napkin rings – a perfect set to stitch out for Easter or any other spring occasion.
- Supplies needed to make the in-the-hoop napkin ring design featured in this post.
What are in-the-hoop napkin rings?
If this whole notion of “in-the-hoop” sounds like Greek to you, the first thing you should do is read up on what an in-the-hoop project is. In short, an in-the-hoop project is an item that can be made entirely in your embroidery hoop. If you are used to using your embroidery machine to enhance an existing item, an in-the-hoop item is a little different. With in-the-hoop projects, you use your embroidery machine to make the entire item. Pretty crazy, huh?
Choosing a design
OK – now that we got that out of the way, we need to discuss the design of the napkin ring. There are a number of different in-the-hoop napkin ring patterns. But, before you select one to make, you should ask yourself: what exactly is your goal? Are you enhancing a more casual table setting or making these for a more formal affair? Are the napkin rings for a specific holiday? Do you want to personalize the napkin rings by adding an initial or a monogram? How to you want the napkin rings to close? There are a lot of options.
Basically in-the-hoop napkin ring patterns work in two different ways. Most of the in-the-hoop napkin rings are long and skinny styles that close around the napkin. However, there are others that incorporate a hole and the napkin goes right through. With these designs, the napkin is typically propped up a bit off the table.
Here are some of my favorite designs which include both the wrap around and the hole style of in-the-hoop napkin rings.
Just the basics
- Star napkin ring – this one is a little different from the others as the napkin is designed to go through the star and not around it.
- Blank circle design – add whatever you want into the circle
- Circle style + band – simple self-closing style perfect for personalization.
Super fancy
- Single initial – a fancy, dramatic style
- Scroll shaped napkin ring to personalize
Just for holidays
- Perfect Santa – adorable Santa face designed to be stitched out on white marine vinyl.
- Ginger bread man – great for Christmas time
- Santas belt – so adorable!
- Easter egg – decorative egg perfect for your Easter table
- Bunny – bunny stands up and the napkin goes right through
- Heart – perfect for Valentines day
- Turkey – stands up and the napkin goes through the turkey’s belly.
- Spring collection of ITH napkin rings – a perfect set to stitch out for Easter or any other spring occasion.
How to make an in-the-hoop napkin ring
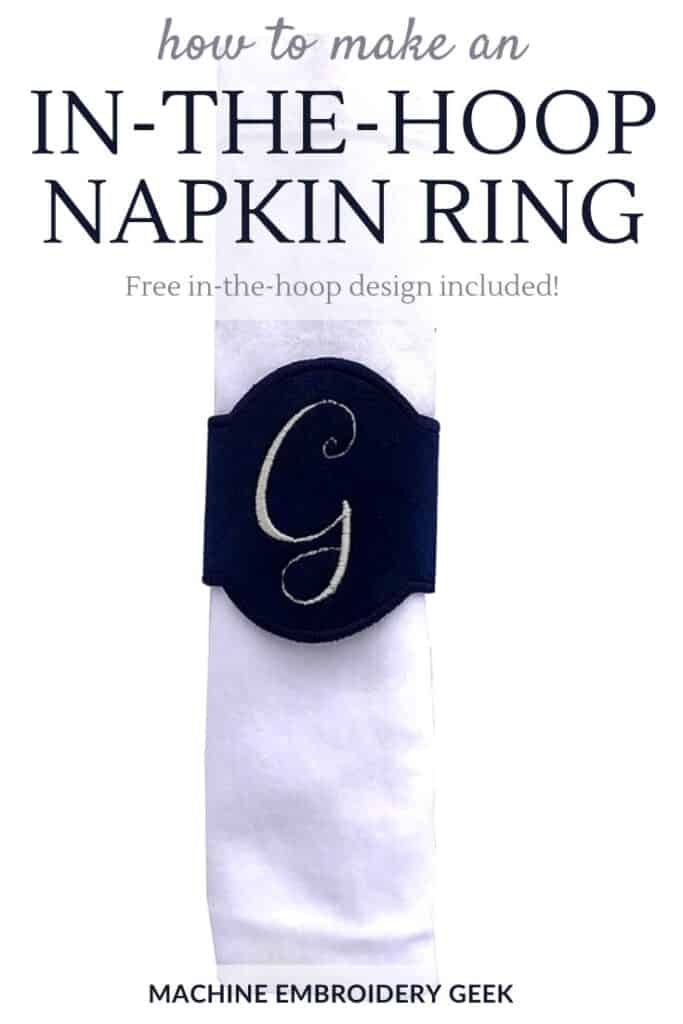
Before investing in some of the more expensive, decorative in-the-hoop napkin ring designs, I thought you might want to try out a more basic pattern. I created this simple version which can easily be personalized with a name or a monogram. With this design, you can also choose different methods of closure. (I’ll explain more when we get to that step below.)
This in-the-hoop design is available (for free) in the resource library.
Preparing your embroidery thread
Before you get started with this project you will want to create a bobbin that matches your top machine embroidery thread. The finished napkin ring will have a finish satin stitch around the outside edge. I am making mine black to blend in with the color of my fabric. So I am creating a bobbin comprised of black machine embroidery thread. This in-the-hoop napkin ring is like many other in-the-hoop projects in that the back of the item is exposed so a matching bobbin thread is going to look more finished.
Preparing your material
Now I’m going to prepare my napkin ring material. I want my napkin rings to have some weight so I have sandwiched a piece of interfacing between two pieces of Ultrasuede. The completed size of the napkin ring is 2.5“ x 6.75“ so I cut two pieces of Ultrasuede slightly larger than this as well as a piece of interfacing the same size. The interfacing will give the finished peace some rigidity.
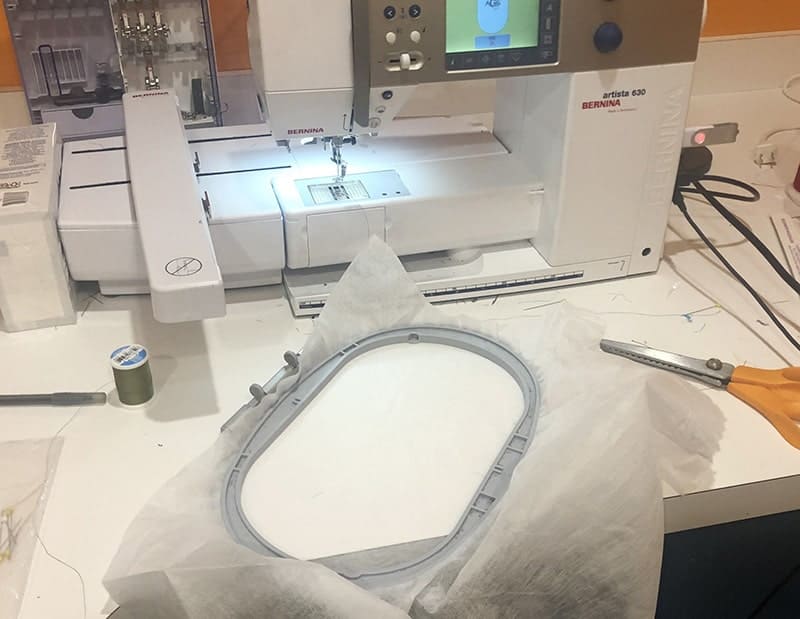
Preparing your stabilizer
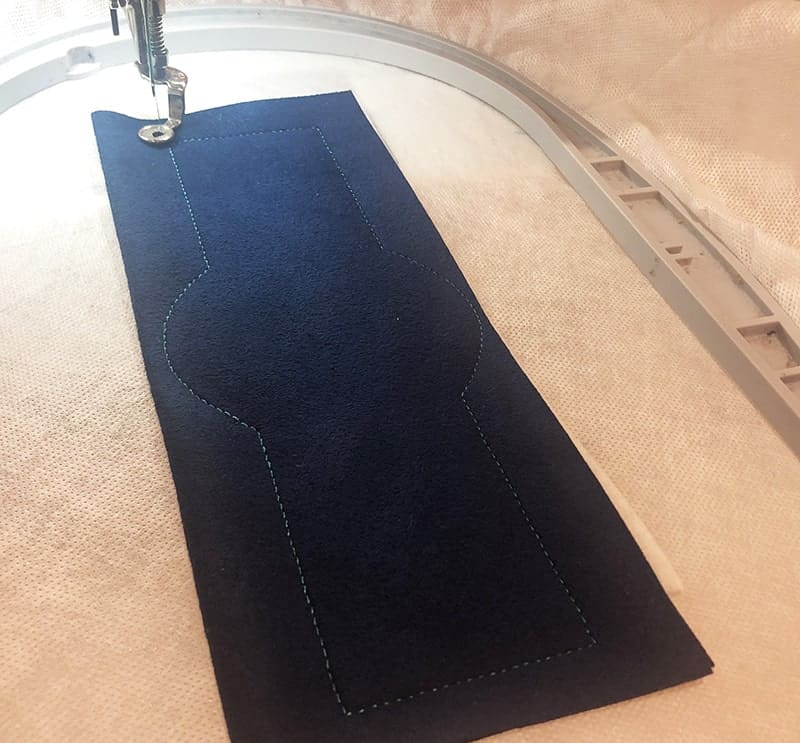
The first step in making this particular in the hoop napkin ring is to hoop a piece of water soluble stabilizer. You want to make sure it is hooped very securely.
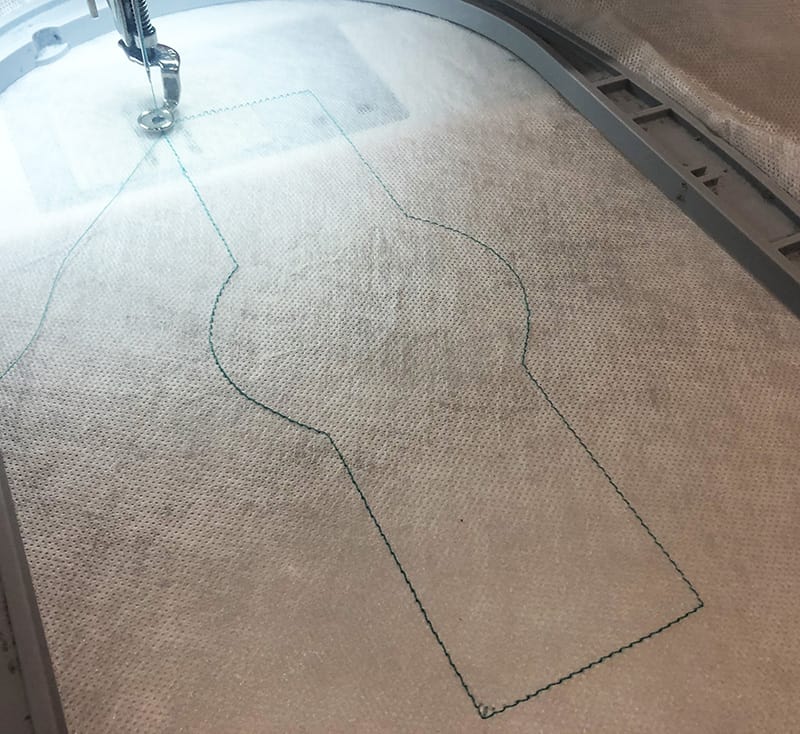
Stitching out your design
Now start your first round of stitching. This is simply a placement stitch to show you where to lay your fabric.
Lay your prepared fabric “sandwich” over the placement line you just stitched out.
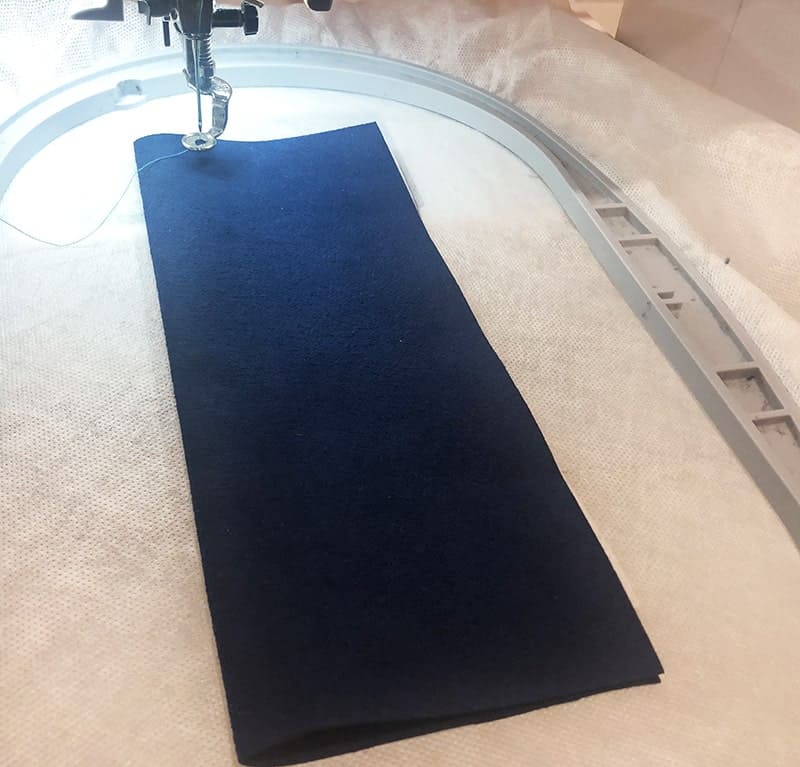
Start the next round of stitching. This is the tack down stitching
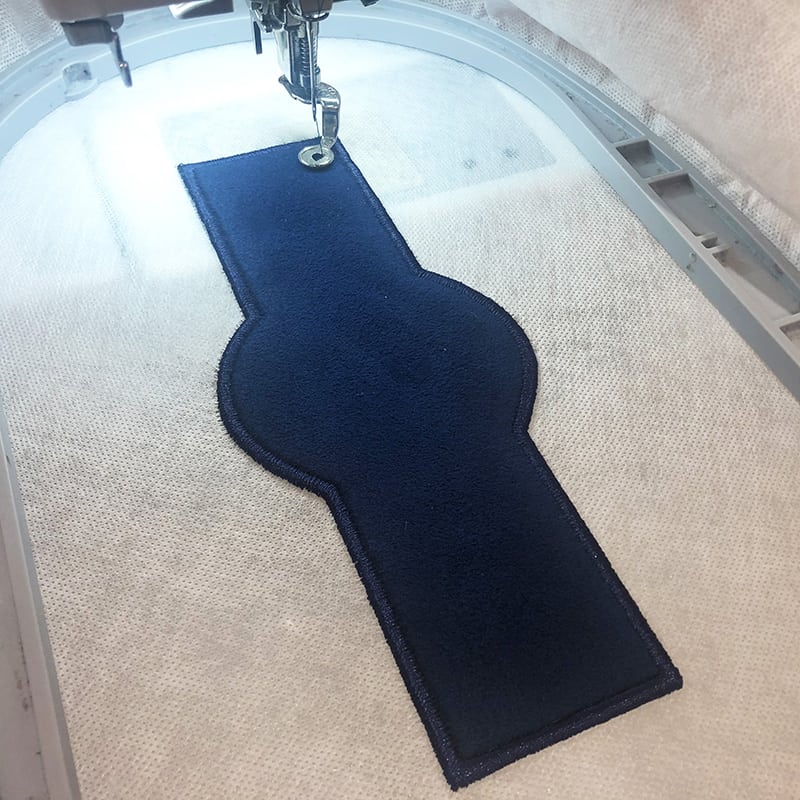
Remove the project from the hoop. Using appliqué scissors, trim the fabric around the tack down stitching line.

Return the project to the hoop and start the next round of stitching. This is the final satin stitching around the outside edges of the napkin ring.
Finishing touches
Looks pretty good, huh? At this point, you can be done with your napkin ring. But you need decide how your napkin ring will turn into a ring. And for this, you have a few options.
You can simply install snaps (if you have a snap kit) on either end to close it. Or you can stitch out either one or two button holes that are incorporated in the file. If you opt to stitch out both, you can close the napkin ring with a ribbon. However, I decided to just stitch one and sew a small, elegant button on the other end to close the napkin ring.
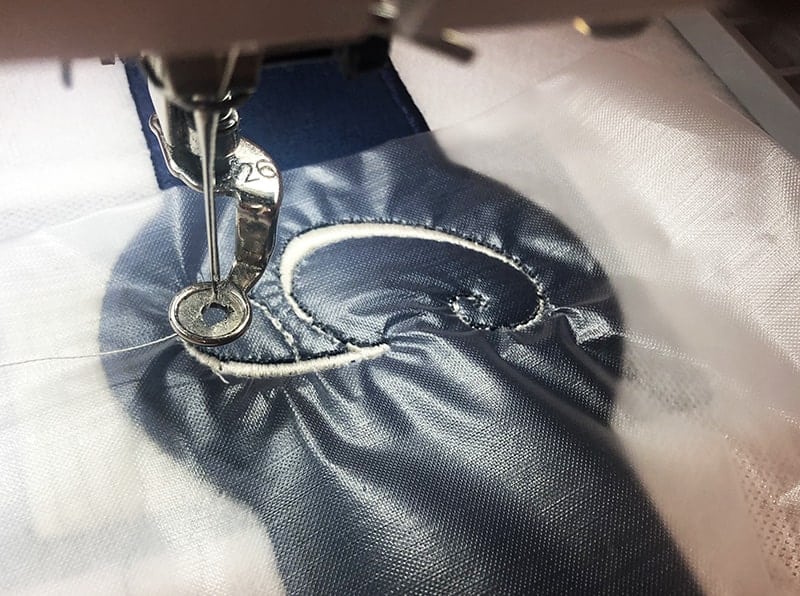
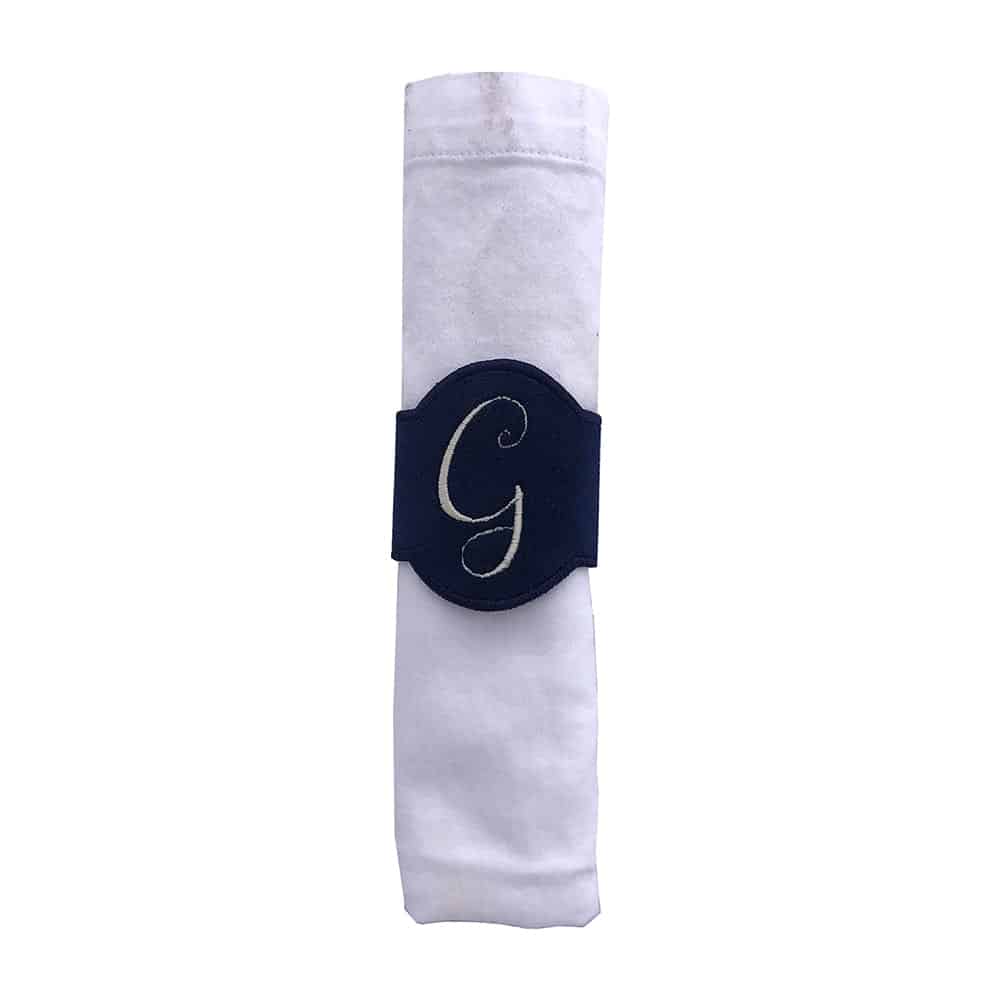
After you stitch out the closure mechanism, next you can personalize it. Since this is such a basic in-the-hoop napkin ring, you will likely want to add a name or a monogram. In this design, the round area for the monogram or single initial is about 1.5″ in diameter. So, plan your monogram design and sizing accordingly.
I opted for a stately “G”. Before stitching out this G, however, I laid down a piece of water soluble topper to make the initial pop out and appear more prominent on the Ultrasuede.
When your stitching is done, simply cut the water soluble stabilizer around the napkin ring to free it from the hoop. Then wet it to remove all of the water soluble stabilizer and water soluble topper. Finally, trim your connector strings.
When it is dry, sew in your button, add snaps or whatever closure you choose.
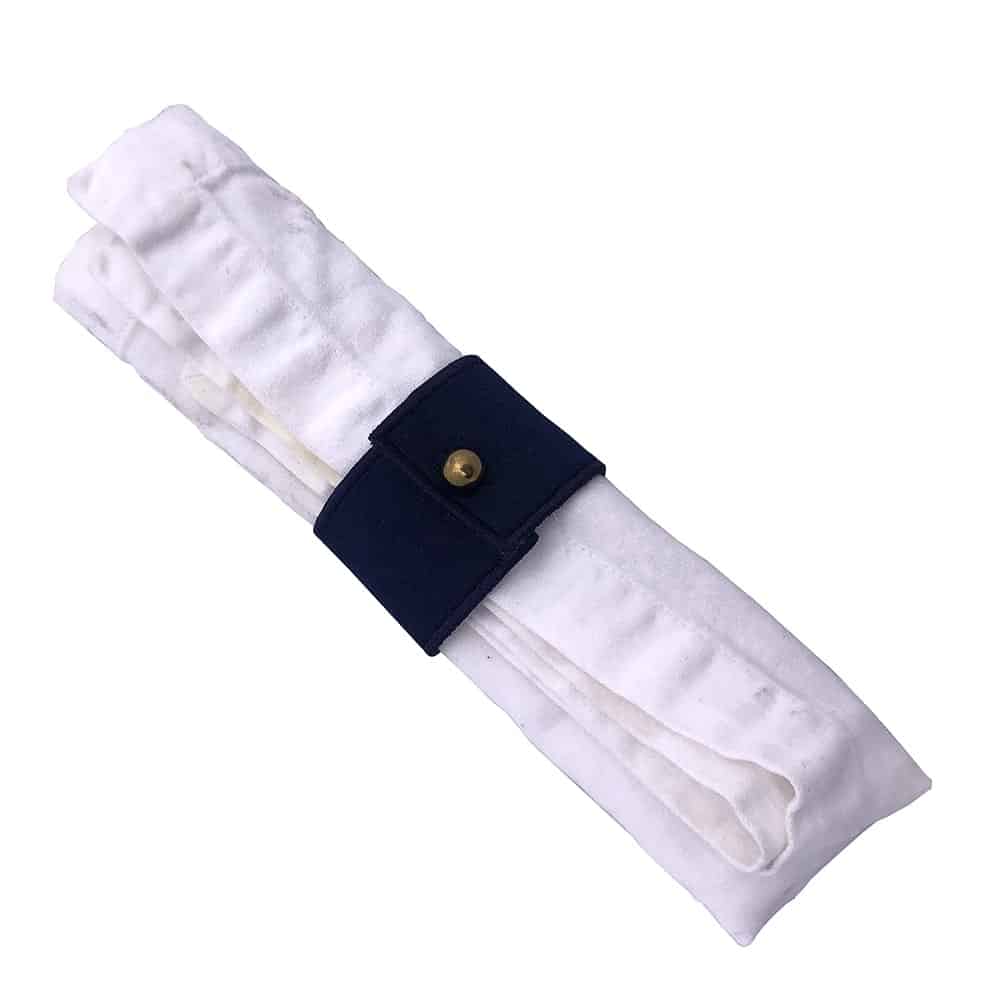
And there you have it! Your napkin ring is done. Now repeat about 7-11 more times to make a complete set! Enjoy!
xo
Julie
[do_widget id=custom_html-38]
Want to remember this? Save “How to make an in-the-hoop napkin ring” on your favorite Pinterest board”If you would like access to this FREE in-the-hoop pattern, subscribe to the blog and you will be able to download it in a variety of embroidery file formats from the resource library!