Disclosure: Some of the links on this site are affiliate links. This means that if you click on them and make a purchase, I may earn a small commission at no extra cost to you. Please know that I only recommend products and services I trust and use myself.
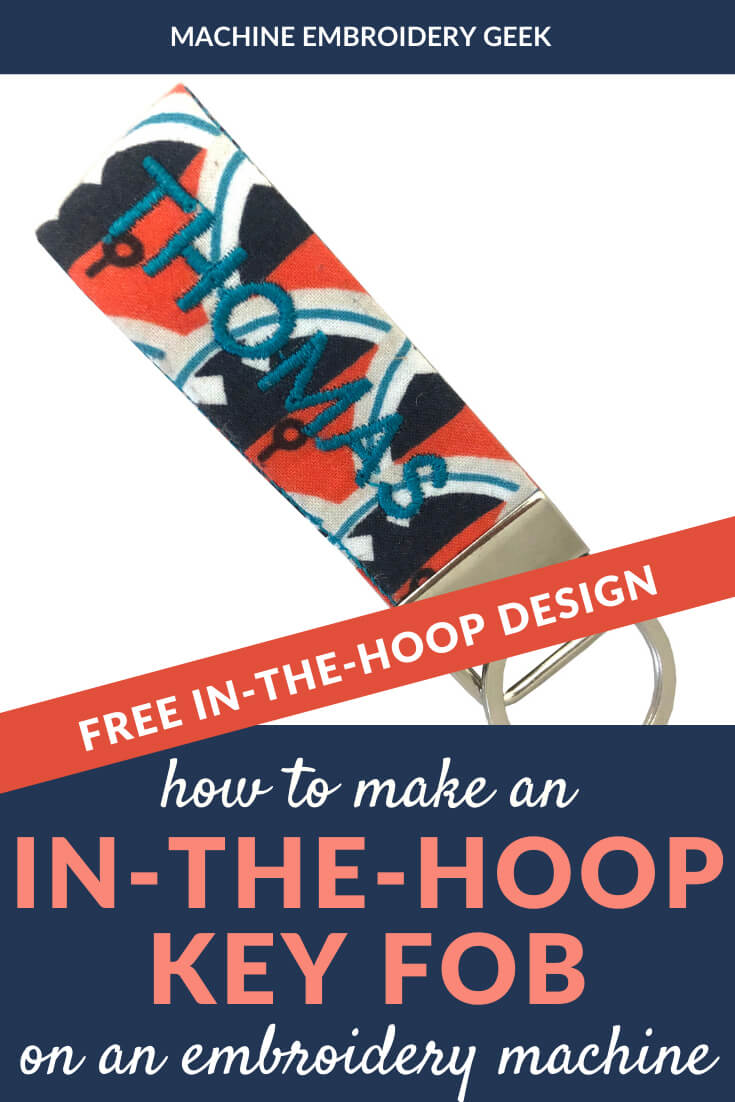
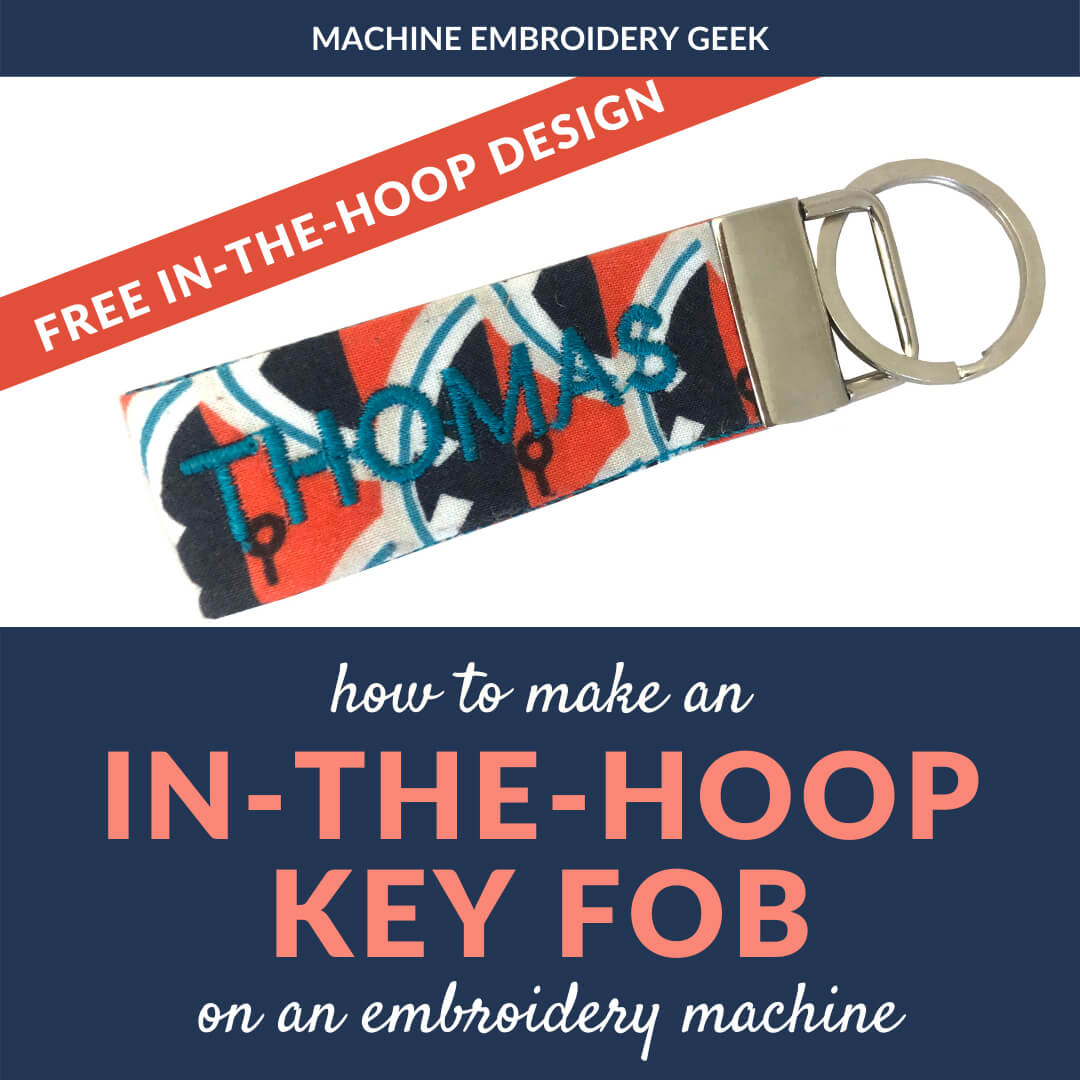
If you have been reluctant to try an in-the-hoop project, perhaps I can tempt you this one. One of the easiest possible projects to make in-the-hoop is a key fob. And there are tons of different styles – some that clip onto a bag or back pack, some that are essentially just a keychain. But, the style we are going to make here is a simple rectangular key fob that can be made with any combination of fun fabrics and personalized for any recipient. So, go ahead and download this free in-the-hoop key fob design (available in the resource library) and work along with me to stitch out this super versatile and adorable project.
Please note that in order to make this free in-the-hoop key fob, you will need an embroidery machine with at least a 5″ x 7″ sized embroidery hoop.
Products mentioned in this post
- Key fob designs
- Supplies needed to make this in-the-hoop key fob
- Two small pieces of fabric
- Heavy, craft-weight fusible interfacing.
- Cut away stabilizer
- Tear away stabilizer
- Sticky back tear away stabilizer
- Water soluble stabilizer
- Embroidery bobbin thread
- Temporary adhesive spray
- That Purple Thang – turning tool
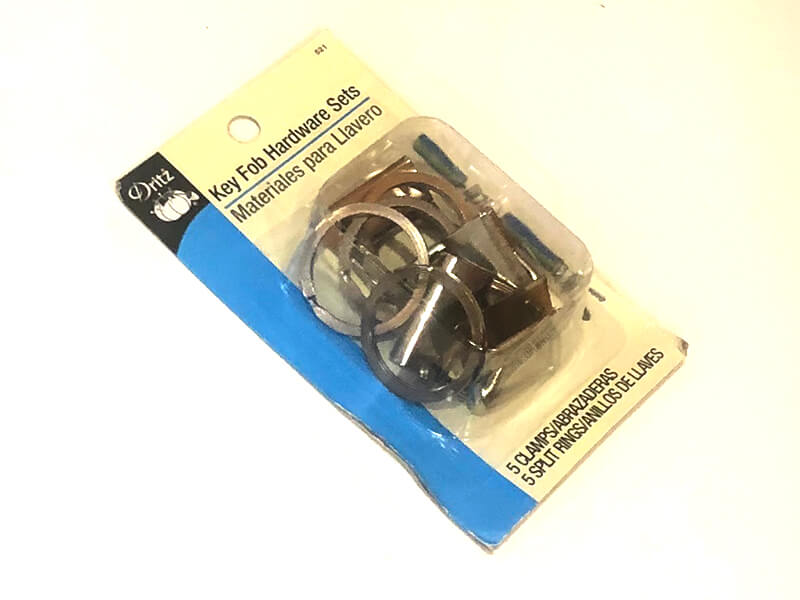
- 1″ key fob hardware
- Key fob kit that includes the pliers
Why make an in-the-hoop key fob?
Let’s face it. Keys can be easily lost or misplaced. So, if you don’t feel like investing in one of those bluetooth key identifiers, a more stylish and low tech option is to attach your keys to a colorful strap and personalize it with your name or monogram.
Key fobs make a great gift, are cheap and easy to make, and are typically a good seller at craft shows.
I, personally, was inspired to make a key fob when I found my son’s keys under the couch. (He’s in middle school and organization is not his strong suit.) So, I figured if I connected his keys to a personalized and distinct looking key fob, there would be less of a chance for them to get lost. And, if he lost them at school, a friend’s house, the pool, etc… with his name embroidered on the key fob, there might actually be a chance that the keys could make it back to him.
Another reason why you might want to make a key fob as opposed to buying one is that personalizing the key fob is a lot easier on an unmade key fob than an existing key fob. Plus – you can make it out of any fabric you want – not what you happen to find in the store.
How to make the wristlet in-the-hoop key fob
Prepare your embroidery file
There are two different ways to execute this project. The file that you downloaded does not contain a name or a monogram. So, if you want to personalize your key fob, you will need to either incoporate the name or monogram within the file, or add the name using the built in fonts on your embroidery machine.
If you decide to integrate the name or monogram within the file, you will want to add the name as the second-to-last thread color. Then, save the resulting file out in the embroidery file format your machine reads. I would suggest using Sew What-Pro to integrate a name or monogram into your embroidery file. Check out my previous post on how to make an in-the-hoop banner where I demonstrate how to integrate a name or letter into an embroidery file.
Your other option is to create the name or monogram on your embroidery machine. If you choose this option, you will need to start stitching out the design and exit when you have secured the top layer of fabric in place. Then, you will type in your name or monogram, scale it and move it to the appropriate location and stitch it out. After that is done, you will return to the design and stitch out the last thread color.
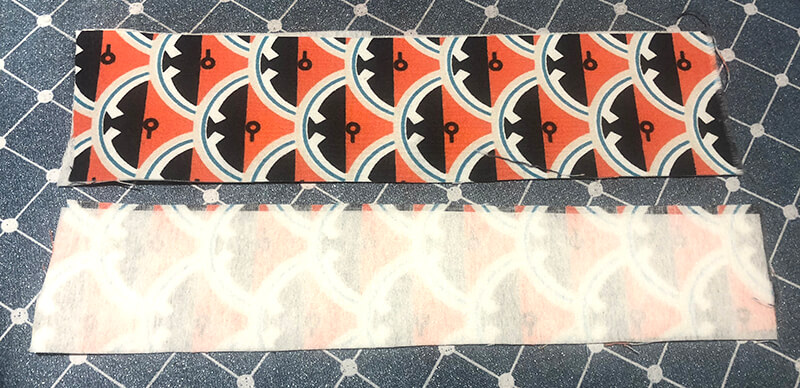
Choose your fabrics
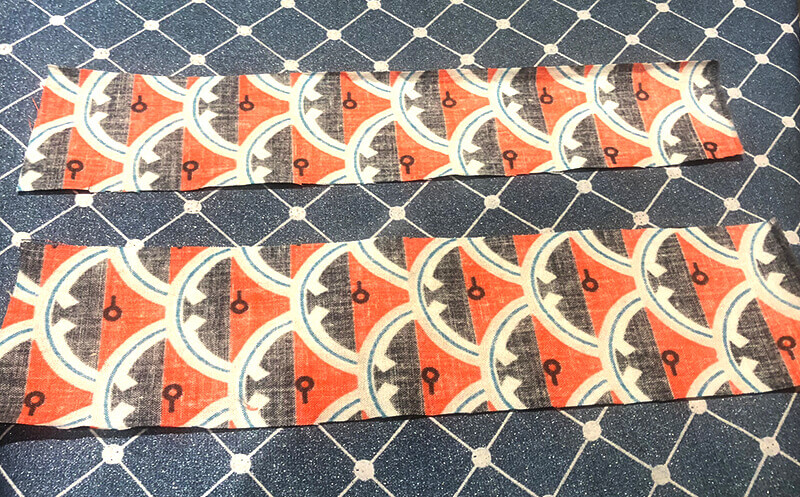
The first thing you want to do is to choose your fabrics for the key fob. Go through your scrap pile and find two pieces of fabric at least 2″ x 8″. The pieces can be of the same fabric or two different ones that coordinate. One piece will be used for the outside of the key fob and one for the inside.
Since I was making my key fob for my son, I let him pick out the fabric. Fortunately, he chose a good one. But, I couldn’t find a solid navy or any other fabric that would coordinate nicely, so I just decided to go with two pieces of the same fabric.
Stiffen your fabric
The best way to stiffen your fabric is to fuse some interfacing onto the back side of the fabric. The fabric we chose was a lightweight, cotton broadcloth, so it definitely did not have enough body on it’s own. I would suggest using a heavy, craft-weight fusible interfacing.
Hoop your stabilizer
The next step is to secure a piece of stabilizer in your embroidery hoop. You can really use either tear away or cut away stabilizer. My preference is sticky back tear away stabilizer which is what I used for this project.
If you decide to use sticky back tear away stabilizer, make sure that you hoop the stabilizer with the shiny side up. Next, use a pin to score around the inside edge of your embroidery hoop. This will create a tear in the top layer of the paper, allowing you to peel it away and expose the sticky surface. For this project, you will be stitching on the sticky surface of the stabilizer.
if you are using regular tear away or cut away stabilizer, I would spray the stabilizer with some temporary adhesive so that the fabric stays in place when you start assembling the project together. Make sure you mask your hoop before spraying to keep it from getting really sticky.
[do_widget id=custom_html-26]
Oftentimes, in-the-hoop projects require water soluble stabilizer However, in this case, we will be turning the resulting key fob right side out so the stabilizer will be completely encased within the embroidery hoop. This is also why you could get away with using either tear away or cut away stabilizer. They will both remain inside of the key fob and provide enough stiffness for the resulting key fob.
When hooping your piece of stabilizer, make sure that it is very taut. Someone once told me that you should be able to bounce a quarter off of your hooped stabilizer, which I think is a good tip, and I often think of that when I’m hooping anything.
Prepare your embroidery machine
In this project, your embroidery machine will be stitching out several different thread colors and pausing between each one. The thread colors you use are up to you, of course, but the only round that will be visible is the embroidery thread you use to personalize the key fob. Therefore, I would suggest threading your embroidery machine with the color you plan to use for the name or monogram, and using a white, standard embroidery bobbin thread. Finally, attach your hoop (with the hooped stabilizer) to your embroidery machine.
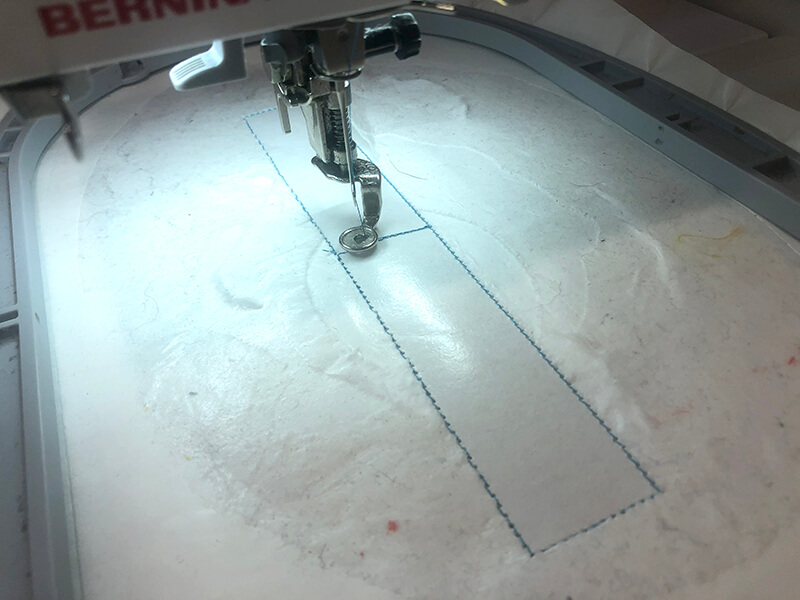
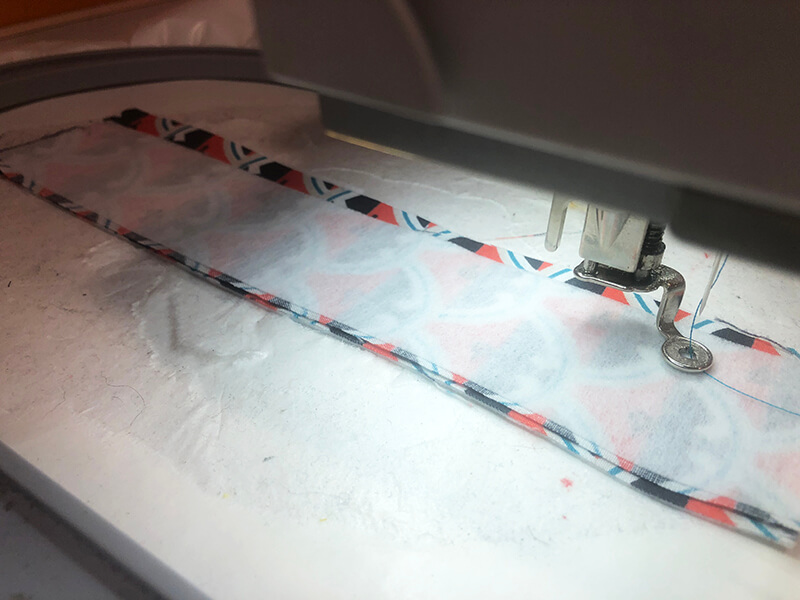
Start stitching
Begin stitching out your first thread color. This will serve as a placement line for your first piece of fabric. Basically, it will be a long rectangle shape with a line in the middle to mark the location of the fold.
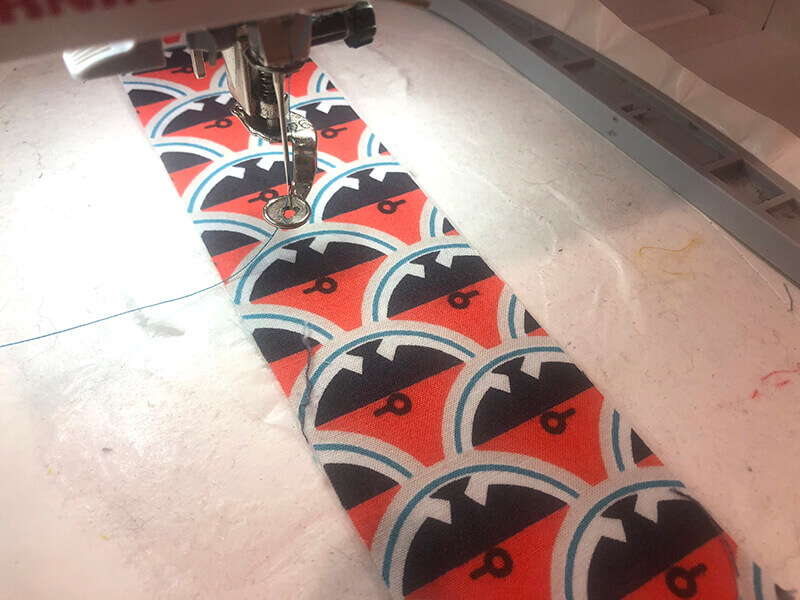
Once you stitch it out, lay your outer piece of fabric over these placement lines. Then start stitching the next thread color. This will serve to secure the front piece of the key fob in place.
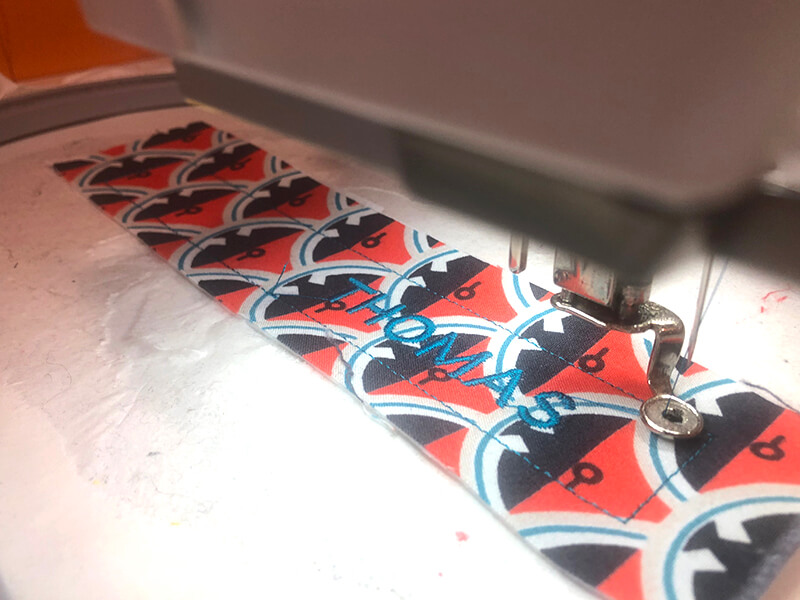
Stitch out your name, initial or monogram
At this point, you are ready to personalize the key fob. Since I integrated the name within my embroidery design, I simply, stitched out the next thread color. But, if you are using the built in fonts on your embroidery machine to personalize your key fob, you will need to exit this design, type out your name or monogram and then position it in the appropriate spot. This is why I marked the fold line in the placement stitching, so help position your name or monogram relative to the fold in the key fob.
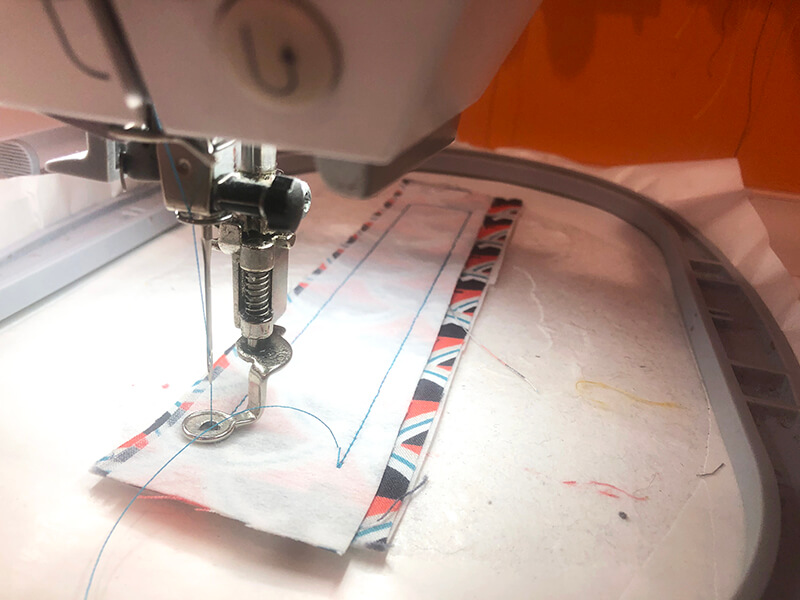
Lay down your second piece of fabric
Lay down your second (or back piece) of fabric over the top piece. Make sure you have right sides together and that the back piece completely covers the borders of the design. Begin stitching the next thread color.
When the stitching is done, remove the entire project from the hoop. You will either tear it away or cut it out of the hooped stabilizer depending on the type of stabilizer you chose.
Trim and turn
Once you have removed the project from the hoop, trim the excess fabric on all sides so that you are left with very minimal seam allowances (about 1/8″).
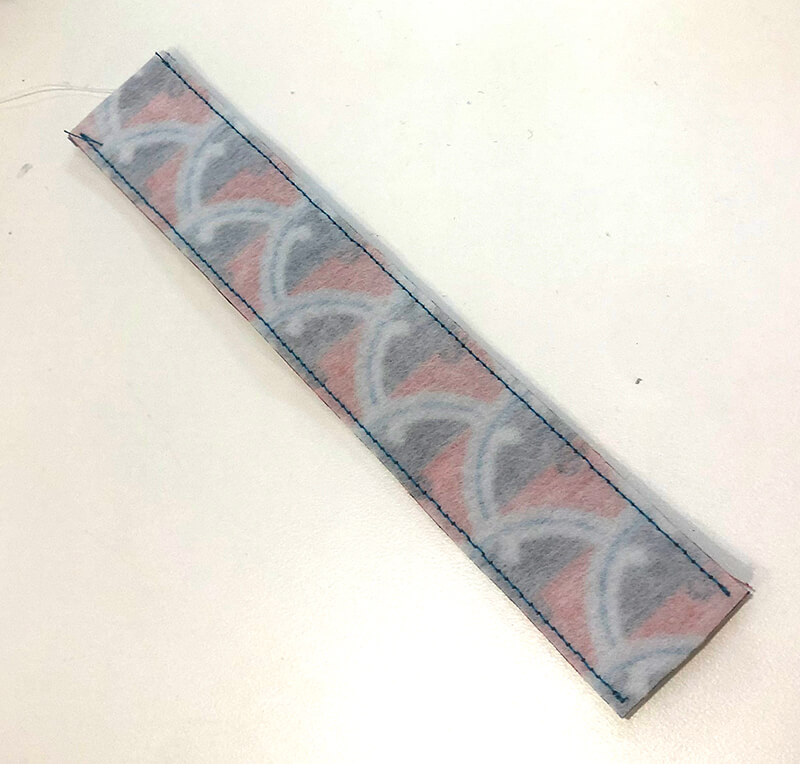
Turn the tube of fabric right side out. I used a chopstick to help me turn it, but you can also use a special turning tool, like That Purple Thang to help you. Press it flat.

Finally, fold the pressed tube in half and attach the key fob hardware. You can simply press the clamps in place and then use some pliers to press it more securely together. You can either buy the 1″ key fob hardware separately or purchase a kit that includes the pliers.
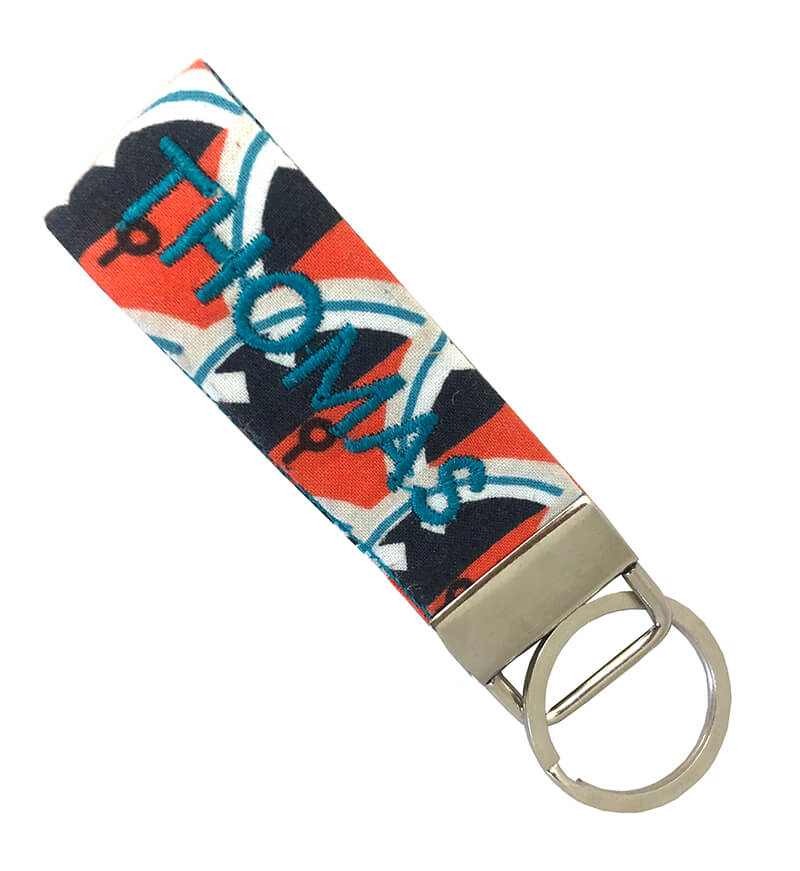
Once you attach the hardware, your key fob is ready for use!
A few more thoughts…
If you want to make a whole bunch of key fobs at once, you can combine multiple instances of the embroidery design into one file using SewWhat-Pro.
Ready for more in-the-hoop projects?
How could you not be? there are tons of other clever in-the-hoop designs that are especially suited for beginners. And there are tons of in-the-hoop designs that are actually FREE!
Enjoy!
xo
Julie
[do_widget id=custom_html-53]
[do_widget id=custom_html-10]