
Disclosure: Some of the links on this site are affiliate links. This means that if you click on them and make a purchase, I may earn a small commission at no extra cost to you. Please know that I only recommend products and services I trust and use myself.
When I first started digitizing, most of my embroidery designs were a hot mess. But, I kept at it, and eventually they turned out better. In addition to reading the books from the pros like John Deer’s Digitizing Made Easy, I hit up anyone who knew anything about digitizing for their advice. Here are some of their best digitizing tips and tricks for machine embroidery that helped me. And hopefully they will help you too.
Don’t rely on auto digitizing
Yes, your software will brag about it’s ability to auto digitize, but a computer is not as smart as you are. And, some of the decisions that your computer makes regarding what should be what color may look quite odd. For example, perhaps your subject is wearing a read shirt and there is a red background. It may interpret these items as the same object and assign the same thread color and stitch angle. But, as a smart human, you would probably want to differentiate the shirt and the background so you would probably want to assign them different thread colors, stitch types and stitch angles.
Note: See my previous post on why you should learn to digitize where Larry Pike of You Can Digitize explains the limitations of auto digitizing.
Do auto digitize some things
Auto digitizing can be a huge time saver! If there is an object with tons of little cut outs, I will auto digitize that specific piece. It’s so much faster than me pointing and clicking around everything. But in most cases, I only use the auto digitizing feature for parts of my embroidery design.
Vary your stitch angle
By default, my digitizing program likes to fill areas of stitching at a 45 degree angle. But, if you don’t change this angle throughout your design it will look very one-dimensional. But, when you vary the stitch angle among the different shapes in your design, there is greater contrast between different elements which produces an overall more interesting looking design.
Also, if you vary the thread direction when you digitizing your design, you won’t have as many pull issues when you stitch it out. Think about it, if all your stitches are running the same way, they will pull the fabric in that way.
[do_widget id=custom_html-5]
Incorporate underlay stitching
Underlay stitching is a very low density preliminary shape fill that is done before the main stitching begins. When you digitize any shape in most embroidery software programs, you can opt to add underlay.
Underlay stitching servers a couple of purposes. When you are stitching out an embroidery design on a nappy fabric, the underlay stitching helps to tamp it down so that the fibers don’t pop through the stitching.
The other benefit of adding underlay stitching to a large shape is that it helps to secure the design on the fabric to avoid puckering and pulling when the design is being stitched out. If the underlay stitching completes without any puckering then there’s a good chance your final stitching will not be puckered.
Outlining

When doing a filled area, you can make the shape stand out more and create a more defined border by adding an outline. My software has a stitch setting called a “triple stitch” which means it creates a running stitch that overlaps itself three times for a more prominent look. I use this triple stitch for outlines. The only caveat is that if the stitch length is too long, then it can’t accurately follow the outline of the shape. By default, I usually select a 2mm stitch length but sometimes I need to go smaller if the shape I’m outlining is quite small.
To make a shape have an outline and a fill, all you need to do is duplicate your shape. Then, just change the duplicated shape to an outline. Since one was a copy of the other, they will automatically be lined up.
Digitize elements from back to front
When you start digitizing a design, you should think strategically about where you want to begin. Start by digitizing the shape that appears farthest in the background in the design. The fills should stitch out first, then the outlines of those shapes. You don’t want the machine to stitch out a fill, then go to another shape that’s a different color, then go back and do that first shape’s outline. For single-needle machine users, it means an unnecessary thread color change.
Minimize the jump stitches
Yes – I know that some embroidery machines actually trim the jump stitches, but most home embroidery machines don’t. Jump stitches can pull the design if they are long and span large areas. So, you should always digitize your design so that you the jump stitches are short.
I was studying the one and only book about digitizing I could find…. (Digitizing Made Easy: Create Custom Embroidery Designs Like a Pro by John Deer) and got to the section about filling an object and specifying the order in which you would like an object filled. In this book, Deer uses the metaphor of vacuuming to describe how a design should be stitched out. He explains that like vacuuming you want to back out of each room while creating the shortest connection strings between each object.

[do_widget id=custom_html-49]
Hide the jump stitches completely

If you are really strategic about how you digitize a design, you can hide the jump stitches completely. Try to find paths that will be hidden that you can use to walk from section to section to reduce or eliminate jumps/trims. In the example above, you can see that the digitizer hid the traveling stitches between each letter underneath the stars so that there were no jump stitches at all!
Increase pull compensation to plump up typefaces
Pull compensation is a setting in embroidery digitizing software that controls the width of the stitches. If your stitches are “pulling” away from the edges of the design, you can often fix this by increasing the pull compensation.
You may also want to increase the pull compensation when the design you are digitizing is intended to be stitched on a thicker fabric. If you are working with letters, you can increase the width of the strokes by increasing the pull compensation which can be very helpful if the typeface is has thin strokes.
Don’t let satin stitches get too wide
In my digitizing program, I have the ability to specify whether I want a shape to be filled with a satin or a step stitch. A satin stitch spans the entire width of the shape which is fine if that shape is narrow, like a letter. But, if you choose a satin stitch as the fill for a wider shape, then you end up with very long, loose stitches which can easily get snagged.
Stitch density
When I digitize embroidery designs, I don’t often change the stitch density. This is because I learned the hard way. I thought that increasing the density would improve the look of my stitched out design. News flash: it didn’t. I just wasted a lot of embroidery thread.
A standard stitch density on most embroidery designs is about .4 to .45. Stitch Density is the amount of stitches per area. The higher the stitch density number, the lower the density. (Yes – I know – counter intuitive).
If you are intending to stitch a design on a fabric where coverage is an issue, your density should be a bit higher than average.
Overlap elements just a tad
When digitizing two shapes that are going to be right next to each other, it’s a good idea to digitize the shapes so that they overlap a bit. Overlapping the shapes a bit will prevent gaps in the stitching of the finished design.
Remove large areas of overlap
Conversely, if you have large areas of overlap, you want to remove the stitching in the overlapped areas. Otherwise, the stitching will get too thick in those areas. For example, imagine you are digitizing a face and you want the eyes to be a different thread color than the face. You should first subtract the eye shape from the face so that your face shape has holes in it where the eyes will be stitched.
Ask the experts for an opinion
One thing I’ve learned is that the employees at the fabric shops that carry embroidery machines know A LOT about machine embroidery. And, the ones I’ve met are not shy about sharing their opinions. I’ve picked up quite a few digitizing tips and tricks from these pros.
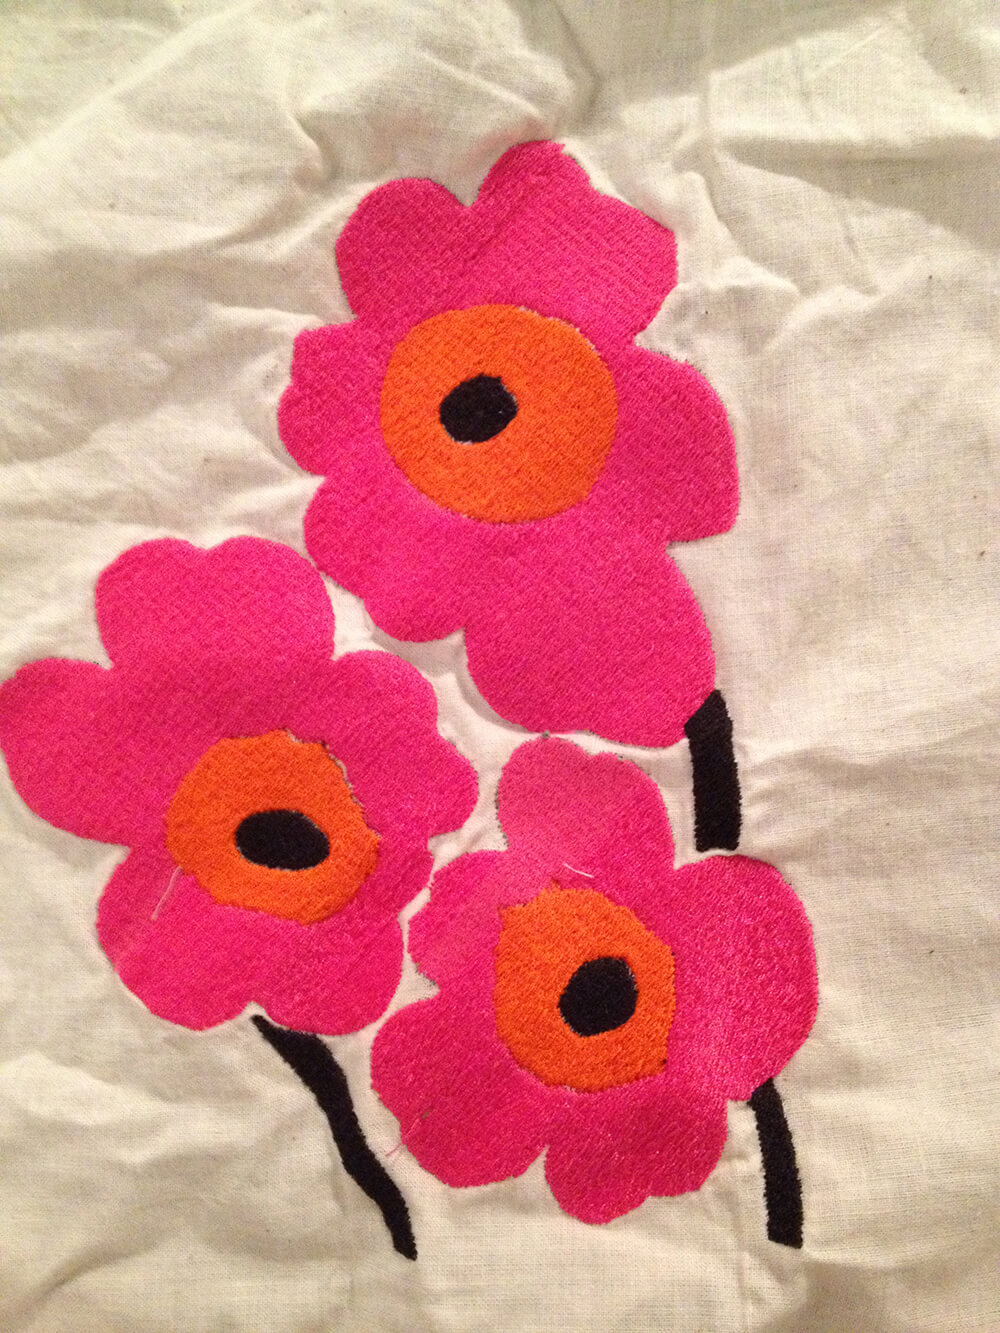
Here’s how I did it. When I first started digitizing, I brought in a sample of my work: an embroidered flower that I had digitized. And in five minutes of speaking with the store’s embroidery expert, I learned a few things that i had done wrong.
Following her suggestions really made a difference for me and improved my digitizing skills. So, I went back several more times as I was learning to see what they thought of my work.
Where to learn more digitizing tips and tricks?
I think that one of the best resources for digitizing tips and tricks are the Facebook groups dedicated to the digitizing software that you are using. I would also seek out YouTube videos created by people using the software. There are also inexpensive courses available on platforms like Teachable and Udemy for just about any embroidery digitizing software you want to learn.
Helpful Shopping Links
Want to remember this? Save “Digitizing Tips and Tricks for Machine Embroidery” on your favorite Pinterest Board
FYI, this article is also posted here: https://baninii.com/2020/09/07/digitizing-tips-and-tricks-for-machine-embroidery/
This is infuriating. They stole the content from my blog. I contacted them and asked them to remove it. If you have a minute – please go to that site and tell them they have stolen content. Makes me so angry.
Good news – they took it down after I complained. Thanks for letting me know.
Hi
I’m new to embroidery and don’t know what digitizing program to buy. Any help and suggestions.
Regards
Elize
+27 82 335 2868
South Africa
I have a blog post that lists some of the popular digitizing software. Fortunately many of them have a free trial period, so you can download them and try them out. Your least expensive option would be SewArt. I have some posts that highlight some of the things you can do with it.
A lot of shops that sell embroidery machines also offer embroidery classes. Take them instead of coming to the store employees repeatedly. Believe me they have a lot to do, even if they love to help. Please give them a break!