Disclosure: Some of the links on this site are affiliate links. This means that if you click on them and make a purchase, I may earn a small commission at no extra cost to you. Please know that I only recommend products and services I trust and use myself.
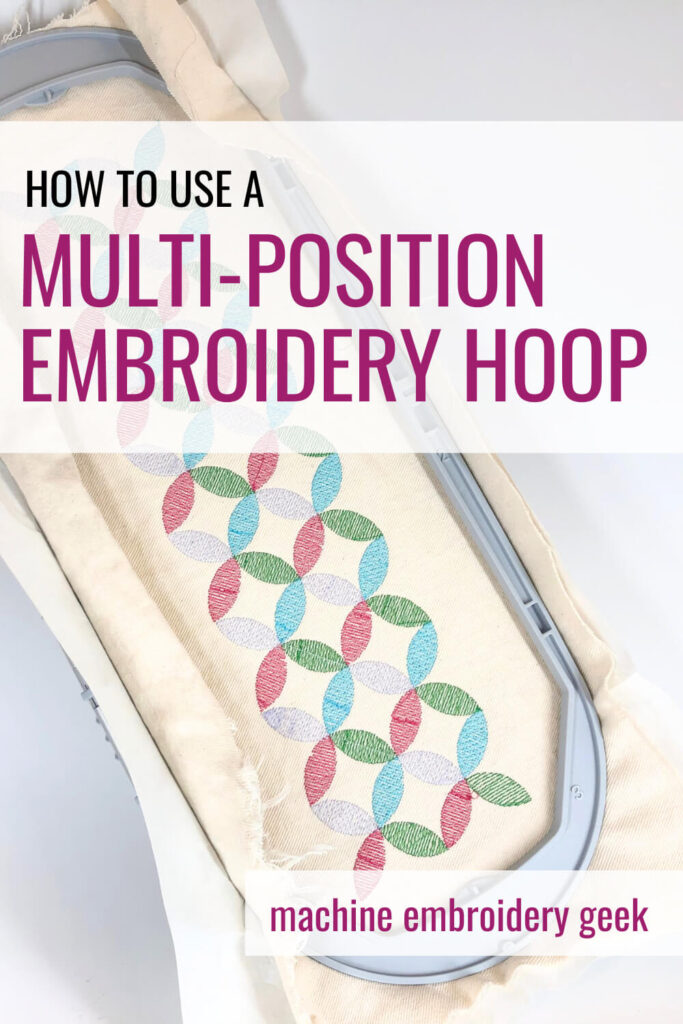
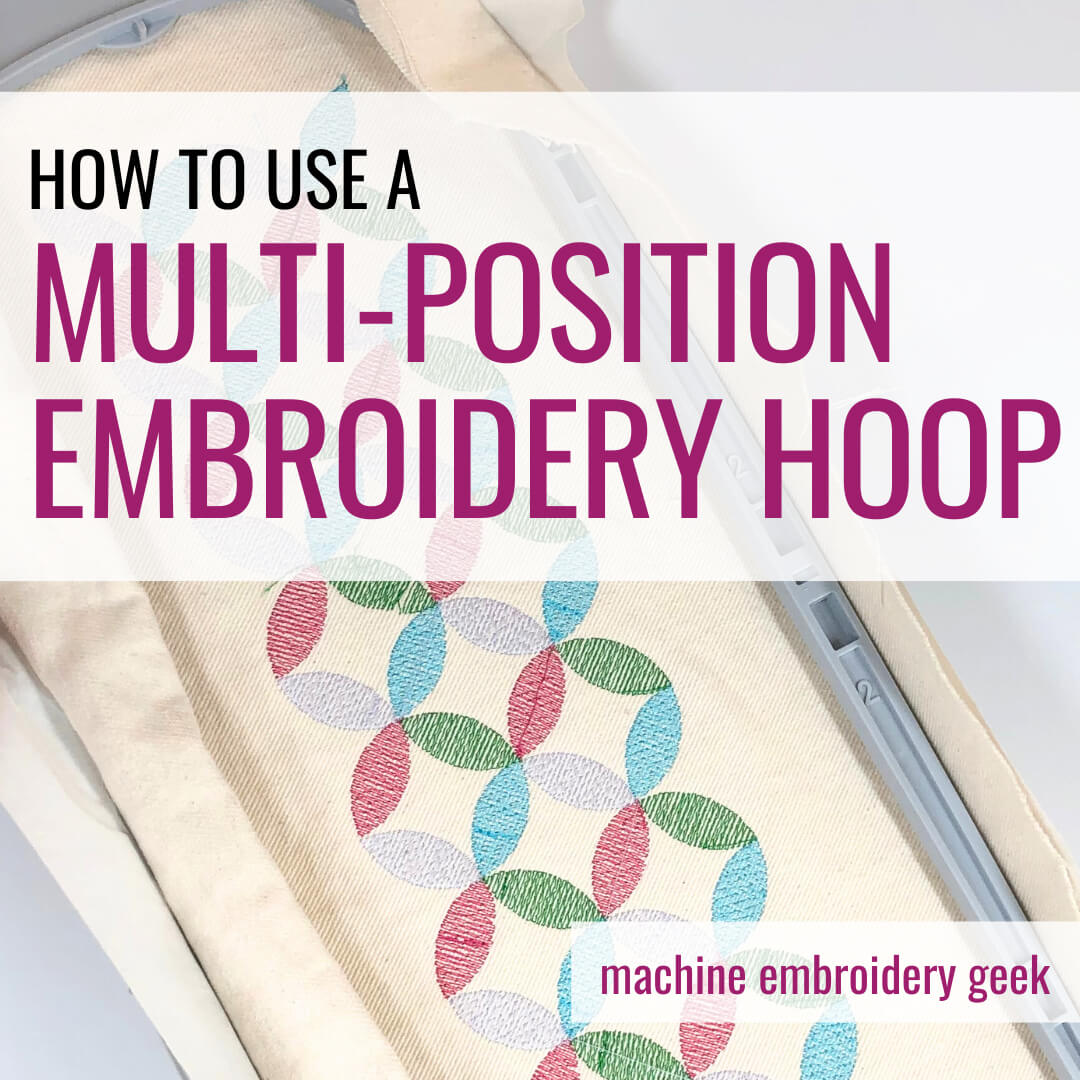
Have you ever wanted to stitch out an embroidery design that is larger than the largest embroidery hoop, you own? The solution may be within reach – and take the form of a multi-position hoop. These unique embroidery hoops (also referred to as repositionable hoops) are add on accessory you can purchase to enhance the capability of your embroidery machine. In this article, I’ll show you how to use a multi position hoop
Products Mentioned in this Post
What is a multi-position hoop?
A multi-position hoop is an embroidery hoop that attaches to your embroidery machine like a regular embroidery hoop. But it differs in that it attaches in (or moves into) two or more positions, allowing you to stitch out one part of your embroidery design with the hoop in one position, and the second (or third or fourth) part of your embroidery design while the hoop is in another position. The net result is that the embroidery design you stitch out can be larger than your max hoop area.
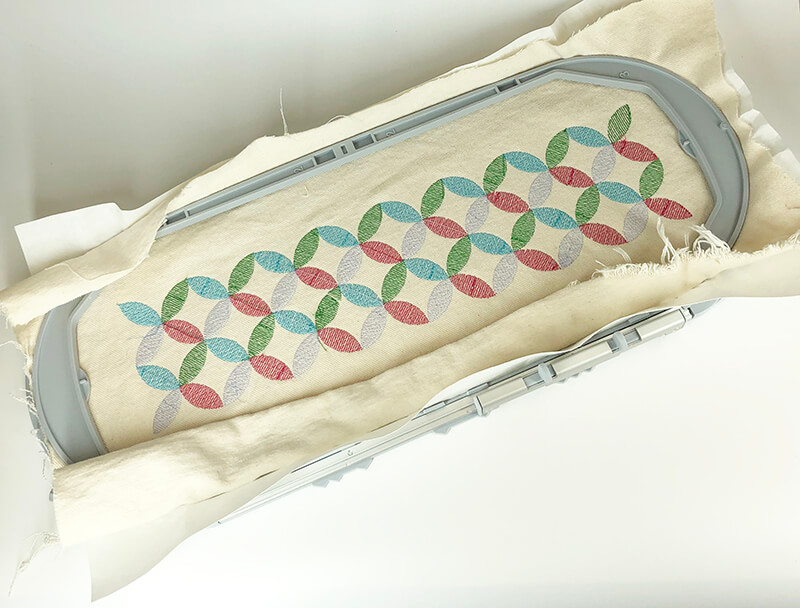
For example, on the very popular PE800 embroidery machine with a maximum embroidery area or 5” x 7”, you can get an embroidery hoop that expands your embroidery area to 5” x 12”. These extra 5 inches of length can really expand your creative possibilities, especially when it comes to stitching out in-the-hoop designs, many of which require a larger. embroidery area.
How to prepare your embroidery design to be stitched in a multi-position hoop
The method you must follow to prepare your embroidery design to be stitched in a multi-position hoop is dependent on the type of embroidery machine you own.
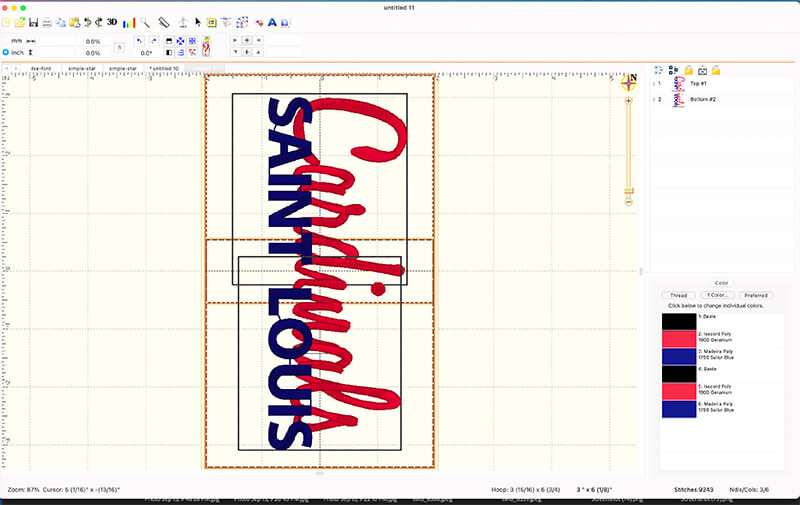
Some embroidery machines require you to split your embroidery design prior to loading it onto your embroidery machine, and some don’t. In the case of the Brother embroidery machines, you must first load your embroidery design into software, and then use a split utility to create the two pieces that will make up your resulting design.
Two programs that will split embroidery designs for you are Embrilliance Enthusiast and SewWhat-Pro.
Software needed for splitting embroidery designs
Embrilliance Enthusiast
If you are an Embrilliance user, you will need to have the Enthusiast module in order to split an embroidery design.
The first step you need to take is to select the multi-position that you are using in the Preferences.
Next you simply open or compose the design you want to stitch out. Finally, choose Utility –> Split to create the resulting files. These separated designs will appear in a new document. When you save this new document, it will save out the separated files. These are the files that you will transfer onto your embroidery machine.
SewWhat-Pro
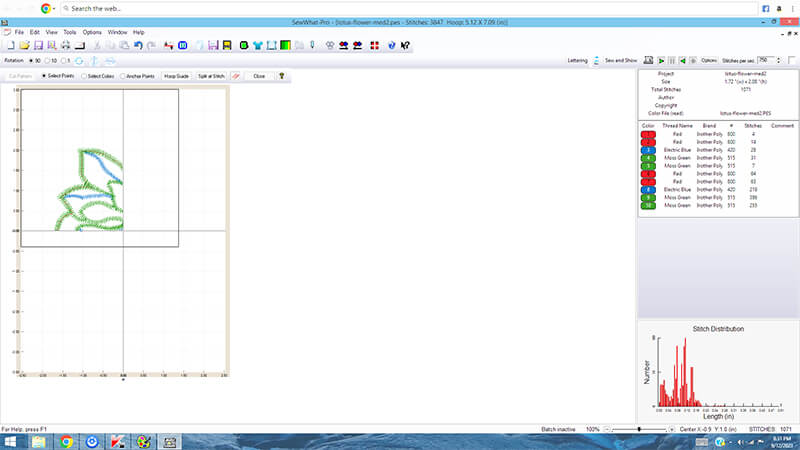
If you own, SewWhat-Pro, you are in luck because you can also use this program to split an embroidery design. I personally think it’s a bit less intuitive than Embrilliance but it still works.
You simply open the embroidery design you want to split.
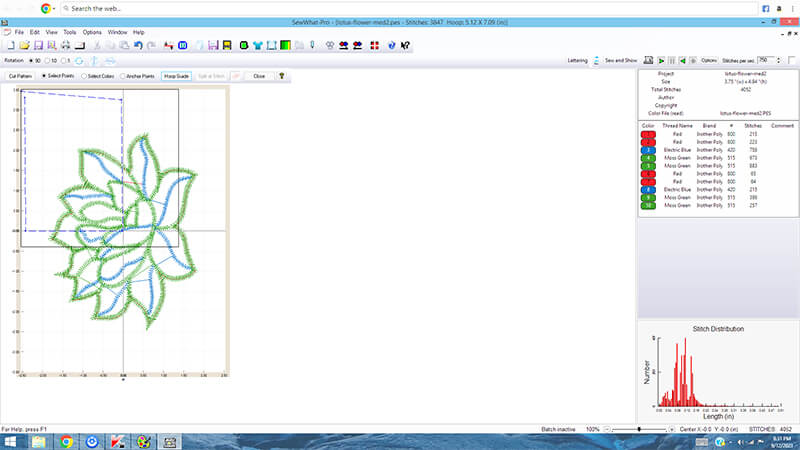
Then, choose the multi-position hoop you want to work with so that you can use it as a reference. Finally, choose Edit -> Split Design and use your cursor to click and drag a shape around the area of the design you want to keep or delete.
When you don’t need to split your embroidery design for a multi-position hoop
Not all embroidery machines require you to split your embroidery design prior to loading it on the machine. I learned this lesson the hard way when I decided to stitch out my rather large embroidery design on my Bernina 630 using the Bernina MEGA Hoop.
I have to admit, I have owned my Bernina MEGA hoop for quite a few years. But, ’ve never actually tried it out. This is because I had no idea how to prep my design to stitch it out on this monster embroidery hoop. I assumed that I would need to split my design in order for my embroidery machine to stitch it out which would require some time and effort to figure it out. But, alas, turns out, I was wrong.
After splitting my design using the split utility in Embrilliance Enthusiast, I loaded it into my Bernina embroidery machine. I was surprised to see that my machine didn’t seem to like my split design. So instead of loading in the split design, I loaded the entire design onto my machine. And guess what? it immediately understood that it would have to be stitched with the MEGA hoop and I was off to the races.
Stitching out a embroidery design with a multi-position embroidery hoop
The process of stitching out your embroidery design using a multi-position hoop is going to differ based on the type of machine you own, and how it handles the multi-position hoop.
Bernina MEGA Hoop
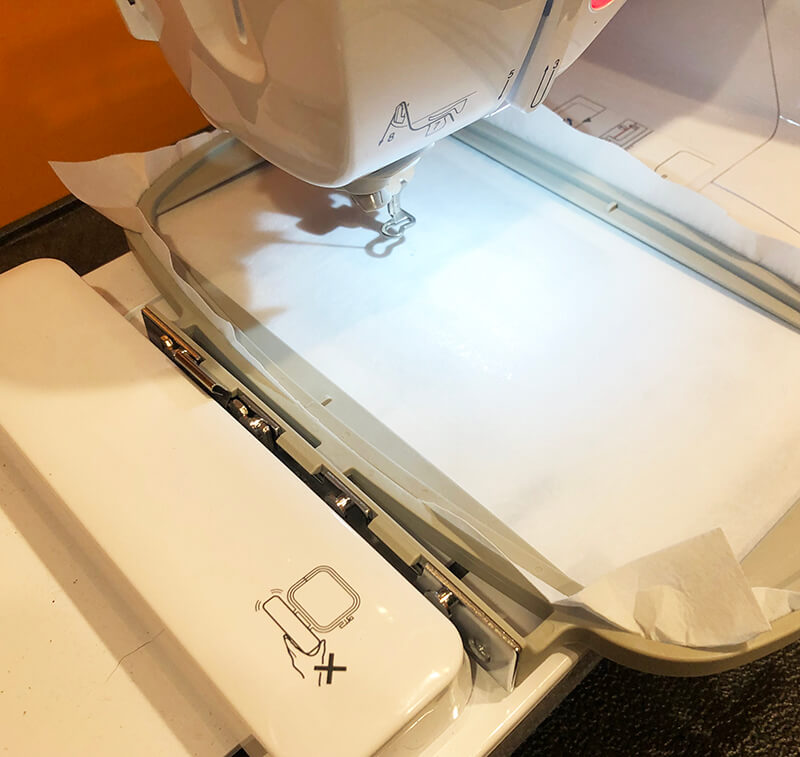
As I already mentioned, my Bernina did not require me to even split the design before it would stitch it out on my multi-position MEGA hoop. I’m guessing this is because Bernina actually makes this hoop and they want to make it as easy as possible for you to use it with your embroidery machine. Once I loaded the design in, attached it to the embroidery arm, the screen started providing visual cues as to where I needed to position my hoop in order for it to do the stitching.
The Bernina MEGA Hoop slides into three different positions while it is still attached to the machine. This is different from the multi-position hoops you would use on a Brother machine. These hoops need to be attached in one location and reattached in another so that you can stitch out one part of the design in one position and the other part of the design in another position.
My Bernina maintained the stitch order of the thread colors when stitching out this extra-large design. It would start the first color which was pink. The illustration on the screen indicated that I would need to slide my hoop into the first position. The it stitched out the pink part of the design. When it was done, it paused and gave me another visual cue to move it into the next position. Once i secured it in place and hit the start button, it continued stitching the pink elements in the design.
I found this method to be quite simple and relatively painless as it required the same number of thread color changes as if I were stitching on a regular embroidery hoop – just a movement of the hoop for each thread color I stitched out.
Brother Multi-Position Hoop
On a Brother embroidery machine the process is a little different.
Obviously – you must have a multi-position hoop. I bought this embroidery hoop set for the PE535 to get the multi-position hoop that would work on my little PE535. Hoop Tech offers a similar set of hoops for the PE770/PE800 embroidery machine.

Before you can start stitching though, first you must load in the split designs. Then you attach the embroidery hoop in the position according to the part of the design that you plan to stitch out first.
So, if you are stitching of the top part of the design first, you put the multi-position hoop in the top position, and load in the top part of the split design.
When this is done, then you unclip the hoop and reattach it in the other position and stitch out that part of the design.
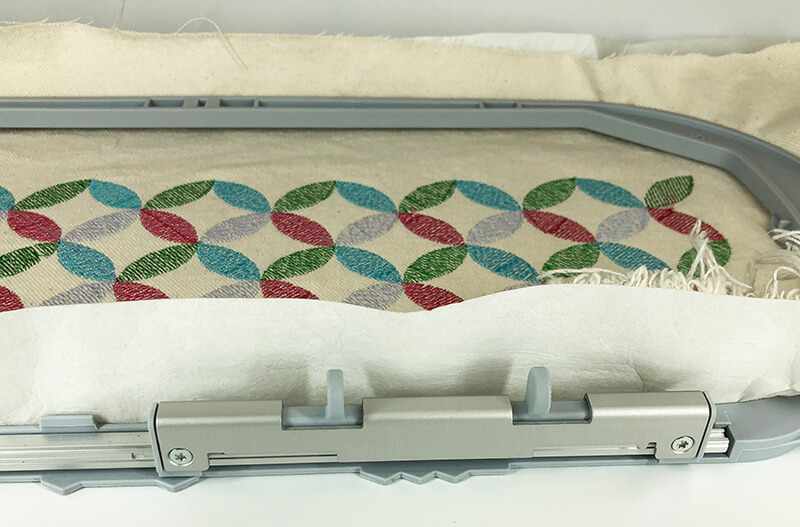
It’s pretty amazing that I was able to stitch out an almost 8″ design on my little 4″ x 4″ embroidery hoop!
Other Considerations when Stitching Out a Multi-Hoop Design
When you’re working with a re-positional hoop, it’s a good idea to choose designs that are not overly complex and to try to split the design and position where it may be less noticeable, that is where there are fewer thread colors in the overlapping areas. If you have an embroidery machine where you have to stitch one half of the design, then the other – it will be twice as many thread color changes.
If you are using Embrilliance Enthusiast to split your design – one important quirk to note. Embrilliance Enthusiast will not split text. You can end up with undesirable overlaps. When this is the case, you will need to stitch out your entire bottom layer of your design – then leave your project hooped and stitch out the top layer of your design – in position one – then in position two.
Frequently asked questions about multi-position hoops
Is stitching out a design with multiple hoop positions more difficult?
No, not necessarily. It takes a bit of practice and patience. However, as long as you are following the instructions on your machine, it isn’t too complicated.
Do I need to use special software to split the embroidery design when working with a multi-position hoop?
No, not necessarily. As mentioned earlier, some machines don’t require you to split the design prior to loading it on the embroidery machine. It all depends on the brand and model of your machine.
What is the benefit of using a multi-position hoop?
The biggest benefit of using a multi-position hoop is that it allows you to stitch out larger designs. This is especially useful for those who want to add extra detail and texture in their embroidery projects. Additionally, the split design also eliminates the need for re-hooping and trying to line up disparate designs so you can save time and effort and have much better looking results.
What other tips do you have for using a multi-position hoop?
One of the most important tips when working with a multi-position hoop is to make sure that your fabric is properly secured in the hoop before you start stitching. This will help ensure that the alignment of your design stays consistent.
Additionally, it is important to make sure that the hoop is tightly secured in each position as you stitch out the design. This will ensure that your stitches are not pulled or distorted. Finally, it’s a good idea to test out your multi-position hoop on some scrap fabric before stitching out your final project – just to be safe!
Ready to try out your multi-position embroidery hoop?
Take it from someone who left her multi-position hoop in the box for waaayyyy too long. And to think it was simply because I was too intimidated to use it. Working with these nifty little devices is really no big deal. Plus, the extra few inches that they provide really opens up your creative possibilities in the world of embroidery
Want to remember this? Save “How to Use a Multi-Position Embroidery Hoop” on your favorite Pinterest Board