Disclosure: Some of the links on this site are affiliate links. This means that if you click on them and make a purchase, I may earn a small commission at no extra cost to you. Please know that I only recommend products and services I trust and use myself.
Have you shied away from embroidering on windbreakers due to their slippery surface? Seems like they would be tricky to embroider, right? In addition to the outer fabric being so slick, windbreakers are often comprised of two layers. So, then, you have the extra complication of the lining and the outer layer sliding around. But, (surprising to me), I have found that despite these material and construction challenges, it’s actually not too difficult to embroider on a windbreaker.
Why a windbreaker?
Yesterday I was out on a run, and while it looked like it was going to be pleasant running weather, all of the sudden, a gust of wind snuck up on me and just about blew me over. Typical spring time. Beautiful days are mixed intermittently with gusty, rainy weather. And for this reason, the essential wardrobe staple for the month of April is a windbreaker.
Wind breakers are designed to literally, to break the wind. The nylon fabric deflects moving air instead of absorbing it. But the nylon is also lightweight. So, with a windbreaker, you shield yourself from the wind without getting too hot if the temperature warms up.
Where to buy a windbreaker?
At most regular stores, a windbreaker is a seasonal item. And like most seasonal fashion, they show up in stores long before the season begins. I hate this! The moment I think about buying a windbreaker, they are mostly sold out!
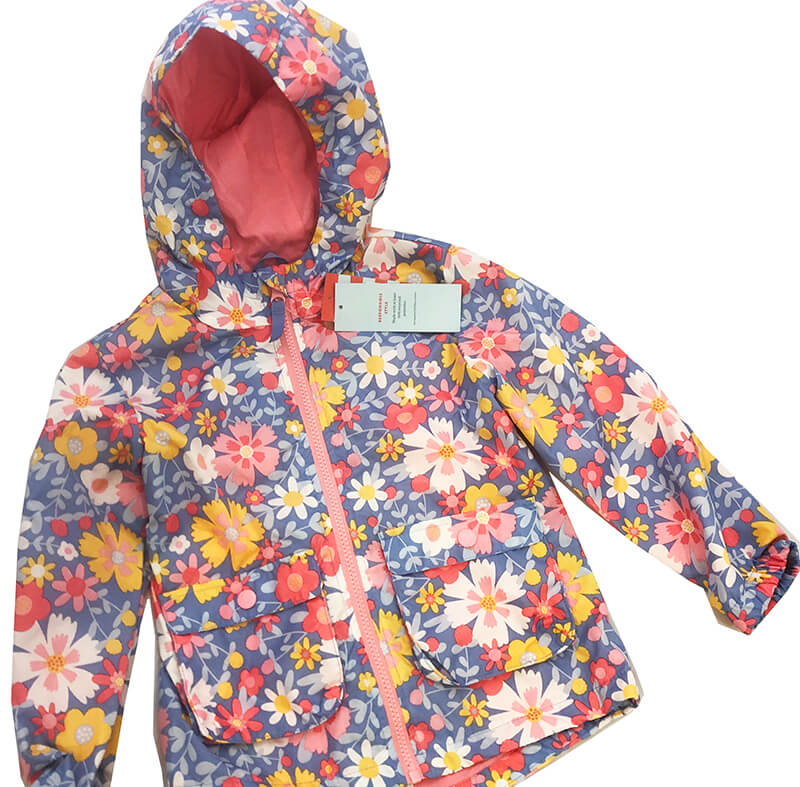
Case in point: When I discovered the adorable flowered windbreaker for my neighbor’s daughter (who was turning 3), I had to drive to a Target 20 miles away just to get the right size. It was sold out almost everywhere. And it was still the beginning of April. Jeez!
So, if you don’ t time your windbreaker purchase early, you will have to look for one at places other than your local Target, Old Navy, Walmart, etc… Fortunately, there are quite a few cute options on Amazon, that you can likely purchase at just about any time of year. And the prices are all pretty reasonable. (Less than $30 – and some much cheaper). Here are some of my favs.
- Ladies raincoat style windbreaker
- Traditional ladies windbreaker
- Men’s windbreaker
- Basic girls’ windbreaker
- Boys (or girls) two-tone windbreaker
- Toddler dino windbreaker
- Adorable toddler windbreaker in many different patterns. Unbelievable price.
How to embroider on a windbreaker
Supplies needed to embroider on a windbreaker
Find a windbreaker
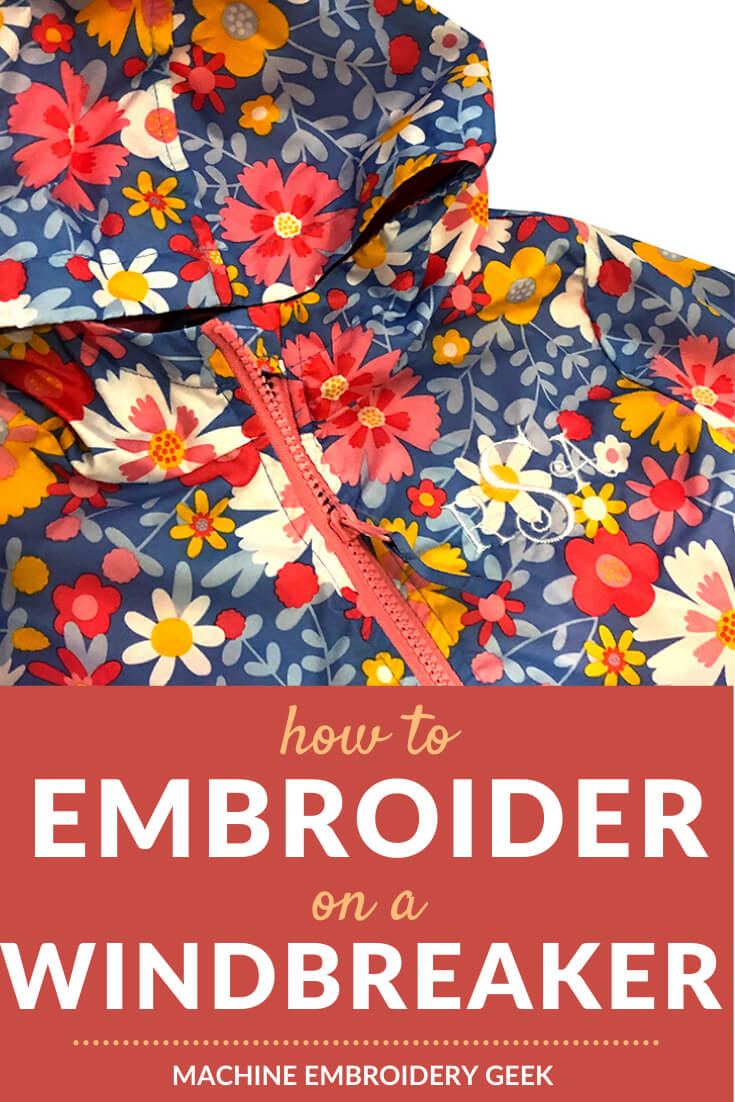
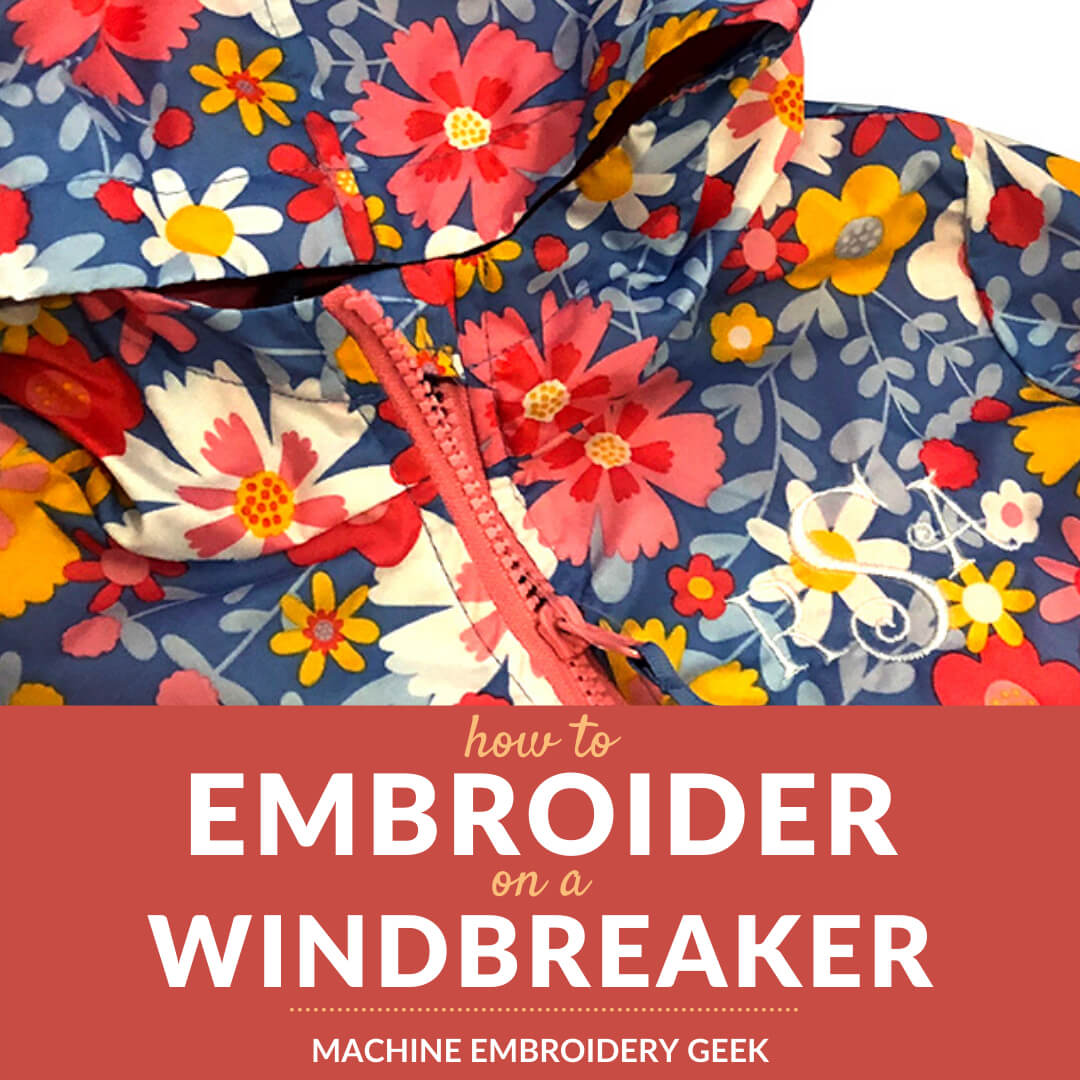
Once you find your windbreaker – you are ready to start embroidering. I absolutely fell in love this little flowered number from Target and I decided to monogram it for my neighbor’s kid. I would have actually bought it for myself, but, unfortunately, it only comes in little girls sizes.
[do_widget id=custom_html-47]
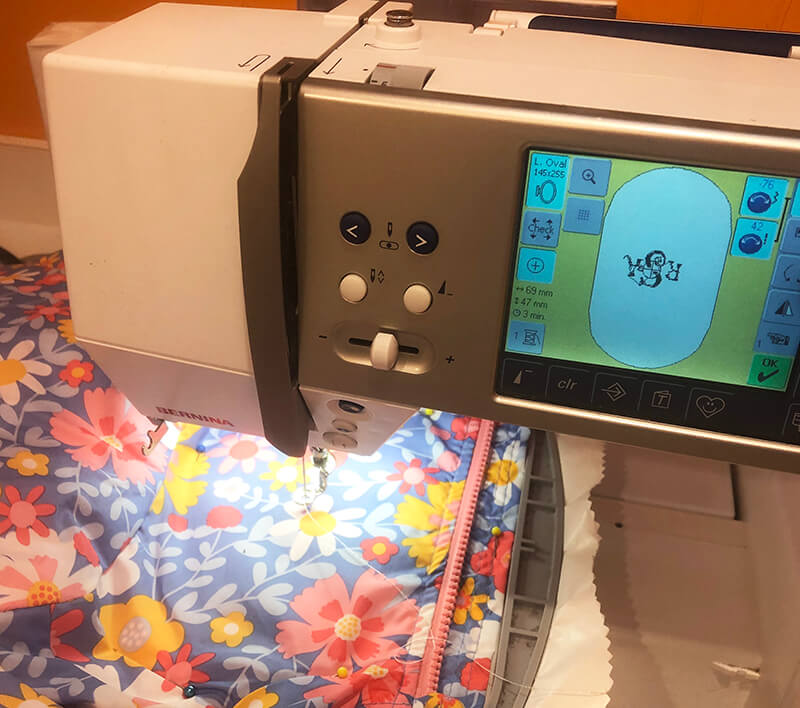
Set up your embroidery file
Before you can stitch out a monogram, you need to prepare your monogram file. There are a number of different ways you can go about setting up a monogram file. For this project, I created the monogram using SewWrite. I chose a whimsical, curly typeface and sized the overall monogram to be about 3″ x 3″.
When choosing a monogram, it’s important to choose a typestyle that matches the clothing or accessory on which it will be stitched. Since this is a jacket for a little girl, the whimsical, curly typeface seemed appropriate.
Also, carefully size your embroidery file. A smaller garment calls for a smaller design.
Prepare your embroidery hoop
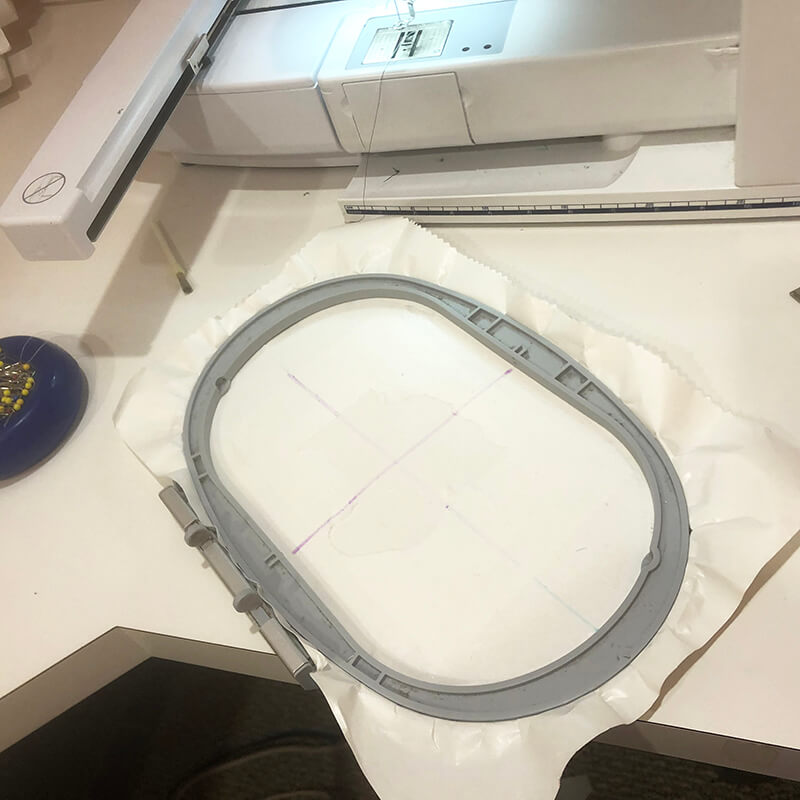
You may think that you have to hoop a windbreaker as opposed to floating it. But with this size of a garment, hooping would be nearly impossible. Plus, since the pins did not leave a permanent mark in the material, floating and pinning was the way to go.
So, to prepare to float this project, you first need to hoop a piece of sticky back tearaway stabilizer (shiny side up). Then, score the top layer of the paper along the inside edge of the hoop. Scoring the tearaway, will allow you to peel away the top paper and expose the sticky surface. Once the sticky surfaces is exposed, draw a vertical and horizontal through the center of the hooped stabilizer using a disappearing ink pen.
Prepare your windbreaker
Before you start sticking pins through your windbreaker, you should determine whether or not they will leave a permanent mark. Try poking a pin through the inside hem or some other spot that is nondescript. Fortunately, in the case of this windbreaker, the pin did not leave a mark. So I proceeded with using them to help me place the embroidery on the windbreaker.
If you want to avoid using pins, then simply make an impression on the front of the jacket with a disappearing ink pin, while marking the corresponding spot on the inside.
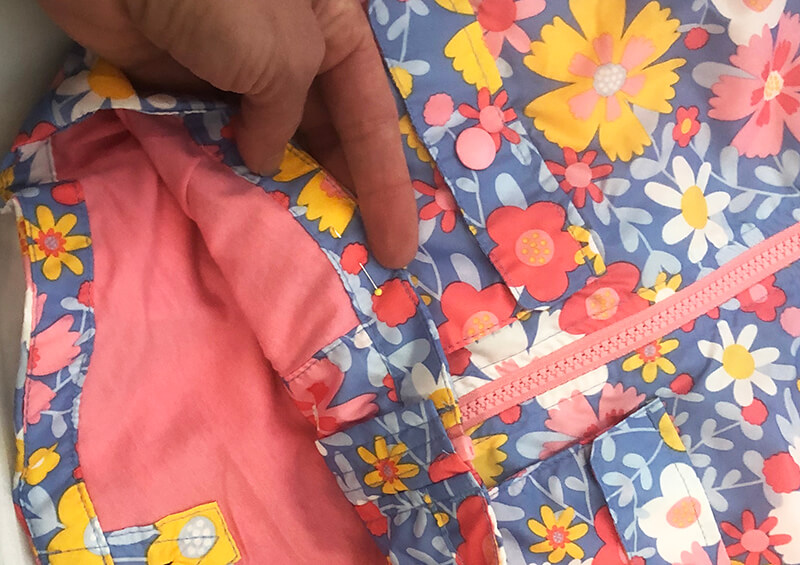
Mark the desired center of the monogram on the outside the coat with a pin. Then, cut a piece of cutaway stabilizer about an inch larger than your monogram design on all sides. Spray the piece of cutaway with temporary adhesive spray and stick it on the inside of the jacket, centered on the pin that is poking through the windbreaker. Next, draw a horizontal and vertical line through the location of the pin.
Float the windbreaker on the hoop
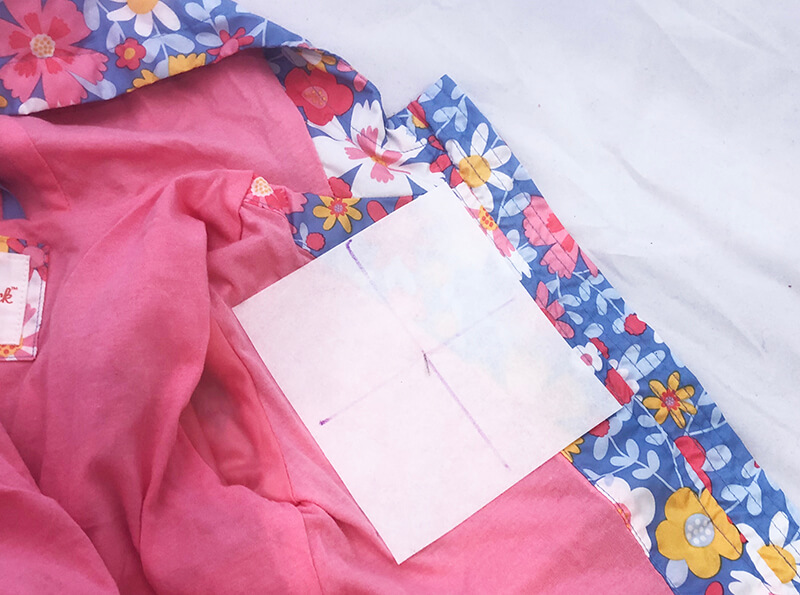
Put your embroidery hoop on your embroidery machine. Now fold the windbreaker in half along the vertical line you drew on the cutaway stabilizer. Align the fold with the center line you drew on the hooped stabilizer. Then smooth out the windbreaker on the other half of the stabilizer.
Once you flatten out the windbreaker on the hooped stabilizer, you can add some pins to help secure it in place. Before doing so, make sure that the pins will not leave a mark. Also, maker sure that the pins are away from the stitch area.
Set up your embroidery design
When floating the windbreaker on the embroidery hoop, it made more sense to lay it upside down. So, when loading the file on the machine, I had to make sure that the orientation of the monogram was upside down.
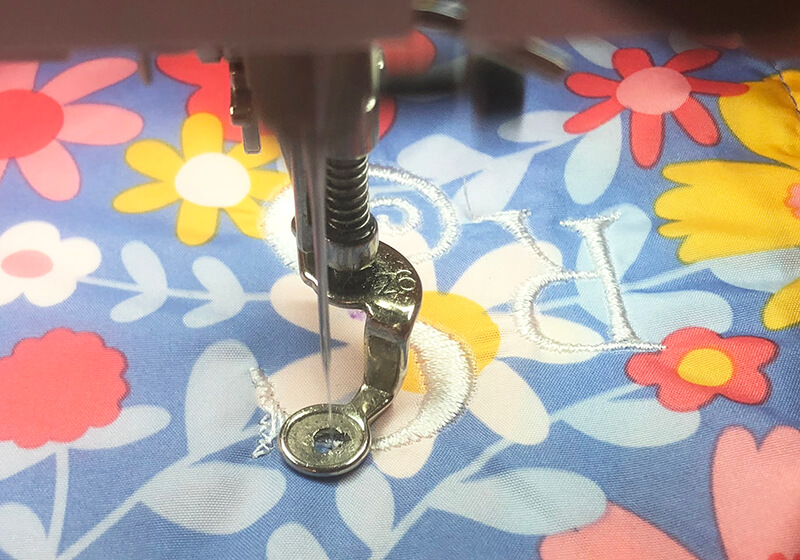
I simply used the embroidery needle that was in my machine, which was a standard 75/11 embroidery needle.
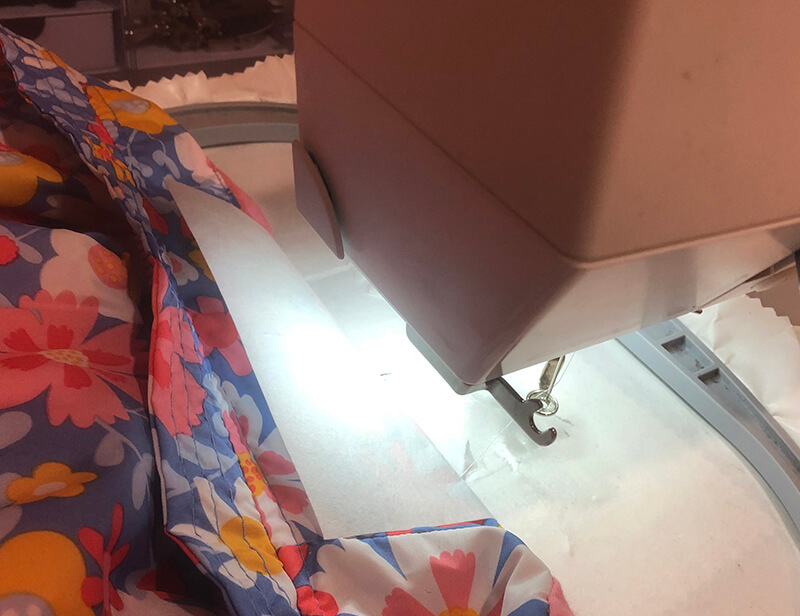
Start embroidering your design
Once you have your windbreaker securely floated on your embroidery hoop, you are ready to start stitching out your design. If you have it securely floated, your embroidery design will stitch out pucker-free!
Clean up your windbreaker
When you are done stitching, remove the windbreaker from the embroidery hoop. Snip the jump stitches with some nippers and trim back the cutaway stabilizer on the inside using appliqué scissors. And voila! You are done.
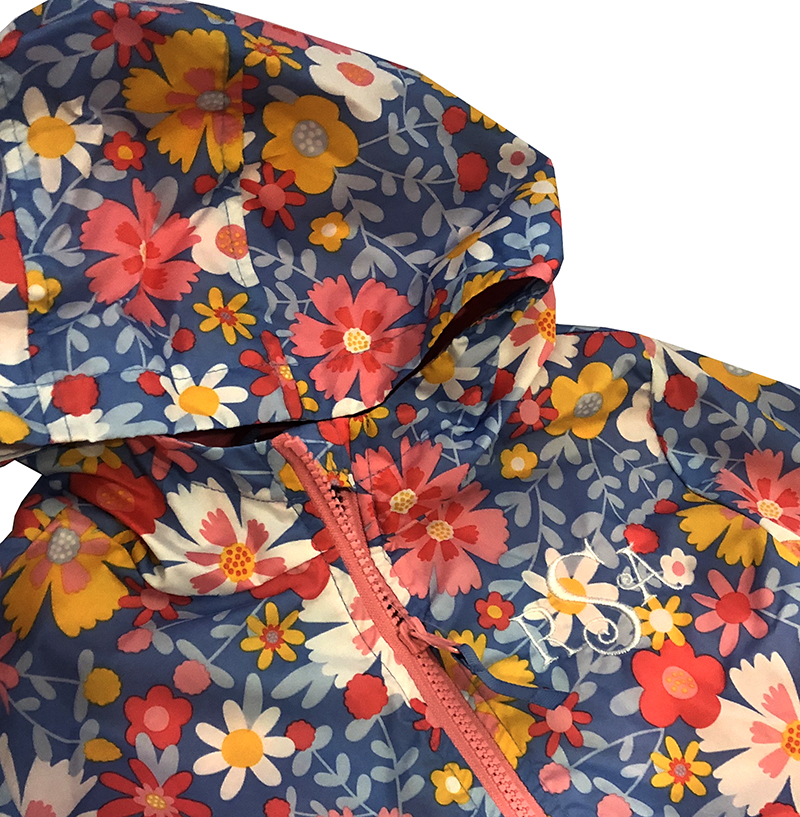
Cute, huh? I can’t wait to give this sweet little monogrammed windbreaker to my little friend.
[do_widget id=custom_html-46]
[do_widget id=custom_html-10]
Want to remember this? Save “How to embroider on a windbreaker” on your favorite Pinterest board