Disclosure: Some of the links on this site are affiliate links. This means that if you click on them and make a purchase, I may earn a small commission at no extra cost to you. Please know that I only recommend products and services I trust and use myself.
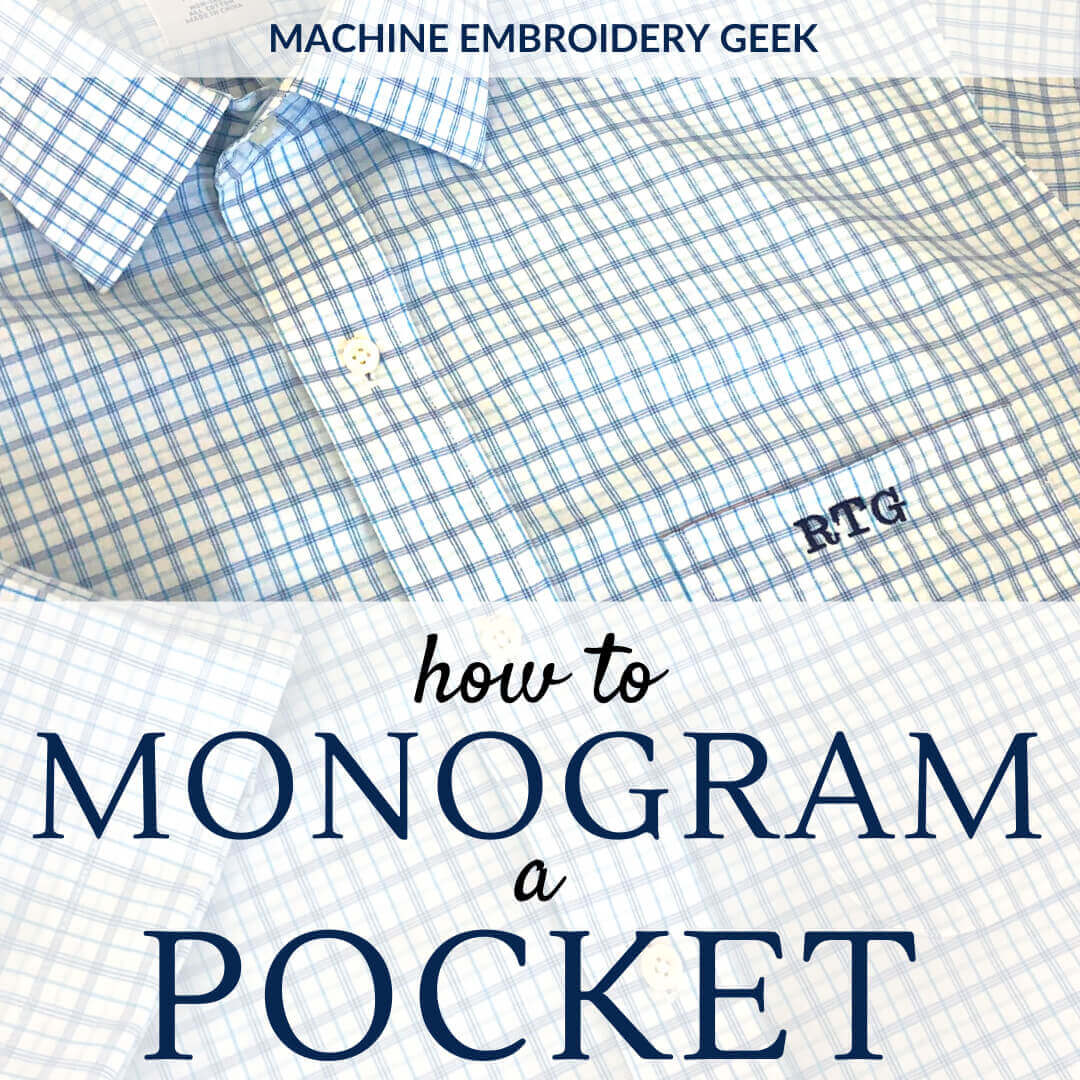
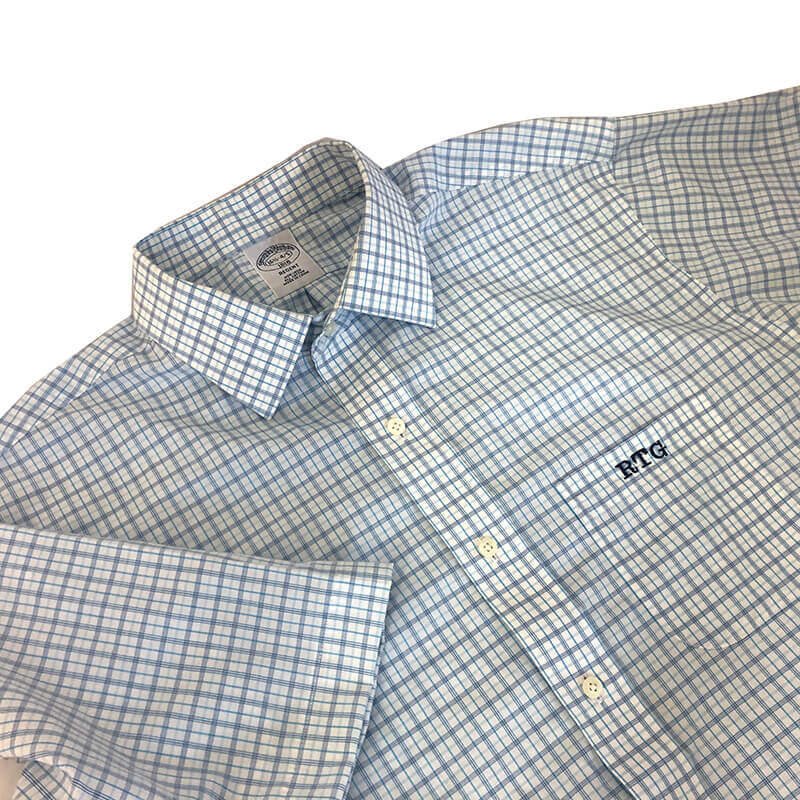
Got a boring dress shirt that you want to spice up a bit for one of the men in your life? Monogram a shirt pocket on a men’s dress shirt to create the perfectly polished high end preppy look. I just did this on one of my husband’s shirts and I love the way it turned out. While it’s just a few little embroidered letters, that monogram can have a major impact.
Products mentioned in this post
- Men’s dress shirt
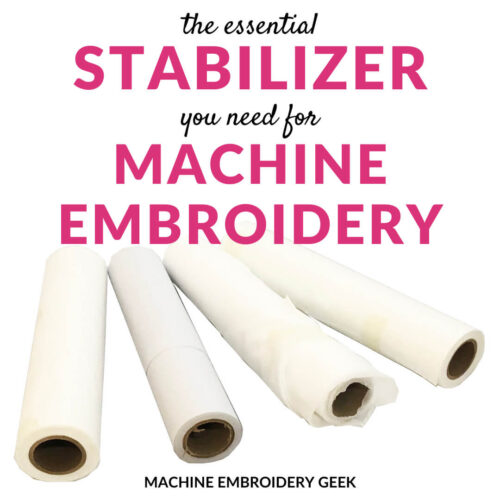
- Disappearing ink pen
- Fusible poly mesh stabilizer
- Sticky back tear away stabilizer
Inspiration for the monogrammed shirt pocket
The inspiration for the monogrammed shirt pocket arose from two separate instances coinciding: my husband trashing another shirt, and a family reunion with some stylish Southerners.
First – the blow out. My husband has a weird habit of tearing open the left elbow of just about every dress shirt he has owned for more than a few weeks. Yes – it’s always the left one and it tends to be his nice Brooks Brother’s dress shirts. It’s so weird.
And, to make matters worse, he actually puts them in the laundry after ruining them. So, I get about halfway finished ironing the shirt when I notice a big hole in the elbow and it is completely unwearable.
So, now, in my sewing/laundry room, I have a growing pile of damaged men’s dress shirts. But, since I hate to see an almost perfectly good shirt go to waste, I decided to get creative about repurposing.
Inspiration struck when were visiting my husband’s extended family in Tennessee. This crowd is pretty preppy and have excellent taste. I noticed that at a more formal gathering, my husband‘s cousin showed up with a sharp looking button down shirt with his monogram on the front pocket. And, I really appreciated that bit of personalization.
[do_widget id=custom_html-56]
Now St. Louis (where we live) isn’t the most hip and happening place, but certainly not as preppy as rural Tennessee. Needless to say, I don’t see monogrammed men’s dress shirts all the time. But I have to admit, I do like it. Men shirts are so boring. Why not spice one up with a little bit of personalization?
Lucky for me I have an embroidery machine that can quickly get the job done.
Plus – with a graveyard of men’s dress shirts piling up in my sewing room – what did I have to lose? I quickly hemmed up the sleeves to make it a short sleever and prepared it for some monogramming.
Here’s how I did it.
How to add a monogram to a pocket on a men’s shirt
Choose your monogram font
I’ll admit it – I was pretty lazy when choosing the font for this monogrammed pocket. I used one of the default fonts on my PE535 at the smallest setting (which was 10mm). In the future I would likely go a bit smaller. My husband said he would have preferred a sans serif typeface, and I was surprised he actually knew what that meant.
Not every font will look great stitched out at such a small size. If you want to use a typeface other than one that is built in on your machine, check out some of these very small embroidery fonts.
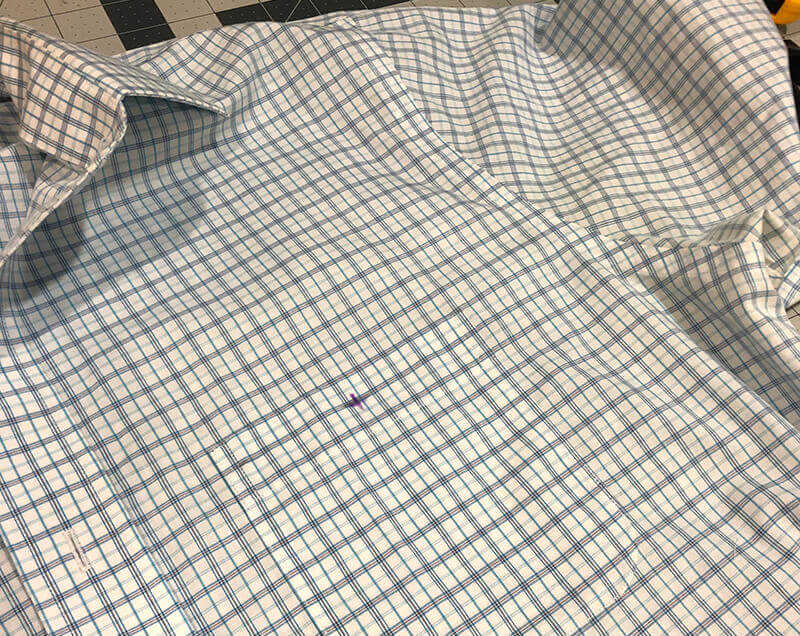
Marking the location of the monogram
The first step you need to take is to mark the center of the monogram on the shirt pocket. Simply find the horizontal center of the pocket. For the vertical center, just find the center of the doubled over area at the top of the pocket. Use a disappearing ink fabric pen to mark the spot.
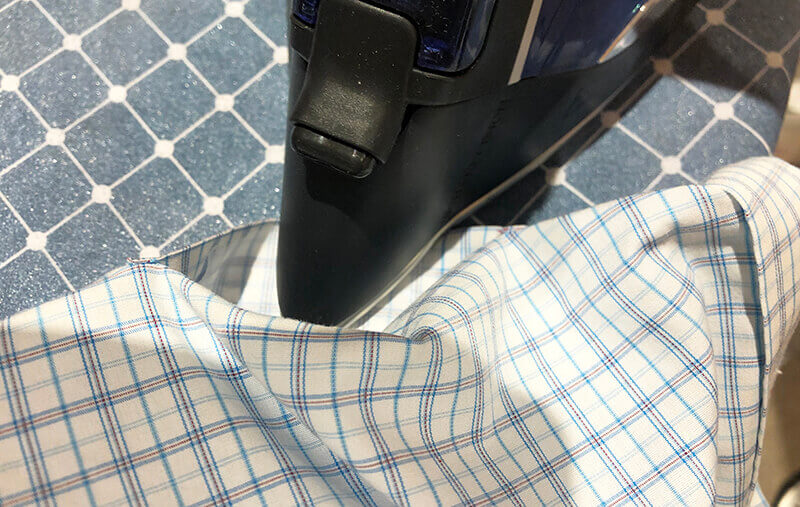
Add stabilizer
You may have heard of the old saying “if you wear it, don’t tear it…” meaning – you should not use tear away stabilizer on clothing. I stabilize just about everything with sticky back stabilizer, but I will also add a bit of cut away stabilizer if I’m embroidering on clothing.
So, for this shirt pocket, I fused a small piece of fusible poly mesh stabilizer on the inside of the pocket, slightly larger than the monogram itself. The reason why I used the fusible poly mesh instead of regular cut away is because regular cut away can be a bit stiff and I wanted the pocket to still be flexible.
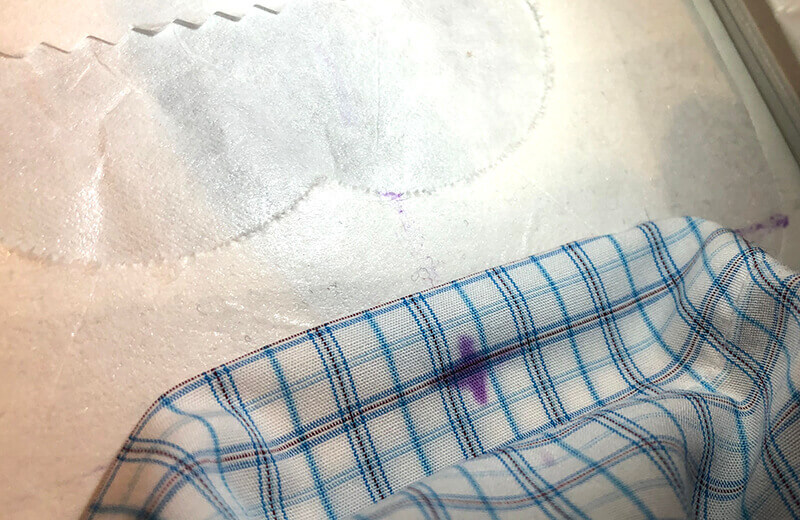
Preparing the embroidery hoop
Hoop a piece of sticky back tear away stabilizer with the shiny side facing up. Then, using a pin, score around the inside edge of the embroidery hoop to create a tear in the top layer of paper. Peel it away to expose the sticky surface.
If you read a lot of my blog posts, you will see that I almost always float my embroidery projects on sticky back tear away stabilizer. One of the reasons why I like this stuff so much is because you can quickly tear your project away from the stabilizer. Then, you can use a few scraps of sticky back stabilizer to patch up the hole from the back side. This should explain why my hooped stabilizer looks so messy in the picture below. It’s because I’ve used the same piece of stabilizer for several projects and keep patching it from the back.
I will patch my stabilizer until the hole gets too big, or the stabilizer is no longer sticky. Only then will I hoop a fresh piece.
When I finally retire a piece of sticky back stabilizer, I cut off all the unused portions around the outside and iron them so that I can use them for patches later.
After the hoop is ready to go, using your disappearing ink fabric pen, draw a vertical line through the center of the hoop and a perpendicular horizontal line near the bottom of the hoop to help you position your pocket on the stabilizer. The reason why I’m working at the edge of the hoop for this project is because the pocket is hard to get to. Positioning it on the edge makes it easier to access.

Floating the shirt
Turn the pocket inside out as much as possible so that you can stick the fused stabilized area on the inside of the pocket to the center point you drew on the hooped tear away stabilizer. Make sure that the top of the pocket is parallel to the horizontal line you drew on the stabilizer. Flatten the pocket onto the stabilizer as much as possible. Then, move the rest of the shirt out of the way.
There are many different methods for keeping your excess material out of the way when you are embroidering, you may want to consider using one of these techniques so that other parts of your shirt don’t get caught up in the embroidery.
Move the needle into place
Even if you position the pocket precisely, you may find that your needle does not line up perfectly with the center point you drew on the pocket. Make any subtle adjustments on your embroidery machine to center the embroidery design on the mark on the pocket.
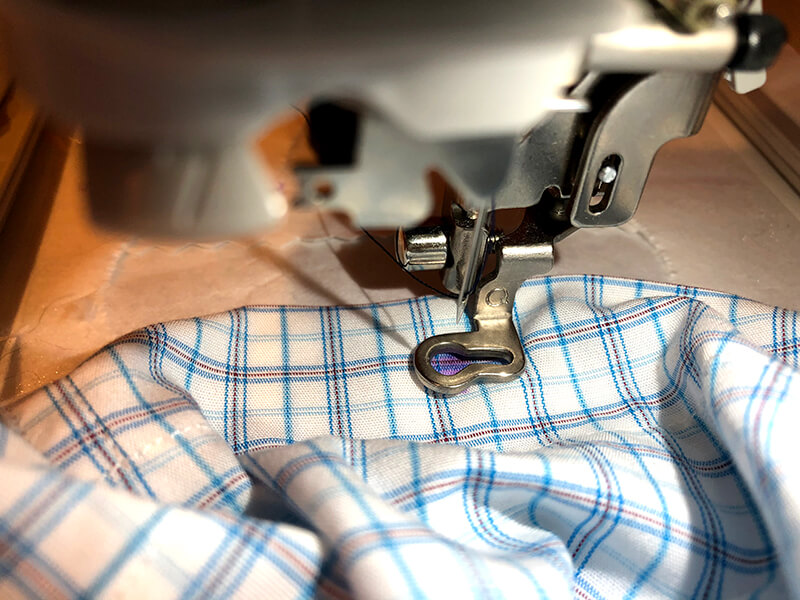
Start stitching
Start stitching out your monogram! This will be a quick stitch since the letters are small. Stay close to your machine so that you can pause it if anything shifts or your excess fabric gets in the way.

Admire your work
Trim your jump stitches and admire your work!
I was actually pretty pleased with how this turned out. When my husband saw it, he said “love the monogram and the short sleeves – but did I really blow out the elbow in that shirt?” Um, yeah….
Another way I like to personalize my husband’s shirts is to monogram the shirt cuff. Obviously, since there are no cuffs anymore, that wasn’t an option for this shirt. But, you could stitch out a monogram at the bottom of the sleeve though.
If you are looking for other ways to use your embroidery machine to make gifts for a man, check out my previous post: “machine embroidery projects for a man.”
Good luck!
Happy stitching
xo –
Julie
[do_widget id=custom_html-53]
[do_widget id=custom_html-10]
Want to remember this? Save “How to monogram a shirt pocket” on your favorite Pinterest board

Thank you. I’m a fan of floating too. Instead of buying the expensive sticky paper I ah e started using the stabilizer on the bolt and school glue sticks. Works like a charm.