Disclosure: Some of the links on this site are affiliate links. This means that if you click on them and make a purchase, I may earn a small commission at no extra cost to you. Please know that I only recommend products and services I trust and use myself.
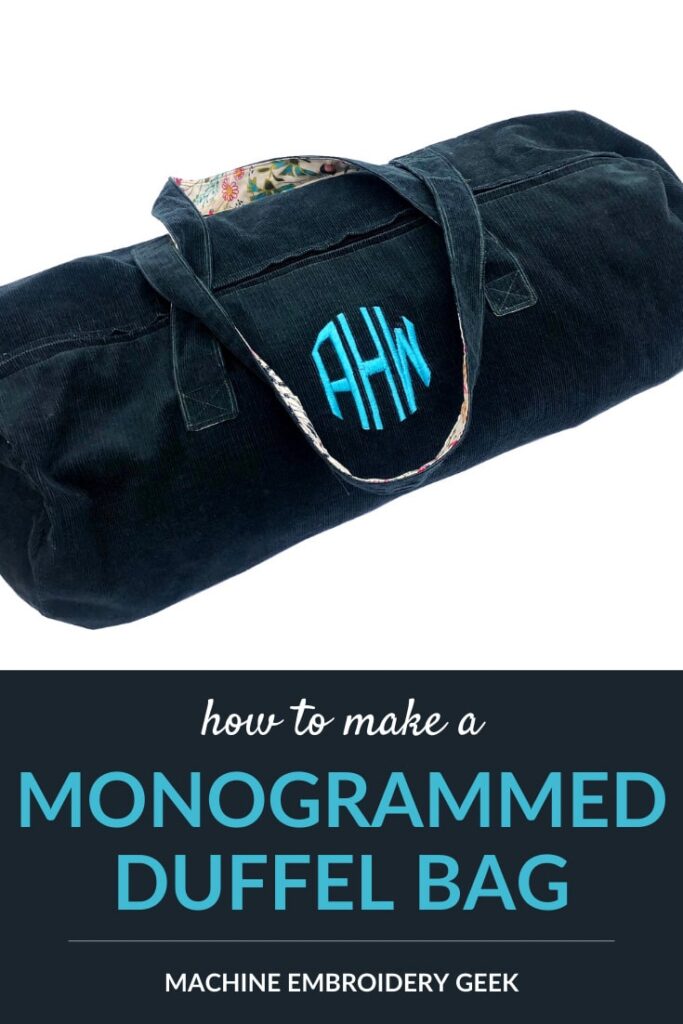
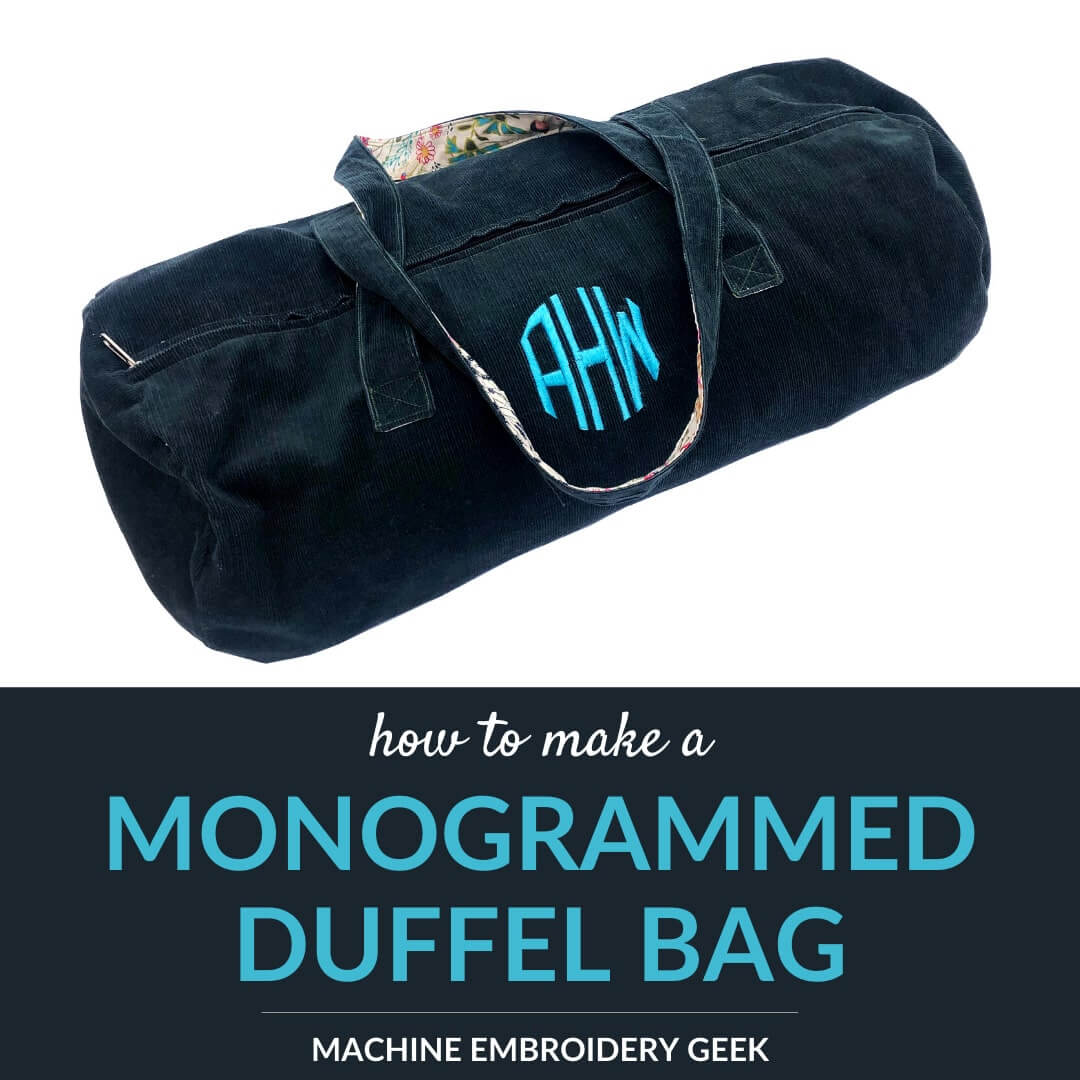
I’ve monogrammed a lot of duffel bags over the years using my embroidery machine, because, frankly, a monogrammed duffel bag makes a GREAT GIFT. The only issue is that duffel bags can be challenging to get on your embroidery hoop. In fact, one time when I was monogramming a duffel bag for my nephew, I ripped out and redid the monogram 3 times! I just couldn’t get the monogram straight because the heavy bag kept moving around.
One way to avoid the challenge of getting a duffel bag onto an embroidery hoop is to just make the duffel bag yourself. Sound a little crazy? It’s actually surprisingly easy. And I actually just did exactly this.
And, you know the best part about it? I was able to make the entire monogrammed duffel bag using remnants from my sewing room!
Supplies needed for this project
Inspiration for the monogrammed handmade duffel bag
I got inspired to make a monogram duffel bag as a birthday gift for my friend Alix, after she told me a very sad story. A while back, she was meeting a friend for an overnight getaway. When they arrived at their destination, they discovered that both of them had the same luggage: A PLASTIC GROCERY BAG. And, coincidentally it was from the same grocery store! Really? I thought. That’s the best option you can come up with for transporting your belongings for an overnight visit?
This called for an intervention, and I would be the one to intervene.
How to make the monogrammed tote bag
Materials
When I thought about making this duffel bag I knew that the outer fabric would need to be somewhat durable. Fortunately, I have excessive amounts of corduroy lying around my sewing room which fit the bill perfectly!
Why so much corduroy? Well, a while back I got this idea to make patchwork corduroy pillows for my son’s room. But, I had a hard time finding a variety of different colors. So, I went on eBay and found a listing for a bunch of corduroy remnants.
Normally eBay is one of my favorite sources for cheap fabric. And, it seemed like a good deal. Unfortunately, when the fabric arrived, I was a bit disappointed. First of all, not all of it was actually corduroy, and secondly the color combination was not very inspiring.
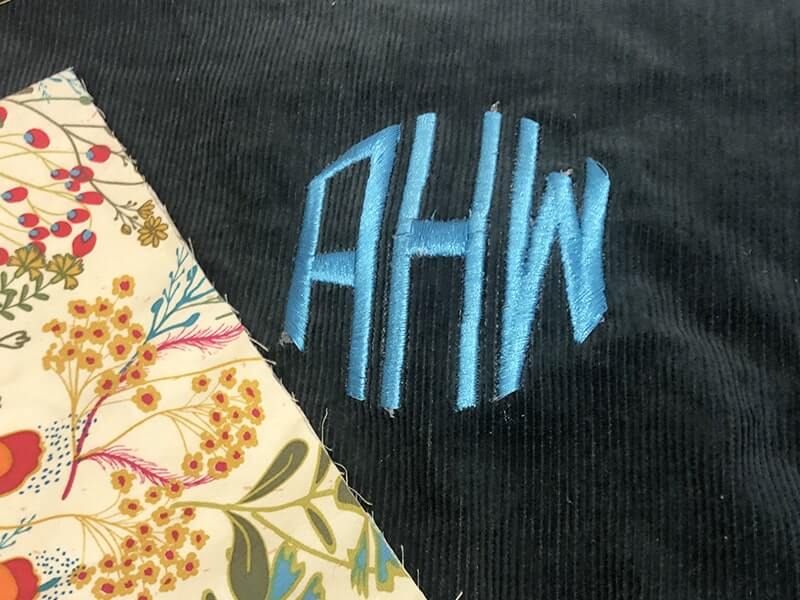
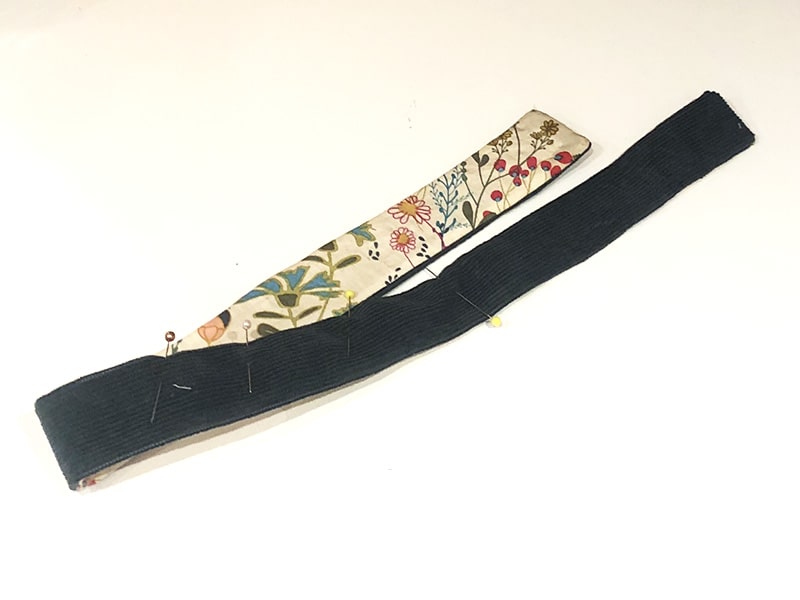
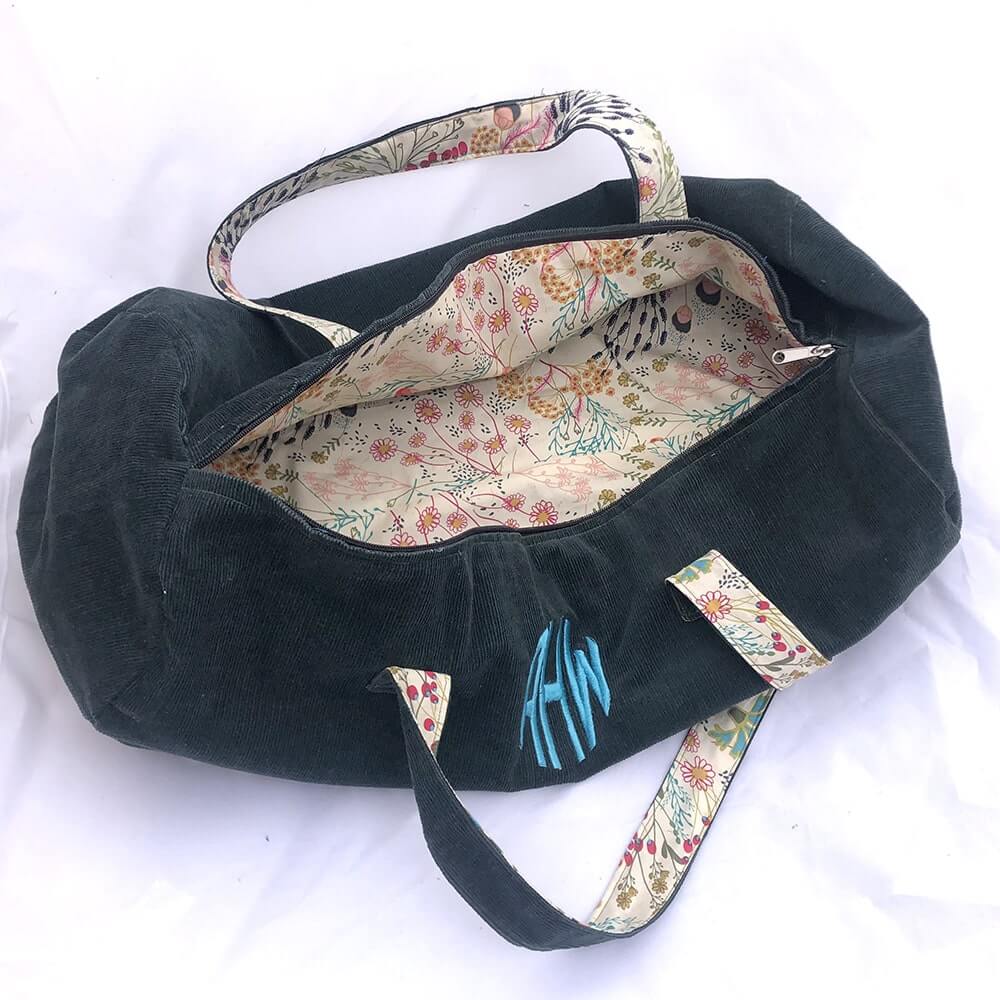
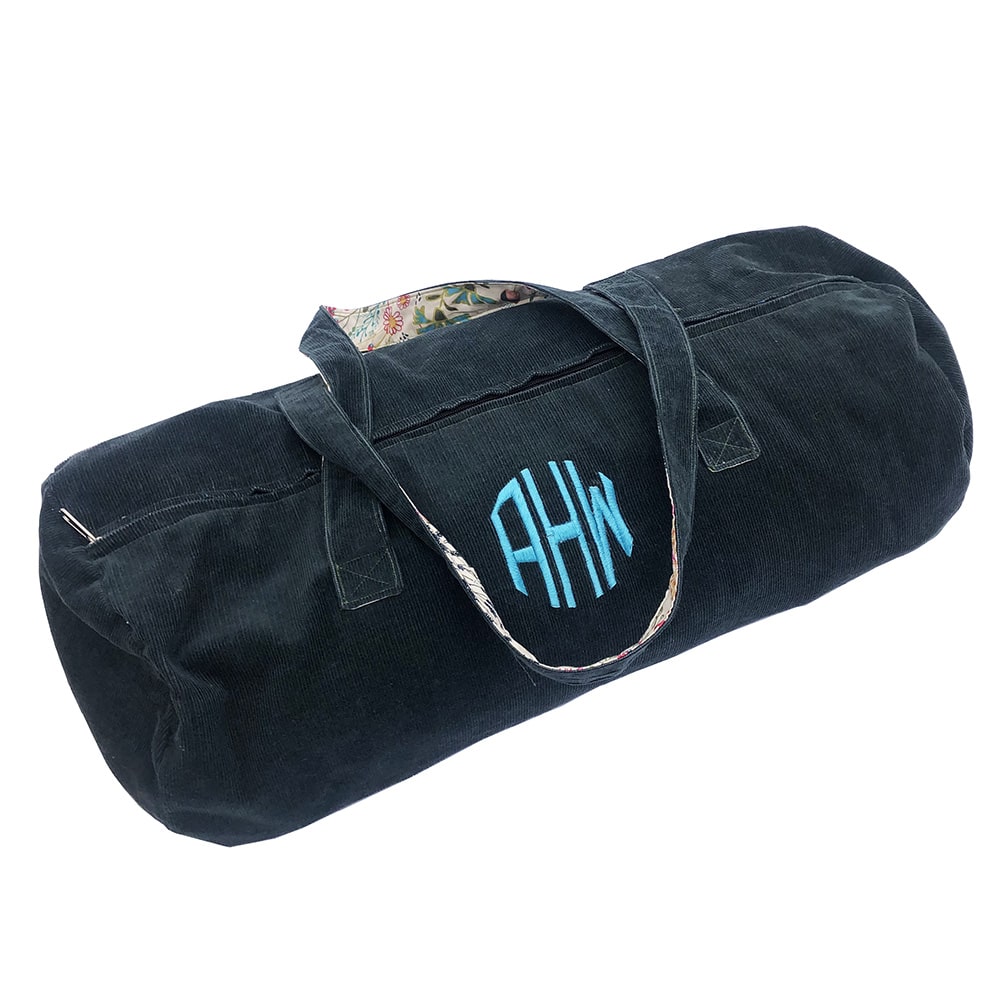
So, this corduroy has sat untouched in my sewing room for quite a while. Turning it into a monogrammed duffel bag provided the perfect opportunity to give it a second life. I decided to use a pretty forest green piece.
After identifying the corduroy I wanted to use for the exterior, I needed to find a coordinating lining fabric. Luckily, I discovered that I had just enough of a remnant of a pretty floral I had recently used to make curtains. The flowers in the pattern included a deep green which matched the outer corduroy perfectly.
In addition to having just the right amount of fabric lying around, I also had the perfect sport style zipper. No emergency runs to Joanns were required!
Duffel bag pattern
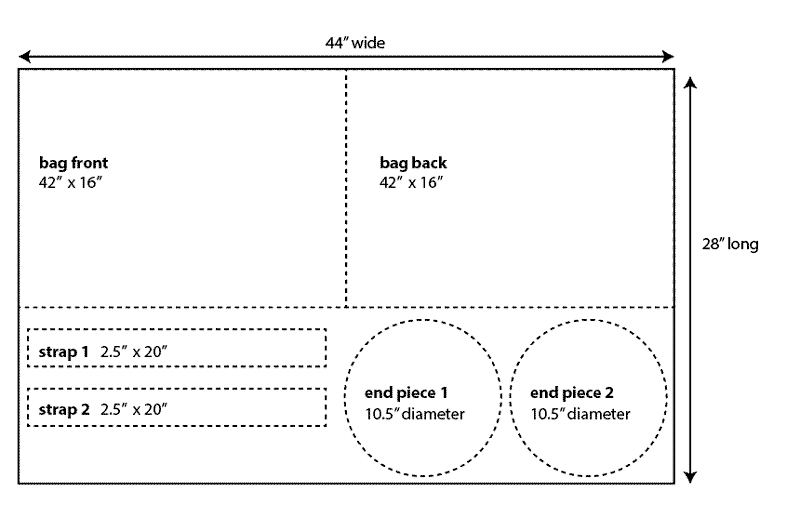
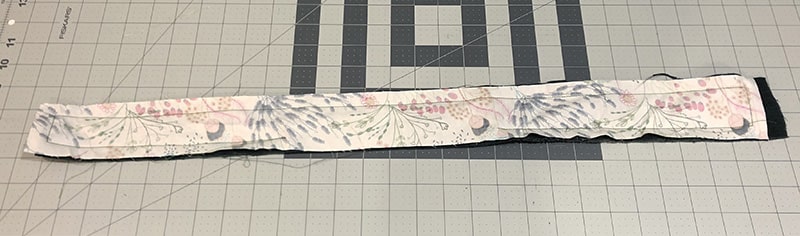
I based my pattern on another bag that I owned. I decided that the appropriate width for the overnight duffel should be about 22″. This way it’s economical to make with 44 to 45 inch wide fabric, because you can get the entire body of the duffel in 16″ of fabric.
Here’s how I suggest laying out the fabric pieces. You will need to cut all of the pieces out for the outer fabric, and then once again for the lining fabric. I incorporated 1/2″ seam allowances on each piece.
Stitching together the lining
In order to avoid multiple changes of thread colors, I thought it made most sense to assemble the lining since I would be using a lighter thread color and I would be using the darker thread for more of the finishing touches.
Here’s how to do it.
- With right sides together, stitch together the bag front and back lining pieces using a regular stitch length. This will be the bottom of the bag.
- Now stitch together the bag front and back lining pieces along the top edge, except USE A BASTING STITCH. You will be taking this out later.
- Press open both of these seams. You will have made a tube.
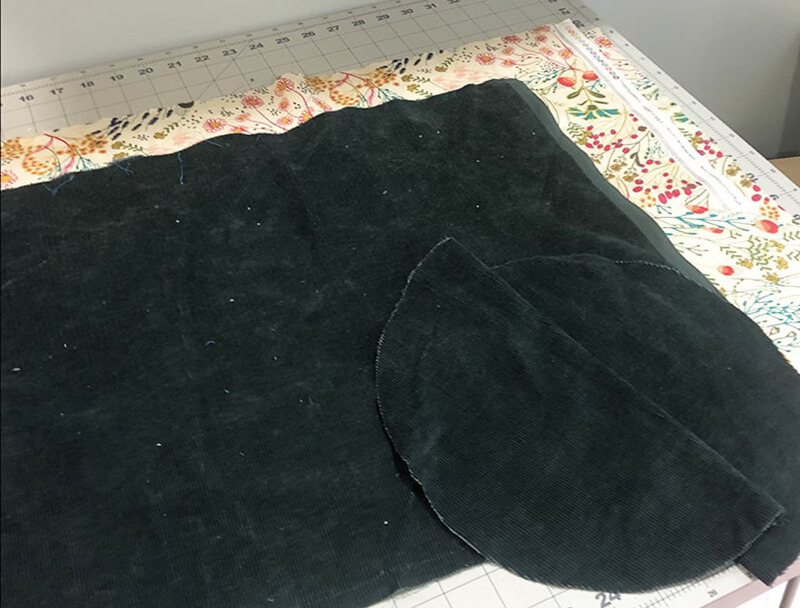
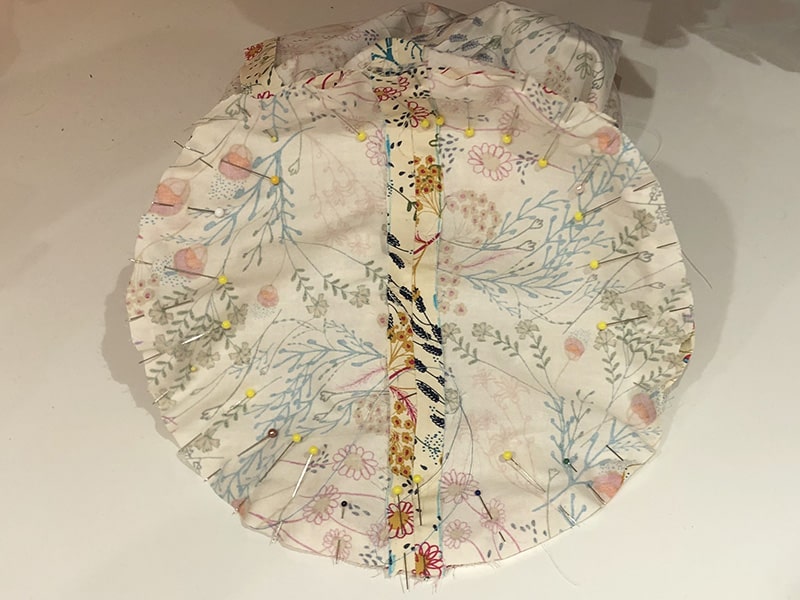
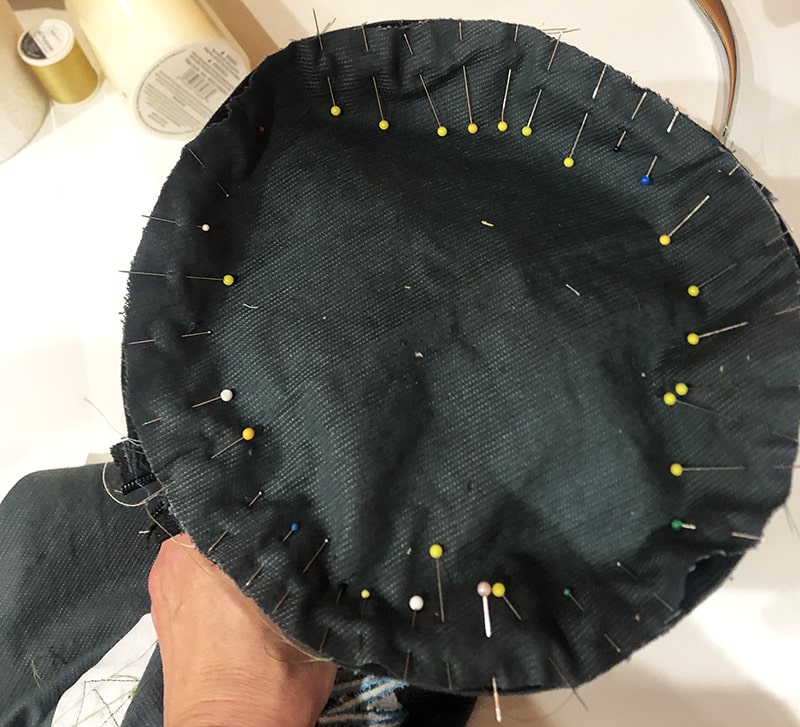
- Next, with right sides together, pin the ends of the bag to the ends of the tube. I divided both my circle pieces and the bag body pieces into quadrants to help me evenly distribute the circular fabric around the end of the bag. Pin it A LOT. And pin it so that the pins are visible on the circle end.
- Sew the circle pieces to the ends of the bag body pieces.
- Using a seam ripper, open up the seam that you basted together. Then set the entire lining aside.
Monogramming the bag
Before you stitch together the outer fabric of the duffel bag, you should monogram it!
If you have never set up a monogram embroidery file, check out this previous post to learn how to do it.
Looking for some monogram inspiration? Check out my favorite monogram fonts.
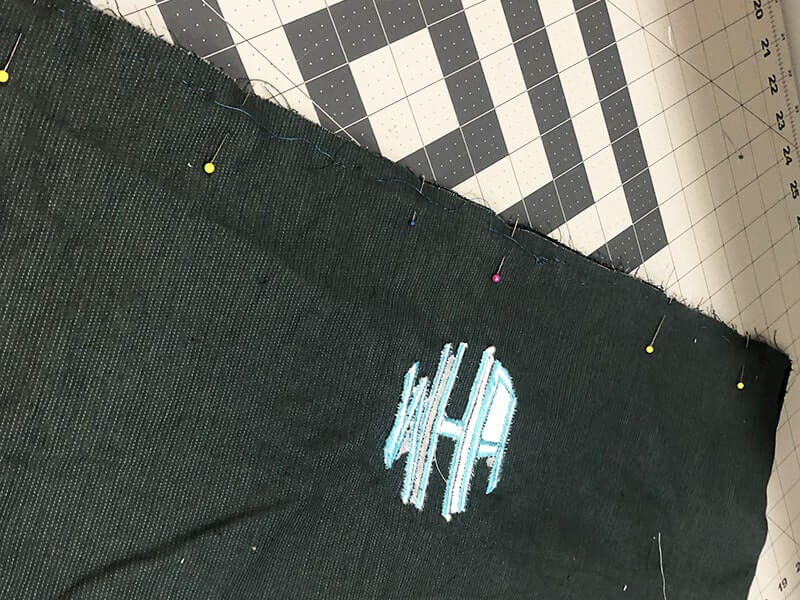
- Locate the center of the monogram by folding the bag front outer fabric in half so that right sides are together and the short edges are lined up.
- Use a pin to mark the center
- Now mark the center of the monogram about 5″ down from the top edge of the bag front along the fold.
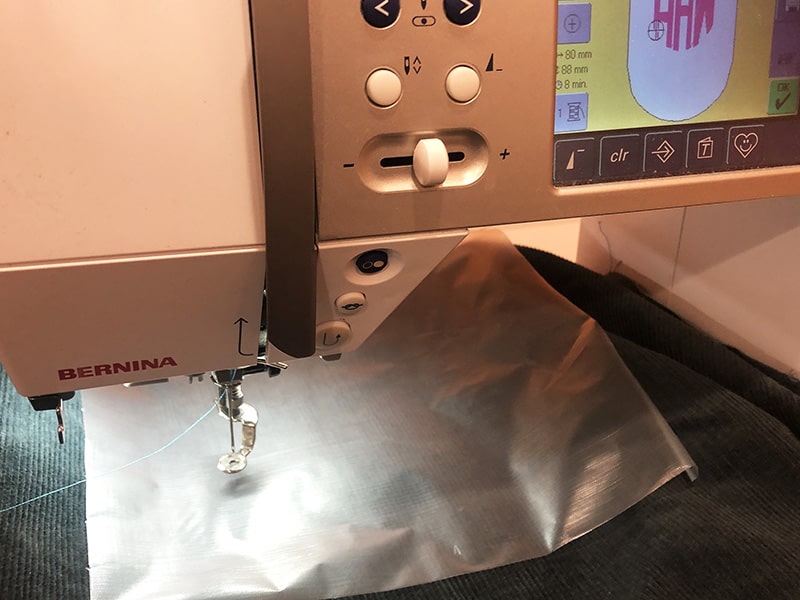
- Hoop a piece of adhesive-backed stabilizer, score the top paper with a pin and peel it away to expose the sticky surface.
- Draw horizontal and vertical lines on the sticky stabilizer using a disappearing ink pen.
- Line of the fold of the fabric with the vertical line you drew on the sticky stabilizer. And line up the center of the monogram with the center you drew on the hooped stabilizer
- Unfold the fabric and smooth.
- Lay down a layer of water soluble topper over the fabric.
- Start stitching! Be sure to use an embroidery thread color that ties together the outer fabric with the lining.
Nervous about embroidering on corduroy? See my previous post about how to embroider on corduroy.
[do_widget id=custom_html-26]
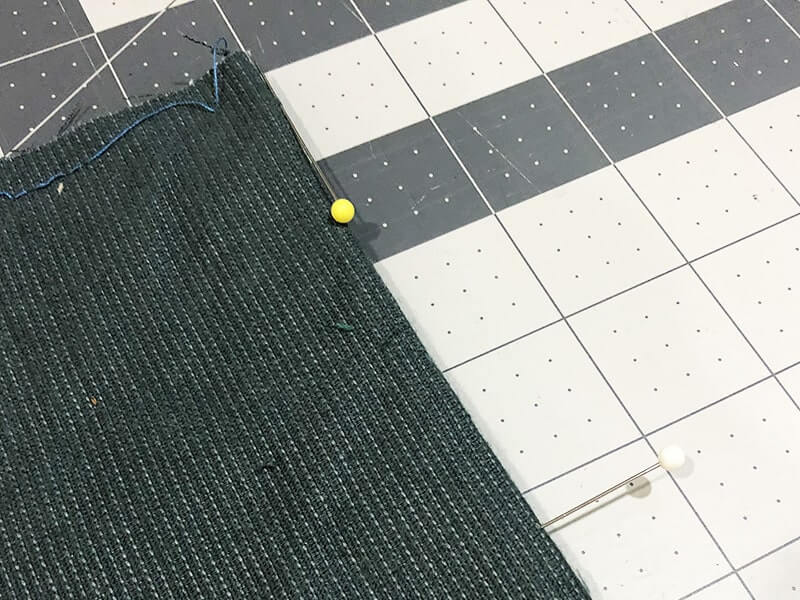
Installing the zipper
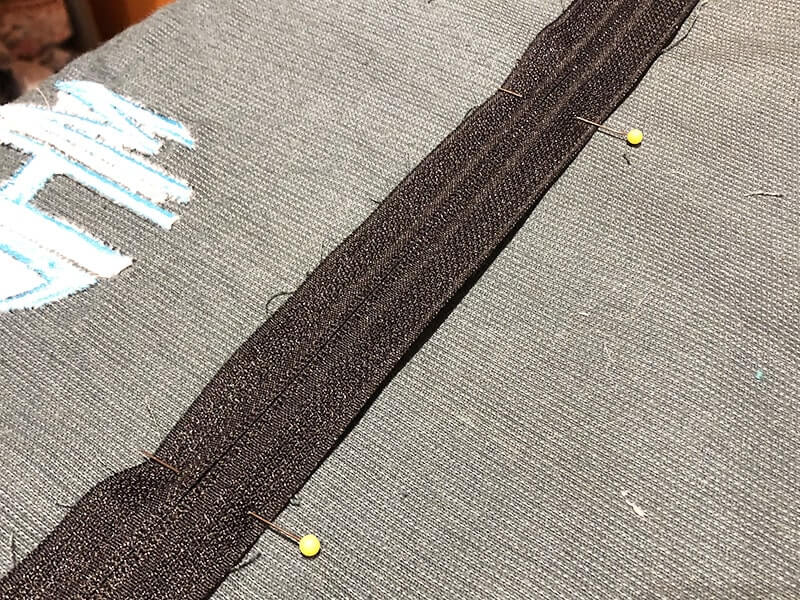
- Pin the front and back body pieces together along the top edge.
- Baste it together leaving 1/2″ seam allowance
- Press the seam allowance open.
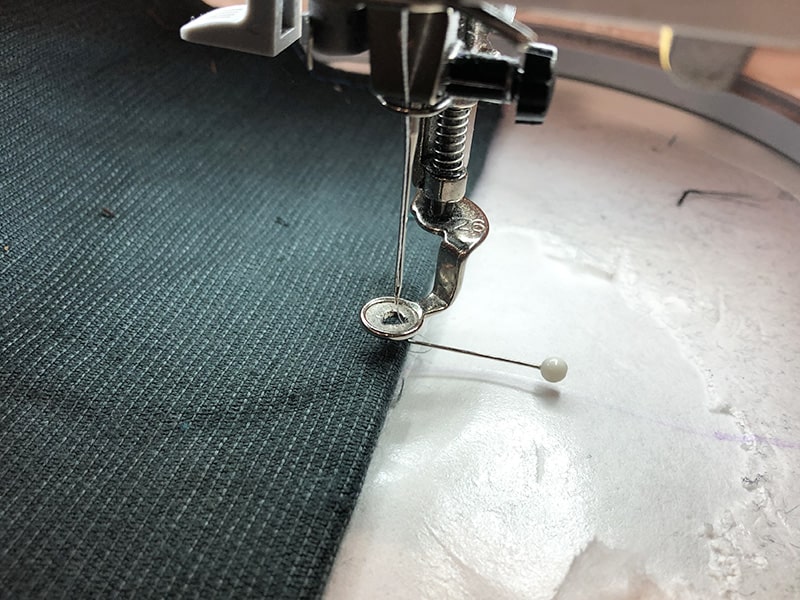
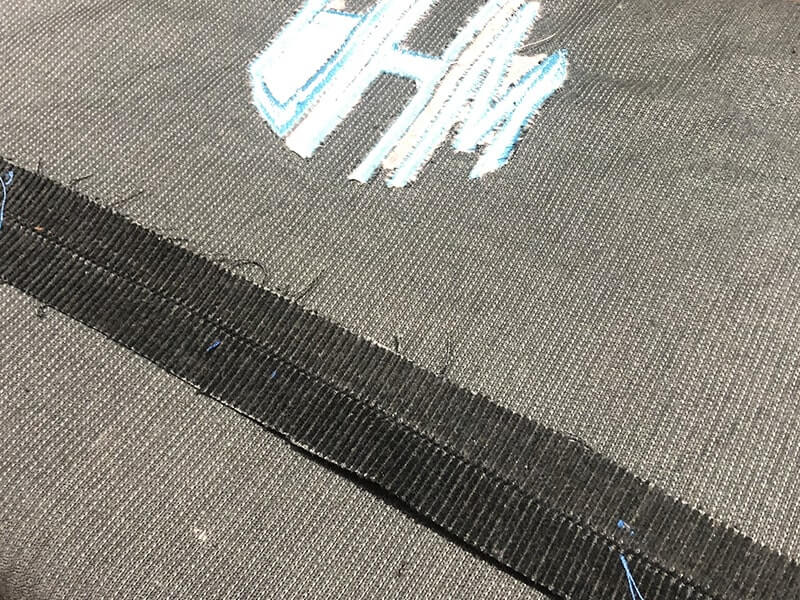
- Peel away the paper on one side of a piece of zipper tape and stick it down along the entire length of the seam allowance. Do this for both seam allowances
- Peel away the paper and stick down the zipper.
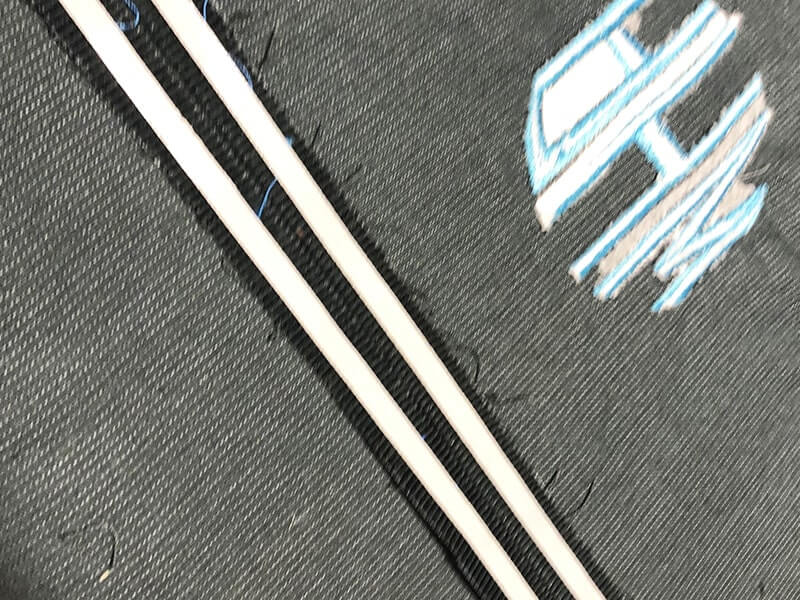
- Stitch down the zipper, moving the pull out of the way when you get to it in order to keep your seam straight.
- Remove the basting stitching to expose the zipper.
Making the straps
- Pin the right sides of the bag fabric to the right side of the lining fabric for both strap pieces.
- Stitch them together leaving 1/2″ seam allowance an dan opening of about 6″ long.
- Trim the seam allowances down to about 1/8″ except in the area of the opening
- Turn the straps right side out and press.
- Top stitch both of the straps
Attaching the straps to the duffel bag
- Locate the spots where you want to attach the straps to the duffel bag. I positioned my straps about 4.5″ from the center of the monogram and about 4.5″ from the zipper center. Pin in place. One strap will be pinned to the right and the left of the monogram and the other one will be in the same position on the back side of the bag.
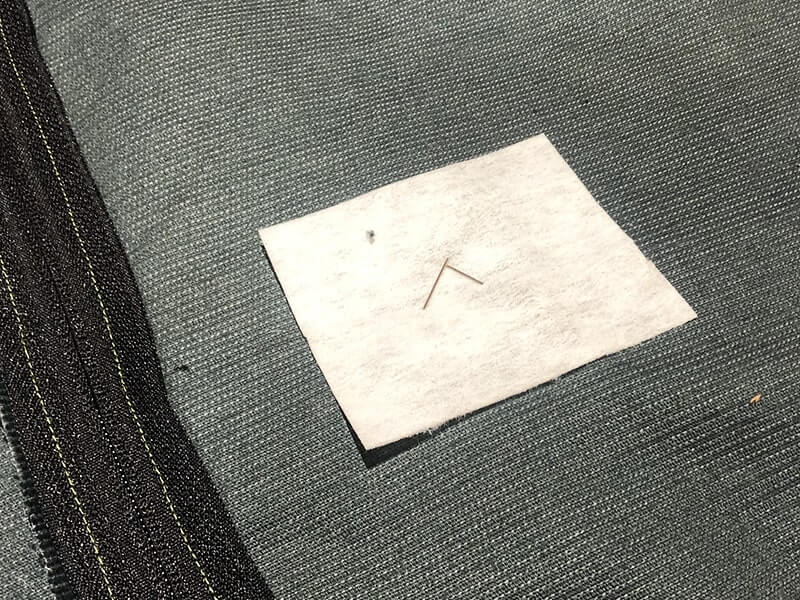
- Fuse a small piece of heavyweight interfacing to the back of where you pinned the straps. This is to provide reinforcement for the straps so they do not tear through the fabric.
- Stitch the straps into place. I stitched in a square at the end of the strap and then an “X” through the square to ensure that the straps would be held on securely to the bag.

Sewing the bag together
- Stitch together the bottom of the bag front and back to form a tube.
- Attach the end pieces of the bag to the tube just as you did the lining.
Attaching the lining to the inside of bag
- Pin the lining to the outer bag material and slip stitch in place.
- Trim up your strings and you are done!
Wow – this duffel turned out better than I expected. I can’t wait to give it to my friend. I hope she will find this to be a suitable replacement for her grocery bag “luggage.”
Frequently asked questions regarding making a monogrammed duffel bag
What size is a standard duffel bag?
There is no standard size for a duffel bag. But, I think this size (22″ x 11″ x 11″) is suitable for an overnight or a trip to the gym.
What is the best type of fabric to use for a duffel bag?
The best type of fabric to use for a duffel bag is a sturdy fabric such as canvas, denim, or corduroy.
How do I personalize my duffel bag?
You can personalize your duffel bag by adding a monogram, applique, or embroidery to the front of the bag.
What is the best way to attach the straps to the duffel bag?
The best way to attach the straps to the duffel bag is to use a heavy-duty interfacing and stitch them in place.
What is the best way to close a duffel bag?
The best way to close a duffel bag is with a zipper. But the heavier duty variety designed for outerwear.
Can I make this duffel bag without a monogram?
Yes, you can make this duffel bag without a monogram. Simply omit the monogram and proceed with the instructions.
Want to make a monogrammed duffel?
Visit the resource library to access the pattern layout and end piece template.
Happy stitching!
xo
Julie
[do_widget id=custom_html-27]
Want to remember this? Save “How to make a monogrammed duffel bag” on your favorite Pinterest board