Disclosure: Some of the links on this site are affiliate links. This means that if you click on them and make a purchase, I may earn a small commission at no extra cost to you. Please know that I only recommend products and services I trust and use myself.
Now that my kids are getting older and (gasp) even driving – they have the capability to buy any gift they want. So, these days, gift giving is a bit more challenging. Gone are the days when I could appliqué a goofy design on a sweatshirt and hit a home run. My kids’ tastes have gotten more specific, and (shocker) they prefer to pick out their own clothes. So, for this reason, gift cards are now the go-to gift. But how do you make a gift card a bit more personal and less like you just picked it up at Walgreens? Easy. Whip up a cute little in-the-hoop gift card holder, insert a gift card, and all of the sudden, your run-of-the-mill, grocery store purchased gift card is a bit more special.
Wondering how to do it? Well, there are a lot of different gift card holder designs that you can make on an embroidery machine. But, in this post, I’ll show you how to make a simple style that I created myself.
Products mentioned in this post
- In-the-hoop gift card holder design*
- Water soluble stabilizer
- Sparkly vinyl materials
- Felt.
- Blue painters tape
- 1/8″ ribbon
- White machine embroidery thread
- Variety of machine embroidery thread colors
- Ugly sweater in-the-hoop gift card holder
- “Happy Birthday” in-the-hoop gift card holder
- Mitten in-the-hoop gift card holder
- In-the-hoop gift card holder with a snowflake design
- VW bus Christmas in-the-hoop gift card holder
* Design used in this post.
What is an in-the-hoop gift card holder?
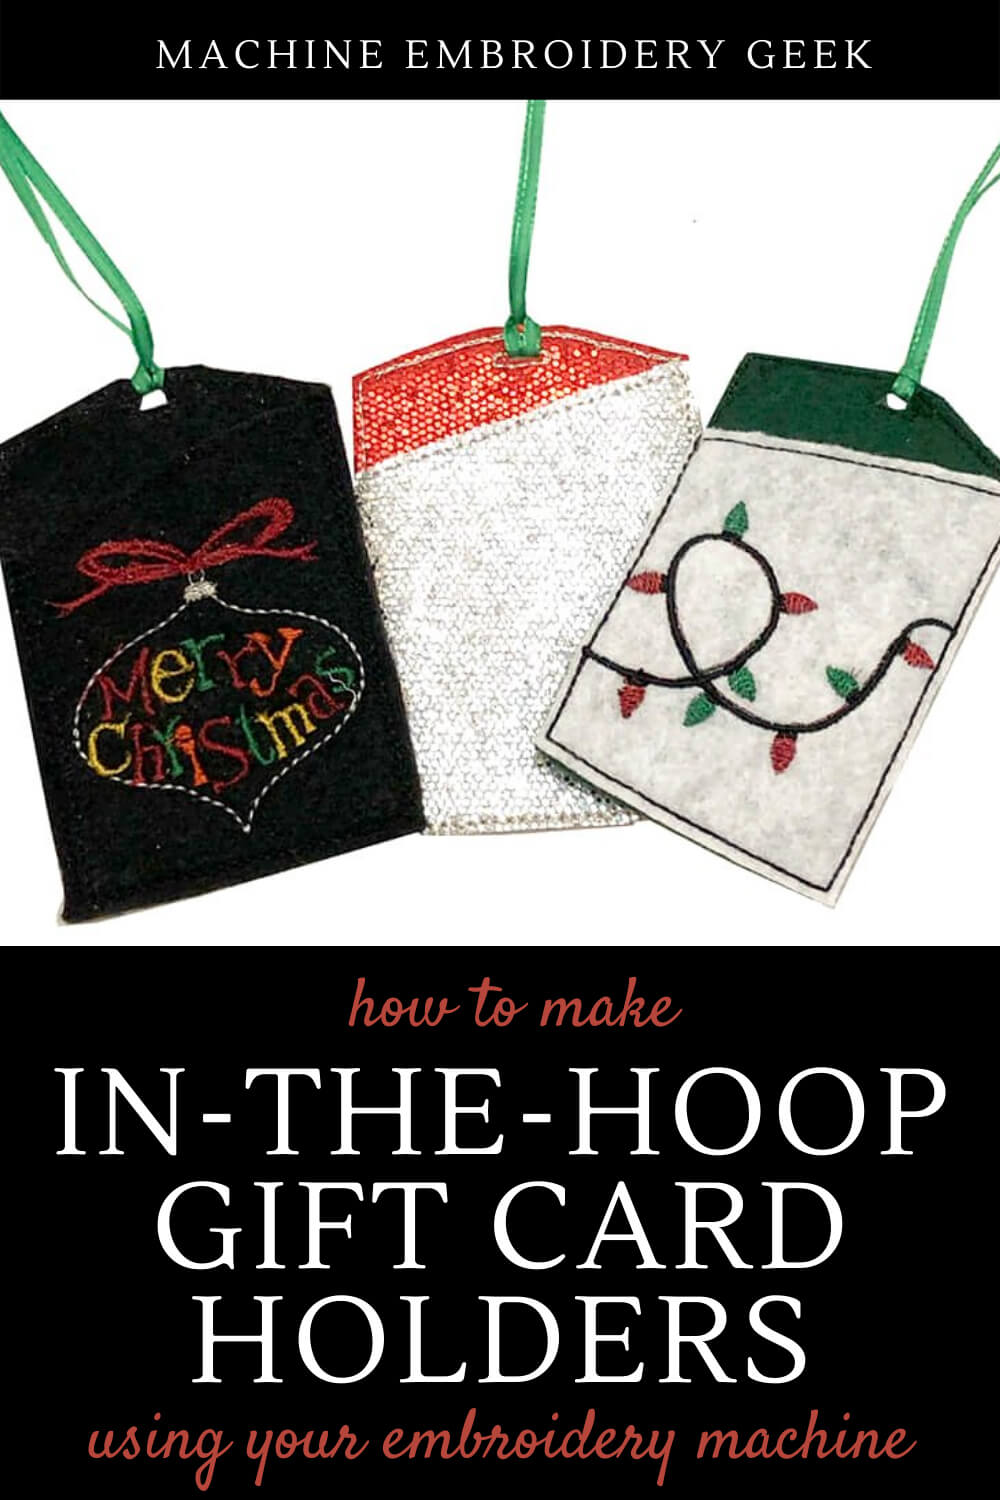
Never seen an in-the-hoop gift card holder? Well, there’s not a lot to them. Typically a gift card holder is like a sleeve that reveals just a bit of the gift card inside. Of course, there are more complex styles (which we will check out later in this post). But, the vast majority are just sleeves.
You can make an in-the-hoop gift card holder in a variety of fabric. However, keep in mind that an in-the-hoop gift card holder made of lightweight cotton or other lightweight fabric will be quite flimsy. In my example, below, I have used sparkly vinyl and felt to make my in-the-hoop gift card holder.
Why make in-the-hoop gift card holders?
Now that just about every grocery store, Walmart, Target and gas station offer gift cards for a myriad of stores and restaurants, a gift card is hardly a unique or one-of-a-kind gift. But, despite the ubiquity of gift cards, they are still an awesome gift. Personally, I love a gift card. And, I almost don’t even care where it’s from. Target? SWEET! Michaels? Perfect. Taco Bell? DING DONG – I’ll take the #3!
But if you want your gift card to be a bit more meaningful, why not present it in a handmade package? It makes for a much more thoughtful and considered gift.
Never made an in-the-hoop project? Don’t fret. This is a great place to start as it is one of the easiest in-the-hoop projects you can make – perfectly suitable for beginners.
How to make an in-the-hoop gift card holder
In the following example, I’ll show you how to make the plain version of my gift card holder design. In this set of designs, I’ve included two other versions containing holiday designs. You would stitch these out in a similar manner as demonstrated below. You will just stitch out the design in between stitching the gift card holder together.
Supplies
Water soluble stabilizer
Like many in-the-hoop projects, you will assemble this item on water soluble stabilizer. Because the water soluble stabilizer washes away, you won’t see any remaining stabilizer around the edges. The water soluble stabilizer tends to leave the fabric a bit stiff as well which is appropriate for this project.
Gift card holder material
In the example, below, you will see that I’ve made my gift card holder from two different sparkly vinyl materials. I also made versions from felt. Other suitable fabrics include faux leather or any thing with a bit of body that won’t ravel as the outside edges of this in-the-hoop gift card holder will be left unfinished.
Blue painters tape
Other types of tape will work, but my favorite to use on in-the-hoop projects is blue painters tape. It’s strong but gentle.
1/8″ ribbon
You will need about 8″ of 1/8″ ribbon to attach a loop to the top of your gift card holder.
Embroidery thread
If you make the plain version of the in-the-hoop gift card holder, you only need one color of embroidery thread. (I used white in my example below). If you stitch out one of the versions that incorporate a design, you will need a variety of embroidery thread colors.
Steps
Change your bobbin thread to match your top thread
Since the back side of your gift card holder will be visible, you want it to look as polished as possible. For this reason, I recommend changing your bobbin thread to match your top embroidery thread. If you are stitching out one of the versions with a design on the front, make the bobbin thread match the embroidery thread color you are using for the outline stitching of the gift card holder.
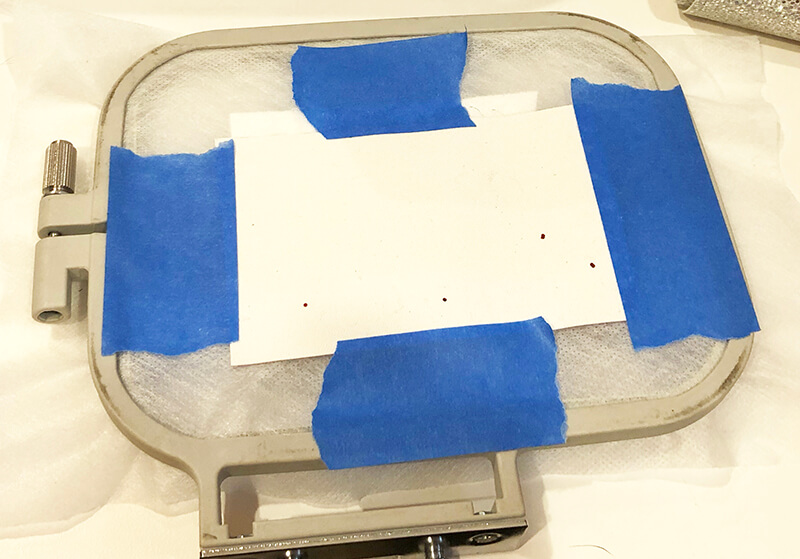
Hoop a piece of water soluble stabilizer
First, cut out a piece of water soluble stabilizer that is slightly larger than your embroidery hoop. Since I was using a 4″ x 4″ embroidery hoop, I used a piece of stabilizer about 6″ x 6″. Then, secure it in your embroidery hoop, making sure that it is very taut.
Start stitching out your embroidery design
Load your design onto your machine and start stitching out the first thread color. The first thread color is simply a placement line showing you where to lay down your fabric.

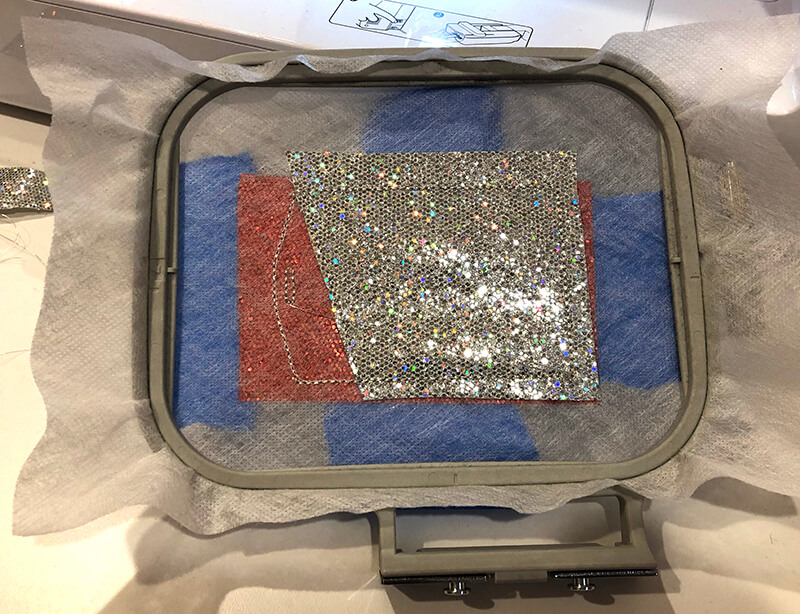
Lay your front piece of your gift card holder over the placement stitching line.
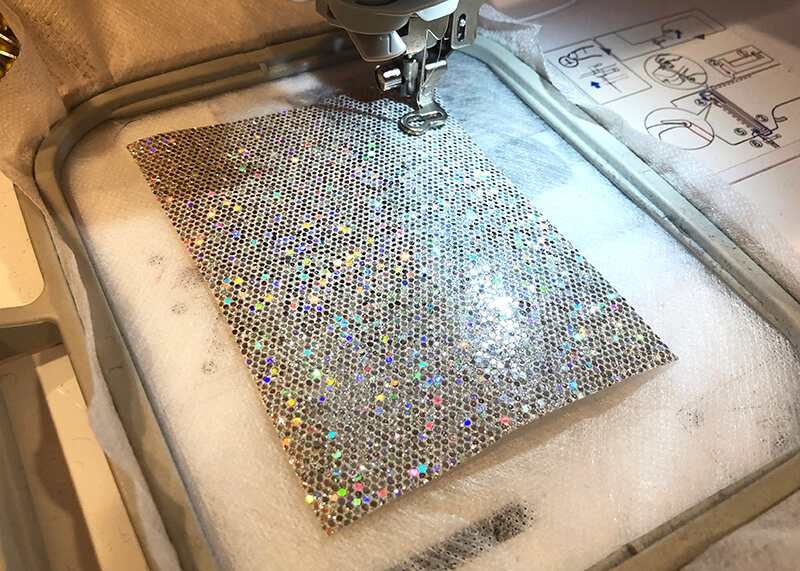
Then, start stitching your next thread color. This will tack down the front piece of your gift card holder onto your water soluble stabilizer.

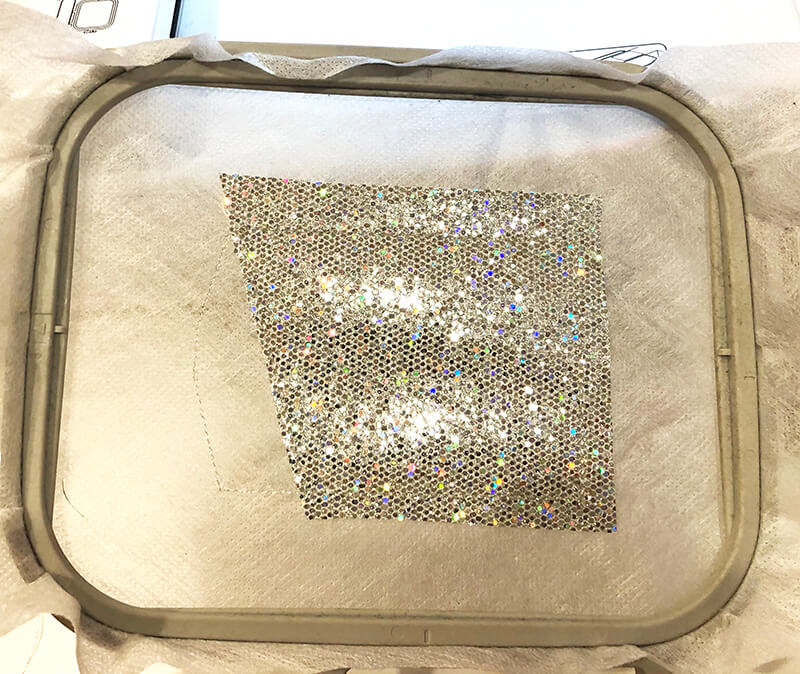
Remove the embroidery hoop from your machine and trim the top edge of the gift card holder front. You do not need to trim the outside edges at this point. When you are done trimming, return the embroidery hoop to the embroidery machine.
If you are stitching out one of the in-the-hoop gift cards with a design on the front, the next thread colors you will stitch out will make up the design. When the design is done stitching out, remove the embroidery hoop from the embroidery machine and flip it over.
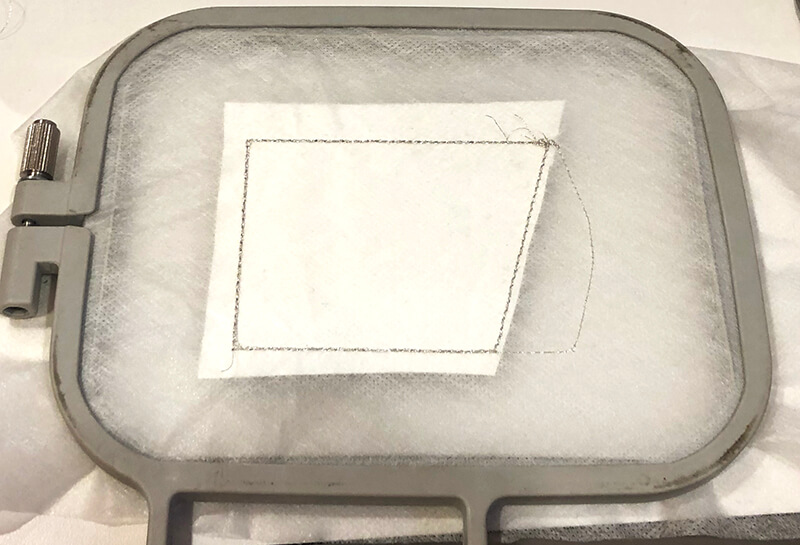
Tape your back piece onto the back of the hooped stabilizer. Make sure that the right side of your material is facing the water soluble stabilizer. The material should completely cover all of the stitching. Also, double check that the blue tape does not cover any of the stitch lines.
Return the embroidery hoop to the embroidery machine and stitch the final thread color. This will attach the back of the gift card holder to the front.
When this is done, you can remove the entire project from the hoop. Trim off the excess fabric around the outer stitch line. In addition, make a slit inside the small rectangle at the top of the gift card holder. This is for adding a ribbon loop.
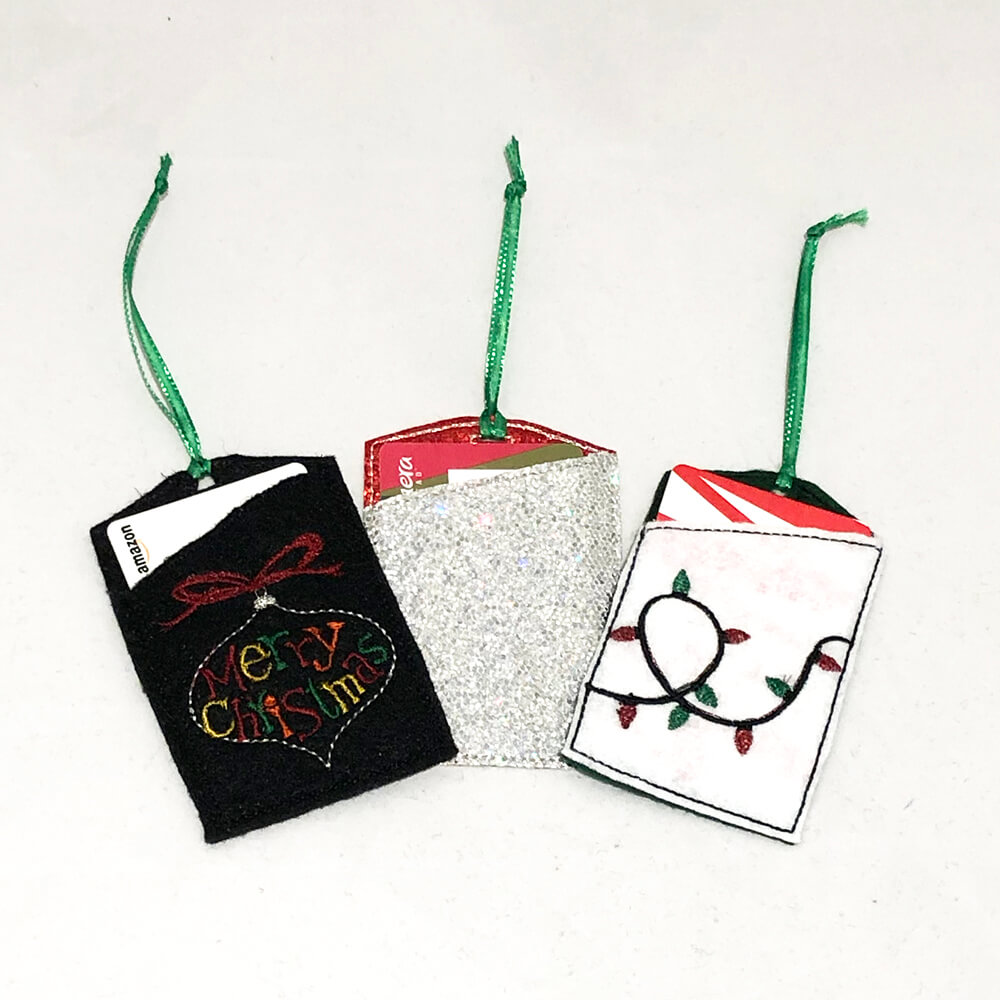
All done! Here is my completed project with the two other styles I created.
Other styles of in-the-hoop gift card holders to make on your embroidery machine
Not crazy about my versions? Well – lucky you – there are tons of other styles available. In fact, you can probably stitch out an in-the-hoop gift card holder for just about anyone on your list. Here are some of my favs.
Reindeer Gift Card Holder
What’s more Christmassy than Santa’s reindeer? This in-the-hoop reindeer gift card holder is pretty aderable and has a built-in hole to make it an ornament.
Happy Birthday
Christmas isn’t the only appropriate occasion for gift card giving. You can’t forget birthdays! Here’s a sweet little “Happy Birthday” in-the-hoop gift card holder that you can use any time of year.
Mitten
Not sure if your recipient celebrates Christmas? Then stitch out a less holiday-specific version, like this cute mitten in-the-hoop gift card holder. You can even attach two mittens together and double gift card!
Here’s another not-so-holiday specific version. It’s a simple in-the-hoop gift card holder with a snowflake design.
Elf Belt
This in-the-hoop elf belt gift card holder brings a burst of holiday cheer, with a playful design that feels straight out of a certain beloved North Pole adventure. Its merry little elf makes gifting so fun you’ll swear it was crafted in Santa’s workshop—no maple-syrup spaghetti required.
Ok – so now are you ready to make some in-the-hoop gift card holders?
Don’t be scared!
xo
Julie
Want to remember this? Save “How to make in-the-hoop towel toppers” on your favorite Pinterest board