Disclosure: Some of the links on this site are affiliate links. This means that if you click on them and make a purchase, I may earn a small commission at no extra cost to you. Please know that I only recommend products and services I trust and use myself.
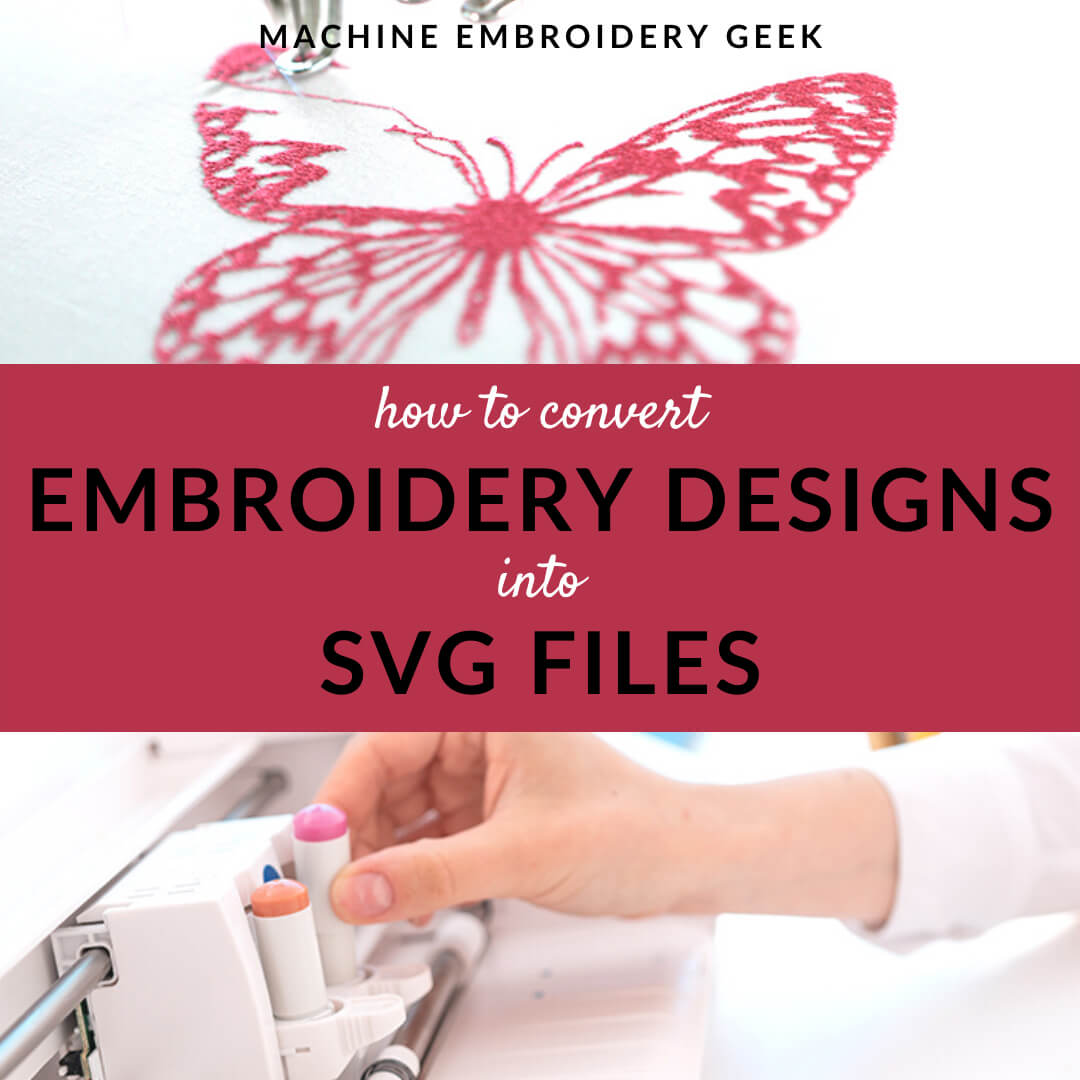
Do you have an embroidery design in an embroidery file format (such as PES, EXP, JEF, etc…) that you love and wonder if could be turned into an SVG file that you could cut with your Cricut or Silhouette machine? Fortunately, it can be done, and there are a number of different ways to go about it. In this post, we’ll cover what an embroidery design file is, how it differs from an SVG file and the reasons why you might want to convert an embroidery file to an SVG.
Products mentioned in this post
- SewWhat-Pro
- Online image conversion tool: https://www.imageconvert.org
- Inkscape – free vector-based image editor
- Photopea – free web-based pixel-based image editor
What is embroidery design file?
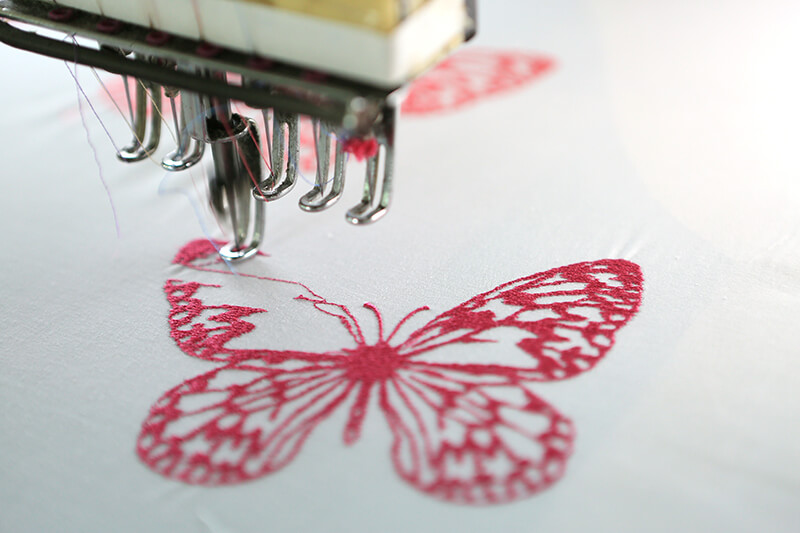
An embroidery design file contains the instructions for how to stitch an image onto fabric. The designs are made up of instructions that tell an embroidery machine how to stitch out a design. The file contains A LOT of information, including thread color, thread order, stitch type and stitch angle. Because embroidery designs have to contain all of this unique information specific to embroidery, perhaps you can see how they are different from any type of image format that just contains instructions for the computer on how to display it.
Embroidery design file formats
Embroidery designs come in many different file formats which can be read by different brands of embroidery machines. For example, a Janome machine will only read the JEF file format, while a Brother embroidery machine reads PES files. Oh – it would be nice if there was a universal embroidery file format, but – alas – there is not.
And, despite there being such a large variety of different embroidery file formats – none of them are similar AT ALL to an SVG file. So, it doesn’t matter which embroidery file format we start with, converting the embroidery design to an SVG file is the same for them all.
How do you create embroidery files?
Embroidery designs are created with embroidery digitizing software. You can make embroidery files yourself, but you need to own embroidery digitizing software in order to do so. There are a number of different embroidery digitizing software programs available, but high quality digitizing software can be a bit pricey and it takes a bit of time to learn how to do it. Many people who do machine embroidery simply purchase embroidery files online as opposed to creating the designs, themselves, using embroidery digitizing software.
What is an SVG file?
An SVG (scaleable vector graphic) file is a two-dimensional image that has been created and saved in a vector format. Vector images are made up of shapes and lines, instead of pixels. Therefore, SVG files can be scaled without any loss of quality.
SVGs are a generic vector-based file format
SVG files differ from other vector-based file formats because it is a generic, universally recognized format. In fact, it is the only vector-based file format that can be viewed within a web browser. The SVG format was actually developed by the W3C ( a non-profit organization that sets standards for the World Wide Web) in 1999, and they are comprised of XML text.
SVGs are different from JPEGs
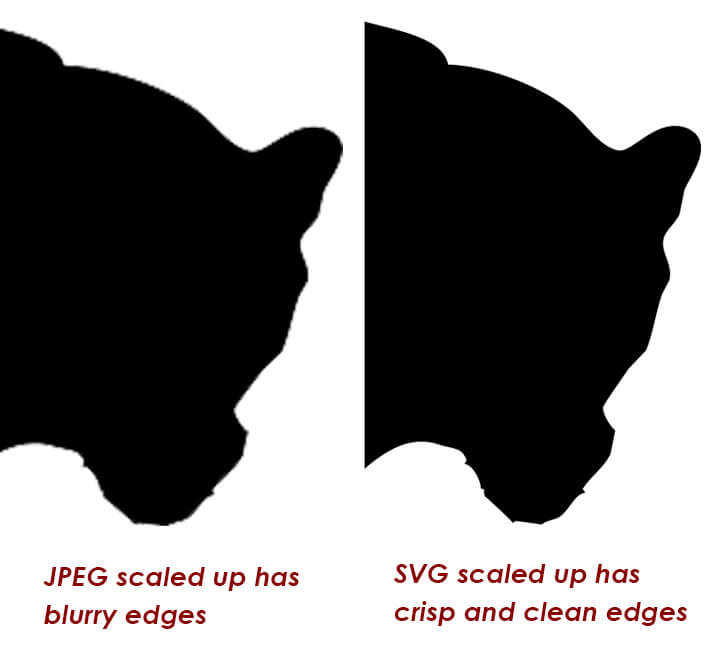
The biggest benefit of a vector-based image is that it can be reduced and enlarged without any loss of quality. In other words when you scale a vector file up, it will still look just as good as when it was smaller. The same can not be said for pixel-based images like jpegs. If you scale up a pixel-based image, you will start to see the individual pixels.
Logos are most often created in vector-based software because they are comprised of a limited number of colors. They also need to be scalable. A logo should be recognizable printed on a small business card or scaled up quite large on an outdoor sign.
Because vector-based files (such as SVGs) are based on lines and shapes, they tend to look a bit cartoonish. They are not intended to represent realistic scenes as a pixel-based image (like a JPG) could.
SVGs are understood by Cricuts
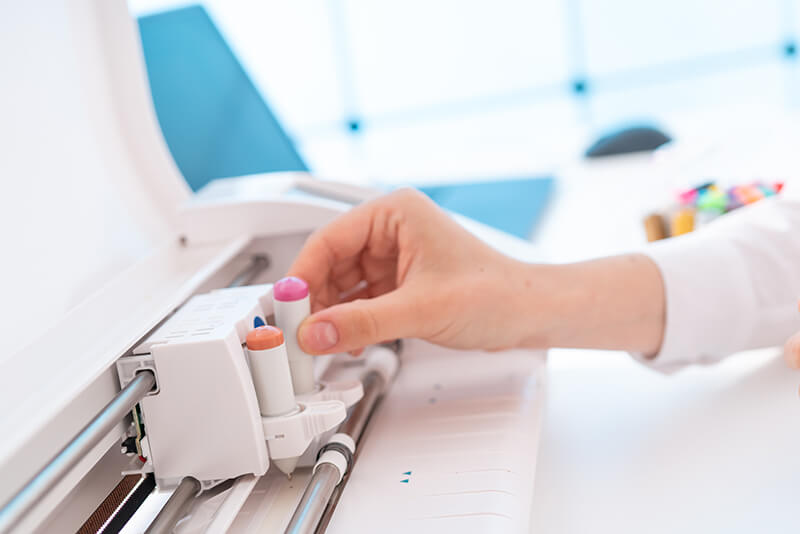
SVG files can be read by most cutting/plotting machines. In fact, it’s usually their preferred format because they have such crisp and clean outlines. Therefore, Silhouette and Cricut machine owners who want to cut out decals and iron-on designs usually want to obtain the design in SVG format in order to do so. For this reason, there is a plethora of SVG files available for sale on a wide variety of websites.
SVG files vs. Embroidery files (PES, DST, JEF, HUS, etc…)
| SVG file | PES file (or other embroidery file format) |
| read by cutting machines | read by embroidery machines |
| comprised of vectors and shapes | comprised of instructions including number, type, size and direction of stitches, thread color and stitch order that are understood by an embroidery machine |
| editable in a text editor | not editable in a text editor |
| a universally understood file format among different programs and machines | propriety file formats only understood by some software and specific embroidery machines |
Why would you want to convert an embroidery design into an SVG file?
The simplest reason why you would want to convert an embroidery design into an SVG file is because you like the design and want to cut it out or plot it on your Silhouette or Cricut machine. Both of these brands of machines understand SVG files.
Another reason why you might want to convert an embroidery design into an SVG file is to expedite the appliqué process. Some people extract a SVG from their appliqué design in order to have their cutting machine precisely cut their appliqué fabric based on the shape of your appliqué design.
Others like to use the SVG file exported from embroidery design just to print it out on paper and help with positioning of the embroidery on the project.
If you are into hand embroidery, you may also be interested in obtaining an SVG version of a machine embroidery design so that you can use it as a basis for a hand embroidery pattern. After you convert it to an SVG file you can scale the design to the exact size for your hand embroidery project. Then you would trace the pattern onto the fabric so that you would know where to embroider.
How to convert an embroidery design file into an SVG file
There are a few different methods you can use to generate a SVG from your embroidery design. The method you chose should be based on the type of SVG file you want to create and the tools you have available to you.
Method 1: Use SewWhat-Pro to convert your embroidery design into SVG format
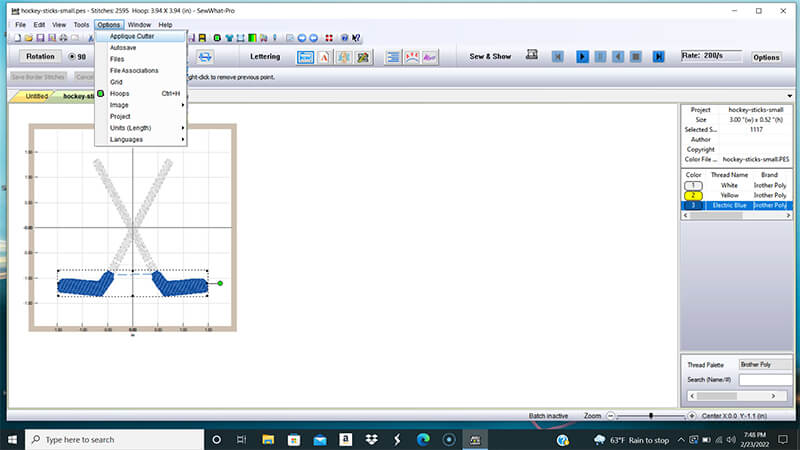
SewWhat-Pro is an inexpensive embroidery design editor that has an “export to SVG” feature. To convert your embroidery design into an SVG, you must start by opening the embroidery file (in whatever format you have hand) in the program.
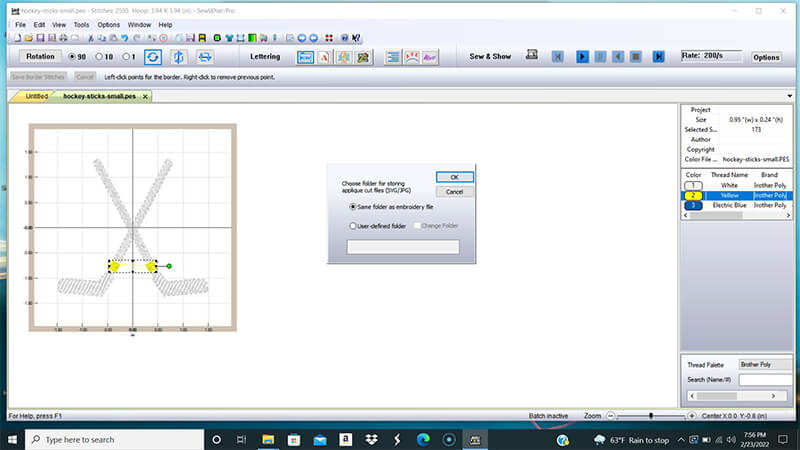
As you know, embroidery designs can be comprised of multiple thread colors. So, in order to create the SVG file, you simply select the thread color that you want to work with. Then, go to the Options menu and select “Appliqué Cutter.” Once you click “OK,” the shape of the embroidery will be exported into SVG (as well as JPG) format. By default, these files will be saved in the same folder as the embroidery file.
Method 2: Online converter + graphics editors
If you just Google: “convert PES to SVG,” you will get several results that are web-based tools offering free file conversion from one file format to the other. I tested a bunch of them and found that very few worked very well. The best one I found was: https://www.imageconvert.org.
If you decide to use this online convert, you must first select the file type you are starting with (PES – or whatever embroidery file format you are using) and which file format you are converting to (SVG). Then you select your file and click “convert.” After a few sections, you will be able to download your converted files. And there you have your SVG!
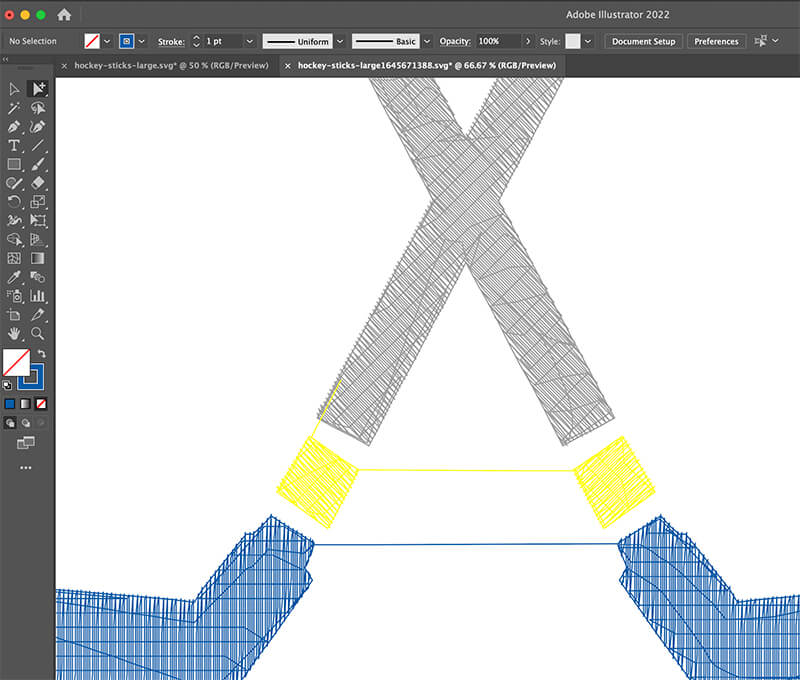
Unfortunately – you may not love the quality of the SVG this tool creates. The problem with this online converter (as well as many others I tested) is that they create vector based shapes out of every line of stitching. In the image below, you can see what my converted SVG file looks like – tons of vertices!
Use a vector-based drawing tool to re-trace the shapes based on the key vertices
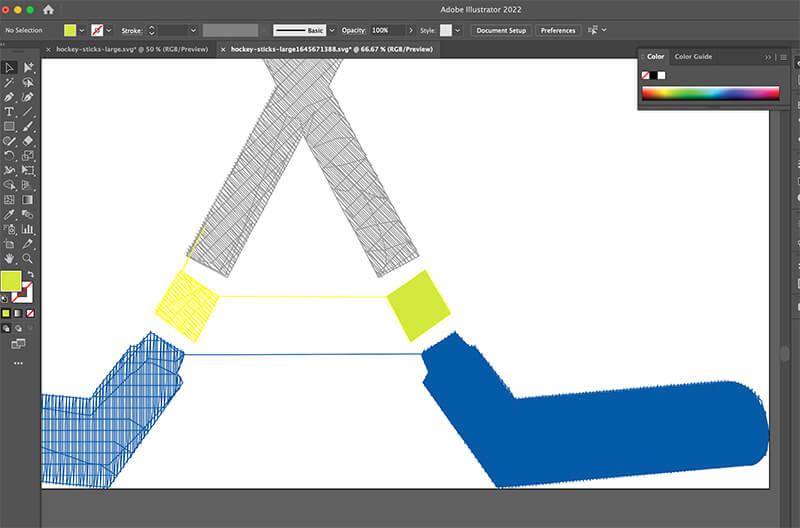
If you are comfortable working with vector based drawing programs, you can easily create a new outline around the existing shapes and get a nice, clean, SVG file. In the image below, you can see how I traced the shapes using the vertices of the converted file as a reference point for my new, cleaned up shapes. I used Adobe Illustrator to trace over the shape, however you could use any vector-based drawing tool to accomplish this task. For example, the free and open-source program, Inkscape, would work as well.
If you are not comfortable drawing around existing points within the online converted SVG to create a cleaner version of the SVG, you can try another trick – manipulating the SVG file in the free online bitmap editor Photopea.
Ok – I know what you are thinking – why use a pixel-based image editor to make your SVG? This may seem counter intuitive, but it is a reasonable solution.
Use Photopea to simplify the SVG shapes
Here’s how you do it. First go to Photopea. Open the SVG file within the program. Each layer contains a separate element in the design. This is actually kind of helpful. You can work with each layer individually or merge them into one. I decided to make all of the elements the same color so I merged the layers. Just shift-select all the layers and then right-click and select “Merge Layers.”
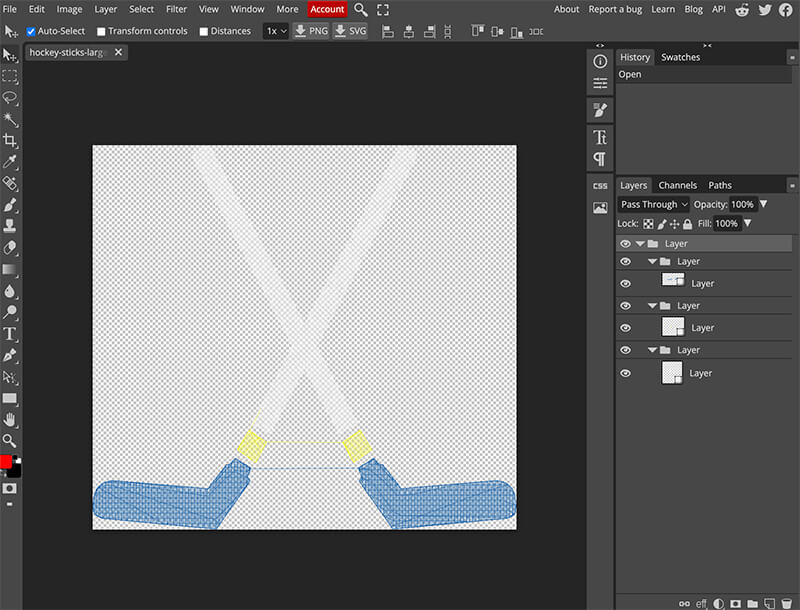
Since the shapes are fairly well outlined, our technique will be to select all of the background areas of each layer, then invert the selection to have a selection that is the outline of each shape.
Use the Magic Wand tool to click in all the background areas. By default the Magic Wand will only select contiguous open area, so if your design extends to the edge of the canvas, you may have to hold down the shift area and click a few times to get the entire background area.
Once you have the background selected, from the Select menu, choose “Inverse.” Now the selection will be of the hockey sticks and not the background.
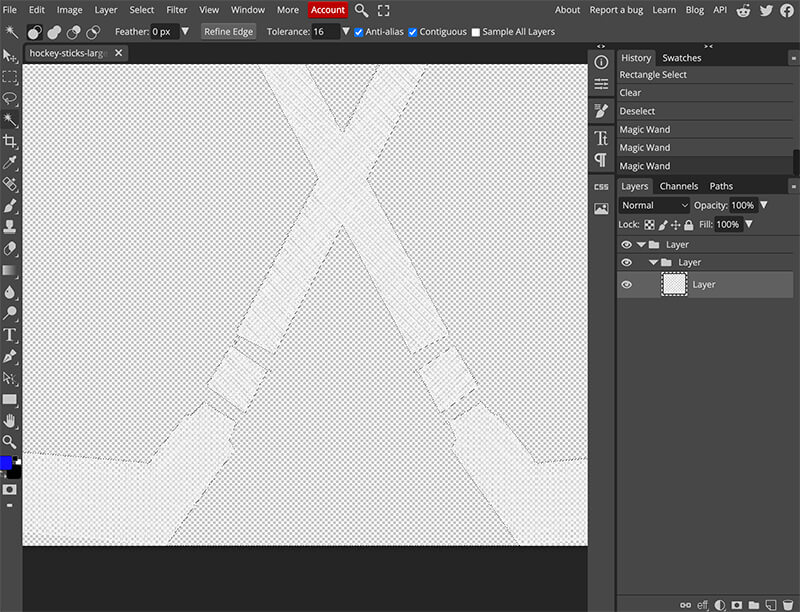
The next step you need to take is to fill the selection with a color. Create a new layer, and then from the Edit menu, choose “Fill” and fill your selection with any color. Your hockey sticks will then be a nice solid shape.
With the new layer selected, choose “Vectorize Bitmap” from the Image menu. Finally, export your new SVG file by choosing File -> Export from the File menu and selecting SVG as your desired format.
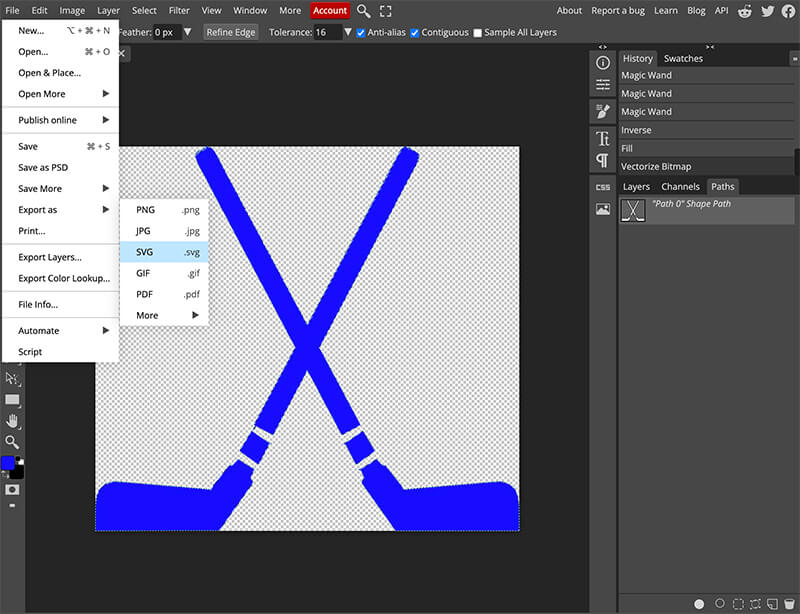
The resulting SVG file may not be quite as smooth as you want it. However, you can always open the SVG file in a vector-based drawing tool and smooth out the shapes with a smoothing tool.
So what is the best way to convert an embroidery file into an SVG file?
I was actually quite surprised by my research and experimentation that I did for this article. I expected that there would be many different methods for converting embroidery files to SVG. But, after looking at several different free and paid programs, I’ve come to the conclusion that SewWhat-Pro is probably the best tool for the task.
SVG conversion is essential if you want to be able to use embroidery designs on your cutting machine. After testing different programs and methods, I believe SewWhat-Pro is the best program for embroidery file to SVG conversion.
Good luck! And happy converting!
xo
Julie
[do_widget id=custom_html-10]
 Want to remember this? Save “How to convert an embroidery file into an SVG file” on your favorite Pinterest board