Disclosure: Some of the links on this site are affiliate links. This means that if you click on them and make a purchase, I may earn a small commission at no extra cost to you. Please know that I only recommend products and services I trust and use myself.
Halloween is the perfect opportunity to get creative. It’s fun to come up with wacky and weird outfits using unconventional materials laying around your house. And – if you are lucky enough to own an embroidery machine – you’ve got yourself a Halloween costume secret weapon. You can make tons of silly and functional Halloween accessories in-the-hoop on your embroidery machine. And one of the fastest, easiest, and least expensive ones to make is a mask. In this article – I’ll show you exactly how to make an in-the-hoop mask on your embroidery machine.
Note: you will need an embroidery hoop that can accommodate at least a 5” x 7” embroidery design.
Supplies needed to make an in-the-hoop mask
- In-the-hoop Halloween mask patterns.
- Felt:
- Superhero – 2 pieces of the same color (red): 6” x 8″. Frankenstein – 2 pieces of green felt: 6” x 8”, one piece of black felt: 3” x 8”. Cat – 2 pieces of grey felt: 6” x 8”, one piece of white felt: 3” x 8”. Dog – 2 pieces of tan felt: 6” x 8”, one piece of dark brown felt: 4” x 8”.
- Elastic – 2 – 6” long pieces ¾” wide
- Velcro – 8” piece, both the soft and rough sides – ¾” wide
- Water soluble stabilizer – at least 5” x 7” or a piece large enough to fit securely in your embroidery hoop.
What is an in-the-hoop project?
Before we get into the nitty gritty of the how to… this project may require some explaining. If you are new to machine embroidery – you may not be familiar with the term: “in-the-hoop.”
An in-the-hoop project is a type of embroidery project that can be completed entirely within the hoop of an embroidery machine. This means that no (or very little) additional sewing or crafting is required after the design has been embroidered. In-the-hoop projects are becoming increasingly popular among embroidery enthusiasts as they are quick, easy, and versatile. Learn more about in-the-hoop projects.
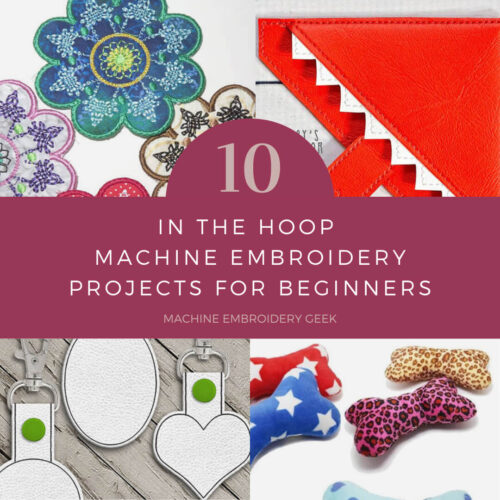
There are tons of in-the-hoop projects out there ranging from simple coasters and keychains to more complex items like plush toys and bags. There are adorable in-the-hoop projects to make for babies, in-the-hoop toys and games and tons of great in-the-hoop Christmas ornaments. The possibilities are endless, especially when it comes to Halloween costumes.
Where to buy in-the-hoop patterns
Now that you understand what an in-the-hoop project is, you may be wondering where to find patterns or designs for these types of projects. The good news is that there are numerous online shops and marketplaces where you can purchase in-the-hoop patterns. For example, Etsy is treasure trove of in-the-hoop projects for sale. But you can also find many in-the-hoop patterns for free.
Why make an in-the-hoop mask for Halloween?
There are many benefits to making an in-the-hoop mask for your Halloween costume.
First and foremost, it’s a budget-friendly option. Instead of spending money on a pre-made mask or purchasing expensive materials, you can use scraps of fabric or felt for the design. This makes it a great option for those who want to save money while still having a unique and creative costume.
When making a in-the-hoop mask, you also have complete control over the materials used and can choose ones that are comfortable and safe for your skin.
Another benefit is the convenience factor. With an embroidery machine, you can simply load the design and let it do all the work. This saves time and effort compared to hand-sewing or crafting a mask from scratch.
Plus, an in-the-hoop mask allows for endless customization options. You can choose from a variety of designs, colors, and materials to create a mask that fits your specific costume theme or personal style.
Most importantly (I believe) is that making an in-the-hoop mask allows you to create a unique and personalized mask that will stand out from store-bought options.
How to make an in-the-hoop mask
Preparing the water soluble stabilizer
Each mask requires a slightly different series of steps, however, to make each mask you will need to begin by hooping a piece of water soluble stabilizer.
Cut a piece of water soluble stabilizer at least 2” larger in width and height than your embroidery hoop. Hoop the stabilizer securely and attach your embroidery hoop to your embroidery machine.
Initial placement stitching for all masks
Start stitching out the first thread color. This serves as a placement line for the mask fabric and elastic straps.

Tape the elastic pieces onto the stabilizer so that they extend ¼” over the vertical placement lines on the side of the mask. The elastic pieces should extend beyond the outside of the mask.

Start the next thread color which will tack down the elastic.
For the next steps, jump to the specific mask you are making.
In-the-hoop Superhero mask
Remove the embroidery hoop from the embroidery machine. Tape a piece of felt over all the placement stitching on the back side of the hooped stabilizer. Return the embroidery hoop to the embroidery machine.
Float the other piece of felt on top of the hooped stabilizer, completely covering all the placement stitching.
Start stitching the next thread color which will be the top stitching for the mask. It will also hold all of the layers of the mask together.
You are done stitching your superhero mask.
In-the-hoop Frankenstein mask
Float a piece of green felt on top of the hooped stabilizer, completely covering all the placement stitching.
Start stitching the next thread color (black) which is the scar.
Stitch the next thread color, which can be black as well. This is the placement stitching for the hair piece.
Lay down the black felt over the placement stitching for the hair area.
Tape the other green piece of felt to the back of the hooped stabilizer, completely covering all the placement stitching.
Return the hoop to the machine.
Stitch the next thread color (black) which will create the top stitching around the hair area.
Remove the hoop from the machine and trim the excess fabric around the hair area 1/8” from the stitch line.
Return the hoop to the machine and start the next thread color and change your thread color to green. This will be the final top stitching around the green parts of the mask.

In-the-hoop dog mask
Float a piece of tan felt on top of the hooped stabilizer, completely covering all the placement stitching.
Stitch out the next thread color (black) which is the dog’s nose and mouth.

Remove the hoop from the embroidery machine and tape another piece of tan felt onto the back of the hooped stabilizer, completely covering the placement stitching.
Return the embroidery machine to the hoop and stitch the next thread color (tan) to secure the front and the back of the felt together and complete the tan top stitching.
Start stitching the next thread color which is the placement stitching for the ears.
Lay a piece of dark brown felt over both of the ears, completely covering the ear placement stitching.
Stitch out the last thread color (dark brown) to complete the top stitching on top of the ears.
In-the-hoop cat mask
Float a piece of grey felt on top of the hooped stabilizer, completely covering all the placement stitching.
Stitch out the next thread color (black) which is the cat’s nose.
Change the thread color to pink and stitching out the next thread color which are the ears.
The next thread color is the placement stitching for the cat’s cheeks. You can leave the thread pink.
When the placement stitching is done, remove the embroidery hoop from the embroidery machine and tape the other piece of grey felt on the back of the hooped stabilizer, completely covering the stitching. Then, return the embroidery hoop to the embroidery machine and float a piece of white felt over the cheeks.
Start stitching the next thread color (white) which is the top stitching of the cheeks.
Remove the embroidery hoop from the machine and trim the felt 1/8” from the stitch line around the cheeks.
Change the thread color back to black and stitch out the next thread color which are the whiskers.
Stitch the last thread color (grey) which is the final top stitching.
Finishing all in-the-hoop masks
Once you are done with all of the aforementioned stitching, you are ready to complete your masks. Remove the project from the hoop and trim away some of the excess water soluble stabilizer.
Trim around the outside border of the mask, leaving about 1/8” seam allowance, cutting through all layers EXCEPT for the area near the elastic band. In order to avoid cutting through the elastic, trim the front and the mask separately.
Cut out the eye holes, again leaving about 1/8” seam allowance
Overlap the rough piece of Velcro over one elastic end approximately ¾” so that the flat part of the Velcro faces the wearer’s head. Stitch the Velcro and elastic together using two rows of satin stitching, one at the end of the Velcro and one at the end of the elastic.

Overlap the soft piece of Velcro over the other elastic end approximately ¾” so that the flat part of the Velcro faces outwards. Stitch the Velcro and elastic together using two rows of satin stitching, one at the end of the Velcro and one at the end of the elastic.

Now your mask is all done! Put on your mask and design your Halloween costume around it!

Ready to make some in-the-hoop masks?
Hopefully now you can see how easy it is to make some in-the-hoop masks and are inspired to make your own.
Wait – it’s not Halloween? No worries. You can also use these in-the-hoop masks for everyday dress up play or as party favors. Let your creativity run wild and have fun!
As you continue to explore the world of in-the-hoop machine embroidery, don’t be afraid to experiment with different materials and techniques. And be sure to check out all the amazing in-the-hoop mask patterns available. You can use fabric scraps, add embellishments like beads or sequins, or even try out different stitches on your machine. The beauty of in-the-hoop projects is that they allow for endless customization and personalization.
Good luck!
Want to remember this? Save “How to make an in-the-hoop mask” on your embroidery machine on your favorite Pinterest board