Disclosure: Some of the links on this site are affiliate links. This means that if you click on them and make a purchase, I may earn a small commission at no extra cost to you. Please know that I only recommend products and services I trust and use myself.
Love appliqué but hate having to remove your embroidery hoop from your machine to trim your appliqué fabric? Then why not precut appliqué fabric by hand or with your cutting machine? It’s quick, easy and ensures you will get a nice clean finish to your appliquéd project.
Products mentioned in this post
Why does appliqué fabric need to be cut?
If you are new to appliqué on an embroidery machine, you may not understand why or how appliqué fabric is cut.
When you stitch out an appliqué design on an embroidery machine, the fabric needs to be cut so that it is the correct size and shape for the design. This is because you want to make sure that the final satin stitching around the outside of the fabric covers the raw edge of the fabric.
You can cut the appliqué fabric in one of two ways: either precut your appliqué fabric or cut it during the appliqué process.
Cutting the appliqué fabric during the stitching process
The design of most appliqué files make it possible for you to cut out the appliqué shape as you are stitching them out. This is because appliqué files are comprised of special rounds of stitching that help you do it.
The first round of stitching in an appliqué file is called the placement line. This tells you where to lay down your appliqué fabric. Your appliqué fabric must completely cover this placement line.
Then – after laying down the fabric – you run a second round of stitching called the tack-down stitching. This secures your appliqué fabric in place.
After this is done, you should remove the embroidery hoop from the embroidery machine and trim away the appliqué fabric outside of the tack down stitching line using appliqué scissors.
Finally, you simply return the embroidery hoop to the embroidery machine and complete the final satin stitching.
Easy, right?
So, what’s wrong with this method?
Absolutely nothing! The downside is that you are manually cutting the fabric which takes time and can be a bit tricky especially if the appliqué design is intricate. It can also be a bit challenging to cut the appliqué close enough – but not too close – to the tack down stitch line.
Oh – and then there’s the challenge of trimming away appliqué fabric that is inside of a closed shape. It can be scary making a small slit in the appliqué fabric without cutting the project fabric underneath.
Fortunately, you can avoid all of these struggles by pre-cutting your applique fabric before you start stitching out the embroidery design.
But how do you do it?
How to precut your appliqué fabric
First you must choose your cutting method. You can either pre-cut your appliqué fabric by hand – or you can cut it using a cutting machine (like a Cricut). But, whatever method you choose – you need to obtain an outline of the shape that you are cutting.
Occasionally, digitizers will include a file that includes the applique outline. Typically this file will be either a JPG, PNG, PDF or an SVG.
If you don’t see any of these files included, you will need to create it yourself. Both SewWhat-Pro and Embrilliance Essentials will allow you to generate an SVG file from an appliqué design.
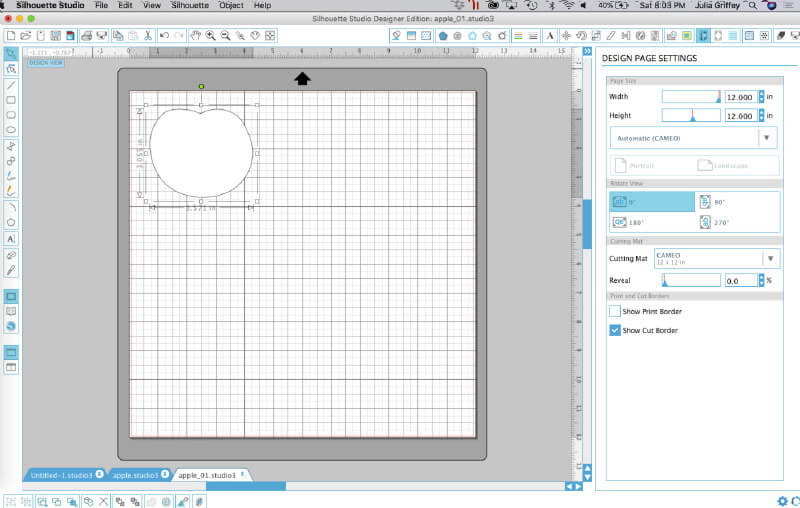
Creating an SVG file from an appliqué design in Embrilliance Essentials
Start by opening the appliqué file. In the Object View – you will see all the elements that the machine will stitch out when it creates the appliqué.
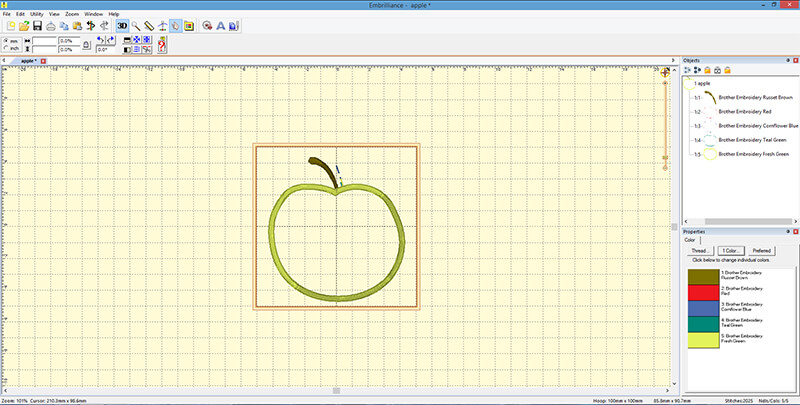
If you are having a hard time seeing what is what, run your stitch simulator to watch the design stitch out. After you do that – you should be able to tell which element in your Object View is the appliqué placement line.
Select the element in the Object View that represents your appliqué placement line. Then select the associated color swatch below. A dialog box will appear with one of the tabs labeled “Appliqué.”
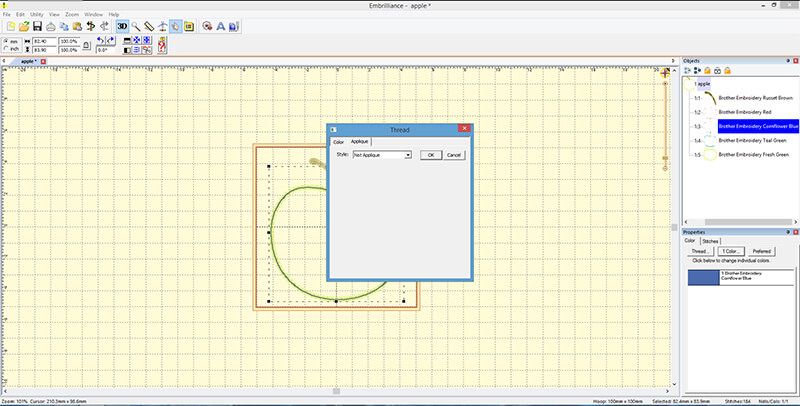
Select the “Appliqué” tab. Then change the drop down selection to “Appliqué Position.” Now you will see that you can save the SVG file that is based on this position line.
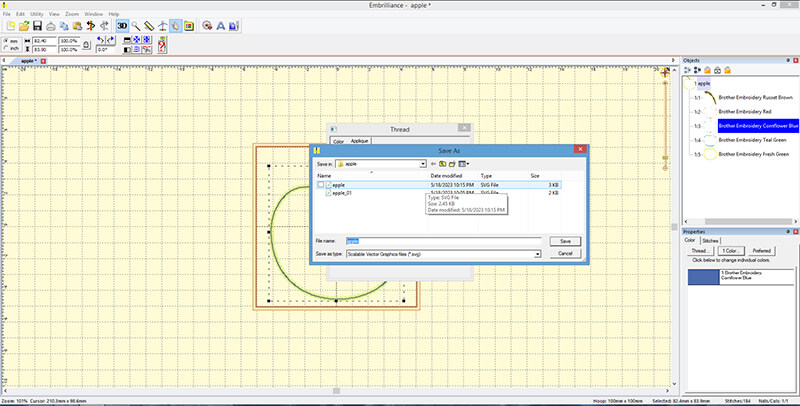
You will also notice that there is an option to “inflate” the SVG. By default, it’s set to 1.5 mm. You will likely want to leave it at this setting because you want your appliqué fabric to be slightly larger than your position line. This is because typically the position line follows the same path as the tack down stitching line and you want to make sure that the tack down stitching catches the fabric. Therefore, the applique material needs to be slightly larger than the position and tack down stitching lines (hence, the inflation).
Creating an SVG file from an appliqué design in SewWhat-Pro
SewWhat-Pro has features that are similar to Embrilliance Essentials, one of which is allowing you to create an SVG file from an appliqué file.
First, you must open your appliqué design in SewWhat-Pro. Next, find the thread color that represents the position stitching for the appliqué design.
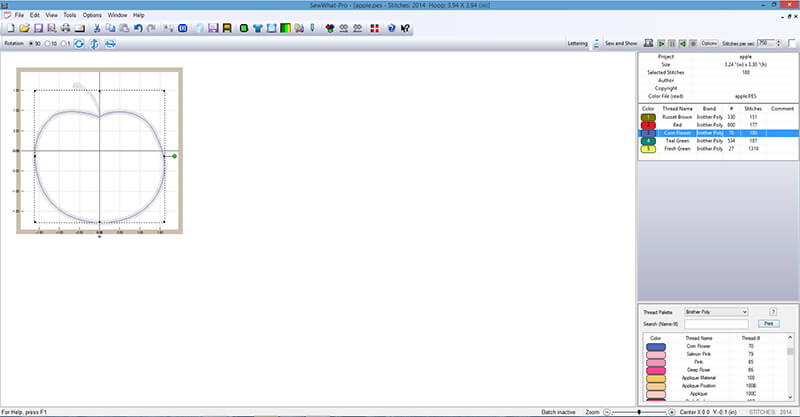
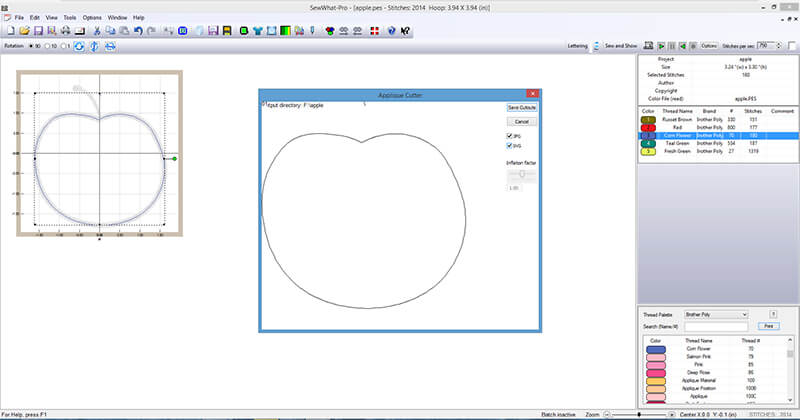
Select it, then go to Tools -> Appliqué Cutter and then you will see an option to save out the path as an SVG file (or a JPG).
Cutting out your appliqué fabric using the SVG file you created
Now that you have your SVG – you are ready to pre-cut your appliqué fabric for machine embroidery! Remember- you can do this one of two ways: manually cutting, or cutting it with your cutting machine.
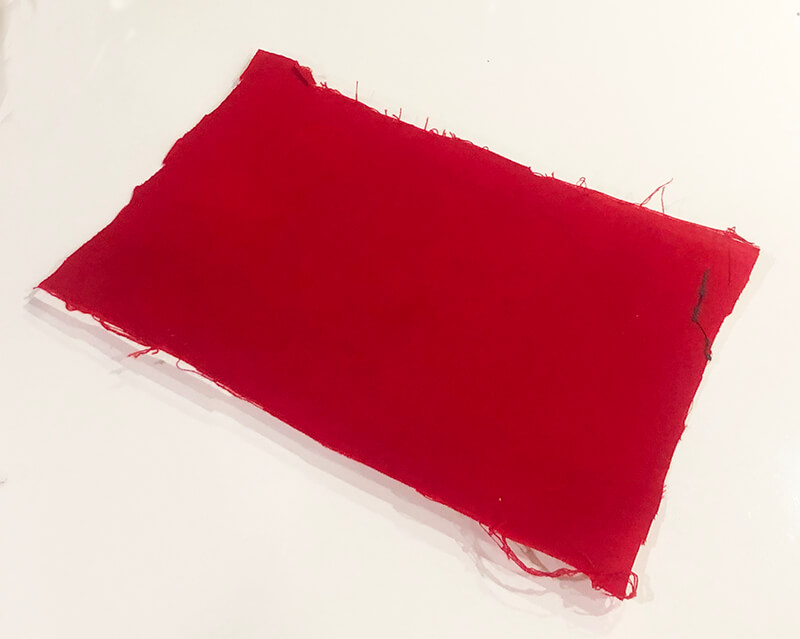
In addition, before you cut out your appliqué fabric using either of these methods, it’s important to first, pre-wash the appliqué fabric and then fuse some HeatNBond Lite onto the wrong side of the fabric. And, don’t peel away the pape before you start cutting.
Manually cutting your applique fabric
If you do not have a cutting machine, you can precut your appliqué fabric using an exacto knife or a simple pair of scissors. The first step is to open and print out the SVG file that you just created. Many programs will read SVG files. My personal favorite is the free program Inkscape. But you may also be able to open the SVG file using free utilities online like Photopea.
Once you find a program to open the SVG file, simply print it to scale. How do you know if it’s to scale? Measure it on the paper!
Next, spray a bit of temporary spray adhesive onto the wrong side of the right side of the paper printout and stick it to the wrong side of your appliqué fabric. Your cut line should still be visible. Then, simply cut around the outline.
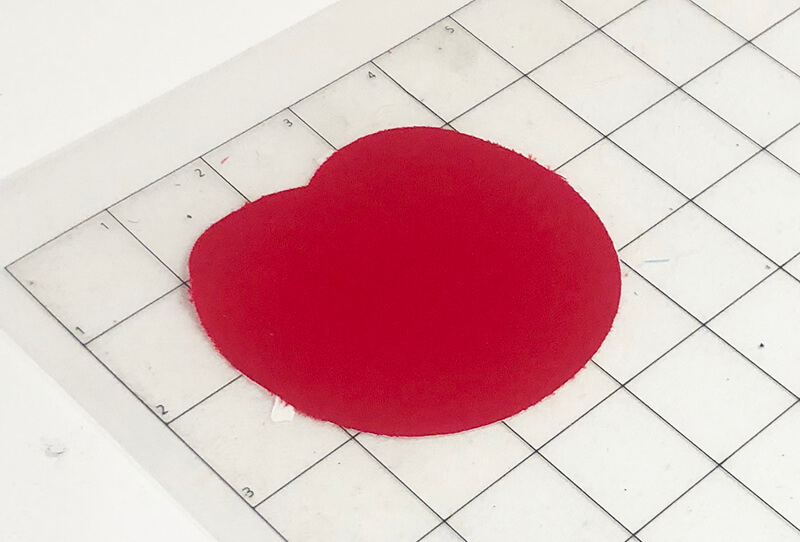
Cutting your appliqué fabric on your cutting machine
Using a cutting machine such as a Cricut, Silhouette, or Brother Scan-and-Cut is a great way to precut your appliqué fabric. The process will vary slightly depending on the type of machine you have.
For Cricut and Silhouette machines, open the program that comes with your machine – it should recognize SVG files. If you are familiar with your cutting machine, then you will likely know which options to choose to get your machine to cut around the outlines dictated by the SVG file.
Once you have your file set up properly in your cutting software, simply stick your prepared fabric on the mat and start cutting it out.
Stitching out an appliqué design using precut appliqué fabric
Now that you are done precutting your appliqué fabric, you are ready to stitch out your appliqué design!
The process is exactly the same as if you were cutting during the applique process, with a few minor differences.
Placement stitching
Load in your appliqué file and start stitching the first thread color. This is your placement stitching line which shows you exactly where to lay down your pre-cut appliqué fabric.
Since your appliqué design is already cut – you don’t have a lot of room for error in terms of where you set down the appliqué fabric. After peeling the paper backing from the HeatNBond Lite, lay the appliqué fabric over the placement stitching line, making sure that the next round of stitching will catch the edge of the applique fabric.
Removing the embroidery hoop from the embroidery machine and fusing the appliqué fabric in place helps to ensure that the fabric stays put during the applique process. Yes – I realize that it can be almost impossible to get your iron inside of your embroidery hoop area but if you just get it close and turn on a lot of steam, that will activate the HeatNBond Lite adhesive and get it to stick in place.
Tack down stitching
Return the embroidery hoop to the embroidery machine and start stitching the next thread color. It will secure the applique fabric in place. if you feel like the excess fabric hangs over too far beyond your tack down stitching line in some places, you may want to remove the embroidery hoop from the machine and trim it away a bit more – just to ensure that the final satin stitching completely covers the raw edge of the fabric.
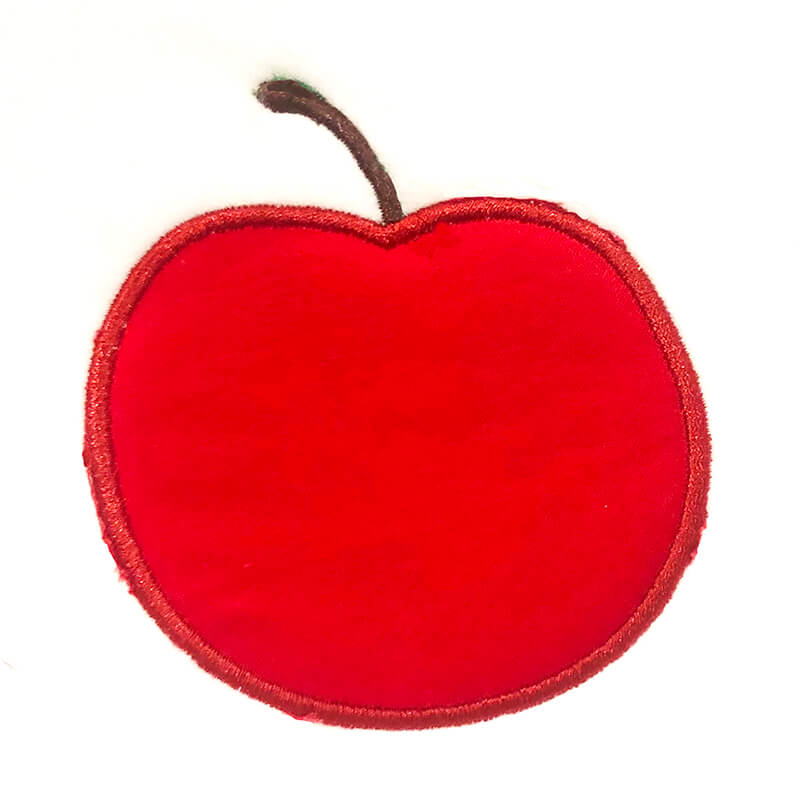
Final satin stitching
Finally, start stitching the final thread color. This is your satin stitching that will cover that raw edge of your applique fabric. When this stitching is complete – you are done!
Ready to precut your appliqué fabric?
By following these steps, you should now have a beautiful appliquéd project! Whether you use your cutting machine or the traditional method of using scissors, precutting fabric for machine embroidery can help save time in the long run.
This is especially true, if you are doing several applique projects at one time. You could set up all the SVG files in your cutting software and cut out several designs in one go!
It may take some practice before getting it right but once mastered, this technique will make creating appliqued projects much faster and easier than ever before. So don’t wait – get started on your next masterpiece with pre-cut appliqués!
Want to see more about how I did it? Check out this video
Want to remember this? Save “How to precut appliqué fabric on your favorite Pinterest board”