Disclosure: Some of the links on this site are affiliate links. This means that if you click on them and make a purchase, I may earn a small commission at no extra cost to you. Please know that I only recommend products and services I trust and use myself.
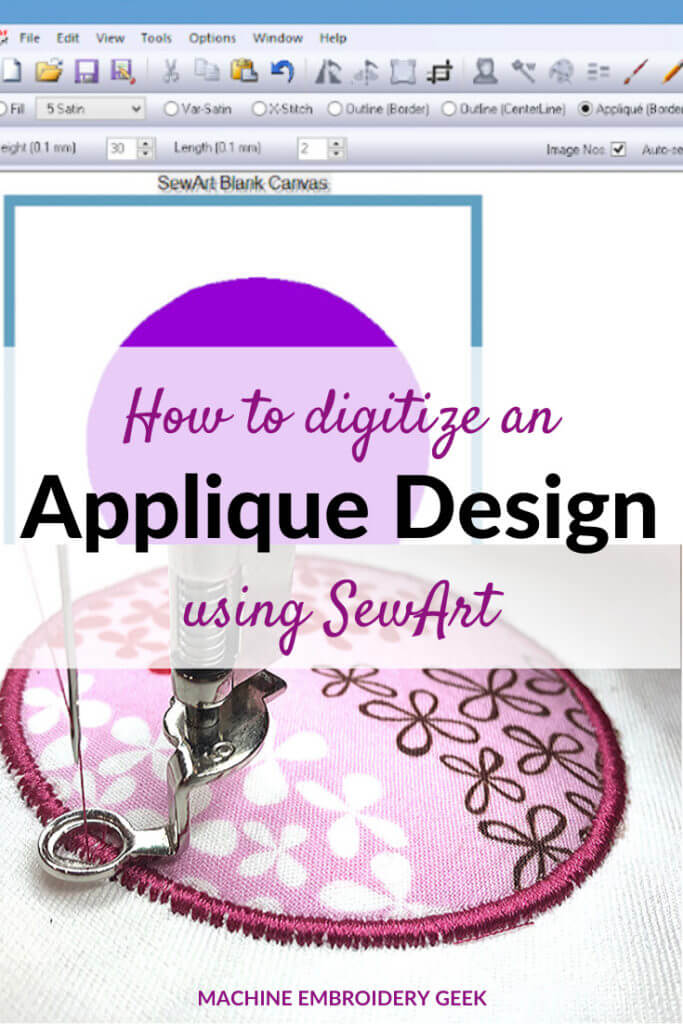
SewArt is a very inexpensive embroidery digitizing program, so it’s capabilities are sometimes underestimated. However, after downloading and playing with the software quite a bit, I’m pleasantly surprised by what I can accomplish with this inexpensive digitizing software. Of course you can convert JPG images to embroidery files using some of its auto digitizing tools. But, did you realize that you can actually even digitize an appliqué design using SewArt?
Products Mentioned in this Post
What makes appliqué designs different from regular machine embroidery designs?
Regular machine embroidery designs are created to be sewn out using just thread. Appliqué designs differ from regular embroidery designs because they are created to incorporate appliqué fabric. Instead of the stitching filling in the shapes of the design, the appliqué fabric fills in the shape. The design file is programmed to stop at certain points to accommodate the inclusion of the fabric.
How your embroidery machine stitches out appliqué designs
Appliqué designs almost aways start by stitching out a placement line. The placement line is intended to show you where the appliqué fabric should be placed. You want to make sure that the appliqué fabric covers the placement line.
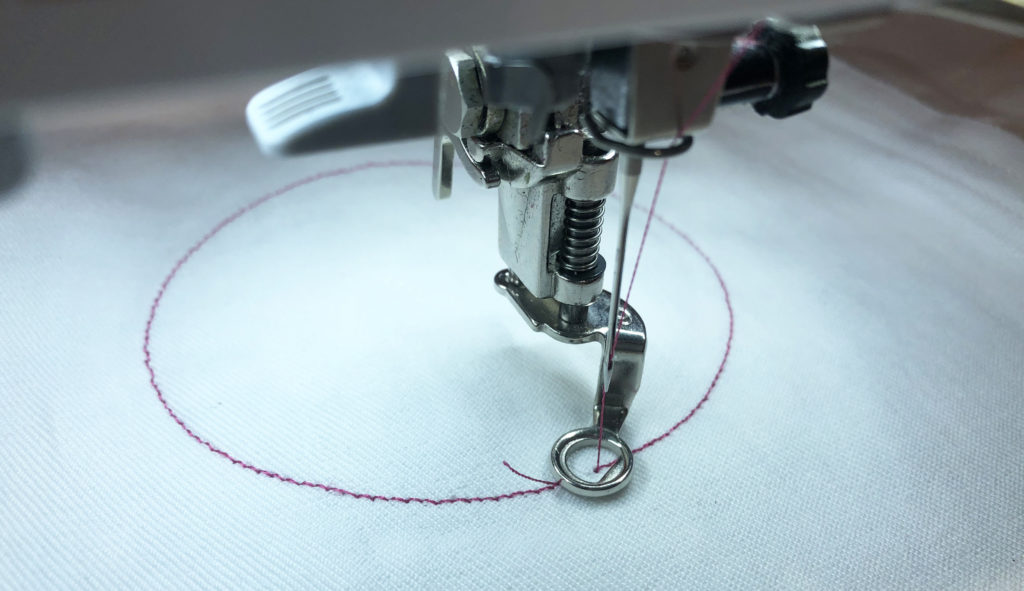
The next round of stitching is the tack down stitching. The intention is to hold the appliqué fabric in place so that you can trim the outside edge of the fabric, always using appliqué scissors.
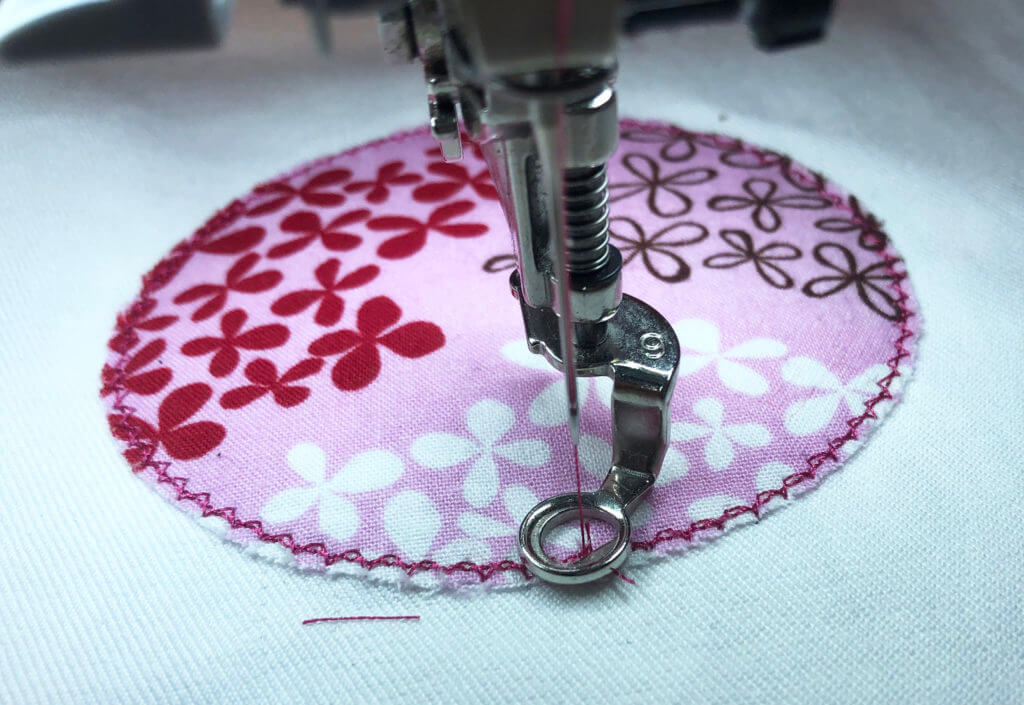
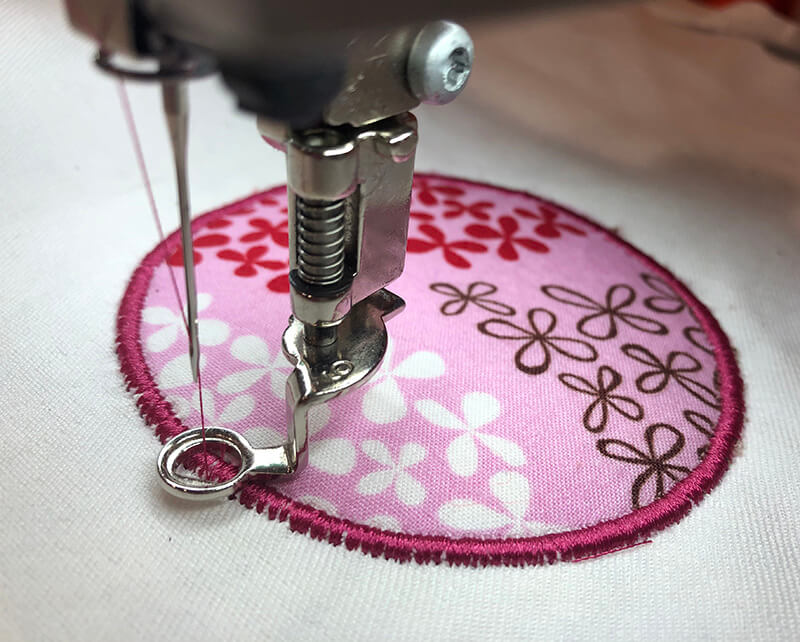
The final round of stitching is the finished satin stitching around the outside edge. This stitching should cover the raw edge of the appliqué fabric.
Not sure how to stitch out an appliqué design? Check out my post about how to appliqué with an embroidery machine.
Already familiar with appliqué on your embroidery machine, but looking for some pointers? Check out my top 10 tips for machine appliqué.
How to digitize an appliqué design using SewArt
It’s one thing to stitch out an appliqué design on your embroidery machine. But what about creating one? SewArt makes it super easy.
Of course you can make an appliqué file from any shape, but to keep it simple, I decided to make a simple circle appliqué using the built-in circle shape in SewArt. Here’s how I did it.
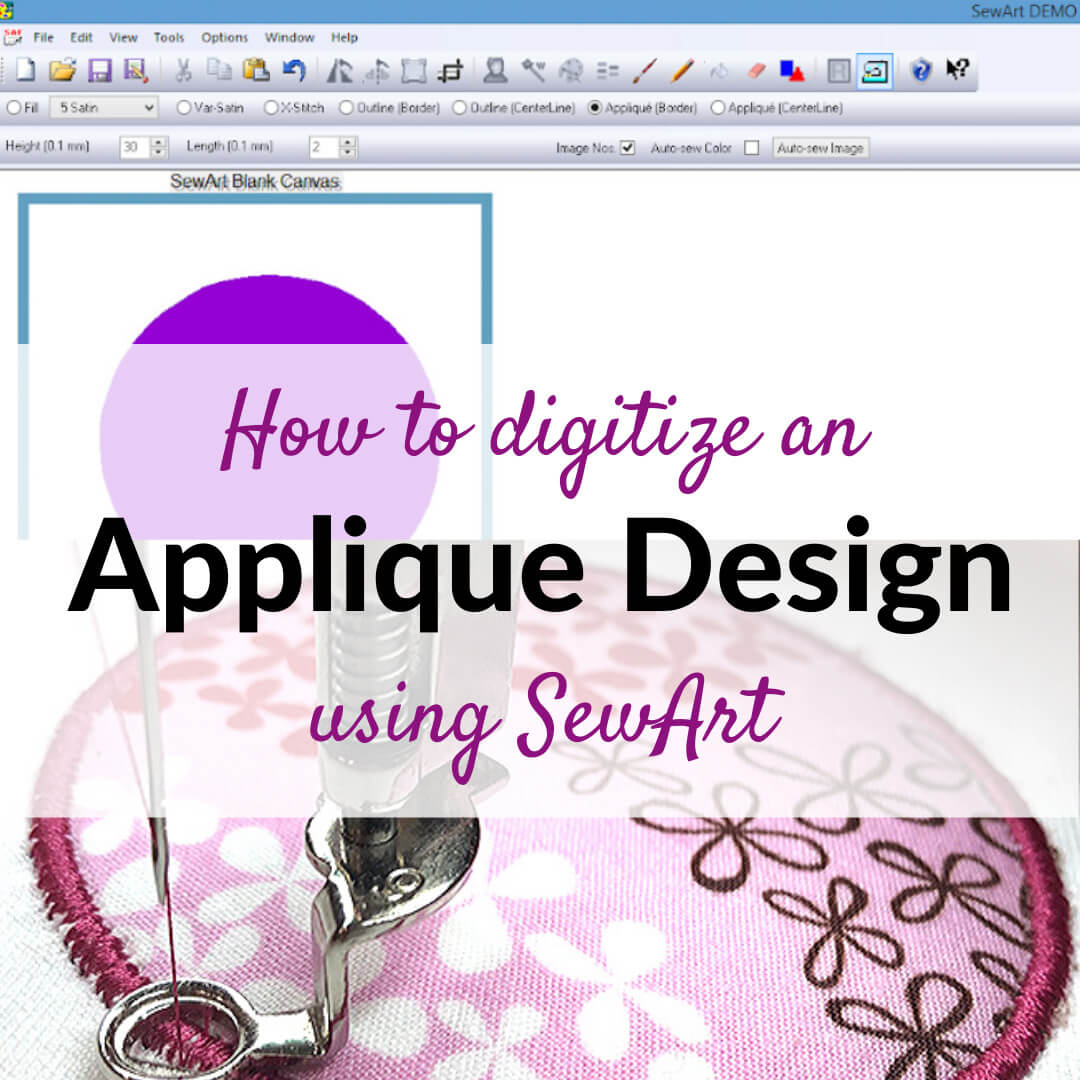
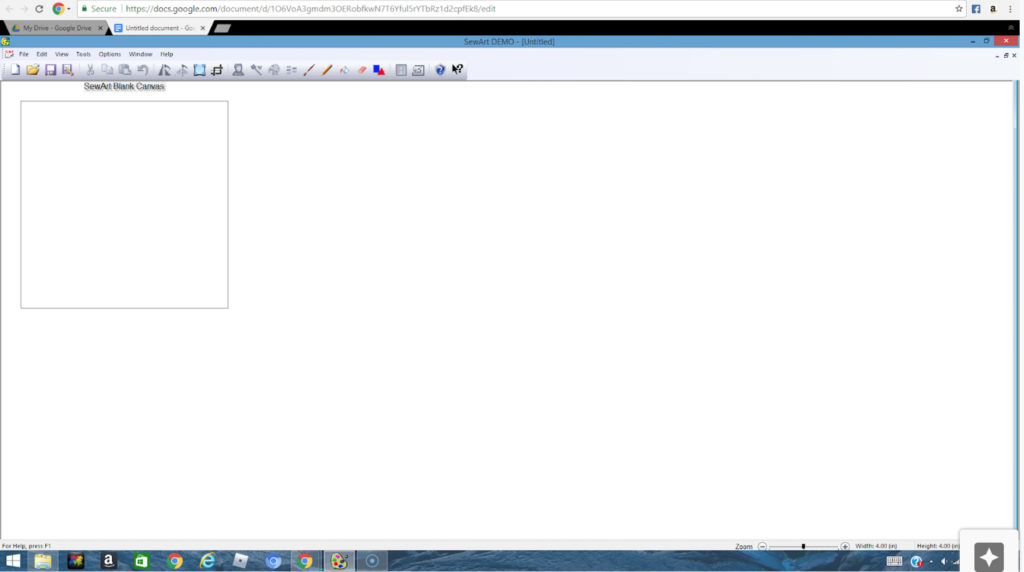
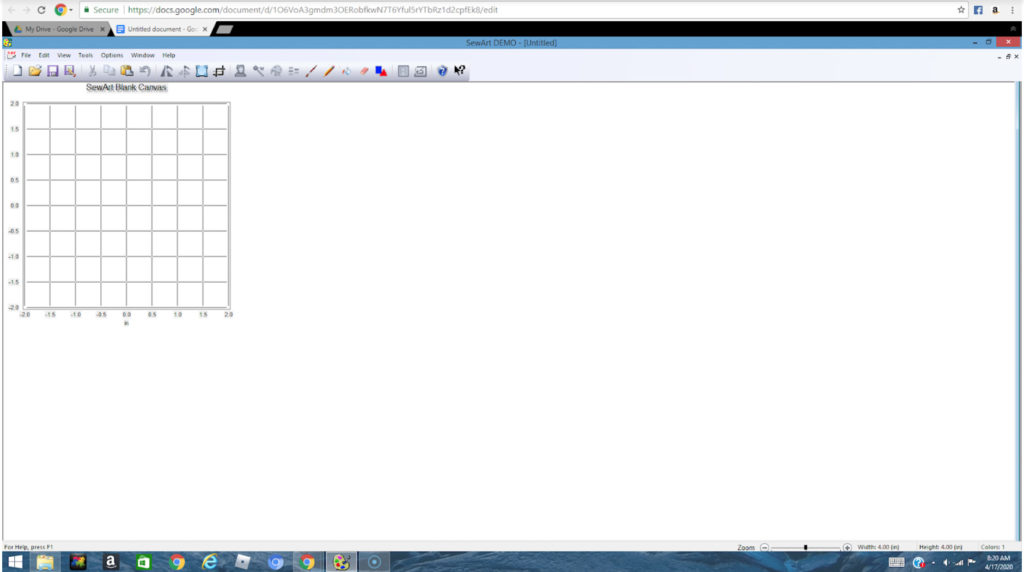
Start with a blank canvas
When you start SewArt, you will see a blank canvas. Since we are going to build the file from one of SewArt shapes, there is no need to open any other file.
Turn on the grid
From the View menu, I turned on the grid to be able to clearly see the size of the appliqué design I was creating.
Select one of the built-in shapes
From the shapes menu, I selected a circle and resized it to be about 3 inches in diameter. How could I tell how large the circle was? I used the grid to guide me.
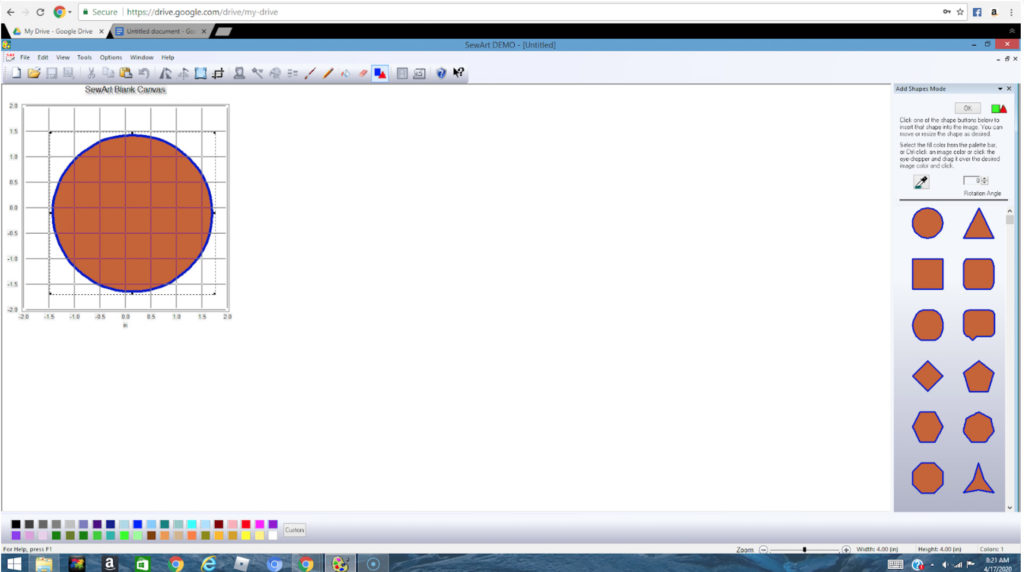
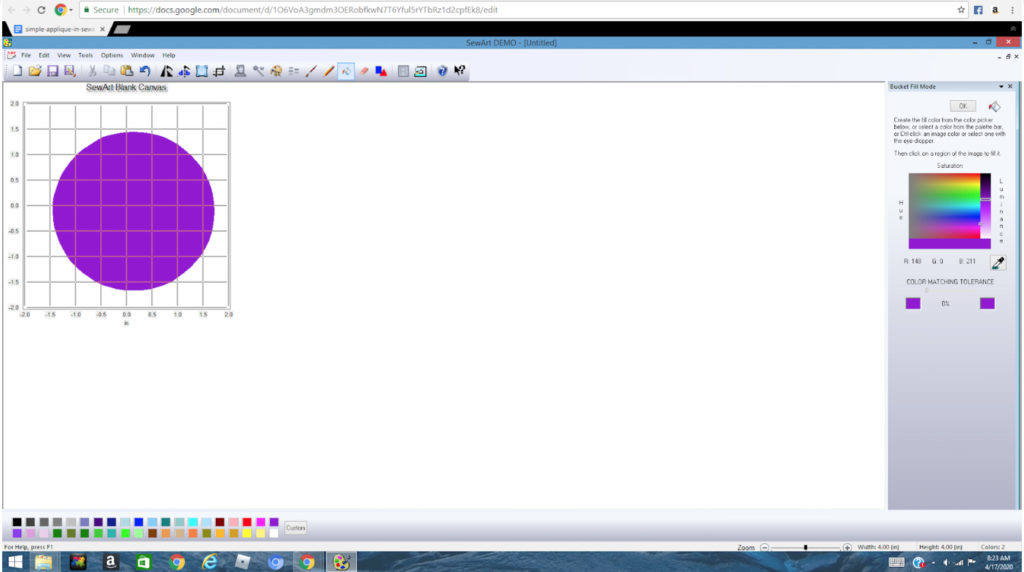
Make the shape one solid color
By default the shapes in SewArt have a stroke and a fill that are different colors. Because I wanted a solid circle, I used the paint bucket tool to apply the same purple color to the stroke and the fill so that the software would interpret the circle to be one solid color.
All I had to do was to click on the circle fill area and the outline with the paint bucket tool to make the circle all purple.
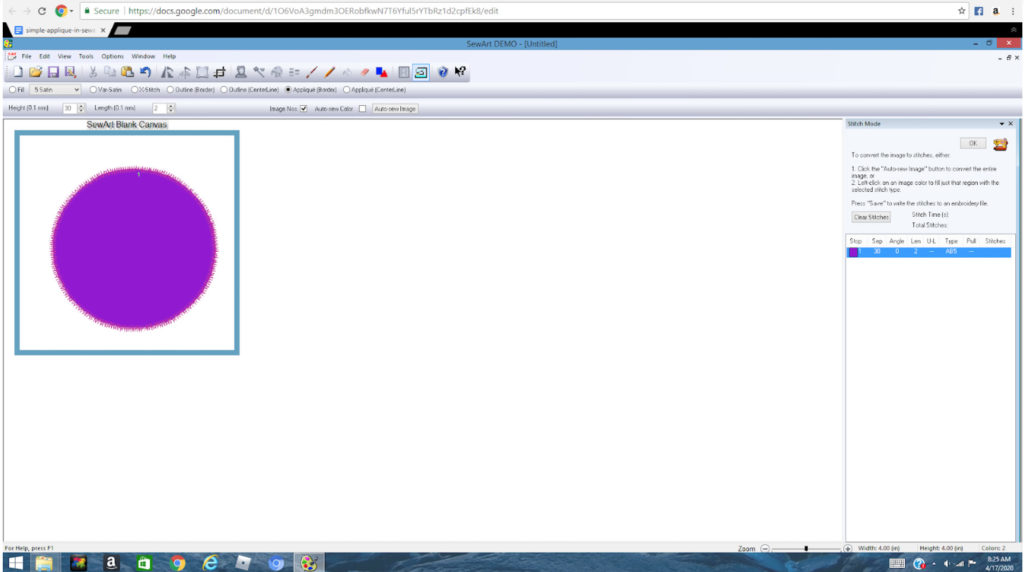
Define the stitches
Now the circle is ready to use as a basis for an appliqué design. Click on the sewing machine icon to start creating some stitches. This will bring you to a new screen where you define the stitch types.
In order to create the appliqué design, we first need to select the appropriate settings.
In the top bar, select “Appliqué (Border)” then make sure that in the drop down box, select “5 Satin” for the stitch type.
Then you need to select the width and density of your stitches. The setting: Height, controls the width of the stitches. I chose 30 for my stitch width which is 30 * .1 = 3mm.
For the density, which is labeled “Length,” I chose 2. The lower the number for the length, the tighter the stitching will be.
You may notice that on the right hand side, the color stops are displayed. Even though it appears that there is only one round of stitching, SewArt will actually create three.
Because we have selected “Appliqué” as the stitch type, SewArt will create three rounds of stitching as previously described: the placement stitching, the tack down stitching and the final satin stitching.
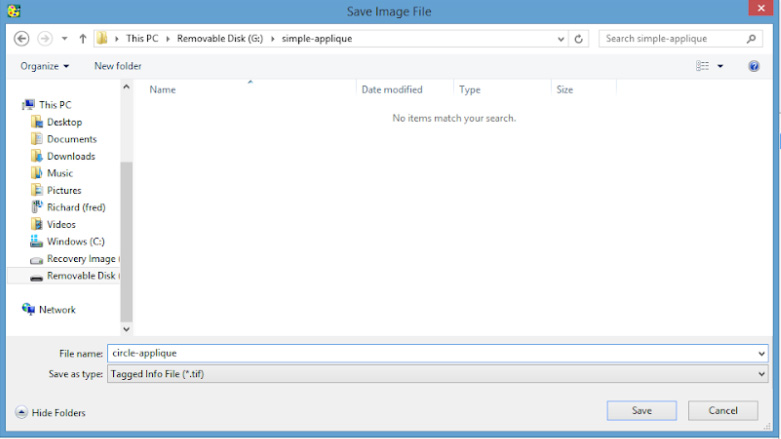
Save the image and the embroidery design
Choose File -> Save.

SewArt will first prompt you to save the file as an image. Since you are manipulating graphics from which you are basing your embroidery, you may want to save the modified image.
By default, SewArt chooses the TIF format for your modified image to save. TIF is not a very compressed format, so I might choose JPG instead. Just give the file a different name than your original artwork if you want to preserve the original version.
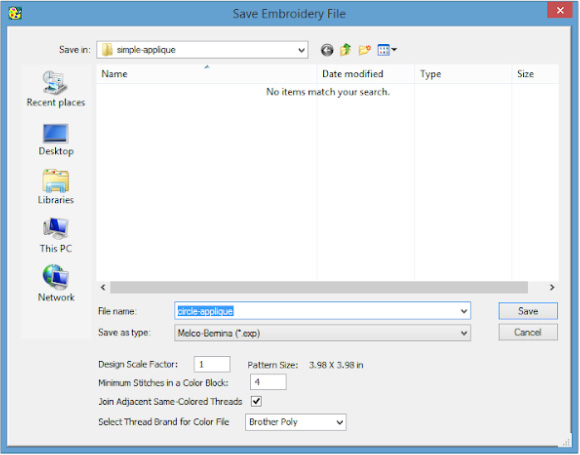
Now save your embroidery file. You will notice that there is an option to check “Join Adjacent Same-Colored Threads” which is checked.
I was concerned about leaving this checked because I thought it might remove the stops between the placement, tack down and final satin stitching, but it turns out it doesn’t affect the creation of these three stops. So you can just leave it checked when you save your embroidery file.
Not sure what format to choose for your embroidery file? Check out my recent post on determining and converting embroidery file formats.
Test out your new appliqué design
In order to test out your design, you will need to load it onto your embroidery machine. Not sure how to do that? Check out my recent post on loading embroidery files onto your embroidery machine.
You should always test out your embroidery and appliqué designs on some scrap fabric before stitching them on your finished product. Before I wrote this post, I wanted to check the quality of the appliqué design that I created. So I stitched it out on my embroidery machine, and I was happy with the results.
My personal preference is to trim the fabric after I have just a single line of stitching done as opposed to after the zig zag tack down stitching. So, I simply repeat the first round of stitching (the placement stitching) after I lay down my appliqué fabric. I trim my fabric using my appliqué scissors after that stitching is done, then continue on with the official tack down stitching and the final satin stitching.
Frequently asked questions about how to digitize an appliqué file in SewArt
Can you only make appliqué designs from simple shapes?
Nope! You can make appliqué designs from any shape. In fact, I’ve made appliqué designs from human face profiles!
What embroidery file formats can you save your appliqué files in from SewArt?
Almost any! VP3, JEF, PES, DST, HUS, VIP, EXP and XXX.
Will SewArt run on a MAC?
Yes – but you need to use an emulator program with it. An emulator program makes your MAC run like a PC so that you can run PC only software on it.
Can you make other types of embroidery designs on SewArt?
Yes – you can make regular embroidery designs as well as appliqué designs using this program.
Can you make embroidery and appliqué designs that you can actually stitch out using the trial version?
Yes. But, you are limited to the number of colors in the design.
Can you digitize appliqué designs in other digitizing software?
Absolutely. But, SewArt is probably the cheapest program you will be able to find that offers this feature.
Ready to try?
AS you can see, it’s not difficult to digitize an appliqué design in SewArt. Give it a try yourself! S & S Computing, the company that makes SewArt, offers a free 30 day trial of the software where you can actually create and stitch out embroidery and appliqué designs.
Where to buy SewArt
You can obviously buy the software on S&S Computing site . However, you can also purchase it from an authorized reseller like Machine Embroidery Geek!
Want to learn how to use SewArt, SewWhat-Pro and SewWrite?
Check out my course: the SewArt, SewWhat-Pro and SewWrite Master Class.
[do_widget id=custom_html-59]
Want to remember this? Save “How to digitize an appliqué design using SewArt” on your favorite Pinterest Board