Disclosure: Some of the links on this site are affiliate links. This means that if you click on them and make a purchase, I may earn a small commission at no extra cost to you. Please know that I only recommend products and services I trust and use myself.
If you are new to the world of machine embroidery, you are likely starting to hear about embroidery digitizing and, perhaps, wondering that’s all about. It certainly didn’t take me long to start wanting to be able to stitch out the art I liked and not necessarily the embroidery designs that were available for sale. After a bit of research, I quickly learned that in order to turn images into embroidery files – I would need to learn how to digitize.
Products mentioned in this post
What is embroidery digitizing?
Embroidery digitizing is the process of transforming artwork into a file that an embroidery machine can read and stitch out with the resulting embroidery looking like the original artwork.
What embroidery digitizing is NOT
Oftentimes I hear people talk about “converting” files from a digital graphic into an embroidery file, and it’s actually one of my big pet peeves. Converting implies that you can push a button to make an embroidery file from an image. While, most embroidery digitizing software does allow you auto digitize areas in your image, true professional embroidery digitizing is not a one-click task and requires some experience and know-how to achieve a good digitized file for machine embroidery.
What is digitized file for machine embroidery?
A digitized file for machine embroidery means that the file can be read by an embroider machine and the machine can stitch out the design according to the instructions of the file. Digitized embroidery files can come in a variety of file formats as different type of embroidery machines read different file types.
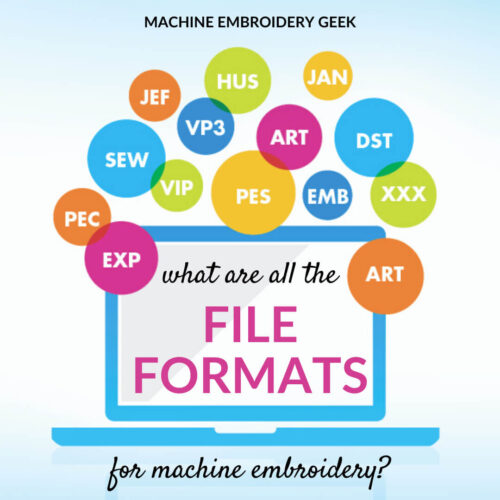
What are machine embroidery file formats?
Unfortunately, there are a ton of different embroidery file formats, as each embroidery machine manufacturer uses a proprietary file type. For example, Brother embroidery machines will read the PES file format. Janome embroidery machines read JEF files.
Is digitizing embroidery hard?
Many people who are not technically savvy are intimidated by digitizing. But, if you are truly interested in digitizing, it’s not that difficult to learn. The key is practice. You need to be willing to create embroidery designs, stitch them out, observe how your designs turn out, and then make revisions. It’s really a process of trial and error, asking questions and test stitching out your designs.
Embroidery digitizing difficulty also depends on the nature of the embroidery design. Photo-realistic and intricate designs will be more complicated to create than simple shapes and designs. When you are learning to digitize, start with very basic images and work your way up.
What skills do you need to be an embroidery digitizer?
You don’t need to be a professional artist or a technical wizard to be an embroidery digitizer. It does help to have some experience with computer graphics. But if you really want to learn, you just need to be willing to practice.
What equipment do you need to digitize embroidery designs?
Most machine embroidery digitizing software runs on PCs. However, you can install a PC emulator on your MAC and run any PC only software via an emulator. Embrilliance Stitch Artist is one of the few embroidery digitizing programs that will run natively on a MAC.
A lot of digitizers like to work with a tablet and stylus, but these are not necessary accessories. If I am digitizing on my laptop, I do find an external mouse to be easier to use while digitizing than the track pad built in on my computer.
[do_widget id=custom_html-31]
What are the steps for embroidery digitizing?
- Select your artwork
- Convert your artwork into an appropriate format and resize if necessary
- Reduce your number of colors
- Decide what types of materials this embroidery design will be suited for
- Plan your stitch order
- Choose your stitch types and angles
- Make any adjustments for fabric pull
- Test stitch out your embroidery design
Select your artwork
The term “digitizing” implies that the creator is using some artwork from which she is basing her embroidery design. However, when you are digitizing, you don’t necessarily need to start with artwork. You can create art from scratch in the software and then save that work as an embroidery file. Most often, however, digitizers start with some type of artwork that they use as a reference to create an embroidery design.
The source artwork I use for an embroidery design varies tremendously. Sometimes I see a graphic in the environment that I think would make a cool design. Oftentimes, I draw a design and then scan the paper. And, still another way I source artwork is via stock image databases.
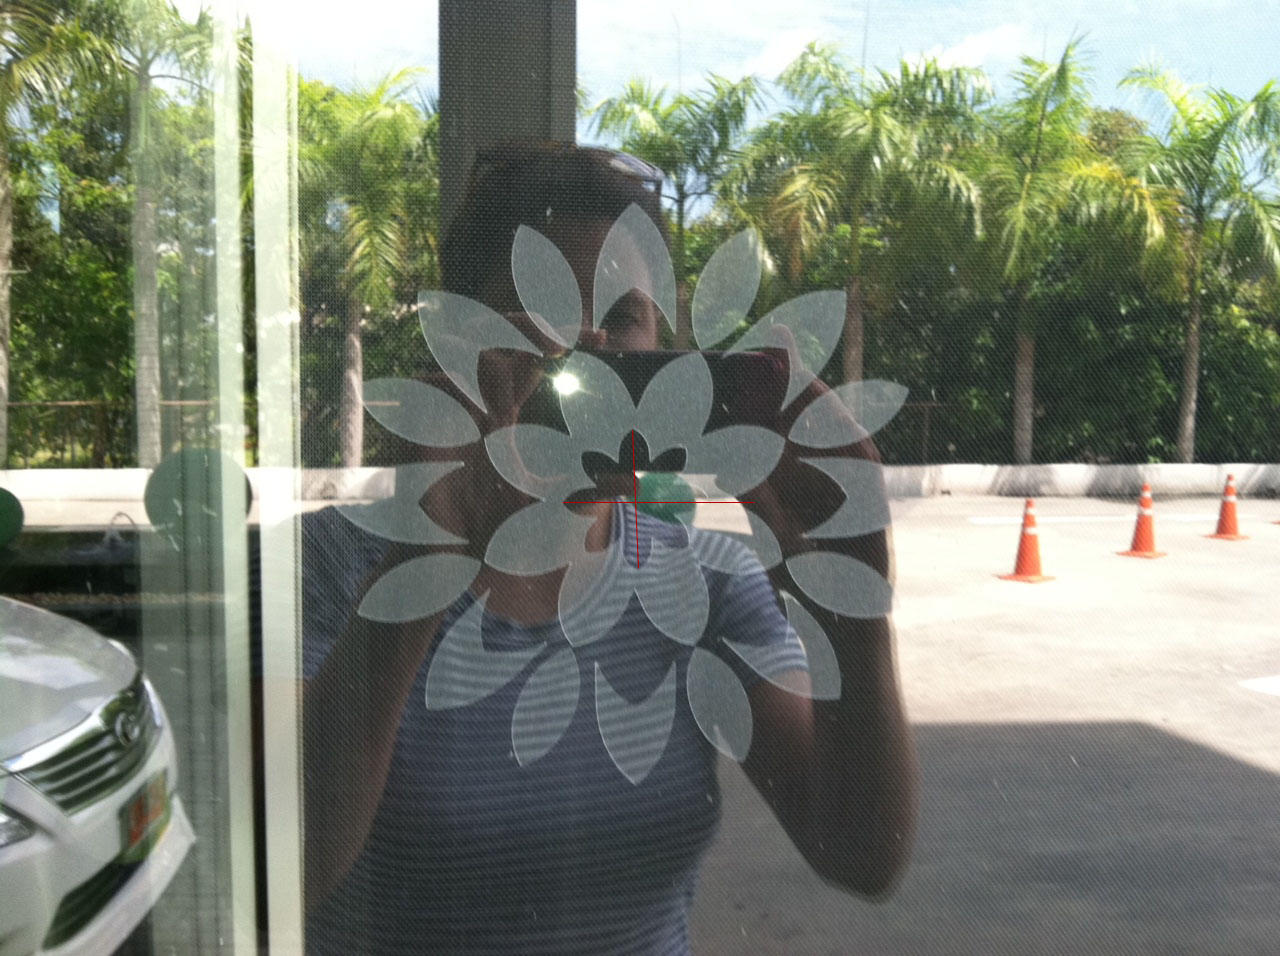
To ensure my designs are unique, I often combine elements from different pieces of art to create a resulting design.
When selecting imagery to digitize, I steer clear of anything that might be copyrighted. For example, you will see that many digitizers sell Disney themed embroidery designs, and I’m sure that these design sell quite well. However, I’m guessing that they are violating copyright laws.
Convert your artwork into an appropriate format and resize if necessary
Different digitizing programs allow you to import artwork in different formats. For example, my Bernina Artista software will not allow me to import JPGs, but instead prefers PNG and BMP files. So, I must convert my files into one of these formats before I can import it into the software.
If you plan on drawing on top of your image in the digitizing program, you can either size your image down to the intended size of the design, or resize the design after you finish digitizing. My personal preference is to digitize at a larger scale than what my design will ultimately be. Once I finish digitizing, I scale it down and make sure everything looks right at that size.
Reduce your number of colors
Reducing the number of colors in your design is a necessary step if you are going to use any of the auto digitizing tools within the software. If there are too many different colors in the image, the software can’t make out any distinct areas of single color.
This is especially true if you are trying to digitize a photorealistic image which is comprised of millions of different colored pixels. Remember – you do not own millions of colors of machine embroidery thread so you need to simplify the color palette if you want the computer to define areas of stitching based on your photo.
Decide what types of materials this embroidery design will be suited for
Some of the settings you choose when digitizing should be dictated by the material on which you plan to stitch out the design. For example, if the design is going on a very nappy fabric like a towel, you may want to incorporate a knock down stitch into your design.
If, on the other hand, you want to stitch out the design using foam underneath to give it a 3D effect, you will want to modify some settings so that the stitching can accommodate the volume underneath.
Plan your stitch order
Before you start digitizing, you should take a hard look at your design. What do you want your machine to stitch first? Think about what shapes go in the foreground and what shapes go in the background. Plan out that order before beginning.
Next, think about the logical order of stitching out parts of your design. Try to end your stitching of one shape near the start of another to minimize jump stitching. Sometimes you can actually digitize items in a very strategic manner to eliminate jump stitches altogether.
Choose your stitch types and angles
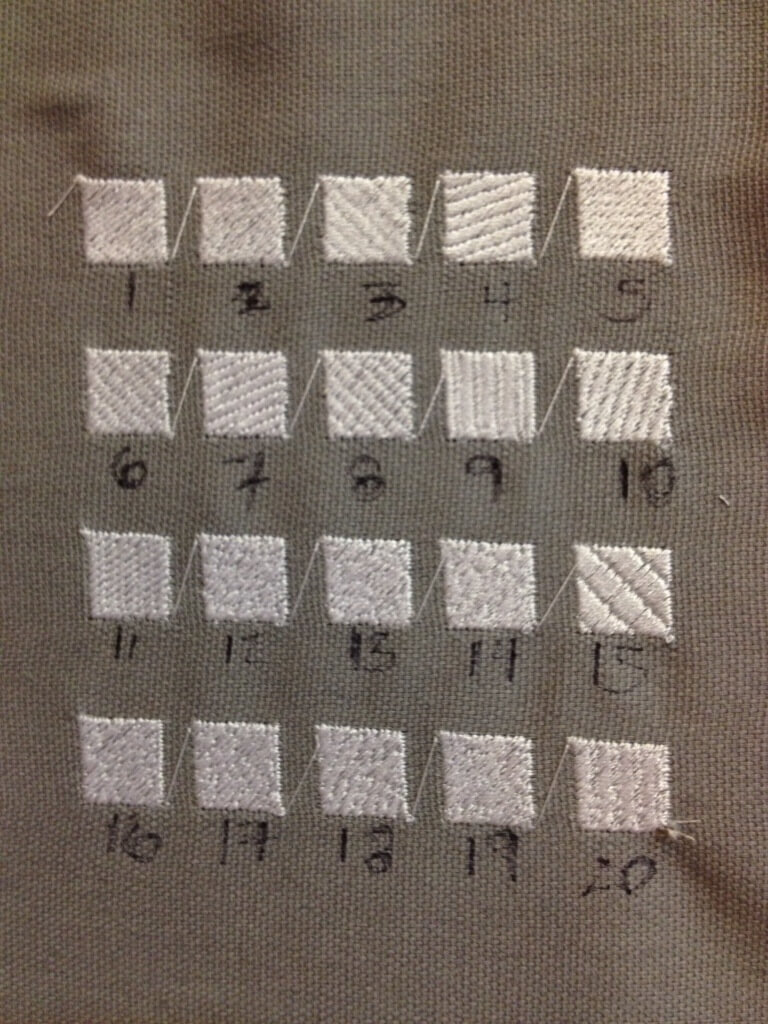
For each area of your design, you will need to specify the type and angle of the stitching. Each software supports many different fill types. In order to learn what the different fills looked like, I actually created a series of squares, each with a different fill that is available in my software. Now I have a better sense for what each one looks like.
When specifying a filled area of stitching, you can also specify stitch angle. If all of the elements in your design are stitched at the same angle, you will have a very flat looking design and your embroidery will pull your fabric in that direction. I am always careful to vary the stitch angle of the elements within my embroidery design.
Make any adjustments to ensure good coverage
Two important settings to pay attention to when you are digitizing include: underlay stitching and pull compensation.
Underlay stitching in an embroidery design is a preliminary layer of stitching that your machine stitches out first. It serves two purposes: it holds your fabric in place and it also provides another layer of coverage. I almost always add underlay stitching in the designs I digitize. There are some special circumstances where you would not want underlay, but generally it’s a good idea.
Pull compensation is a setting you can apply to a filled area of embroidery to make it extend out just a bit more. With filled areas of embroidery, the stitching wants to pull away from the borders of the shape in a direction perpendicular to the stitching. if I have a filled area in a design that needs to butt up against a border or another filled area, I generally add a bit to the pull compensation or even overlap those elements just a bit.
Test stitch out your embroidery design
When I see shops that sell embroidery designs and fonts based on a rendering in the software, I get very suspicious. It appears that they did not test stitch out the design.
I can’t imagine selling a design without test stitching it first. I sometimes catch a mistake that I made in the digitizing process – like duplicating a round of stitching. When that is the case, I go back to the software and fix it before exporting it in a variety of formats and putting it up for sale. Sometimes, once I see the design stitched out, I feel like it would look better if I adjusted some settings, so I go back into the software and make some changes. I may even feel compelled to test stitch out the design again.
Common questions about embroidery digitizing
Can you use an embroidery machine without knowing how to digitize?
Of course! There are tons of free and paid embroidery designs you can stitch out on your embroidery machine. You just need to get the embroidery file in the appropriate format, transfer it onto a flash drive, plug it into your machine and start stitching!
Most embroidery machines also come with several built-in designs. For example, my Brother PE535 came with 80 designs. I can’t say that I love too many of them but it’s a start.
How do you convert embroidery file from one format to another?
Let’s say you have your embroidery design in one format but need it in another, what should you do? If you are a digitzer and want to generate a bunch of different file formats at once, many programs offer a bulk export tool. For example, in SewWhat-Pro, you can select all the file formats you want the program to generate from your source file, and then the program will make all the different versions.
But if you just need one file converted into another format, you can either open it in a program like SewWhat-Pro and simply save it as a different format. Or – you can use a free or inexpensive embroidery file format converter to do the job.
Are there embroidery digitizing training programs?
Yes. There are several companies that offer courses. However, most are software specific. So, you should investigate which embroidery digitizing software you want to use and then find a course that will teach you how to do it. Fortunately, many digitizing programs offer a free 30-day trial so you can try out a few before committing to any.
A very basic (and inexpensive) embroidery digitizing program is SewArt. You can actually purchase a license for it on this site. You can also enroll in the SewArt, SewWhat-Pro and SewWrite Master Class.
You may want to start by checking out a book that addresses digitizing in general before deciding what program you want to learn. I personally like the book: Digitizing Made Easy by John Deer.
So, that, my friends, is what embroidery digitizing is all about!
I hope you have learned a few new things about embroidery digitizing and possibly be inspired to learn how!
xo
Julie
[do_widget id=custom_html-10]
[do_widget id=custom_html-28]
[do_widget id=custom_html-64]
Want to remember this? Save “What is embroidery digitizing?” on your favorite Pinterest board
I’d hate for you to lead your readers to think it’s okay to take pictures of designs they find in public and then sell them as embroidery files. Might want to point out how digitizing something to throw on a personal sweater is a lot different than criminal infringement of someone else’s copyrighted material. Just some thoughts.
Of course. That is a great point. You should not digitize other people’s original artwork. Always obey copyright law.